


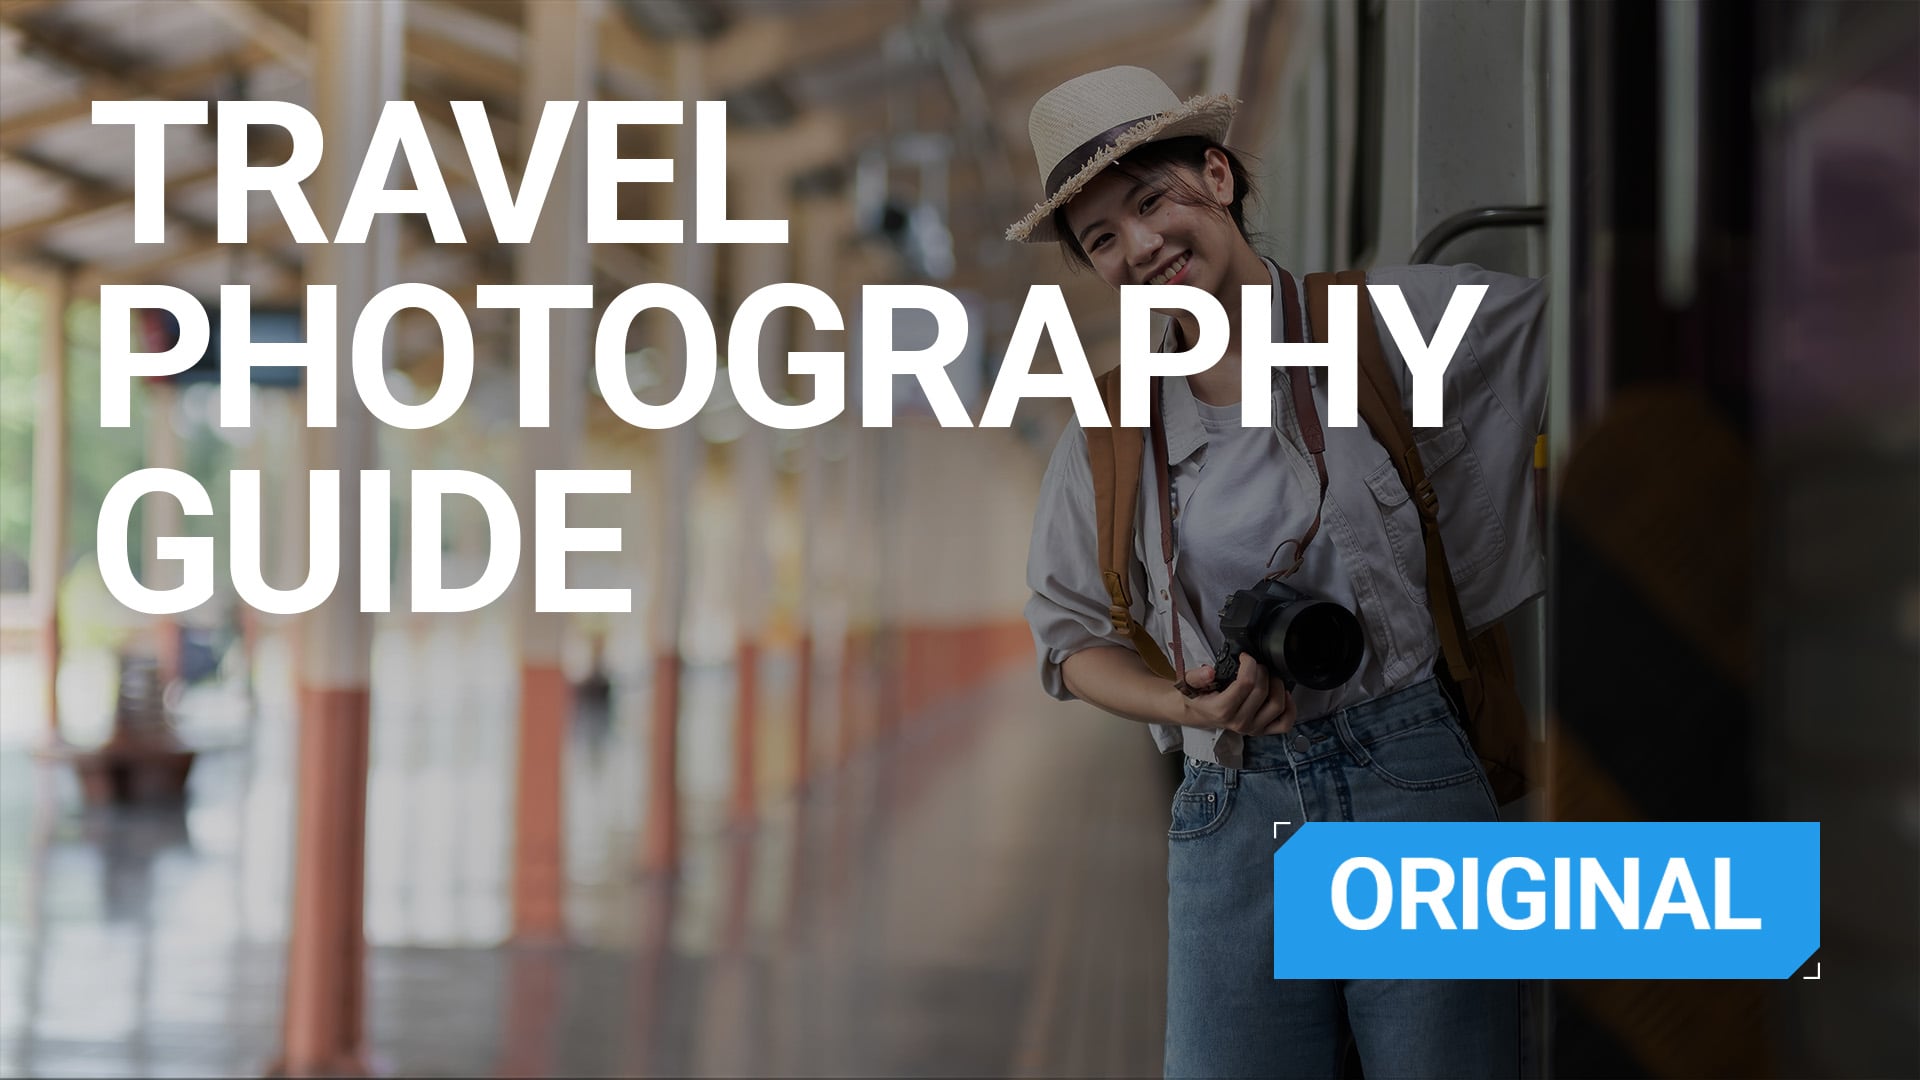
Travel Photography: The Ultimate Guide to Shooting Stunning Images on the Road
Nov 1, 2025
Dunja Đuđić
Dunja Djudjic is a multi-talented artist based in Novi Sad, Serbia. With 15 years of experience as a photographer, she specializes in capturing the beauty of nature, travel, concerts, and fine art. In addition to her photography, Dunja also expresses her creativity through writing, embroidery, and jewelry making.
Share:
Travel photography is the art of capturing the essence of a place through compelling images. It’s more than just snapshots: travel photos tell stories, evoke emotion, and preserve memories that resonate long after the trip ends.
In this ultimate guide to travel photography, you’ll learn everything you need to start or level up your photography while exploring the world. From beginner tips and must-have gear to editing tricks, composition techniques, and even how to turn your passion into a business, this guide covers it all. You’ll also discover ethical considerations, safety advice for your camera gear, and creative ideas to keep your travel portfolio fresh and inspired.
Travel Photography for Beginners
If you’re just starting out, travel photography can seem a little overwhelming. So many places to see, so much gear to choose from, and how on earth do you start doing it professionally? But let’s take it one step at a time.
[Related Reading: Try These 3 Essential Tips for Better Travel Photography This Summer]
How to Get Started with Travel Photography
The first step in travel photography is, well, traveling. :) Joke aside, you should actually learn how to see when you’re visiting a new place (or revisiting an old one). Pay attention to light, moments, and details that tell a story about a place. Start with the camera you have, even if’s just a smartphone, and focus on building your eye rather than your kit.
Practice photographing your hometown or weekend getaways. This helps you build skills in familiar settings before applying them abroad. Consistency is more important than location. So, shoot often, experiment, and review your work critically.
The Importance of Storytelling in Travel Photography
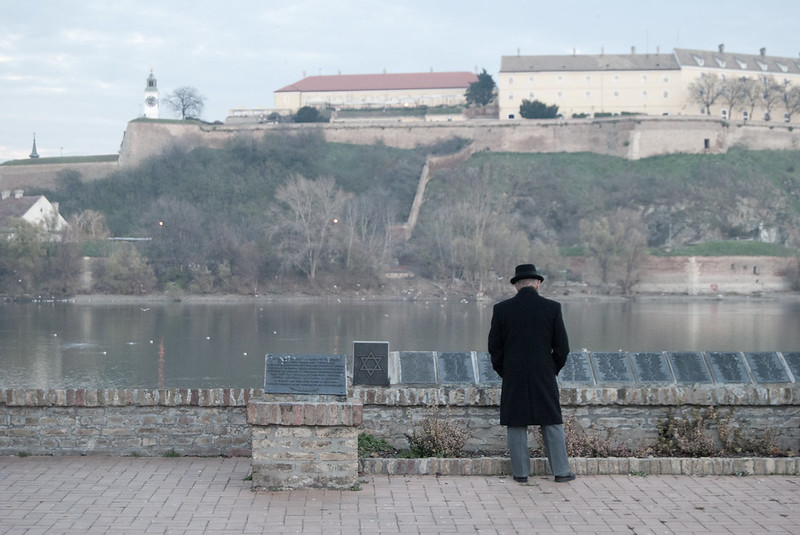
Great travel photography goes beyond aesthetics or mere vacation snaps. It tells a story about culture, place, people, and your experience. Rather than just photographing monuments or landmarks, look for moments that express emotion or local life. It can be a street vendor prepping food, a child playing, or the way morning fog rolls through a quiet valley.
Ask yourself: What does this image say about this place? What do I want someone to feel when they see this photo? When you shoot with a story in mind, your images will carry more depth and purpose – and that’s what makes them memorable.
Beginner-Friendly Tips for Better Travel Shots
- Use natural light whenever possible. The golden hour is a safe bet as it’s especially flattering. But you can work with midday sun, and even in bad weather. You’ll find some tips in the articles linked.
- Be patient. Sometimes the best moments happen after you’ve waited a few extra minutes.
- Edit with intention. Even simple color correction can elevate a decent shot into a great one.
- Back up your photos daily. Don’t risk losing your work to theft or tech failure.
[Related Reading: Travel Photography for Beginners: Everything You Need to Know Before Your Trip]
Travel Photography Gear – What You Really Need
Choosing the right gear for travel photography doesn’t mean buying the most expensive setup – it means matching your tools to your travel style. Whether you’re wandering city streets or trekking through the Andes, your gear should support your shooting goals without slowing you down.
Cameras for Travel Photography: Keep It Lightweight
When traveling, portability matters. Mirrorless cameras are ideal for most travel photographers as they offer excellent image quality in compact bodies. Beginners might prefer models like the Olympus OM-D E-M10 Mark IV or Canon EOS R50 – lightweight, budget-friendly, and intuitive. Video creators often lean toward the Sony ZV-E10 for its 4K video and articulating screen. If durability is key, the OM System Tough TG-7 is built to handle extreme conditions without extra protection.
Lenses: Zoom vs Prime
A versatile zoom lens (something like a 16–50mm or 24–70mm) can replace several primes and reduce your kit weight. These lenses are ideal for shooting everything from landscapes to portraits on the go. If you prefer primes, a 35mm or 50mm are your safest bet. They offer sharpness and pretty versatile focal length in a compact form.
For solo travelers or street shooters, fixed-lens compacts like the Fujifilm X100VI offer a unique mix of discretion and quality, encouraging creative constraint while keeping your setup minimal.
Accessories That Make a Difference
A few small accessories can make your travel photography smoother:
- Mini tripod – useful for low-light, self-portraits, or video.
- ND filter – allows you to shoot wide open or use slow shutter speeds in daylight.
- Cleaning kit – a blower and cloth keep your lens dust-free.
- Extra batteries and memory cards – you’ll rarely regret having backups.
These essentials don’t take up much room but add a lot of flexibility to your shooting.
Gear Based on Travel Type
- Backpacking or hiking: Prioritize lightweight gear. Choose a compact mirrorless or rugged point-and-shoot.
- Urban exploring: Look for discreet cameras with good autofocus and fast lenses for low light.
- Adventure travel: Choose weather-sealed or waterproof gear that can take a beating.
- Family trips: Use an intuitive camera that others can operate too, like the Canon R50.
- Vlogging: Bring a mic, tripod, and a camera with a flip screen and solid video features.
[Related Reading: Best Camera for Travel Photography: Find Yours by Travel Style]
Best Travel Photography Settings for Every Scenario
Manual vs Semi‑Manual (P, A, S) vs Auto Mode – When to Use Each
Choosing the right camera mode in travel photography depends on your comfort level and how quickly you need to shoot. Auto mode is useful for absolute beginners or fast-paced situations where you just want a decent photo without thinking about settings. However, it gives full control to the camera and limits you. It can also lead to inconsistent exposure in tricky lighting.
Semi-automatic modes like Program mode (P), Aperture Priority (A or Av) or Shutter Priority (S or Tv) are more flexible, letting you override some settings. With Program mode, you can set up ISO and white balance, but the camera does the rest of the thinking.
Aperture Priority strikes a good balance. It allows you to control the depth of field while the camera handles shutter speed and ISO. This is ideal when moving quickly between scenes, such as in markets, cities, or nature. Shutter Priority (S or Tv) is a great choice in the street. It lets you lock in a specific shutter speed, which is great when motion matters.
Finally, Manual mode (M) gives you full control over your settings. Even though it’s not always the most practical, I still prefer it in most scenarios. It could be the little control freak in me. Anyhow, it gives you all the power, but it can slow you down. So, it’s best to use it when you have time to work a scene.
Best Settings for Low Light, Sunsets, and Moving Subjects
Each travel photography scenario has its own lighting challenges, so it’s tough to cover all of them in a few paragraphs. But let’s run over some basics.
Generally speaking, the key is to adapt your settings on the go. In low light, start by raising your ISO. Try not to push it too high to avoid noise – it’s useful knowing your camera’s highest usable ISO beforehand. Next, open your aperture to let in more light if needed. For most travel photos, I avoid extremely wide apertures as I want to capture a bit more scene and context. But of course, it all depends on the scene and the shot you have in mind. Finally, adjust your shutter speed. If shooting handheld, the rule of thumb is to make your shutter speed 1/[2 x your focal length]. For example, if you shoot at 50mm focal length, set your shutter speed to at least 1/100 sec.
[Related Reading: Travel Photography Settings: How to Adjust to Changing Light While Traveling]

Moving subjects, whether it’s a bustling crowd or wildlife, require faster shutter speeds to freeze action. Aim for 1/250s or faster. Go even higher if the subject is moving quickly (like birds, bikes or cars). In bright light, this is easy; in dim conditions, you may need to raise ISO or widen the aperture to maintain that speed. Using burst mode can also help capture the perfect moment during fast action.
How to Nail Focus and Exposure While Traveling
Sharp focus and proper exposure are critical – especially when you can’t revisit a scene. Continuous autofocus (AF-C) is your safest bet when dealing with movement. You can use single-shot autofocus (AF-S) or even manual focus for still subjects like architecture or landscapes. Don’t rely solely on autofocus zones – learn how to manually select your focus point so your camera doesn’t latch onto the wrong subject.
[Related Reading: What are focusing modes, and how do you choose one?]
Exposure can be tricky when light is uneven or rapidly changing. Metering modes help: use matrix/evaluative metering for even lighting, but switch to center-weighted when your subject is backlit or surrounded by bright skies.
Lastly, embrace the histogram. It’s a more accurate way to judge exposure than your LCD screen, especially in bright sun. Don’t be afraid to raise ISO when needed – better a slightly noisy shot than a blurry or missed one. And remember: check your settings regularly. When you’re moving from a sunny street into a dim church or from golden hour to blue hour, remember to change settings accordingly.
Travel Photography Composition Techniques
Composition is the difference between a photo that simply saves a moment and one that draws you in. While you don’t need to follow every “rule” to the letter, understanding composition will help you create more engaging and meaningful travel images. So, let’s go through some basics.
Rule of Thirds, Leading Lines, Framing, and Symmetry
The rule of thirds is “the safety net” and a classic. By dividing your frame into a 3×3 grid and placing key elements along the lines or intersections, you create a natural sense of balance. But don’t treat it as set in stone. Learn the rule, and then break it with intention.
Leading lines like roads, fences, shadows, or rivers guide the viewer’s eye through the frame. They can lead toward your subject or into the distance to suggest depth and scale. They’re especially useful when composing city scenes or landscapes.
Use framing elements like doorways, windows, arches, or overhanging trees adds direct focus, context and layers to your photos.
Symmetry and central compositions can also be powerful, especially when capturing architecture, reflections, or street scenes. But if you go symmetrical, make it really symmetrical. With composition like this, even a small misalignment can ruin the balance of your travel photos.
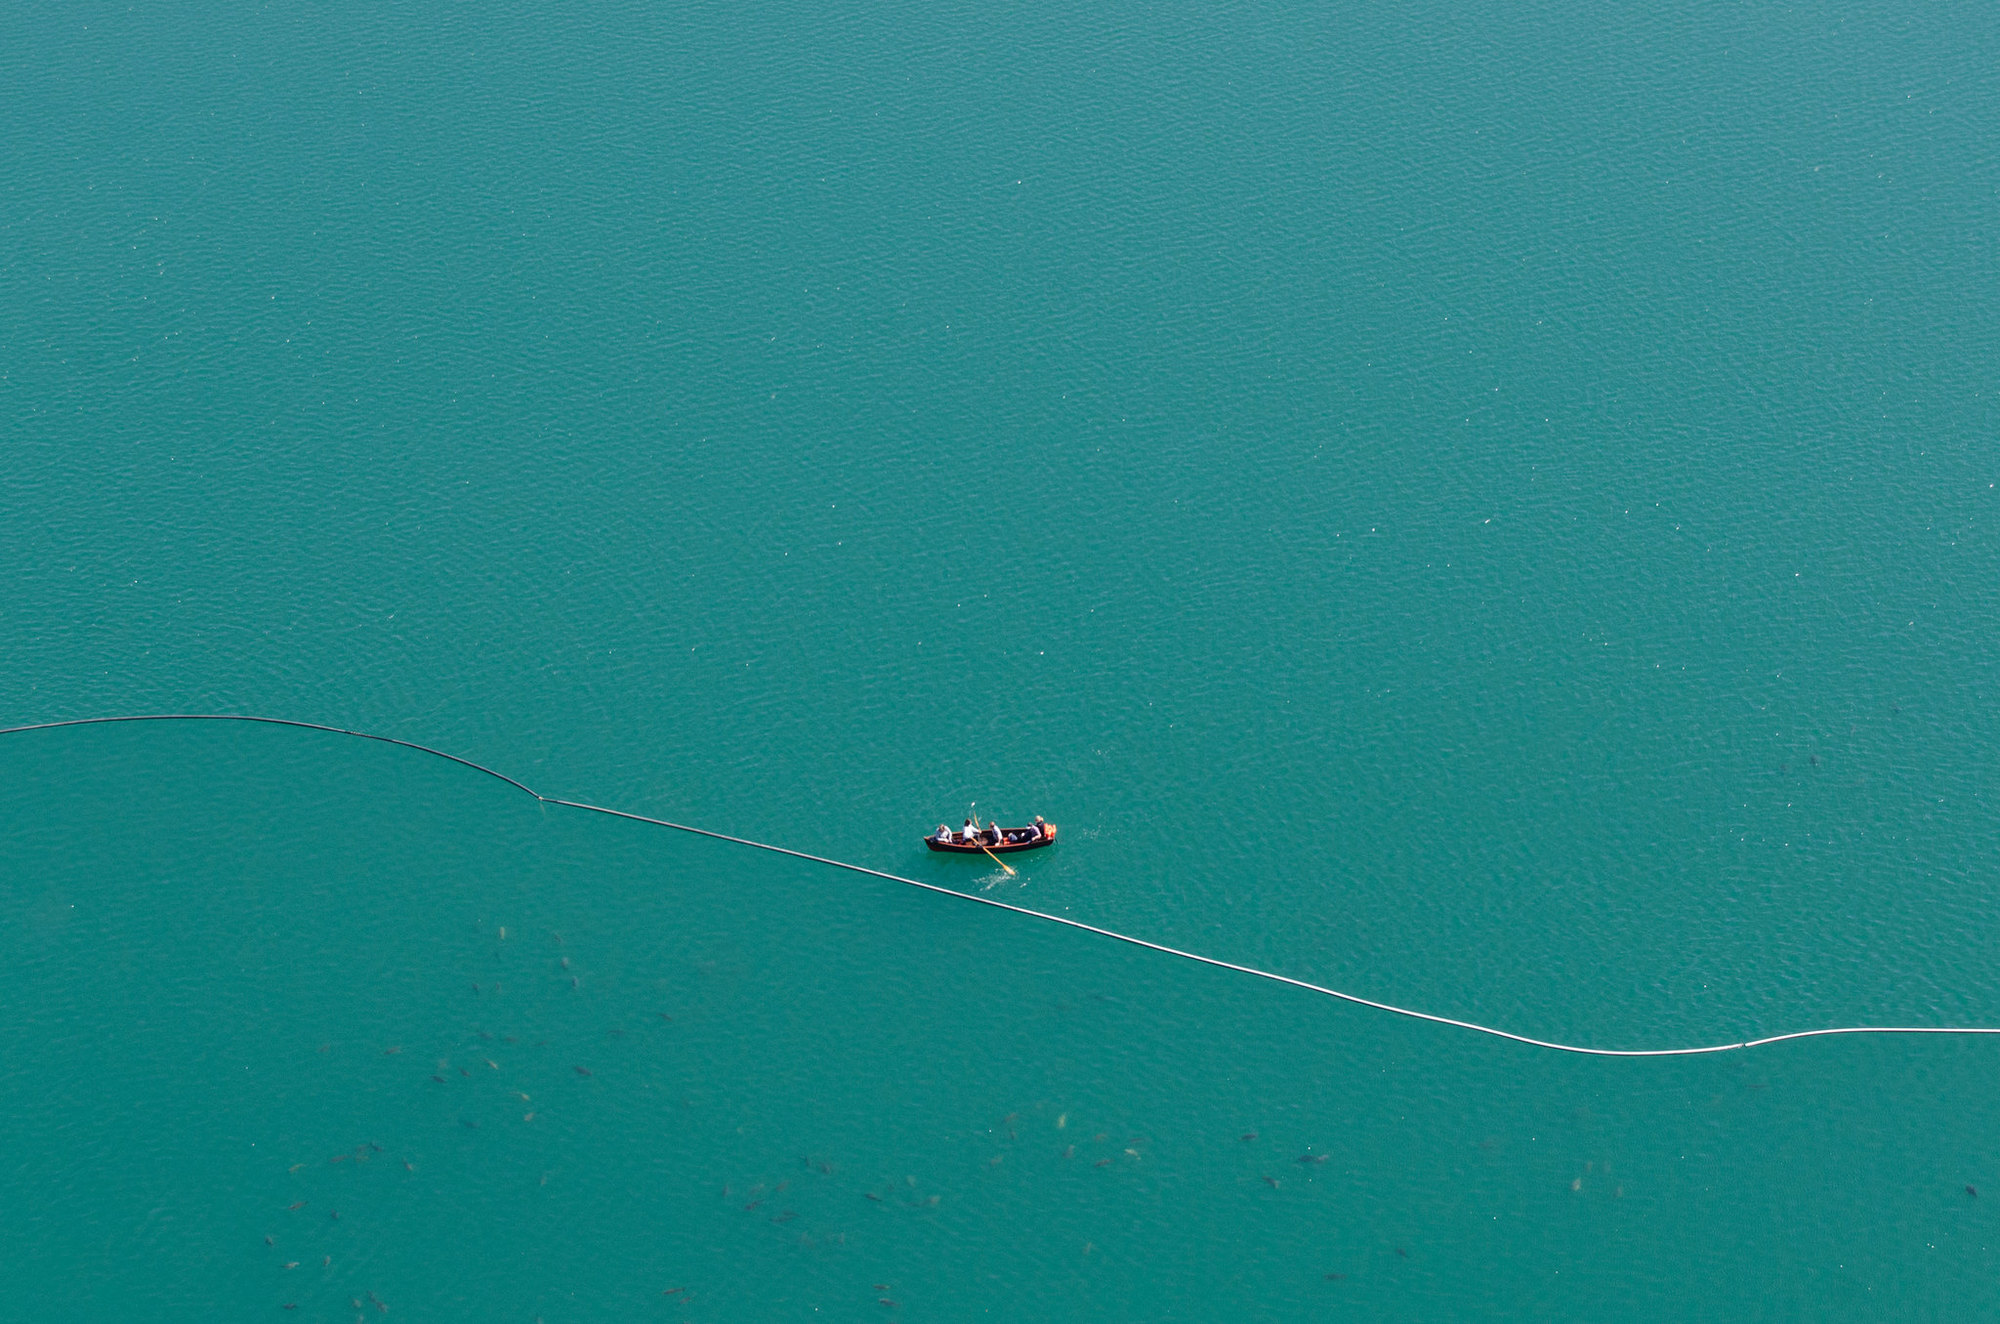
What I’d like to add is negative space, one of my favorite composition techniques. While I use it more in concert photography, it can be a powerful tool for travel photography as well. It can make your image feel cleaner and add a sense of scale and size. It works especially well in minimalist landscapes, portraits in cities or landscapes, or street scenes that capture people and architecture.
Telling a Story in One Shot
Great travel images do more than just look good; they should also tell a story. I know it sounds abstract, but you can help yourself by thinking – What do I want to convey here? What’s the story I want to tell the viewer? What do I want them to think, feel, or notice? Think about what’s happening beyond the frame. What emotion or idea do you want to communicate?
How to Choose the Best Travel Photography Locations
Choosing the right location isn’t about choosing the most “Instagrammable” one. I won’t give you a list of “must visit” travel photography locations, because each of us has their own preferences. I rather want to offer some basic tips for choosing the location that works best for you.
[Related Reading: How to Plan a Travel Photography Adventure: From Research to Reality]
What Makes a Location Photogenic?
Wherever you are traveling, search for interesting shapes and colors, human interactions, or a sense of scale. Places with natural contrasts (old and new, vibrant and decayed, grand and minimal) offer great photo opportunities. Texture, movement, and changing light also add to the mix.
Sometimes it’s not even the location at all, but the angle. An ordinary street corner might come to life when seen from above, or at night, or during a cultural event. Even the “ugly” locations can turn into a great photo. Keep your mind open to the idea that photogenic doesn’t always mean “Instagrammable.” It’s more about the vibe, the story you want to tell, your composition, and what the place means to you.
Researching Destinations Before You Go
One of the best ways to choose photo destinations before you go is to scout them virtually. Use tools like Google Maps Street View to explore the scenes, spot interesting places, or find natural frames before you even arrive. Of course, don’t rely on it too much, as some street views are quite outdated. But it can give you a good idea of space and what to expect.
Forums like Reddit (e.g., r/travel or r/photography) are gold for travel photography information. You can join various photography groups, and even local subreddits. They can offer real-world advice from people who’ve actually been there (with a camera or without). You might discover a less touristy viewpoint or learn that a landmark is often fenced off, under construction, or just so overcrowded with tourists that it’s pointless to even try taking photos at certain hours. Or at all.
A website I found useful (and even used to contribute) is Spotted by Locals. Here you can discover lesser known photo spots, as well as bars, clubs, restaurants and many other places worth either visiting or photographing.
Social media is useful too – but with a caveat. Searching location hashtags on Instagram or TikTok can help you identify angles that work. However, it can also steer you toward over-photographed clichés. Use it for inspiration, not replication.
And don’t forget offline resources: guidebooks, local blogs, or simply asking someone who lives there. Local insight is often the difference between an average shot and a truly unique one.
Timing Your Visit for the Best Light and Least Crowds
The best light for travel photography usually happens shortly after sunrise or before sunset. However, that morning golden hour is a better choice if you want to avoid crowds. Alternatively, some locations become more photogenic at night – lit windows, neon signs, or long exposures.
Planning around events, holidays, or even weather patterns can help you avoid headaches and discover moments most travelers miss. A rainy street, for instance, might reflect light in ways that a dry one never could.
Travel Photo Editing Tips
Editing is a crucial step to your travel photography. It’s not about faking a perfect shot but refining and emphasizing the beauty that’s already there. It’s mainly about correcting distractions and shaping a consistent visual style.
Mobile vs Desktop Editing Apps
You don’t need a full desktop setup to edit your photos. If you shoot with your phone, Lightroom Mobile and Snapseed are great editing tools! Lightroom Mobile syncs with its desktop version and allows for RAW editing, presets, selective adjustments, and cloud storage. Snapseed is especially beginner-friendly and supports layers, healing tools, and curves – all for free. here tons of other editing apps, but I use and wholeheartedly recommend these two.
Desktop apps give you greater control and better performance when working with RAW and high-resolution images. Adobe Lightroom and Photoshop remain industry standards. However, excellent alternatives include Luminar NEO, Capture One, DxO PhotoLab, and Affinity Photo. Most of them also have mobile and tablet versions, too.
Creating a Cohesive Look
Consistency matters, especially if you’re building a portfolio, a blog, or Instagram feed. Presets are a great starting point to getting the cohesive look. They help maintain a consistent tone across photos taken in different lighting or locations. But don’t rely on them blindly. Always fine-tune for white balance, exposure, and contrast to tailor the best settings for each individual photo.
If you’re editing on the road, batching your process helps. Flag your best photos at the end of each day, and do light edits (exposure, crop, preset) in one go. It’s way easier than returning home to thousands of untouched RAW files. Ask me how I know. :)
Keeping Edits Natural and Ethical
Travel photography is rooted in storytelling and real places. I’ll put the emphasis here on real, as we’re flooded with AI-powered editing software and tools. Nothing wrong with them per se, those AI tools can be super useful and speed up the workflow. Removing trash from a beach or correcting a crooked horizon has never been easier! However, there’s also adding fake skies, editing people until they become unrecognizable, or generating scenes and elements that were never there. That’s not what travel photography is about. In fact, I think it makes it pointless.
Stick to edits that preserve the authenticity of the scene. Boost contrast? Sure. Correct white balance? Definitely. Remove a photobomber? Maybe. Add a glowing mountain peak that never existed? Please don’t. This is especially important when photographing people or cultural landmarks. Over-editing skin tones, erasing wrinkles, or altering traditional clothing disrespects the subjects and distorts reality.
Edit with the same mindset you had while shooting: be respectful, intentional, and honest.
Creative Travel Photography Ideas to Try on Your Next Trip
If your travel photography is starting to feel repetitive or you just need some inspiration, here are some creative travel photography ideas. They will help you kickstart your inspiration and add variety, emotion, and storytelling to your shots.
[Related Reading: Travel Photography Ideas: A 7‑Day Challenge for Your Next Trip]
Capture the Journey – Not Just the Destination
The trip itself is often more interesting than the final stop. Photograph the small in‑between moments: waiting at a station, boarding a ferry, the chaos of packing, or the quiet of early mornings in transit. These “invisible” scenes give your collection a broader narrative. And in fact, they are often the most relatable.
Shoot from Unusual Angles
Crouch low, shoot from the ground, look up at buildings, or climb a nearby step for a top‑down view. You can also shoot through objects to add depth and curiosity.
Include Locals – With Respect and Consent
Including people in your shots gives context, emotion, and life to your travel photos. However, always be respectful, whether it’s a candid street moment or a posed portrait. A nod, a smile, or simply asking for a photo goes a long way.
Focus on Small Details
Not every photo has to be wide and show the full context and place. Zoom in on textures, colors, signs, hands, animals, food… You get the gist. These small details can tell big stories.
Play with Reflections
Reflections add symmetry, mood, and interest. Look for them in puddles, windows, bus mirrors, or even polished floors. I personally love this ever since I started photography and it’ something I still gladly observe and capture around me.
Use Light Creatively
Like in other genres, light is your best tool for making creative travel photos. You can use silhouettes at sunrise or sunset, shoot into the sun for flares, or play with shadows on walls and streets. On cloudy days, use that gorgeous diffused light for portraits. When working with natural light, work with it, not against it.
Tell a Story in a Series
Instead of thinking in single images, try storytelling in sets. Capture the beginning, middle, and end of an experience: the walk to a viewpoint, the moment you arrive, and how it looked when you left. This approach works beautifully for places like food markets, events like street performances; for your arrival or departure from the place… Or even just a walk through a city.
Take Self‑Portraits in Context
If you travel solo, don’t just rely on selfies. Use a tripod, ledge, or timer to photograph yourself within the scene. A small figure in a vast landscape, your silhouette framed by a doorway, or a candid shot from behind adds a personal touch without dominating the frame. It’s a way to include yourself in the memory.
[Related Reading: How to Take Photos of Yourself When Traveling Alone]
Turning Travel Photography into a Business
So, you want to start earning from travel photography. While it can sound tricky and overwhelming, we do offer some ideas to get you started and gear you towards travel photography business.
[Related reading: Quick and simple business guide for photographers]
Building a Portfolio and Website
When building a portfolio, select only your strongest travel shots. Aim for consistency in style and subject matter to show you’re more than a casual shooter. Your website should also double as a brand platform: use a crisp logo, easy‑to‑navigate layout, and clear messaging about what you offer. Use a contact form early on to start building a list of interested viewers, some of whom could turn into clients.
Monetization Options (Stock, Prints, Blog, Social Media, Workshops)
There are many ways to monetize your travel photography beyond just selling prints. You can license images to stock libraries, sell photo books, run a travel‑photography blog or YouTube channel (which can lead to sponsorships), and teach or run workshops on location.
If you turn to content licensing, make sure to clearly define usage rights (commercial vs editorial) so you retain control and revenue.
How to Get Paid Assignments or Work with Brands
To attract paid work and brand collaborations, you’ll need a niche, a strong online presence, and credibility. Study the market: what do travel brands, tourism boards, or content platforms want? Reach out with a tailored pitch, showing what you can offer. It’s not just “look at my photos, they’re so great,” but you should tell more about how your style or story can serve your client.
Running a photography business involves sales, SEO, client relations, and marketing as much as taking photos. I know, it’s a lot, but take it one step at the time. Start with building that portfolio, your email list, and present your work around the community. And do reach out for help – not all of us are built to be businesspeople, and there are always those who’ll gladly help you with that part.
Travel Photography Ethics – What Every Photographer Should Know
We’ve already touched on some of these ideas, like asking for consent or respecting people in your photos. But ethics in travel photography go much deeper. A camera offers access, and that access comes with responsibility.
Respecting Locals and Cultures
Every place has its own customs, beliefs, and expectations around privacy. What’s normal in one country might be deeply offensive in another. Before photographing people, sacred spaces, or rituals, take time to learn and understand what’s appropriate and what isn’t. If you’re unsure whether it’s okay to take a photo, it’s better to ask first.
Your subjects are not props, while you’re on a vacation, they’re living their everyday lives. Show them gratitude, not entitlement. Sometimes that means putting the camera down – and that’s okay.
Avoiding Exploitation or Stereotyping in Travel Photography
The way you photograph a place helps shape how others see it. Be mindful of the narratives you’re reinforcing. Avoid exoticizing poverty, romanticizing struggle, or reducing cultures to visual clichés. Travel photography should connect people, not reinforce stereotypes.
Ask yourself: Would I take or share this image if it were taken in my hometown? Would I feel good showing this photo to the person in it? Or, Would I want someone to take a photo of me in this situation? If the answer is no, well… You know what to do. Or not do.
Getting Consent for Portraits
Street photography often involves candid moments, but when someone is clearly identifiable, especially in portraits, it’s respectful to ask for permission. You can gesture it with a smile and by showing to the camera, or ask verbally. I think it works especially well if you speak the local language; it breaks the barriers more easily. So, perhaps learn a few basic phrases before your trip. If someone still says no, move on. Don’t push it.
When photographing children, always get consent from a parent or guardian. And even when you have permission, think carefully before posting those images online.
Think Before You Geotag
Geotagging can unintentionally harm quiet places or sensitive environments. Sharing exact coordinates of a remote lake or little-known mural may bring crowds, damage, or even closures. Use discretion when tagging locations, especially in natural or culturally significant areas.
Travel Photography with Conservation in Mind
Don’t damage a place for the sake of a better photo. Stay on trails, don’t pick plants, and never disturb wildlife. If your photo disrupts the scene or people in it, it’s not worth taking. Whether you’re in nature or a city, leave the place as you found it, or better.
How to Protect Your Camera While Traveling
Weatherproofing and Dust Protection
When you’re traveling, your gear will face more than just good light. It’ll face rain, dust, humidity, cold, and heat. Most camera bodies and lenses are weather‑sealed, at least up to a point. Still, pack a rain cover or even a simple plastic bag for sudden downpours.
Always clean your gear after dusty, sandy, and salty environments. Also, avoid changing lenses outdoors in those conditions if you can. Use silica gel packs in your bags to reduce moisture and help prevent internal fogging or mold.
Avoiding Theft
Thieves target gear that looks expensive and easy to grab. So, try to stay discreet: use camera bags that don’t scream “camera inside!” Avoid logo-heavy straps, and never leave your gear visible in a car. Keep your camera strapped tightly in crowded areas, and carry only what you need each day. After all, less gear means less risk.
Before you travel, take photos of your gear and record serial numbers. Save receipts in the cloud or with your insurance agent. Insure your gear, and keep in mind that not all travel insurance covers camera theft. Because of this, you may need a specialized policy. If your gear is stolen, having documentation helps both the police and your claim.
Always remove memory cards from your camera when parking or overnighting. Losing images is often worse than losing gear. Back up your files daily, either to cloud storage or an external drive you store separately from your camera bag.
If you shoot in busy public areas or set up a tripod, consider tethering your gear to yourself or to something solid. Thieves often work fast, so even a slight delay or extra effort can discourage them.
Last but not least, don’t forget the mental side of protection. Stay aware of your surroundings, and if something feels off, trust your gut and relocate. Your gear is valuable, sure, but your safety always comes first.
[Related Reading: Follow these steps to prevent camera theft]
Secure Storage and Packing Tips
The best travel camera bag is something compact, padded, and subtle – ideally to fit under an airplane seat or in your lap. Avoid packing anything fragile in checked luggage.
Inside your bag, use padded dividers to prevent your lenses and camera from knocking together. Use internal loops or carabiners to tether gear, or small locks if you’re leaving bags unattended even briefly.
Safe Travels!
Travel photography is about more than just great gear or technical know‑how. It’s about curiosity, connection, and storytelling. Whether you’re just starting out or ready to take things to the next level, there’s always more to explore. And I mean both creatively and geographically.
Wherever your journey takes you, don’t forget why you started: to document the world through your eyes. So, whether it’s a weekend getaway or a cross‑continental adventure, pack your gear, plan smart, and go – tell a story worth sharing with your photos.

Dunja Đuđić
Dunja Djudjic is a multi-talented artist based in Novi Sad, Serbia. With 15 years of experience as a photographer, she specializes in capturing the beauty of nature, travel, concerts, and fine art. In addition to her photography, Dunja also expresses her creativity through writing, embroidery, and jewelry making.
Related Posts
 This Ultimate Guide to Lightroom’s Smart Previews helps you edit on the road without external storage
 Photographer shooting on public road almost being run over for shooting on “private driveway”
 Seven Essential Gadgets For A Travel Photography Road Trip
 The ultimate guide to sharpening your images in Adobe Photoshop
Join the Discussion
DIYP Comment Policy
Be nice, be on-topic, no personal information or flames.