


The Ultimate Guide to Concert Photography: Gear, Settings, Techniques & More
Jun 28, 2025
Dunja Đuđić Kalinin
Dunja Djudjic is a multi-talented artist based in Novi Sad, Serbia. With 15 years of experience as a photographer, she specializes in capturing the beauty of nature, travel, concerts, and fine art. In addition to her photography, Dunja also expresses her creativity through writing, embroidery, and jewelry making.
Share:

Concert photography is one of the most chaotic and rewarding forms of photography you can do; at least in my book. You’re battling low light, fast motion, unpredictable artists, and a sea of sweaty fans, all while trying to capture a fleeting moment of magic. It’s tough, but incredibly thrilling!
As a fellow hobbyist who shot everywhere: from tiny, dimly lit blues clubs to huge music festivals, I know how overwhelming it can feel. Especially if you’re just starting out or just thinking of it. So, whether you’re shooting your favorite band from the crowd or dreaming of landing your first photo pass, this guide is for you. It’s built for beginner photographers, music lovers with a camera, and anyone who wants to turn their passion into more than just a few blurry phone pics.
In this ultimate guide to concert photography, we’ll cover the gear you need (and what you don’t) and how to shoot in impossible lighting conditions. We’ll share composition tips, editing tricks, and even how to land your first gig in the pit. By the end, you’ll not only have sharper images but also the confidence to shoot smarter, move like a ninja, and tell unforgettable stories through your photos.
Essential Gear for Concert Photography
To capture stunning concert photos, I can’t tell you, “Oh, the gear doesn’t matter”. Gear does matter. You need gear that can handle unpredictable lighting, fast movement, and sometimes tight spaces. However, you don’t need the most expensive setup on the market to get started. Yours truly still shoots with a Nikon D7000. While it comes with a unique set of challenges that deserve a separate post, it gets the job done!
So, what should be your go-to concert photography gear? Let’s break it down.
Cameras
Both DSLR and mirrorless cameras can perform well in live music environments, and each comes with its strengths and weaknesses:
- DSLRs are reliable and offer excellent battery life, with a wide selection of lenses. You can even use older ones and vintage ones since there’s a huge selection of adapters on the market. On the other hand, they’re bulkier and heavier than mirrorless setups. So, shooting an entire festival day could be a bit of a physical challenge.
- Mirrorless cameras are quickly becoming the preferred choice of concert photographers. They’re lightweight and silent, the latter being ideal for classical or acoustic concerts. They offer real-time exposure previews, and advanced autofocus performance. On the other hand, you may struggle with battery life and overheating, although most models have sorted out both of the issues at this point.
I can’t tell you which camera brand or model to use. But I can tell you what to prioritize when searching for the perfect concert photography camera:
- High ISO performance: high and still usable ISO is crucial for low-light shooting without excessive noise.*
- Fast autofocus – necessary to track moving performers.
- Dual card slots – helpful for backup if a memory card fails.
*Now, if your existing camera isn’t an ISO beast, you can still do quite a lot with it. I find Lightroom’s Denoise extremely helpful and I confidently push ISO limits of my poor D7000.
[Related Reading: Best Cameras for Concert Photography: Features to Look for and Cameras to Pick]

Lenses
Your lens often has more impact on image quality than your camera body. A good lens for concert photography should offer wide apertures and versatility. You can go with either zooms or primes, and it’s totally up to you. However, zooms are more versatile when working at a fast-paced event like a concert. While there’s a common belief that prime lenses are sharper, many modern zooms can confidently compare with them.
Go-To Lenses for Concert Photography
- Wide-angle lenses (e.g., 16–35mm) are ideal for capturing the full stage or crowd. They’re also irreplaceable when shooting at small venues and want to get more of the scene inside your frame.
- Standard zooms (e.g., 24–70mm) are a go-to choice for general use and framing flexibility.
- Telephoto lenses (e.g., 70–200mm) are ideal for distant shots or isolating performers. Also, you can take one of these to take photos from the crowd. It’s a common rule that you can only be in the photo pit for the first three songs (at least here where I live). So, when you leave the pit, you can become a part of the crowd and still get some decent concert photos.
Specialty Lenses
Now, I’m a big fan of primes, especially when I want to limit myself to push my creativity. I wrote about it before. Consider prime lenses like the affordable 50mm f/1.8, known for great low-light capability and sharpness.
[Related Reading: How to Choose Best Lenses for Concert Photography]

However, there are some other specialty lenses that could find a place in your kit:
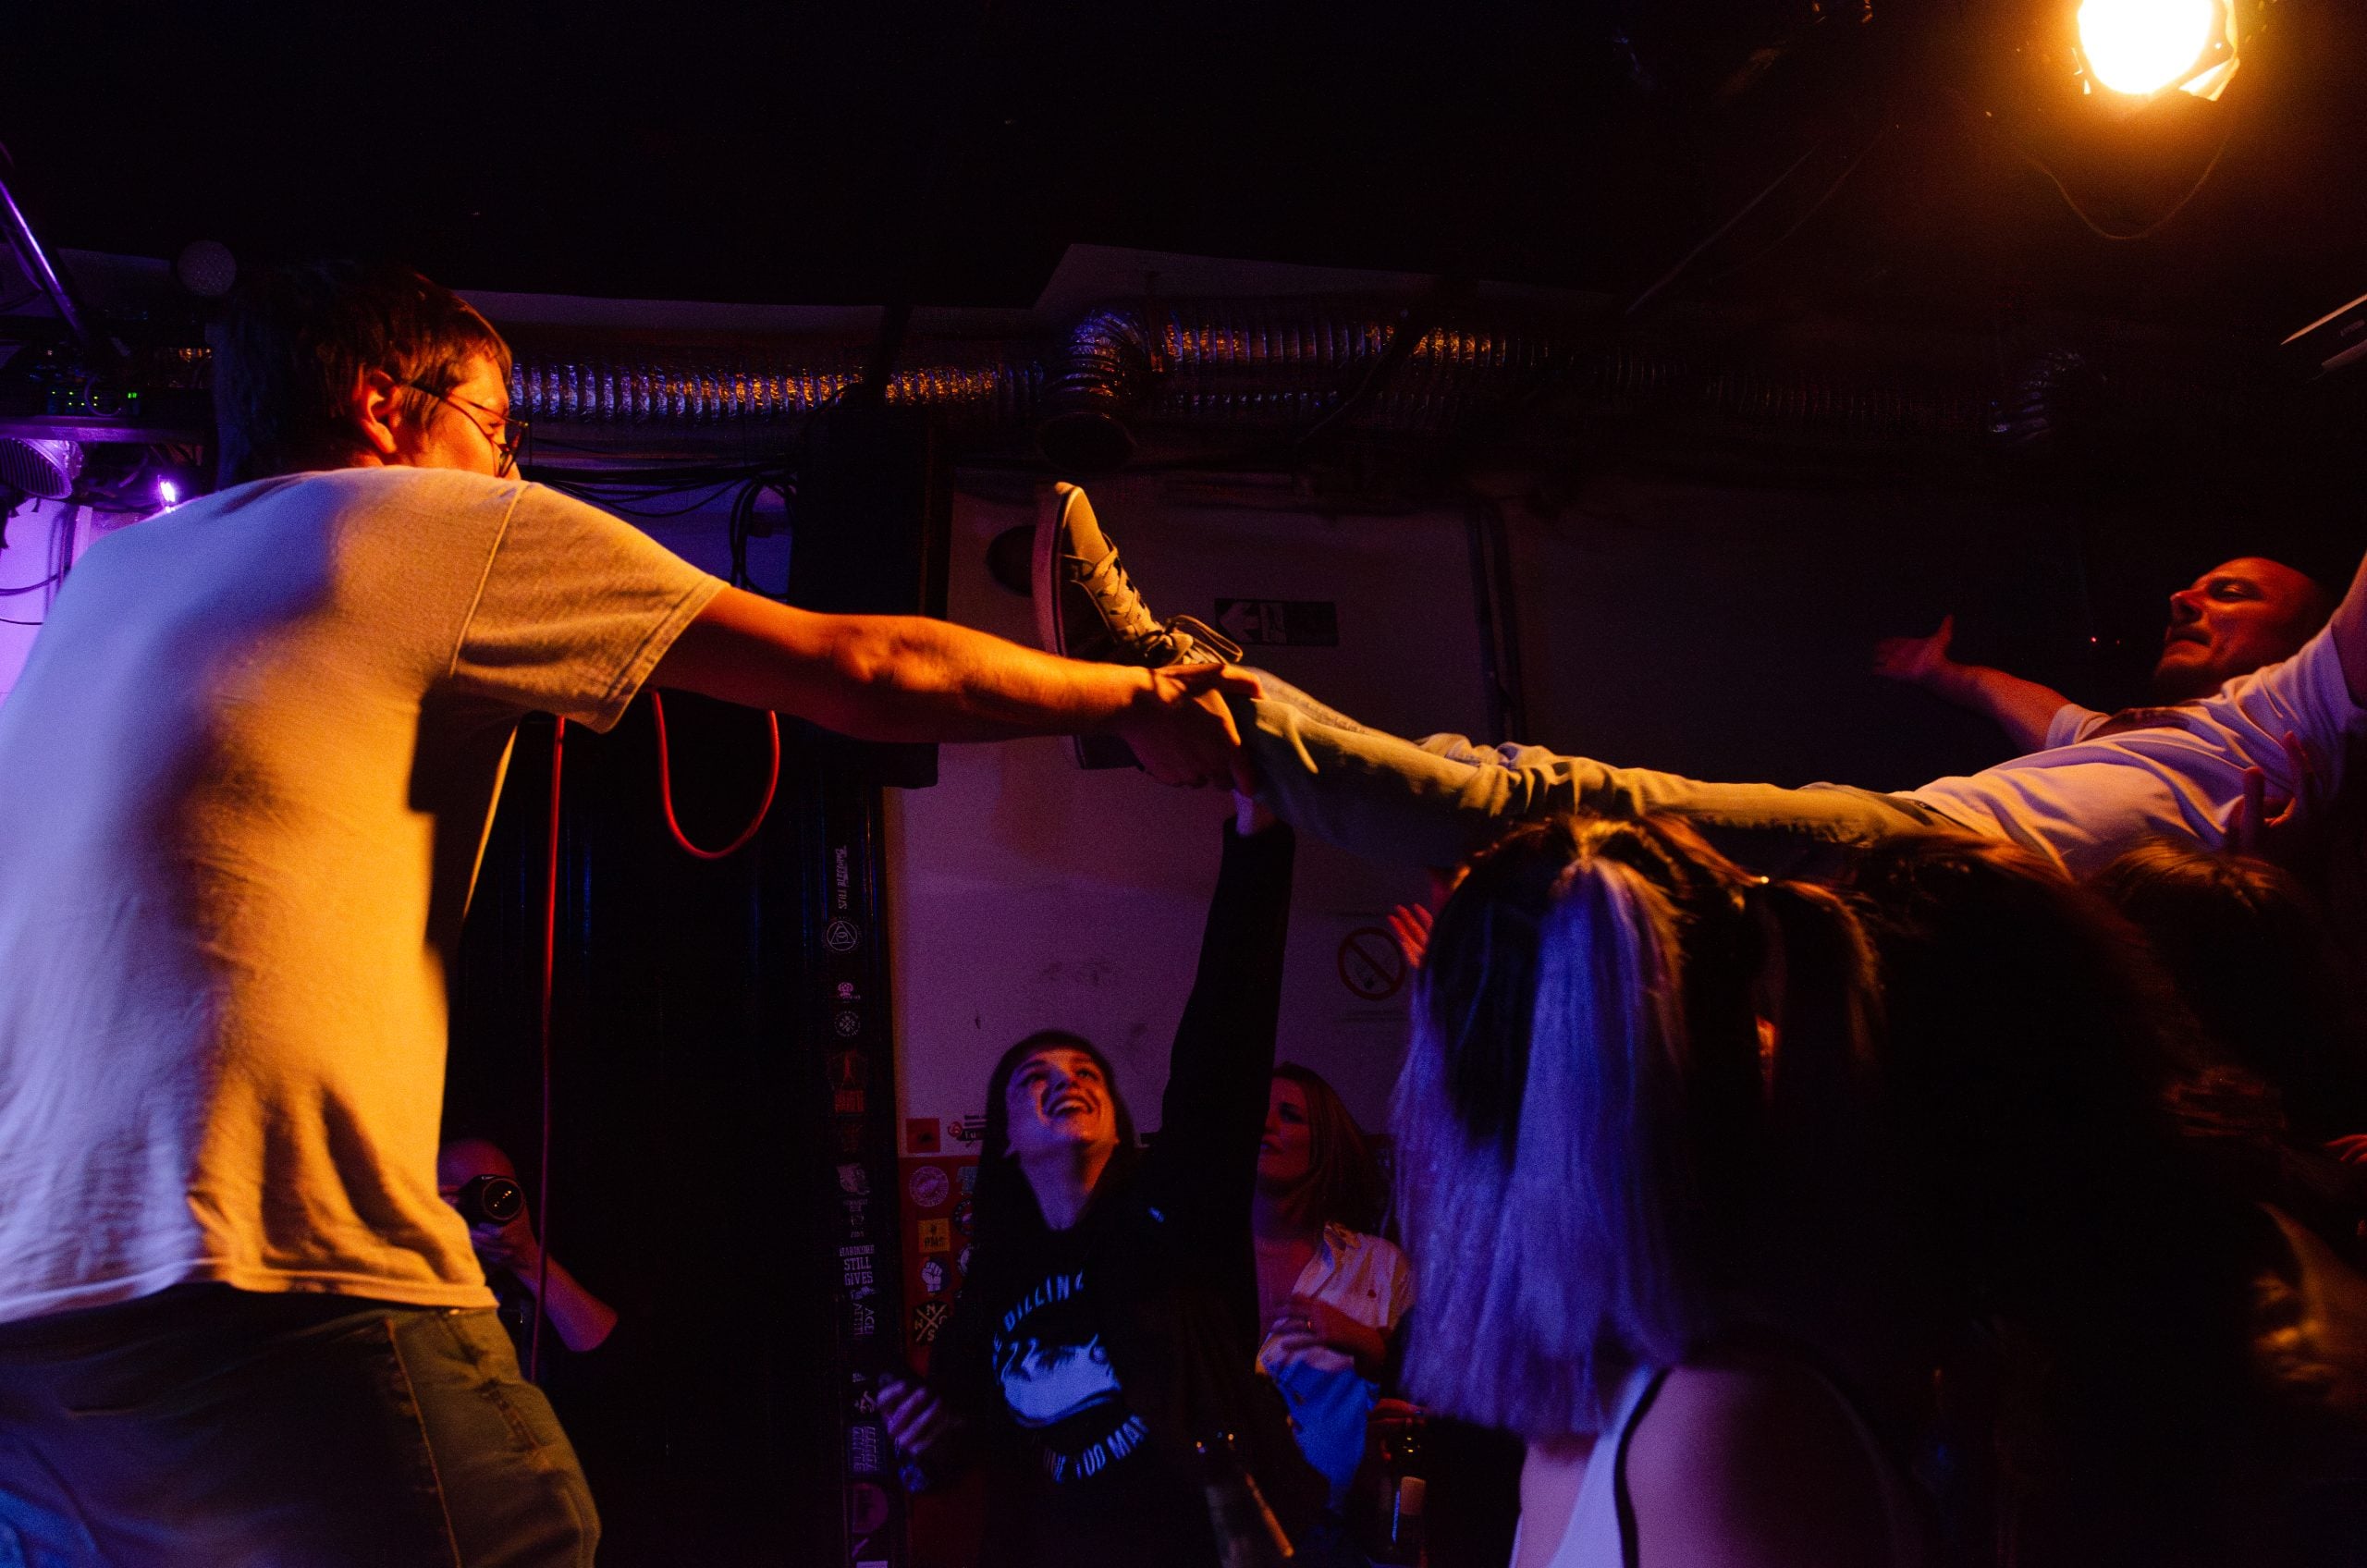
- Ultra-wide or fisheye: ideal for dramatic and creative perspectives. They’re a popular choice at small venues, and I’ve noticed photographers using them at hardcore and punk concerts.
- Macro lenses: yup, macro! I wouldn’t even think of this, but my photographer friend Bojan Božić uses a 100mm macro and it’s his favorite concert lens. He takes close-up portraits and I personally love them!


And one final remark: for concert photography, you’ll need faster lenses. Go for the maximum aperture of at least f/2.8 for the best results in low light.
Accessories to Bring
Last but not least, there are a few smart additions to your kit other than your camera and lenses. They can make a big difference during a concert shoot:
- Extra batteries: long nights and cold venues can drain power quickly. Come prepared!
- Extra memory cards or dual-slot cameras, no matter if you need backup or storage for the gazillion photos you take (or both).
- Two camera bodies: if you own multiple cameras, bring one with one lens, and the other with another. You can go with a wider lens on one camera and the longer zoom on another to avoid mid-set lens swaps.
- Wrist straps or comfortable camera straps to keep your gear secure and your hands free.
- Ear protection: No matter how much you love the band you’re photographing, you risk damaging your hearing in the pit. Reusable musician’s earplugs are ideal, but in case you forget them, I have a pro tip. You can grab your earbuds and use those to muffle the sound. They’re not ideal, but are definitely better than nothing.
- Optional extras: you can bring a small LED lights or a speedlight (if allowed). If you also shoot video, a gimbal will come in handy.
- Low-budget tip: Cargo pants are surprisingly handy for storing spare lenses and batteries if you’re not carrying a full bag and constantly running back and forth in the pit, swapping lenses on the go.
Mastering Low-Light Techniques
Low-light environments are the defining challenge of concert photography, and one of the most satisfying to overcome. You’re often shooting in venues where the only available light comes from unpredictable and fast-changing stage setups. Mastering these conditions is what separates average concert photos from showstoppers.
The Challenge of Colored Stage Lighting
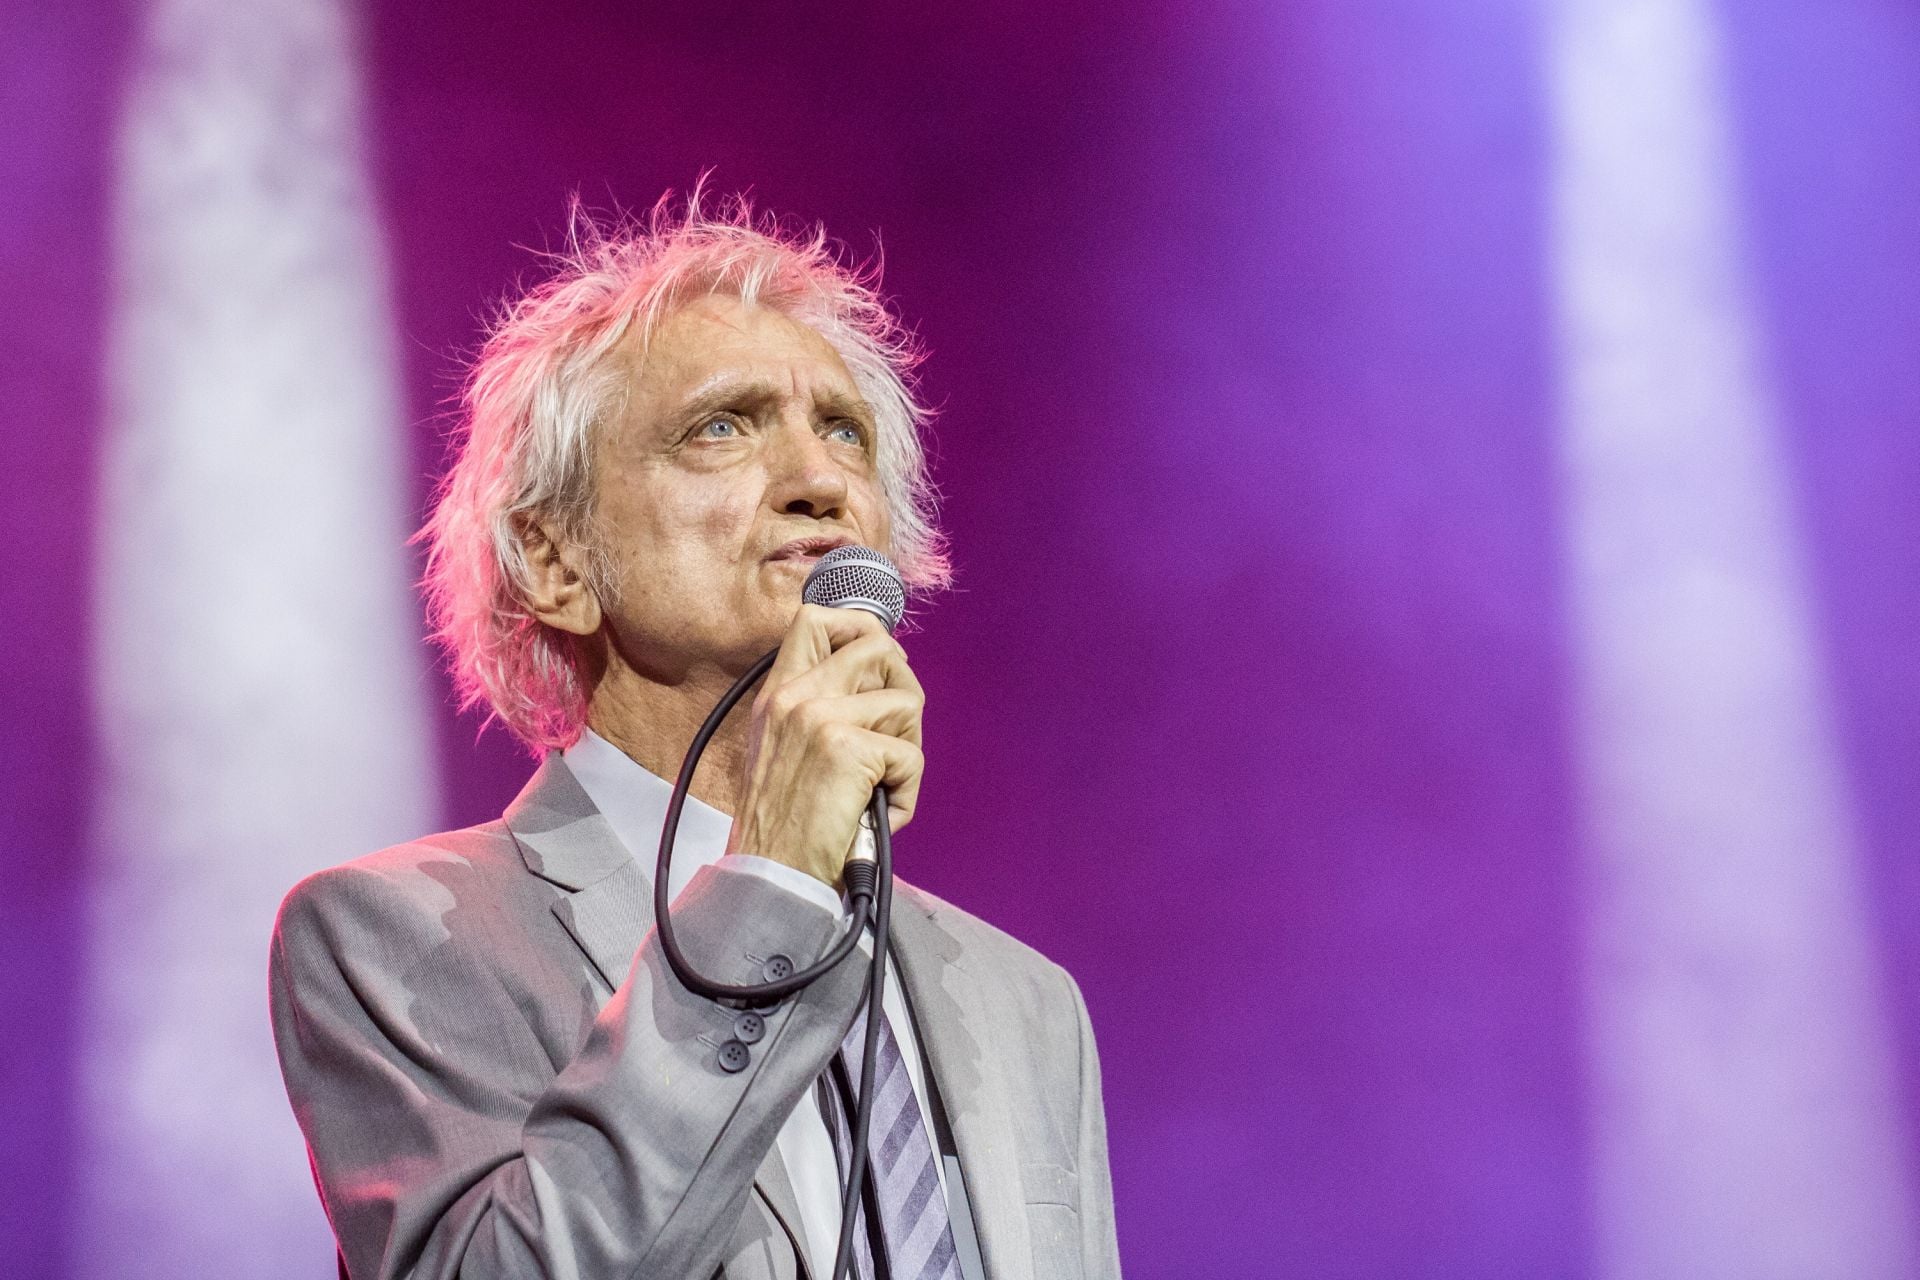
Stage lights are dramatic and beautiful to the audience, but they can be a nightmare for photographers. Harsh reds, purples, and especially blue lights can strip away skin tones and facial features entirely. So, we’ll give you some practical ways to work with this:
- Shoot in RAW to give yourself flexibility in post-processing.
- Adjust white balance manually if auto WB struggles with extreme color casts.
- Position yourself strategically to take advantage of better lighting angles, especially when front lights are used.
Of course, you’ll need some editing nevertheless, but we’ll get to that.
Shooting in Dark Environments
Low light means you’ll need to optimize your settings and lean into your camera’s capabilities. You’ll find it especially challenging in small clubs and bars, as they usually have very modest lighting setups. But here are some tips to help you overcome the low-light obstacles:
- Raise your ISO confidently: go even up to 6400, especially if you use a newer camera model. With older ones, editing tools like Lightroom’s Denoise AI will be your best friend.
- Use a wide aperture: apertures between f/1.4 and f/2.8 help you let in more light and get pleasing subject isolation. However, I’m personally not a fan of super-shallow depths of field in concert photography as I want to get a bit more of the scene in focus. My personal sweet spot is f/3.2 to f/5.6. But this is totally dependable on the lighting conditions, the lens you use, and after all – your personal preference.
- Watch your shutter speed: Going too slow can introduce motion blur, especially with performers who move quickly. So, crank up that ISO and open your aperture to use a faster shutter speed.
In concert photography, it’s best to aim for a balance: your photos don’t need to be perfectly noise-free, but rather make them sharp.
In some cases, you can also go for speedlights. However, make sure that it’s allowed as some artists strictly ban the use of artificial lighting at their performances.
[Related Reading: Low-Light Concert Photography: How to Use Speedlights when Shooting Live Music]

[Learn Photography: Aperture | Shutter Speed | ISO | Exposure Triangle | White Balance | Depth of Field | Panning | Vinneting | TTL | More…]
Dealing with Fast Motion and Unpredictable Light
If you shoot rock, punk, metal and similar concerts, you’ll deal with performers moving fast. Also, you’ll shoot in the that lights flicker, flash, and change constantly. Your camera settings must keep up, so:
- Use continuous autofocus (AI-Servo or AF-C) to track moving subjects. Many photographers lean on back button focusing for concert photography, too.
- Shoot in burst mode to improve your chances of catching the right moment. Sometimes, you need a bit of spraying and praying.
- Anticipate stage cues: If you’re lucky to take photos of a band you like, you may already know the artist’s style and when key movements or light hits tend to happen. Use that to your advantage and go for those perfectly-timed shots.
Ultimately, concert photography is part technical challenge, part instinct. The more you shoot, the better you’ll become at reading the scene and adjusting in real time.

[Related Reading: Capture Motion by Mastering Shutter Speed like a Pro]
Concert Photography Settings That Work
Shooting live music means constant adaptation. Stage lighting changes by the second, performers move unpredictably, and you only have a short window to nail the shots. So, knowing your camera settings and limits inside and out is essential for success.
Shutter Speed: Freeze the Action
A good rule of thumb is to use a shutter speed at least double your lens’ focal length. So, if you’re shooting with a 50mm focal length, your minimum shutter speed should be 1/100s. However, in concert photography, it’s safe to go beyond that. With fast-moving performers and hand-held shooting, you’ll want to go with 1/200s to 1/400s for sharp, crisp images.
[Related Reading: Camera Settings and Tips for Concert Photography Beginners]

ISO: Embrace the Grain (Within Reason)
Lighting at shows is often dim and unpredictable. So, to be able to use that fast shutter speed, you’ll need to bump up your ISO. Start around ISO 1600 and go as high as your camera can handle without introducing unusable noise. For older cameras, ISO 3200–6400 might be the practical ceiling. Newer models can go even further, but I suggest you test your camera’s capabilities before committing to photographing a concert.
Aperture: Let the Light In
As already mentioned, it’s wise to use wide apertures. Primes with f/1.8 or f/1.4 maximum aperture are great for dark clubs or moody lighting. For zooms, a constant aperture is practically a must. This gives you more flexibility when composing shots across varying focal lengths without losing light.
White Balance: Tame the Stage Lighting
Auto White Balance (AWB) does a decent job for most concert settings. However, stage lights can throw in heavy blues, magentas, and reds. If you’re in a concert with consistent lighting (common at classical concerts), you can set a custom Kelvin value until you’re satisfied. At rock concerts and festivals, light changes second after second, so auto white balance could be the best bet. You’ll have to edit the shots anyway. Speaking of which – make sure to shoot RAW.
If you haven’t shot concerts before, I suggest you bring your camera when you attend one (if possible). It will give you a chance to practice and experiment, and explore your camera and lenses further. I’ve discovered strengths and weaknesses of my camera I never thought of before only when I started doing concert photography with it.
[Related Reading: How you can make more money by shooting music]
Composition & Storytelling on Stage
Capturing a live performance is about more than just getting a well-exposed photo. It’s about conveying the energy, mood, and essence of the performer and their music through your concert photography. So, without further ado, here are some tips on how to do it.
Capture Emotion and Energy
Look for facial expressions, intense eye contact, or that moment a musician loses themselves in their performance. These are the shots that connect with viewers because they capture more than just a person on stage. They capture the feeling and the energy you and the crowd felt while they were performing.

Using Framing and Angles in Concert Photography
Don’t be afraid to move around (if you can). Experiment with angles: you’ll likely shoot from a lower angle if you’re covering large shows. If there’s room to go on a balcony or behind the stage, do it. Frame your shot through the crowd or through instruments and other stuff on the stage itself. Experiment with negative space to draw attention to your subject, or use the mic stand, cables, or stage lights as leading lines.


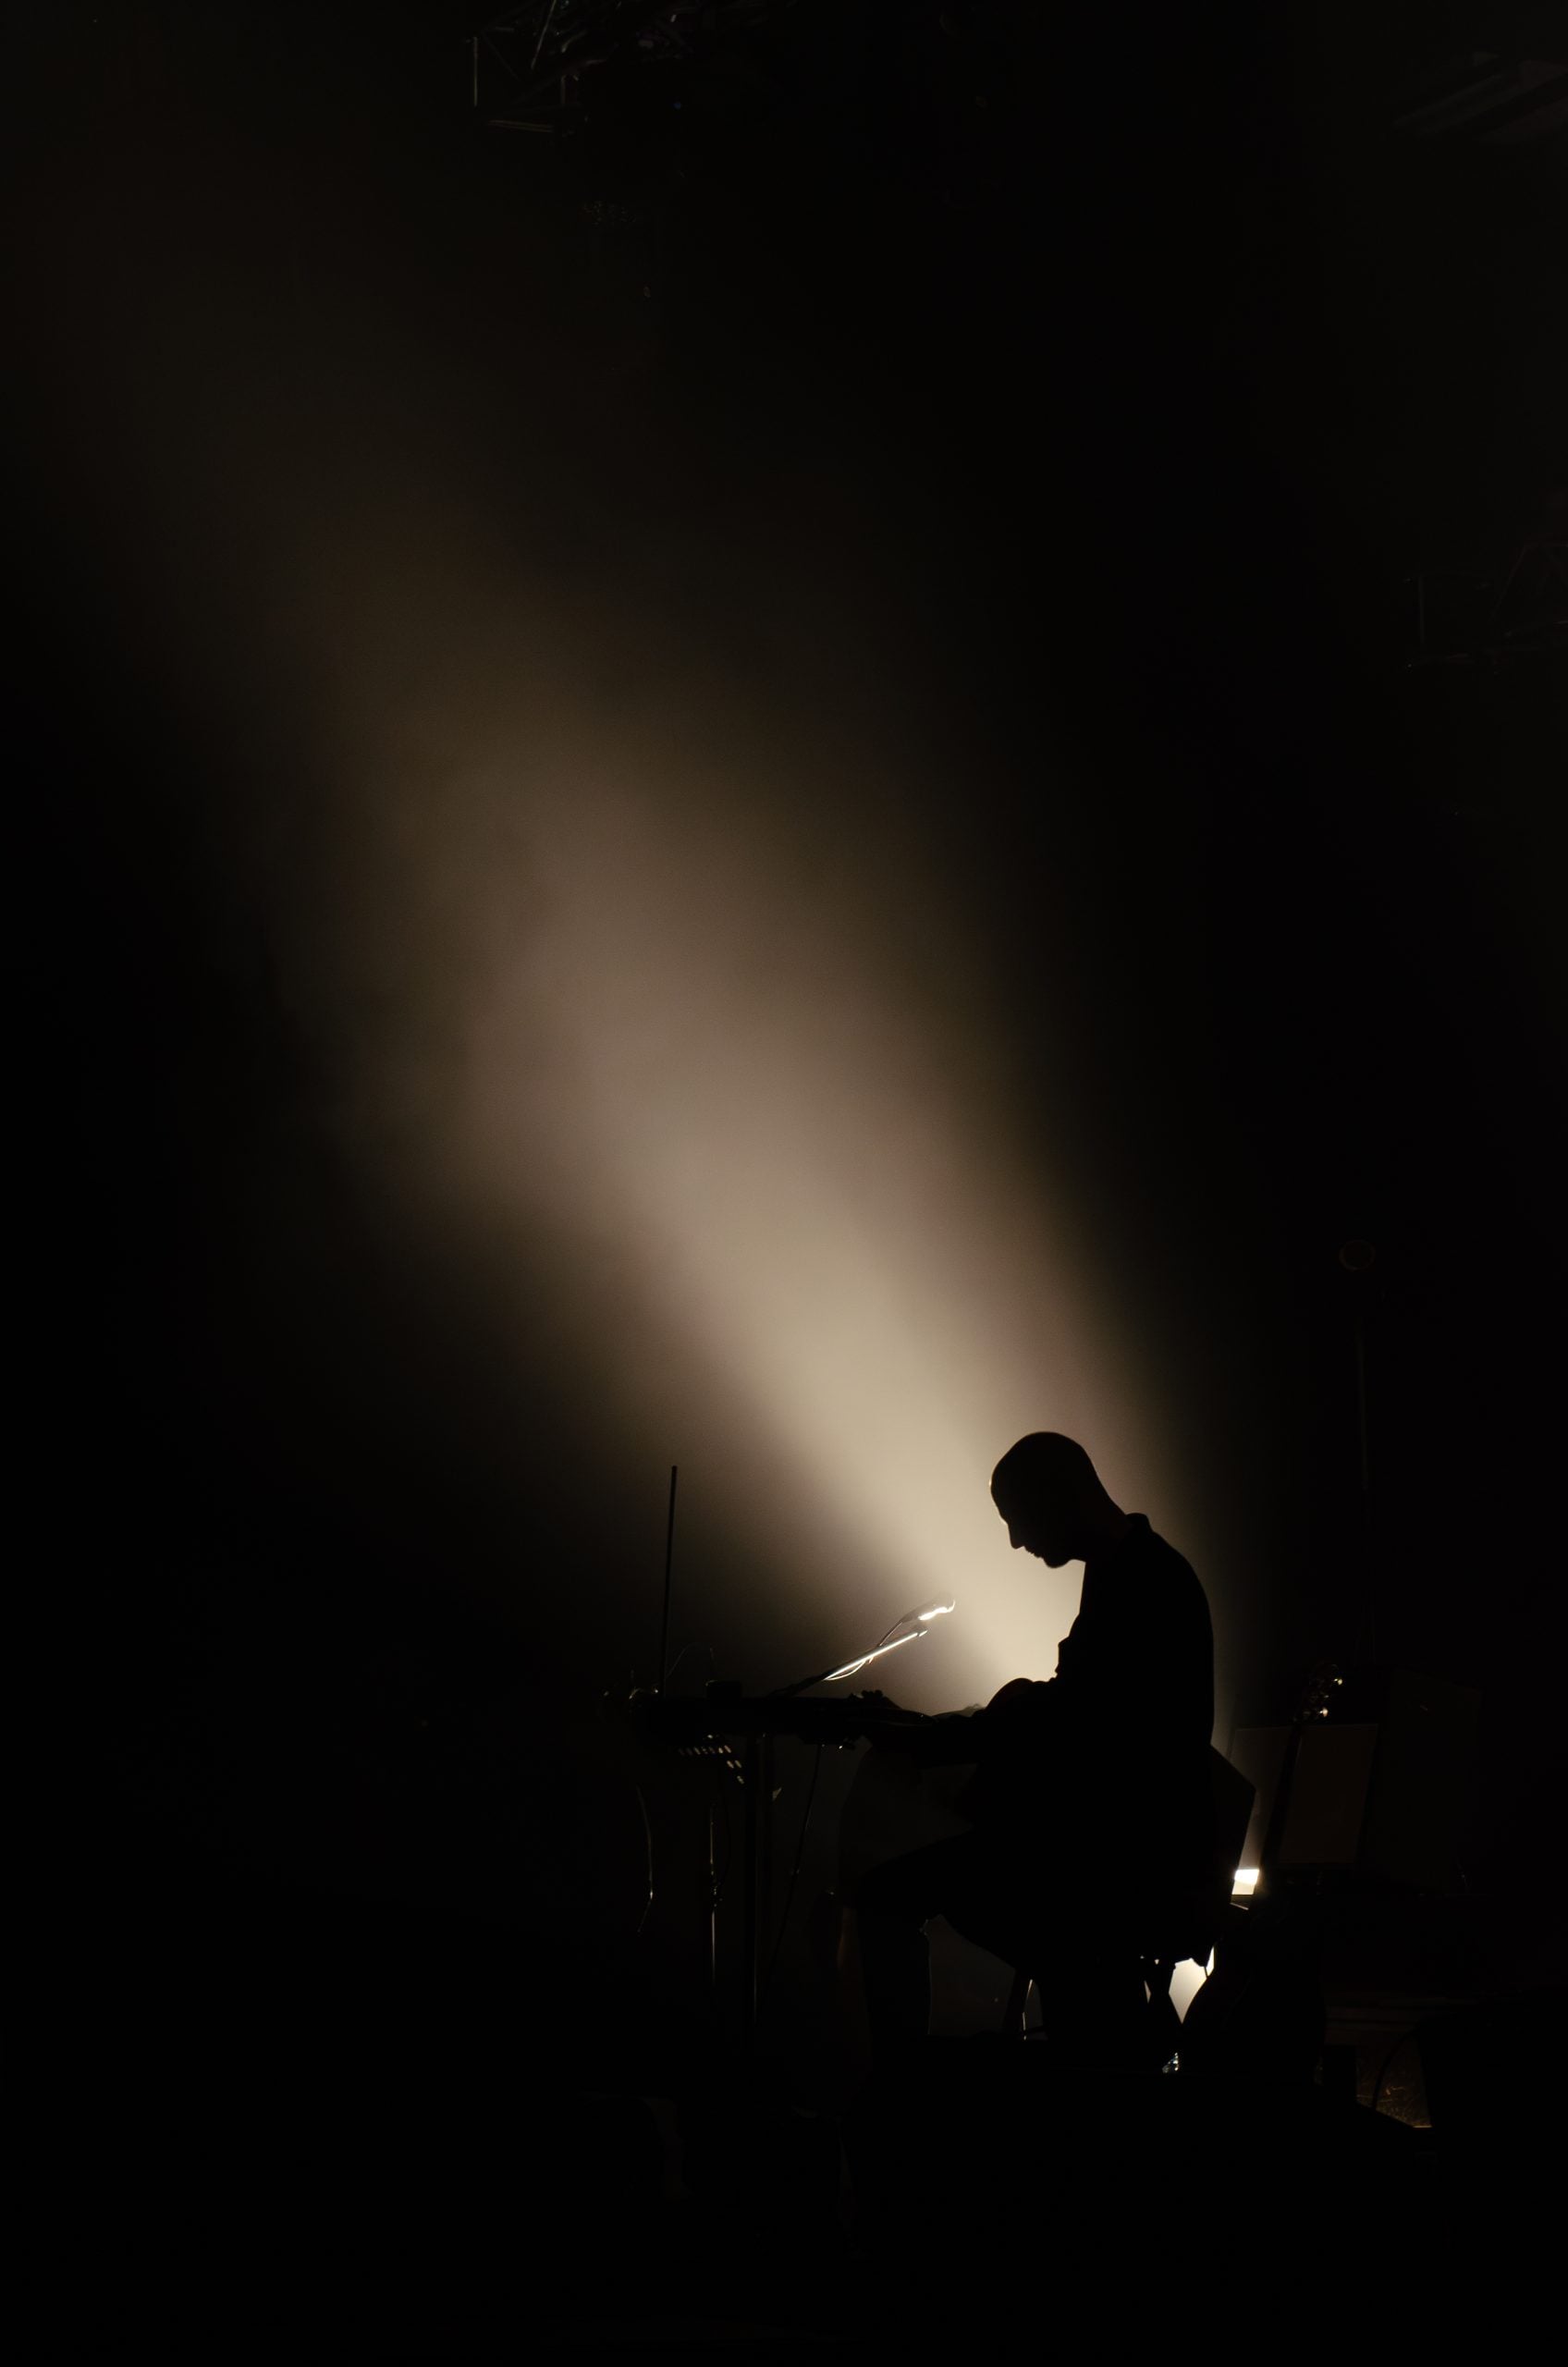
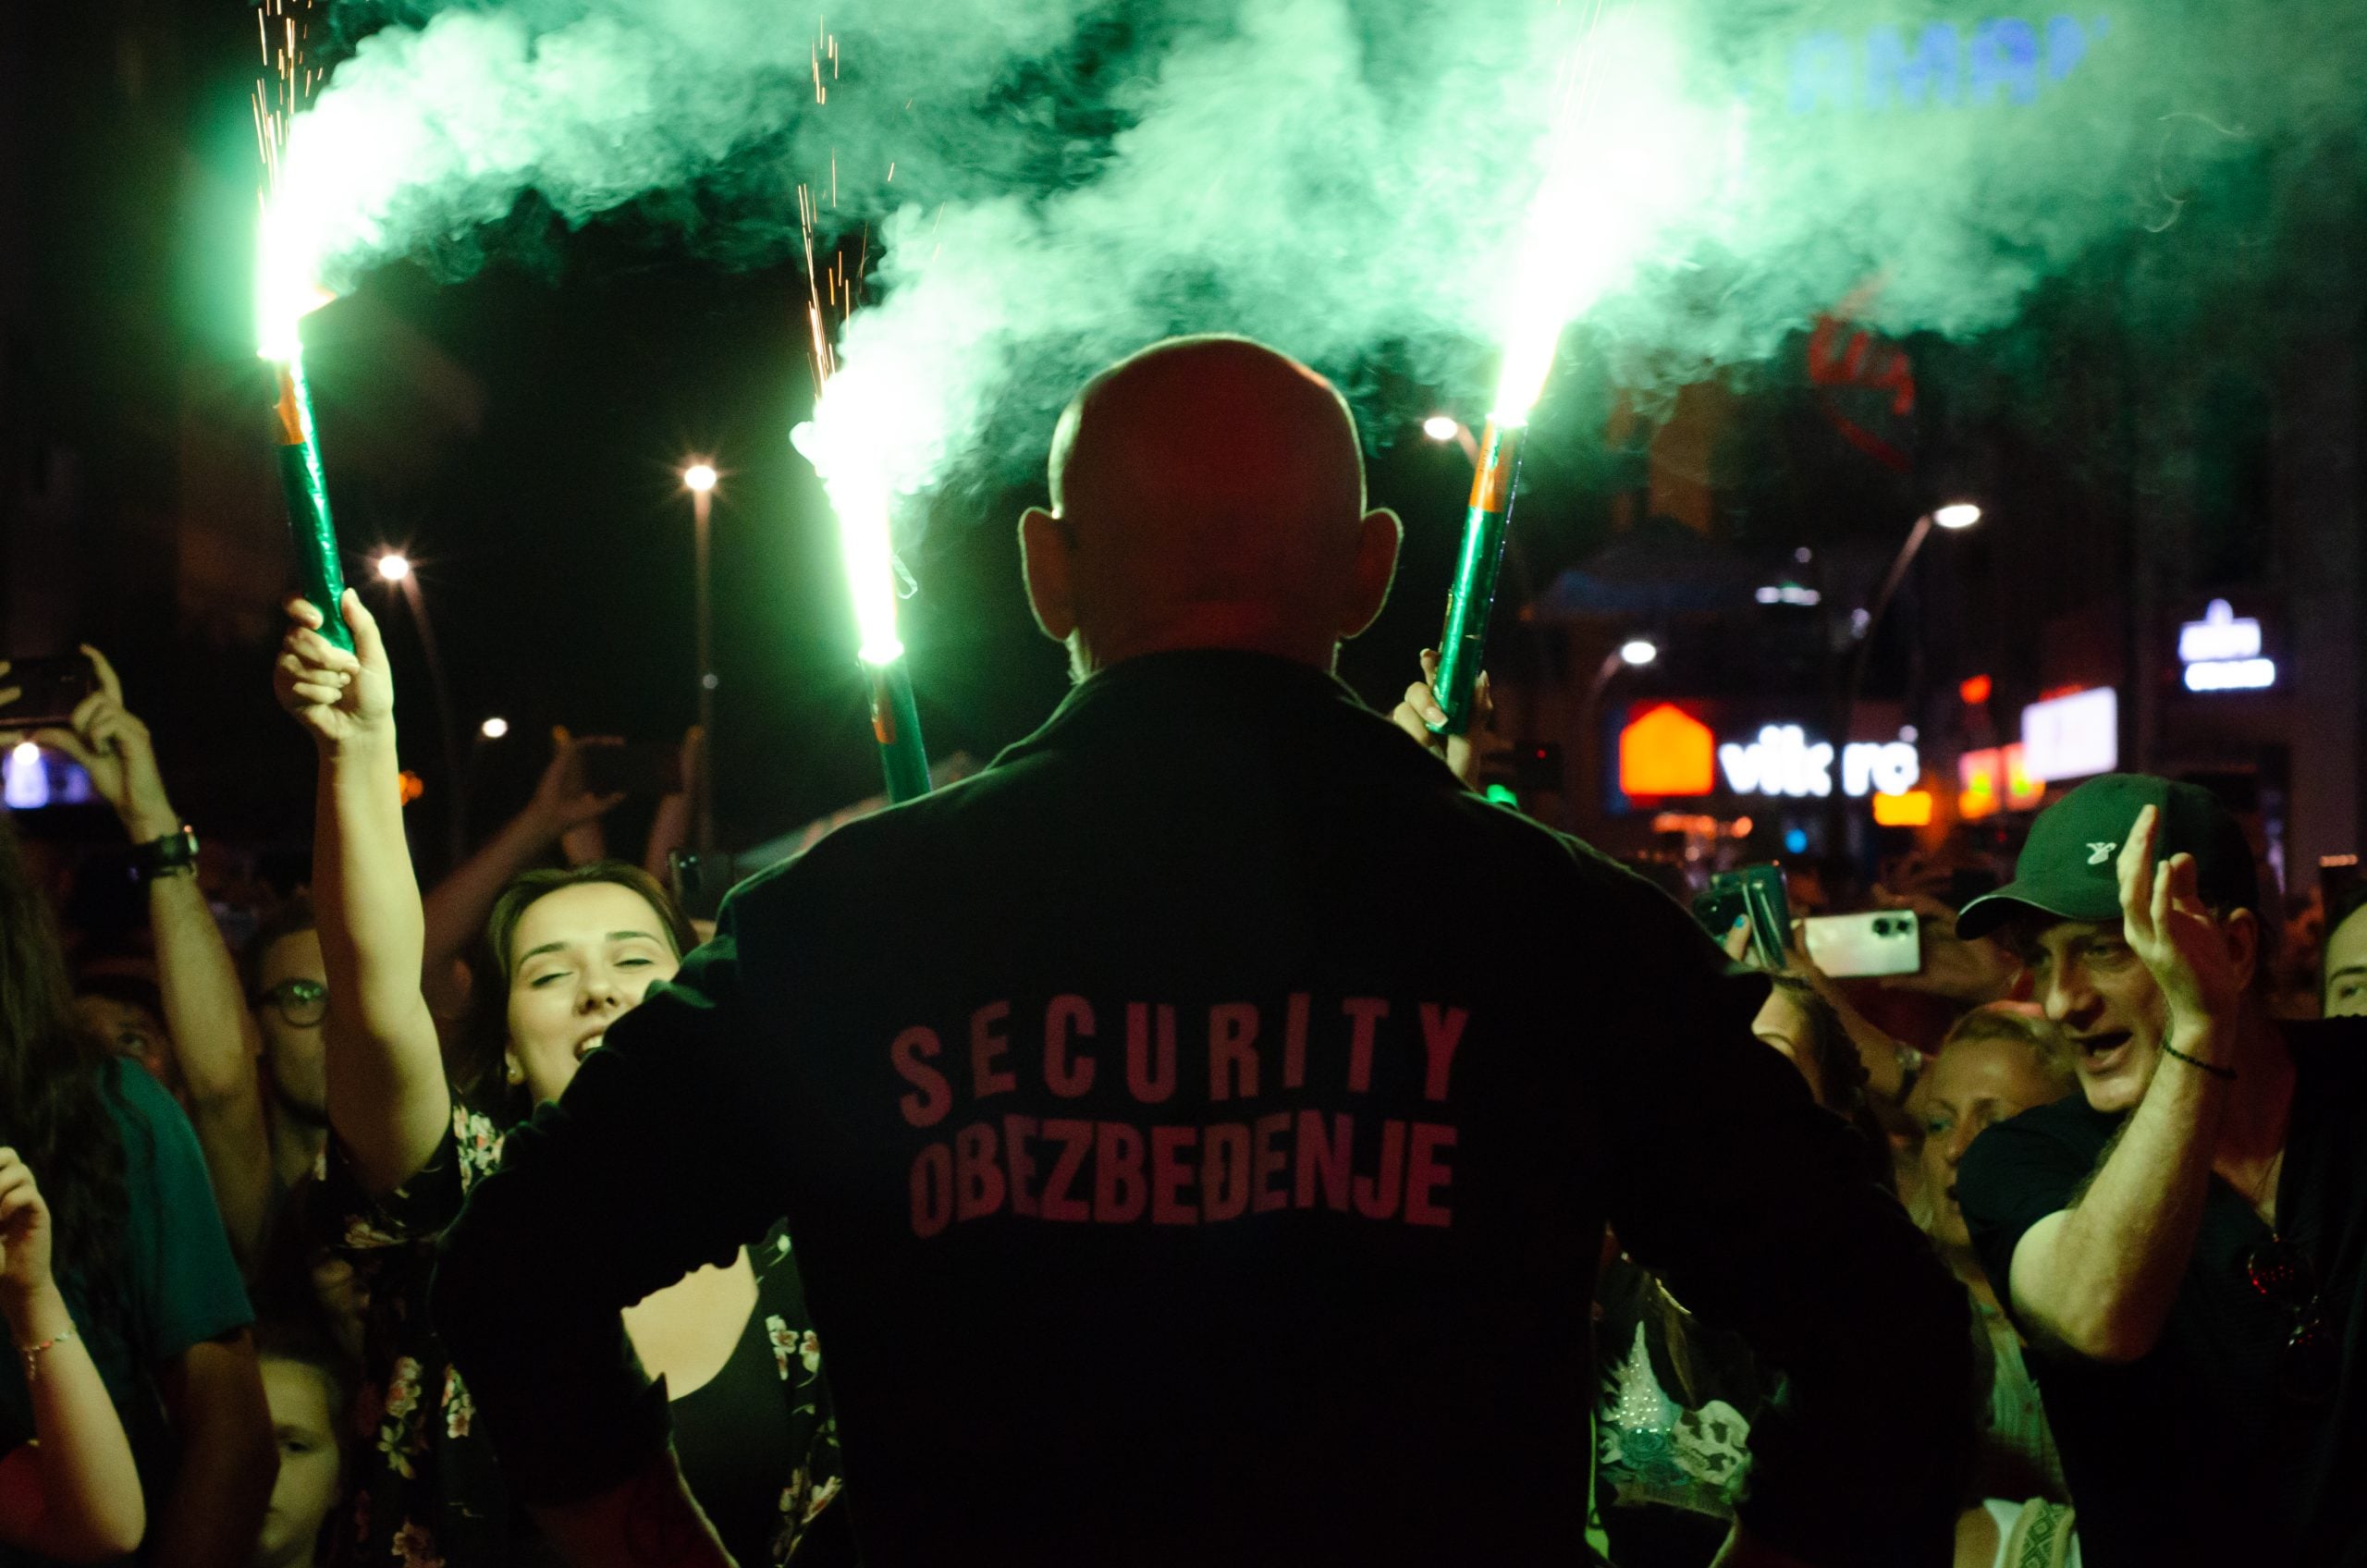
Make the Most of Backlighting, Smoke, and Silhouettes
Concerts often come with dramatic backlighting and effects like fog or smoke. These can either make or break your photo. Use backlighting to create striking silhouettes or accentuate the artist’s shape and movement. The key is to expose for highlights and embrace the mood it creates. On the flip side, if you’re shooting a festival during daylight hours (where the stage lights aren’t doing much of the work), lean harder on composition to tell the story.
[Related Reading: Music Festival Photography Tips: How to Prep, Shoot, and Survive]
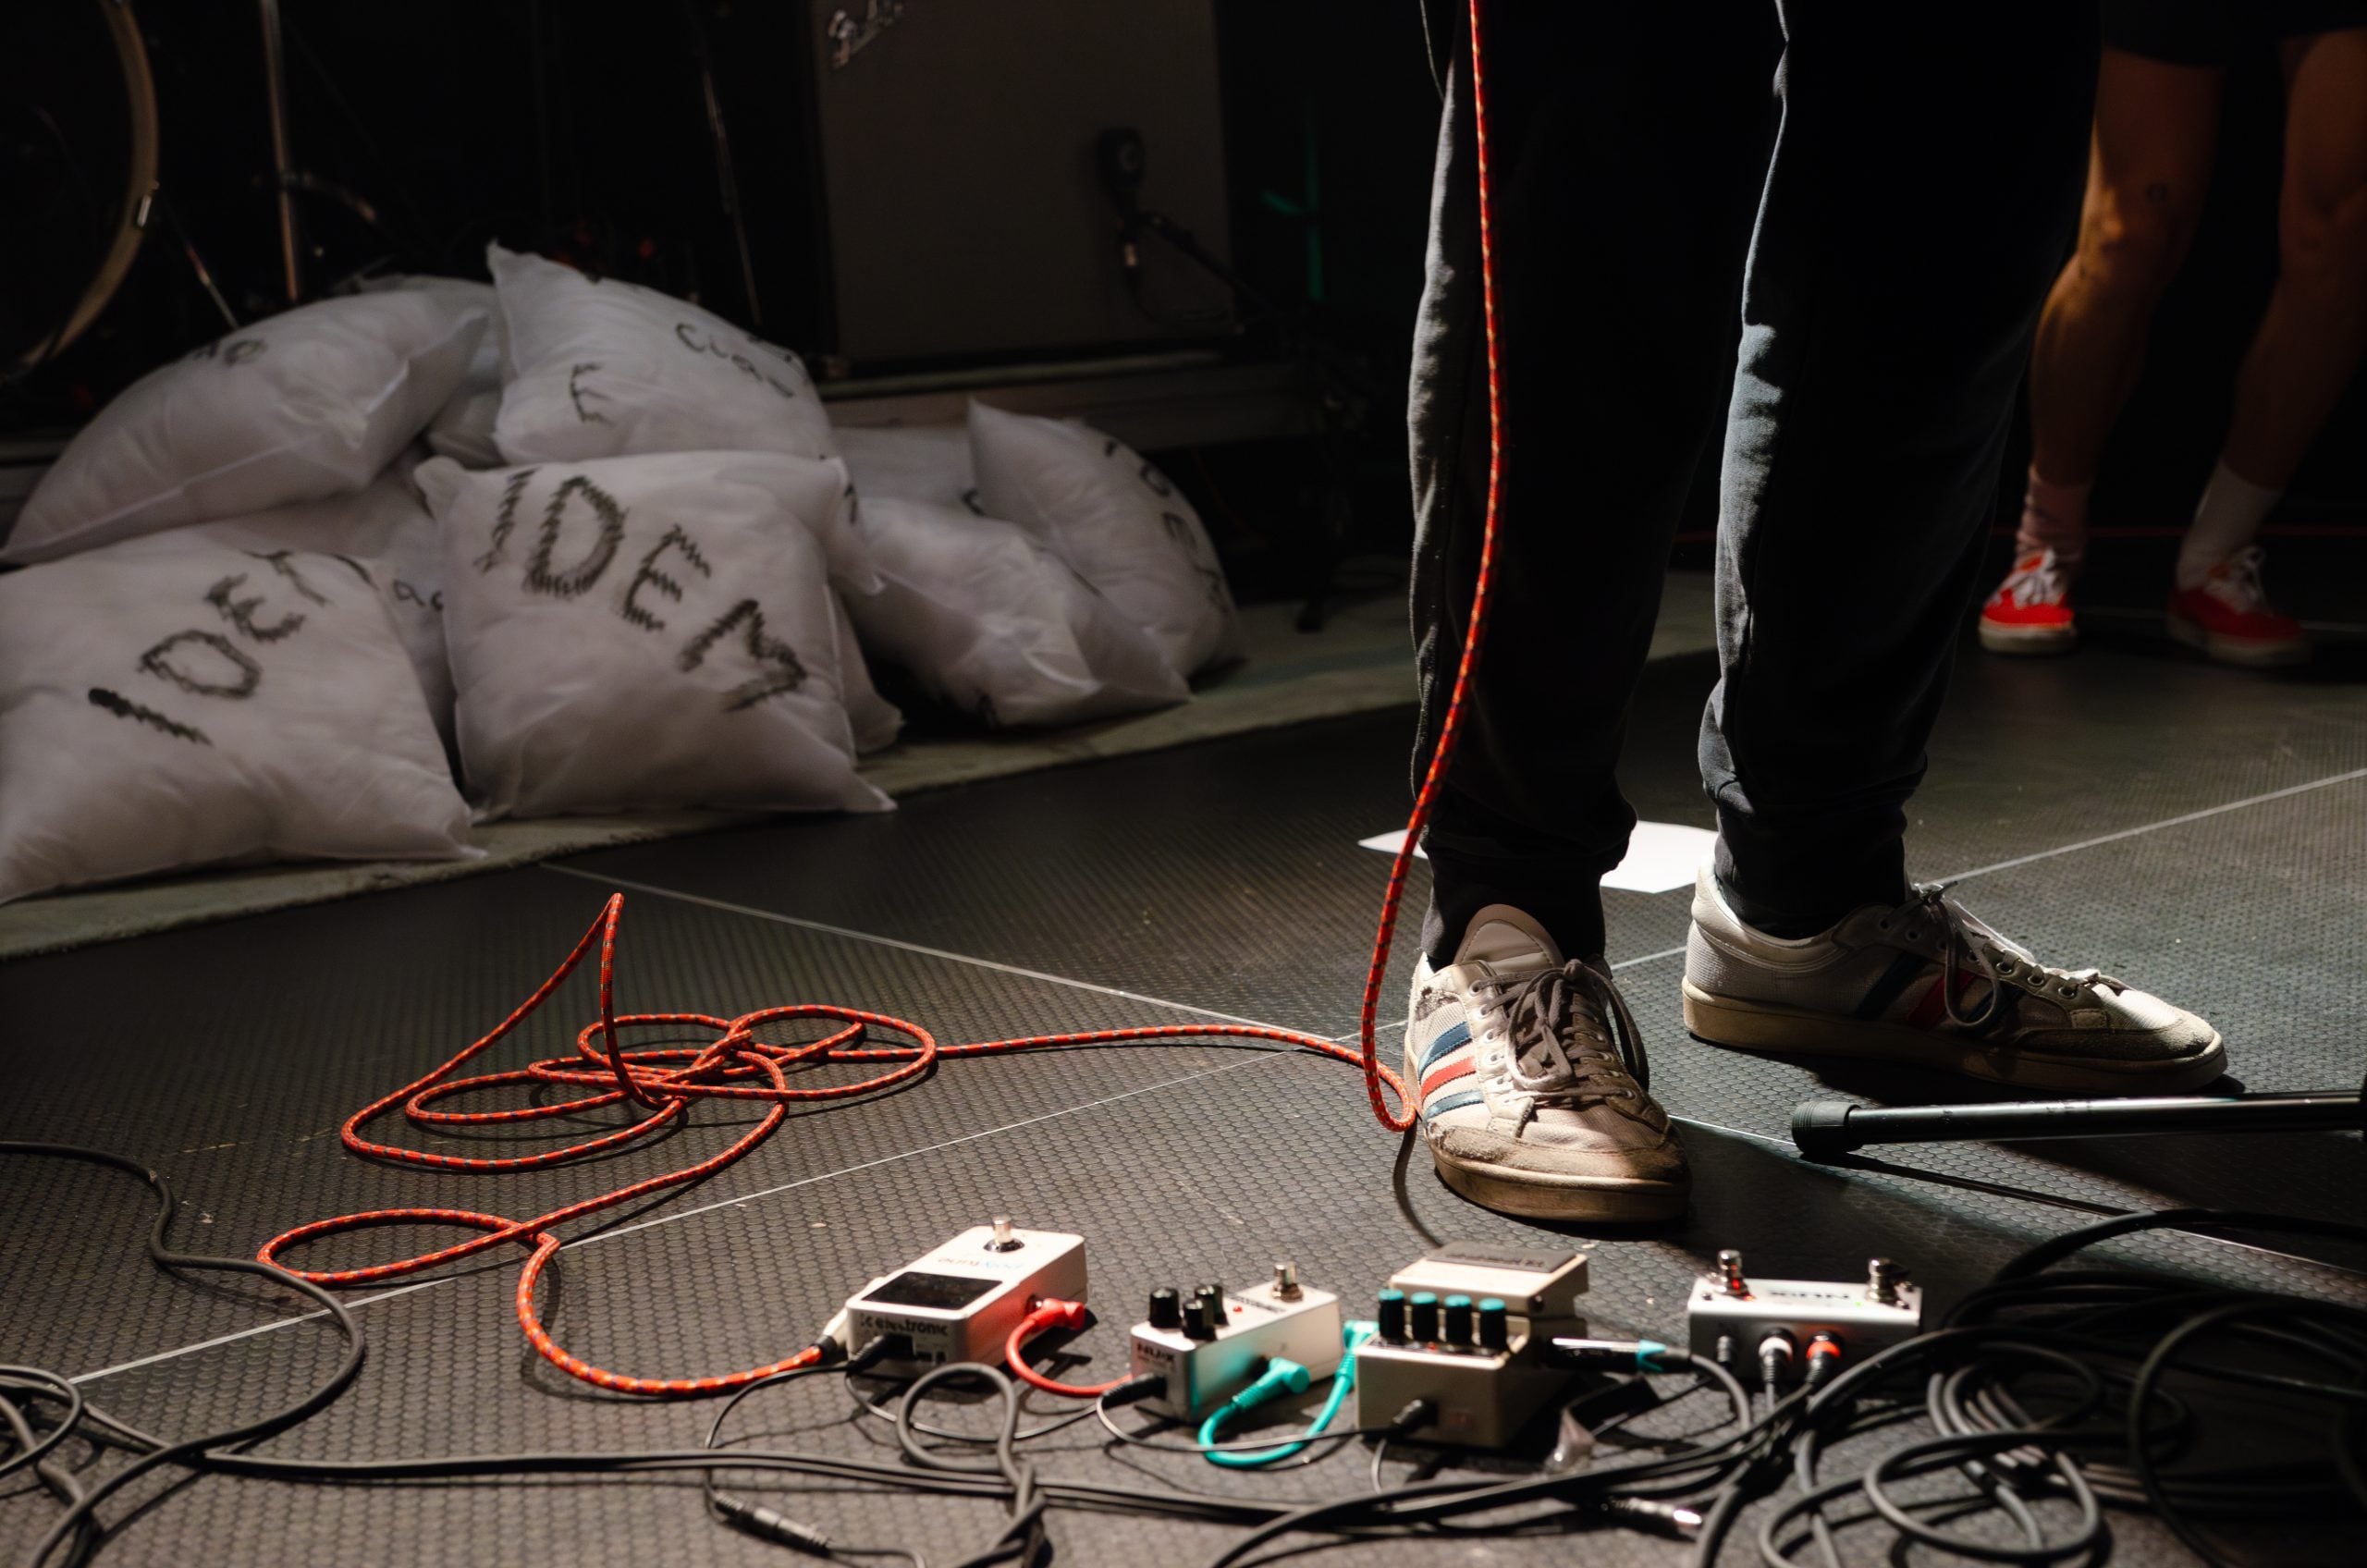
Capture the Details
While all the attention is usually on the front man, make sure to look around. Some of the most memorable shots come from moments and details other people miss – even if they’re the photographers. I personally love quirky wardrobe details, stage props, and guitar pedals. They all make a part of the band’s style, sound, and overall performance, yet they’re often overlooked.
[Related Reading: Concert Photography Composition Tips]


Shooting Different Types of Venues
Every concert venue has its quirks, pros, and cons. Knowing what to expect can make or break your photos. From tight, dimly lit clubs to wide-open festival fields, each environment demands a different approach.
Small Clubs vs. Large Stadiums
Small clubs offer intimacy and easy access, and honestly, the concerts in those venues are often fantastic! However, they come with challenges like poor lighting, limited pit space, and low ceilings. You’ll need to rely heavily on your camera’s ISO performance and lens aperture. But the upside is that you’re closer to the action and can capture raw, expressive moments.

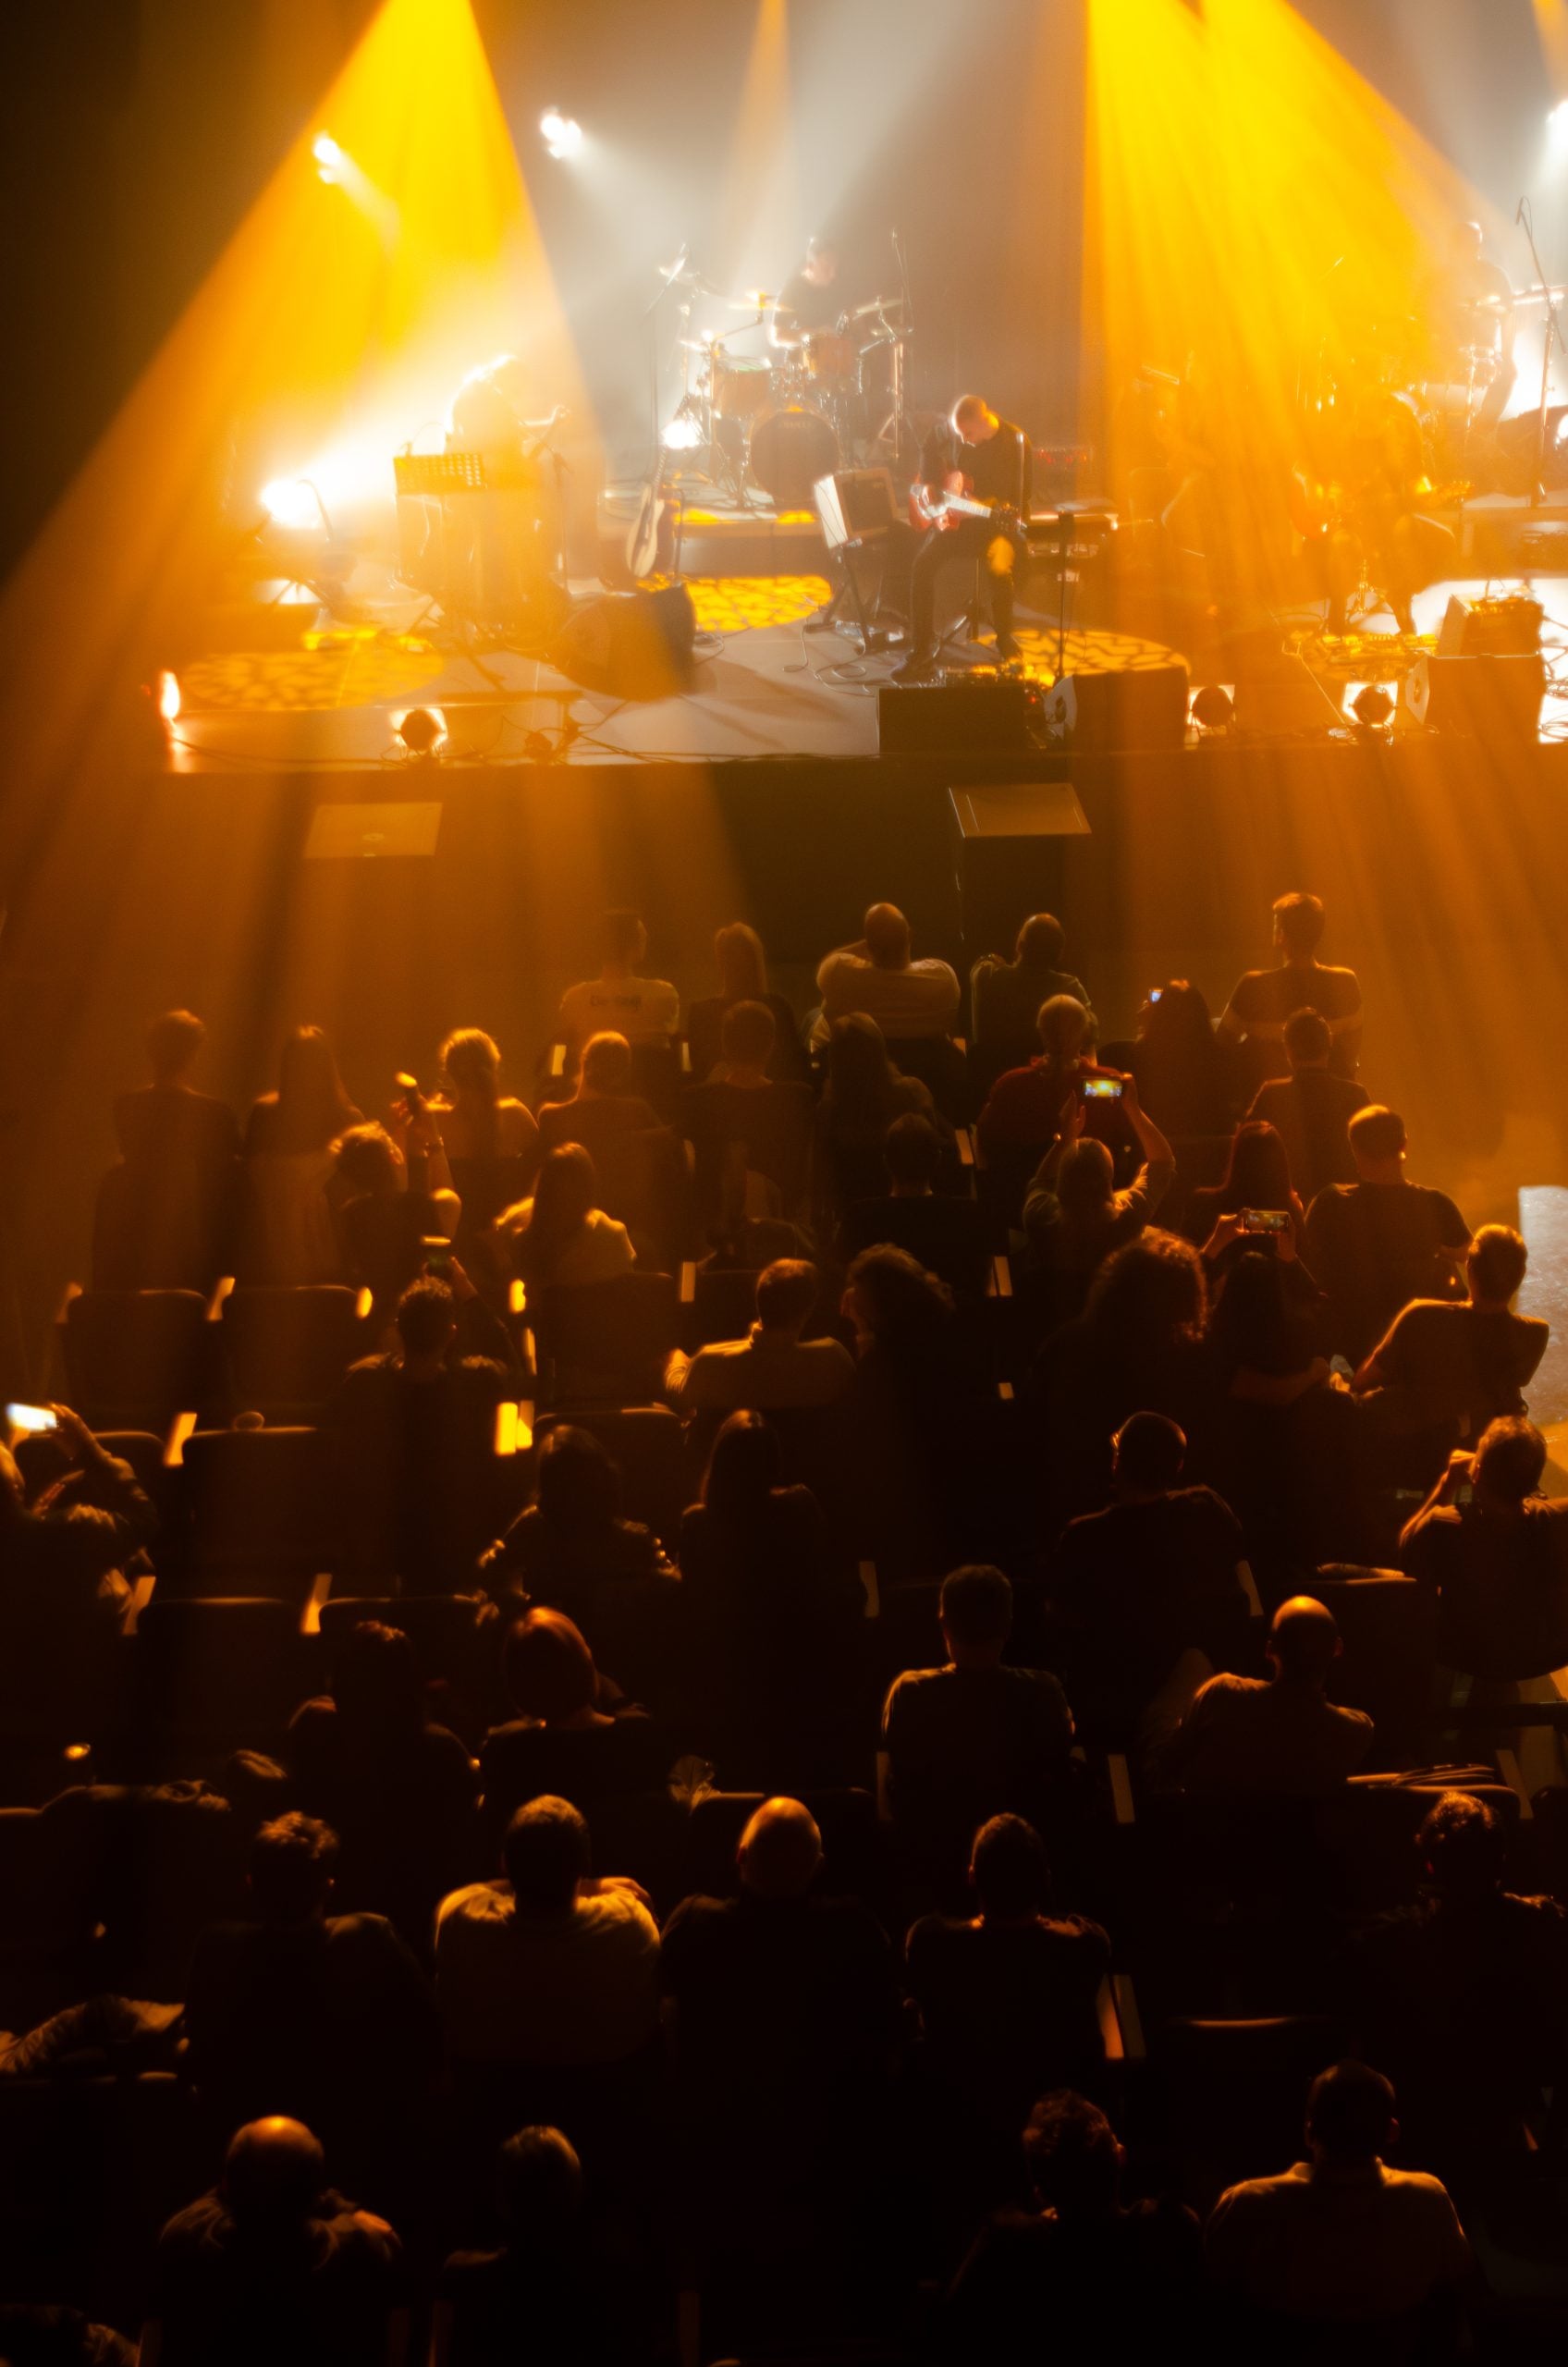
Large stadiums and festival stages, on the other hand, provide bigger lighting setups, pyrotechnics, and more structured environments. But they often come with more restrictions. You’ll likely be confined to a photo pit for just the first few songs, as already mentioned. Also, you’ll be “battling” at least ten other photographers. It’s thrilling, sure, but also super-stressful. You may need long lenses to frame your subjects effectively from a distance. What’s more, some venues will even require you to leave the pit and leave your gear after the first three songs are done.
Indoor vs. Outdoor Concerts
Indoor shows allow for more consistent lighting control, which is great if the venue has a good setup. But when it doesn’t, expect harsh reds, deep blues, or even complete darkness. You’ll also be dealing with reflections and shadows from terrible artificial lights.

Outdoor concerts are usually at larger venues and events, often boasting better stage lighting, too. If you shoot earlier performances, you’ll be working with natural light, which makes it so much easier in terms of freezing the frame. However, direct sun creates harsh contrasts and can flatten your image. Plus – it’s darn hot when you shoot a rehearsal in midday sun in the summer! Anyhow, get familiar with the lineup and plan your shots depending on the time of day and stage orientation.

[Related Reading: How to Shoot Indoor vs. Outdoor Concerts: A Complete Guide]
Navigating the Crowd
Whether you’re in the pit, at the barricade, or shooting from the crowd, you’ll inevitably deal with people in your frame. I suggest you arrive early to stake out the best vantage points. Once the concert starts, move slowly and respectfully if you need to shift positions, no matter if you’re in the pit or in the crowd. Look around you before you move for your own safety and the safety of others. Be nice. At packed shows, you might only have one spot. Well, that’s a part of concert photography, too. Make the most of it and be ready to adapt.

Editing & Post-Processing Your Shots
Step One: Curation
This is my least favorite part when I wake up, copy my photos to the computer and import them into Lightroom. But there are a few tips and tricks to make concert photography culling process less cumbersome. I like to start by rating my images and I have a simple system:
- Give blurry and otherwise unusable photos a 1-star rating.
- Filter by that rating and batch-delete them to declutter the gallery.
- Mark your favorites with 5 stars, and use them as your shortlist. This way, you won’t get overwhelmed, and you’ll be able to release the best concert photos soon after the shows over.
- If you shot in Burst mode, use Survey mode in Lightroom (hit “N”) to compare similar images side by side and choose the best. I normally do this after I’ve already selected the 5-star ones, and then I add these to the selection.
This workflow helps me focus my energy on the shots with real potential, rather than getting lost in a sea of “almost” moments. Also, I suggest taking a few breaks and coming back to your shots after you’ve had a coffee or taken a walk. If you’re anything like me, this will help you emotionally detach from images that are okay, but just not good enough.
Step Two: Taming Noise & Enhancing Clarity
Concerts are notoriously low-light, which often means high ISO and digital noise. Thankfully, there are different denoising options, and I already mentioned Lightroom’s Denoise. The downside is that it takes forever to process images – one more reason to be efficient with your culling and select truly only the best shots to post-process.
When the denosing is done, you can boost clarity and texture for more pop, especially on instruments and facial details, but watch out for over-processing. Less is more when trying to keep a natural concert feel.
Step Three: Fixing Light & Color
Stage lighting can be chaotic, and you’ll likely need some color correction. Use temperature and tint sliders to neutralize skin tones and adjust vibrancy to bring life back into your images. You’ll also find Lightroom’s color mixer to be your best friend, and you can also play with color grading.
In order not to go into full detail, I’ll leave you with two useful videos that helped me deal with my arch enemy – blue stage lights.
In some cases and with some photos, you can also embrace black and white. Depending on the lighting and the overall mood of the photo, it can look even better than the color image.
Exposure tweaks can recover those dark details or tone down blown out highlights. Use local adjustments and masking to fine-tune problem areas without affecting the whole frame. And I can’t stress this enough – shoot RAW! It gives you so much more wiggle room when dealing with underexposed images.
Step Four: Composition in Post
If you didn’t nail your framing in camera, that’s okay. Cropping can help fix off-balance images or draw attention to your subject. Also, be mindful of distractions. Clone out distracting background elements, loose cables, or accidental obstructions that take away from your subject.
[Related Reading: A Newbie’s Guide to Editing Concert Photos]
Copyright for Concert Photography
In the U.S. and most other countries, the moment you press the shutter, the photo is legally yours – unless a contract says otherwise. Understanding this ownership is crucial because some venues or artists may require concert photographers to sign restrictive agreements, sometimes even demanding the transfer of copyright. Registering your images with the U.S. Copyright Office adds another layer of protection, enabling you to pursue legal action and claim statutory damages if your work is used without permission.
Still, owning the copyright doesn’t mean you can use your photos however you like. Editorial use, such as sharing on your website, social media, or publications, is usually allowed. However, commercial use often requires explicit permission and/or model release from the performer due to their right of publicity. This goes for things like selling your photos for ads or merchandise.
To protect your images, avoid rights-grabbing contracts, watermark strategically, retain metadata, and consider registering your work. Being informed helps you safeguard your rights and maintain professional integrity in the dynamic world of concert photography.
[Related Reading: Concert Photography Copyright: What Every Photographer Should Know]
Final Concert Photography Tips
As we’re approaching the end of this concert photography guide, I feel the need to give you a few more practical tips that just couldn’t be categorized in any of the previous sections.
Watch Out for Classic Mistakes
There are some mistakes most newbies make, and even some of the more experienced photographers. These can cost you the perfect moment and you’ll be angry with yourself once you come home and see that you’ve missed those decisive moments.
- Chimping: Constantly checking your screen and going through photos mid-concert distracts you from real-time moments. As you can guess – this will result in missed magic. Take a few test shots, check if everything looks good, adjust if necessary, and fire away. You can check your photos during breaks and when you leave the pit.
- Too-slow shutter speeds: If your photos are coming out soft or blurry, it’s often a shutter speed issue. In a live show, always rely on faster shutter speeds, higher ISO, and wider apertures. Also, don’t forget to switch your focus from Manual to Auto. And don’t ask why I’m saying this. :)
- Focusing only on the frontman: While the lead vocalist is usually the center of attention, the story of the concert includes drummers, fans, lighting techs, security, and the entire vibe. Be on the lookout for those people and those moments, too.
Shoot What You Love
One of the most overlooked tips? Take concert photography of the bands and genres you genuinely enjoy. When you understand the music, you can anticipate peak moments: beat drops, guitar solos, or crowd surges. Naturally, you’ll also be better prepared to capture them and end up with stunning, perfectly timed shots. Familiarity breeds better timing, but also stronger emotional storytelling.

Concert photography is a craft built on persistence. Your early photos might not blow you away, and that’s okay. Keep experimenting. Try new venues, new bands, and test different gear. Push your editing skills, too, as good post-processing is crucial in concert photography. And most importantly, keep shooting. Every show makes you better.
Bonus: If you want to discover new music, click on the band names under each image. I hope both the music and this article inspire you to grab your gear and get some awesome concert shots!

Dunja Đuđić Kalinin
Dunja Djudjic is a multi-talented artist based in Novi Sad, Serbia. With 15 years of experience as a photographer, she specializes in capturing the beauty of nature, travel, concerts, and fine art. In addition to her photography, Dunja also expresses her creativity through writing, embroidery, and jewelry making.


Join the Discussion
DIYP Comment Policy
Be nice, be on-topic, no personal information or flames.
One response to “The Ultimate Guide to Concert Photography: Gear, Settings, Techniques & More”
Great post. Two things I’ve noticed in addition after having done this in all kinds of venues and conditions with different cameras. LED lighting is a different challenge – more economical for venues, but at least at the outset, harder to shooting some colours> I suspect cheaper LED lighting may be worse than the better theatrical equipment. I primarily used Nikon gear (D4, D850) but also tried the FUJI X series equipment for a while before going back to the Nikon gear in low light situations. Maybe just me, but there just wasn’t enough dynamic range in the smaller sensor.