


Product Photography Guide: Tips and Techniques That Work
Aug 13, 2025
Darlene Lleno
Darlene Lleno brings a unique perspective to DIY Photography as someone who grew up surrounded by camera gear but chose words over lenses. With five years of writing experience, she specializes in photography content that’s both technically informed and genuinely passionate. Growing up with a photographer twin brother meant camera talk was everyday conversation in her household. While he mastered capturing moments, Darlene discovered she preferred being the subject and the storyteller behind the scenes. As a travel enthusiast and mother of two, she understands the importance of preserving life’s precious moments. When not exploring new destinations or writing for DIY Photography, you’ll find her reading or tending to her garden. Her approach to photography writing is refreshingly authentic, she may not be behind the camera, but she knows exactly what it takes to help others capture the shots that matter most.
Share:

Product photography turns regular items into powerful sales tools that make people want to buy. Whether you’re starting an online store, building your portfolio, or helping clients show off their products, getting good at this skill opens up tons of opportunities in our visual world.
Good product photos are what separate browsers from buyers. They show quality, build trust, and create connections with people who can’t touch or see items in person before buying. Learning how to take product photos gives businesses a real advantage and photographers a valuable skill to offer.
What is Product Photography?
Product photography captures items for selling and marketing purposes. This field focuses on showing products clearly and attractively to potential buyers across websites, catalogs, ads, and social media.
The work involves way more than just pointing a camera at something. Product photographers need to understand lighting, composition, colors, and camera settings while thinking about who will buy the product and what the brand represents. Every shot needs planning to highlight important features and create images that turn viewers into customers.
Types of Product Photography
Understanding different types of product photography helps you choose the right approach for your specific needs and target audience. Each style serves different purposes and requires distinct techniques, equipment, and creative vision.
Catalog Photography
Catalog photography documents products simply and clearly for basic commercial use. This straightforward approach focuses on showing items accurately without artistic interpretation or lifestyle context. The goal is providing customers with clear, detailed views that help them understand exactly what they’re buying.
Lifestyle Photography
Lifestyle product photography shows items being used in real situations and contexts. This approach helps customers visualize how products fit into their daily lives by showing them in natural environments with appropriate props and settings.
Creative and Artistic Photography
Creative product photography tells brand stories through artistic interpretation and unique visual approaches. This style prioritizes emotional impact and brand personality over straightforward product documentation.
Essential Product Photography Setup

Creating product photos starts with a smart setup that controls every visual part, whether you go DIY or pro. Your workspace doesn’t need to be fancy, but it must give you steady lighting, clean backgrounds, and stable camera positioning.
A basic product photography setup needs several key parts working together. Start with a clean, roomy area where you can position products without distractions. This space should have room for lights, camera placement, and easy product access when you need to make changes during shooting.
Every good product photography setup starts with a solid surface for your products. A simple white table or shooting platform works great for most items. This surface should be big enough for your products plus any props while staying completely clean and free from scratches or marks that show up in photos.
Background choice plays a huge role in how products look. White backgrounds stay the top choice for online selling because they create clean, distraction-free images that work well on any website. However, colored backgrounds, textured surfaces, or lifestyle settings can add personality depending on what your brand needs.
Camera stability is absolutely necessary for sharp, professional results. A solid tripod stops camera shake and lets you frame shots consistently across multiple photos. This consistency becomes super important when photographing different versions of products or creating images for matching catalogs.
Studio Lighting Fundamentals
Good lighting transforms average product photos into professional marketing materials. Understanding how light works and affects your products helps you create images that show colors, textures, and details accurately while looking appealing.
Natural light gives beginners an excellent starting point. Large windows provide soft, even light that makes most products look good without harsh shadows or weird colors. Set up your shooting area near a north-facing window for steady light all day, or use sheer curtains to soften direct sunlight.
Artificial lighting gives you complete control over your product photography setup no matter what the weather or time of day. Continuous LED lights work well for beginners because you can see exactly how the light affects your products before taking the shot. Studio strobes offer more power and faster recharge times but need more experience to use well.
Key Lighting Methods
Key lighting methods include front lighting for even coverage, side lighting for texture and depth, and backlighting for see-through or translucent products. Most professional product photos use a mix of these methods to create balanced, attractive results.
Light modifiers shape and control your lighting. Softboxes create gentle, even light that reduces harsh shadows. Umbrellas provide broader, softer light coverage. Reflectors bounce light into shadow areas to reduce contrast and show product details.
Three-Point Lighting System
Three-point lighting provides complete control over product appearance. The key light serves as your main light source. Fill light reduces shadows created by the key light. Background light separates your product from its background and adds depth to the overall composition.
Soft vs Hard Light
Soft light creates even lighting with gentle shadows that flatter most products. Large light sources relative to your product size produce soft light. This can come from large softboxes, umbrellas, or even cloudy skies for outdoor shoots. Soft light works particularly well for products with shiny surfaces or complex textures.
Hard light creates dramatic shadows and high contrast that can add visual interest to certain products. Small light sources like bare bulbs or direct sunlight produce hard light. Use this technique carefully and only when it supports your product’s brand image and what customers expect.
Light Direction Effects
Direction of light dramatically affects how products look. Front lighting provides even coverage but can appear flat. Side lighting reveals texture and dimension. Backlighting works excellently for transparent products or creating dramatic silhouettes.
Specialized Product Photography Lighting Techniques

Different product types need specific lighting techniques to show their unique characteristics effectively. Understanding these specialized approaches helps you handle any product type with confidence.
Reflective Products
Jewelry, electronics, and polished metal need careful light placement to avoid unwanted reflections. Use large, soft light sources positioned at specific angles to create attractive reflections while keeping products visible. Polarizing filters can reduce unwanted glare from non-metallic surfaces.
Transparent and Translucent Products
These items need backlighting or transmitted light to show their clarity and color. Position lights behind or underneath these products while using reflectors or fill lights to maintain detail in the product structure itself.
Textured Products
Leather, fabric, and rough surfaces benefit from side lighting that creates shadows in surface variations, emphasizing texture and material quality. This lighting approach highlights tactile properties that customers want to see.
White and Light-Colored Products
These can disappear against white backgrounds without careful lighting. Use subtle shadows or colored backgrounds to provide separation. Alternatively, use rim lighting or background lighting to create a subtle outline around light-colored products.
Product Photography Gear Essentials
Professional results don’t always need professional budgets. Understanding which equipment actually impacts image quality helps you spend money wisely and avoid buying things that won’t improve your product photography.
Camera choice matters less than many photographers think. Modern smartphones can make excellent product photos with proper lighting and technique. However, dedicated cameras offer more control over settings like aperture, shutter speed, and ISO, plus the ability to use different lenses for various shooting situations.
DSLR and mirrorless cameras both work great for product photography. The key features to look for include good performance in low light, manual exposure controls, and the ability to shoot in RAW format for maximum editing flexibility later. Full-frame sensors aren’t necessary unless you’re shooting very large products or need extremely blurry background effects.
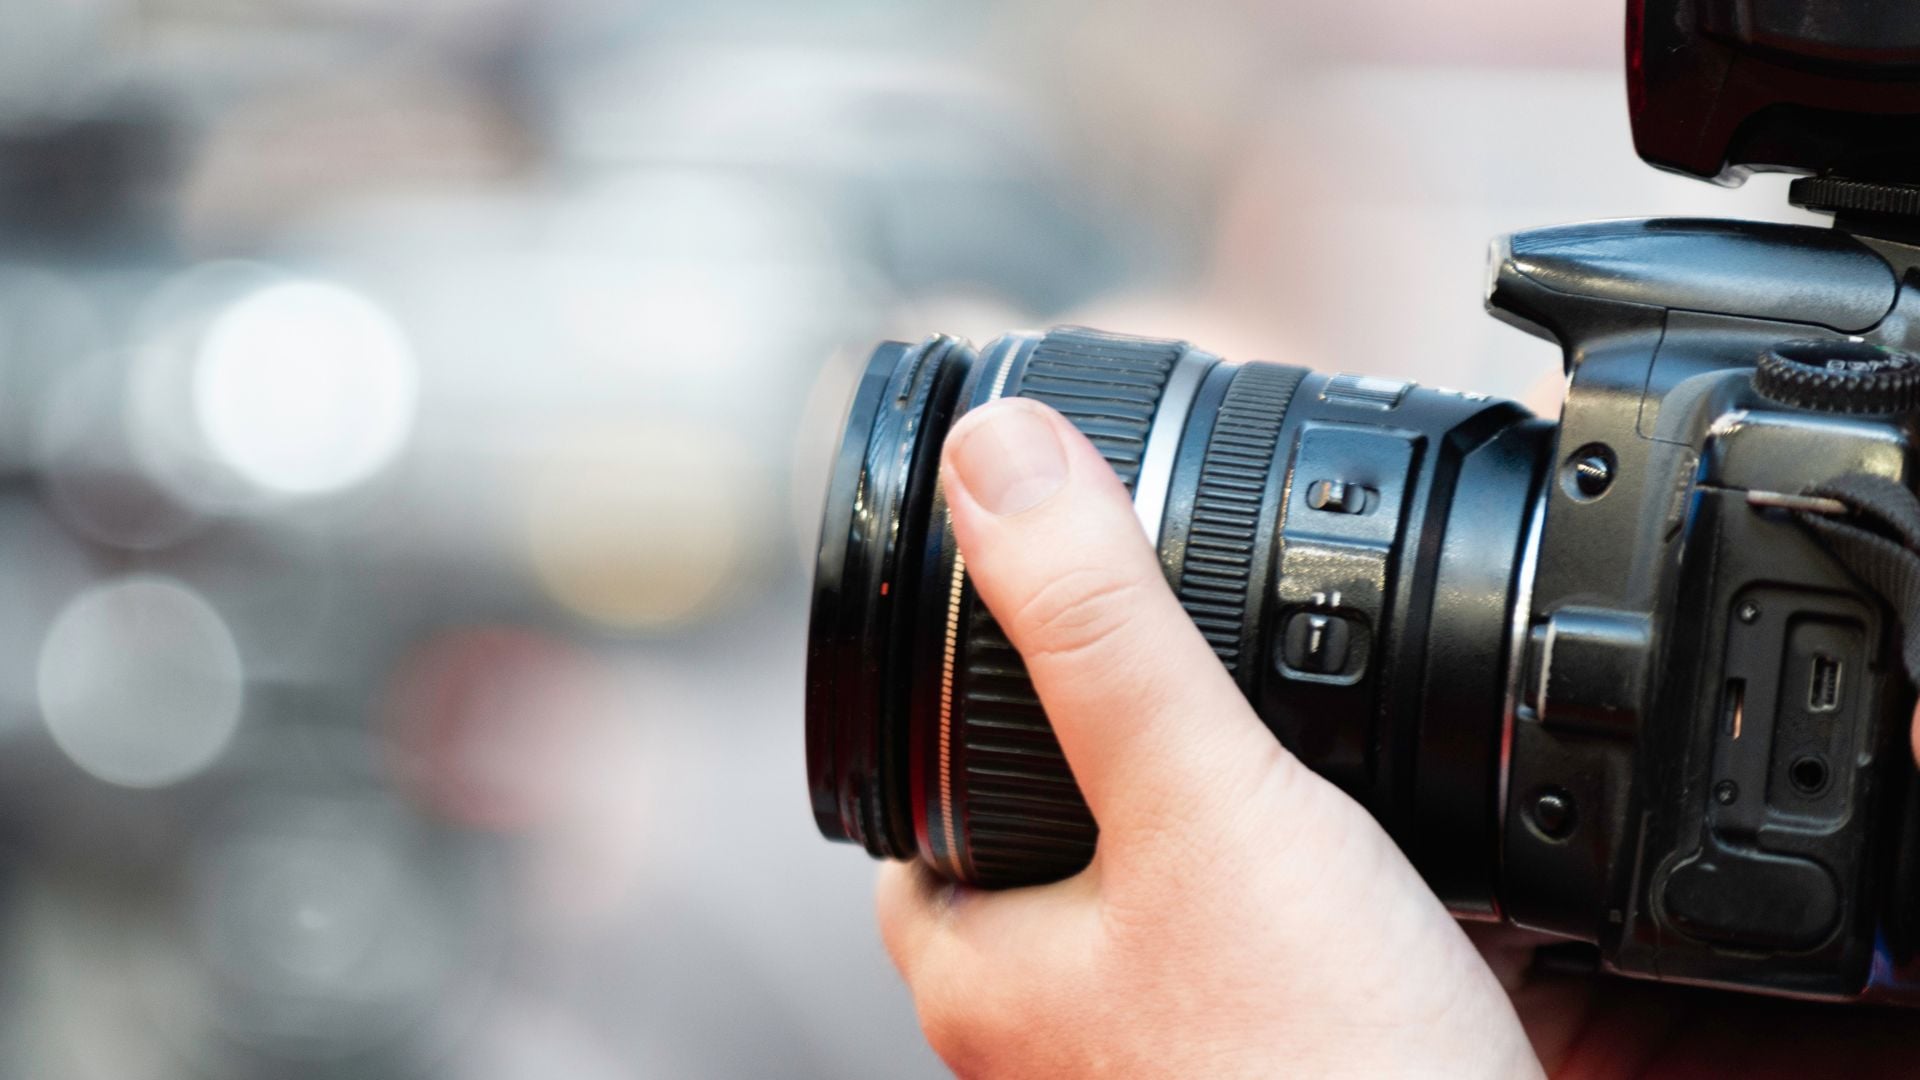
Lens choice significantly impacts your product photography results. A 50mm or 85mm lens on a full-frame camera provides natural perspective without distortion. Macro lenses excel at capturing fine details and textures, while wide-angle lenses work well for larger products or lifestyle shots. Avoid extremely wide lenses that can create unflattering distortion.
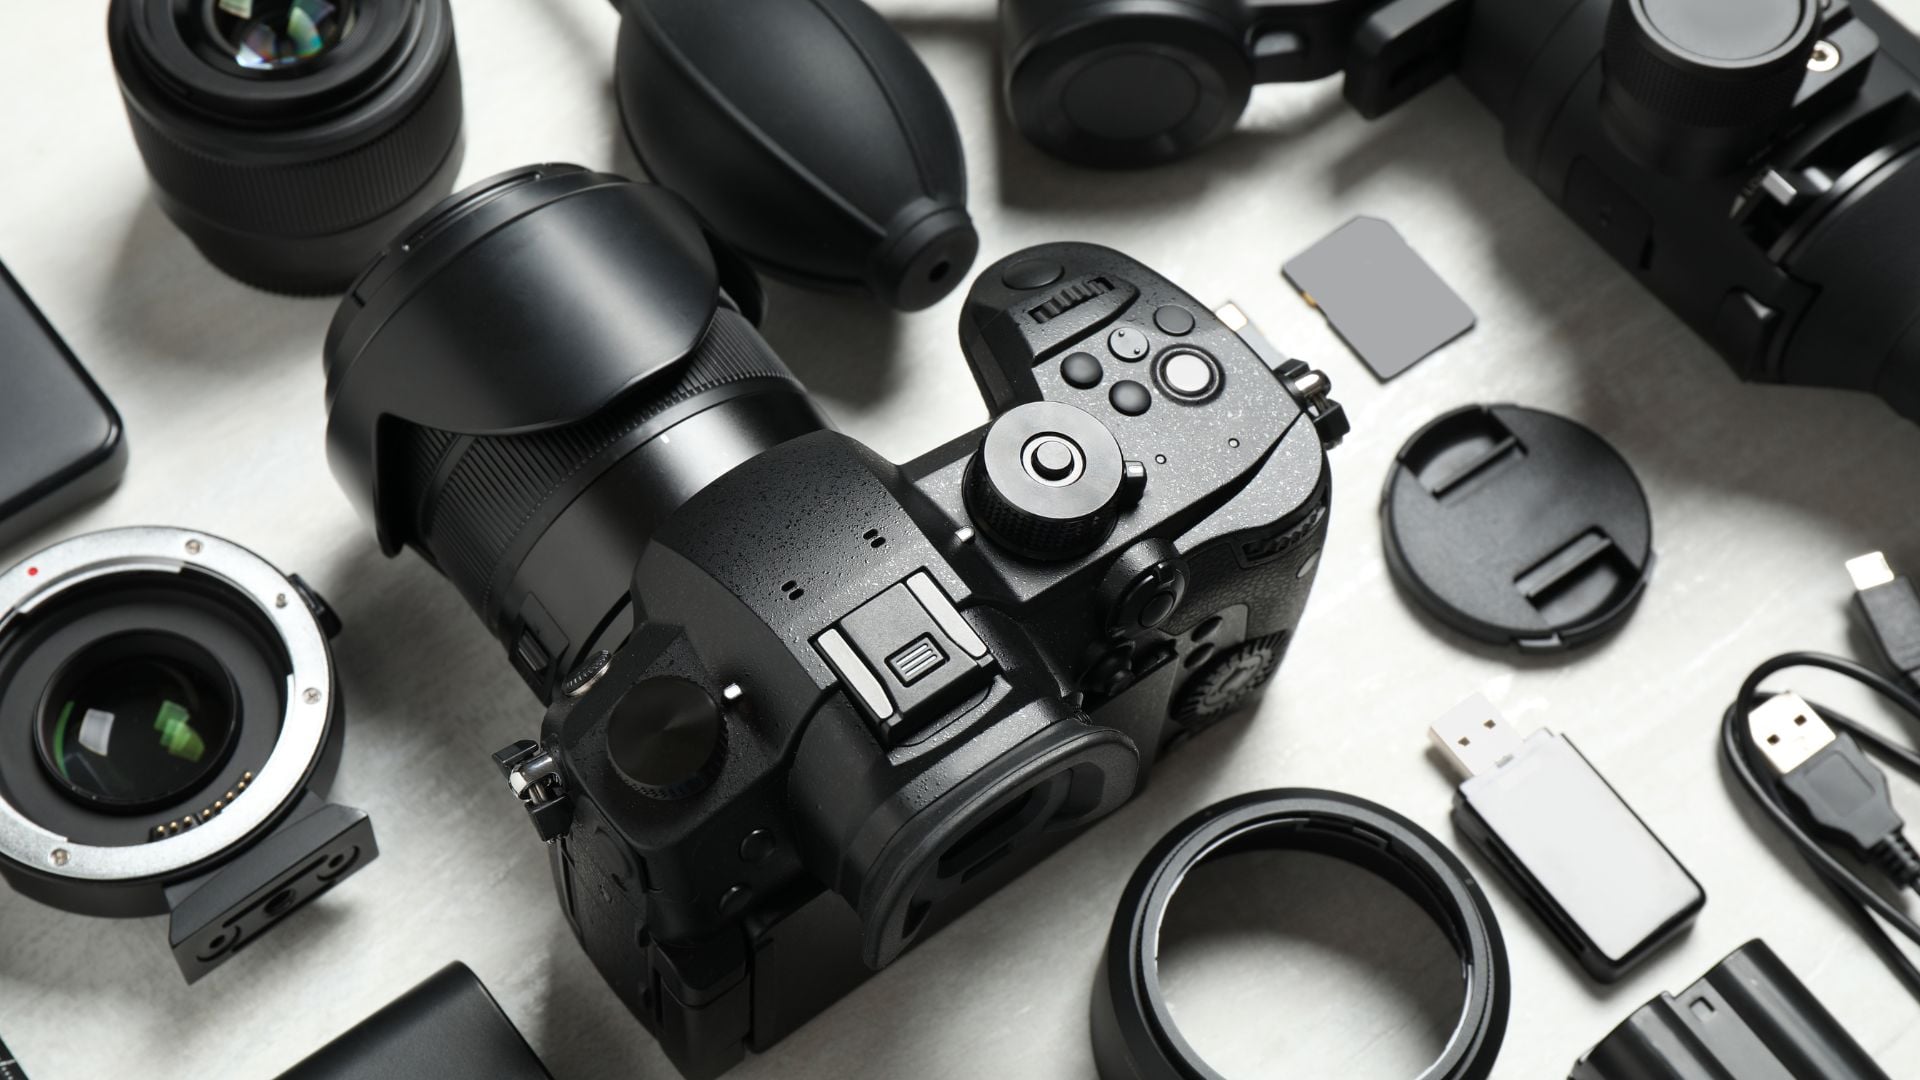
Must-Have Accessories
Beyond cameras and lenses, several accessories make your product photography workflow smoother and improve results. These tools solve common problems and help keep consistency across all your product images.
- Reliable tripod – Forms the backbone of any product photography setup and should extend to comfortable working height while holding your camera steady
- Remote triggers – Eliminate camera shake through wireless remotes, intervalometers, or smartphone apps for hands-free shooting
- Color calibration tools – Gray cards help set proper white balance while advanced color checkers provide precise reference points for editing
- Memory cards and backups – Fast, high-capacity cards prevent delays and backups protect your work during shoots
Additional Useful Equipment
Beyond the essential items, several other pieces of equipment can significantly improve your product photography workflow and results. Consider adding these tools as your skills and budget allow.
Light stands provide stable positioning for your lighting equipment while allowing easy height and angle adjustments. Quality stands invest in your long-term success by providing reliable support for expensive lighting gear.
Backdrop stands and paper rolls create professional backgrounds quickly and easily. Seamless paper backgrounds eliminate distracting creases and provide consistent results across multiple shooting sessions.
Best Product Photography Techniques
Mastering basic product photography techniques separates amateur snapshots from professional product images that sell. These methods work across all product types and form the foundation for more advanced creative approaches.
Composition Fundamentals
Composition rules guide viewers’ eyes to important product features. The rule of thirds places key elements along imaginary lines that divide your frame into nine equal sections. Center composition works well for symmetrical products, while diagonal compositions add energy and movement to static objects.
Leading lines direct viewers’ attention to your main product. These can be created through props, lighting patterns, or background elements that naturally guide the eye toward important product features.
Proper framing ensures your product receives appropriate emphasis within the composition. Negative space around products can create breathing room and elegant presentations, while tight framing focuses attention on specific details.
Focus and Depth of Field Techniques
Focus techniques vary depending on your product’s depth and intended use. Single-point autofocus gives you precise control over the sharpest area of your image. For flat products like books or packaging, make sure your camera’s sensor stays parallel to the product surface for even sharpness across the entire item.
Depth of field controls which parts of your image appear sharp or blurred. Wide apertures like f/2.8 create shallow depth of field that separates products from their backgrounds. Narrow apertures like f/8 or f/11 keep entire products in sharp focus, which works better for technical or catalog photography.
Identifying critical focus points helps ensure the most important product features appear sharp. For most products, focus on the front edge or the area customers examine first when considering a purchase.
Angle and Perspective Planning
Multiple angles show different product aspects and give customers a complete view of items they’re considering. Standard angles include straight-on shots, three-quarter views that show depth, detail shots of important features, and overhead shots that reveal shape and size relationships.
The hero shot serves as your primary product image and should showcase the item’s most appealing angle. This shot typically appears first in product galleries and significantly influences purchasing decisions.
Detail shots highlight important features, textures, and quality indicators that customers want to see before purchasing. These close-up images build confidence and demonstrate product value.

Advanced Shooting Methods
Professional product photographers use specialized techniques to overcome common challenges and create standout images. These methods take practice but produce results that justify the extra effort.
Focus Stacking for Maximum Sharpness
Focus stacking combines multiple images shot at different focus points to create one perfectly sharp photograph. This technique works exceptionally well for small products or macro photography where getting sharp focus throughout the entire product proves impossible with a single shot.
The process involves taking multiple photos while adjusting focus incrementally from front to back of your product. Specialized software then combines the sharpest parts of each image into one perfectly focused final result.
HDR for Challenging Lighting
HDR (High Dynamic Range) photography captures detail in both bright highlights and dark shadows that would otherwise be lost. Take several identical shots at different exposures, then combine them in editing software. This technique works particularly well for metallic products or items with extreme contrast.
Composite Techniques
Product photography often benefits from composite product photography techniques where you shoot the product and background separately, then combine them digitally. This method gives you perfect control over lighting and positioning for both elements while making setup less complex during shoots.
Motion Blur for Dynamic Products
Motion blur adds energy and context to product images. Use slower shutter speeds to capture movement while keeping your product sharp. This technique works well for sports equipment, vehicles, or any products associated with action and movement.
Technical Camera Settings for Products
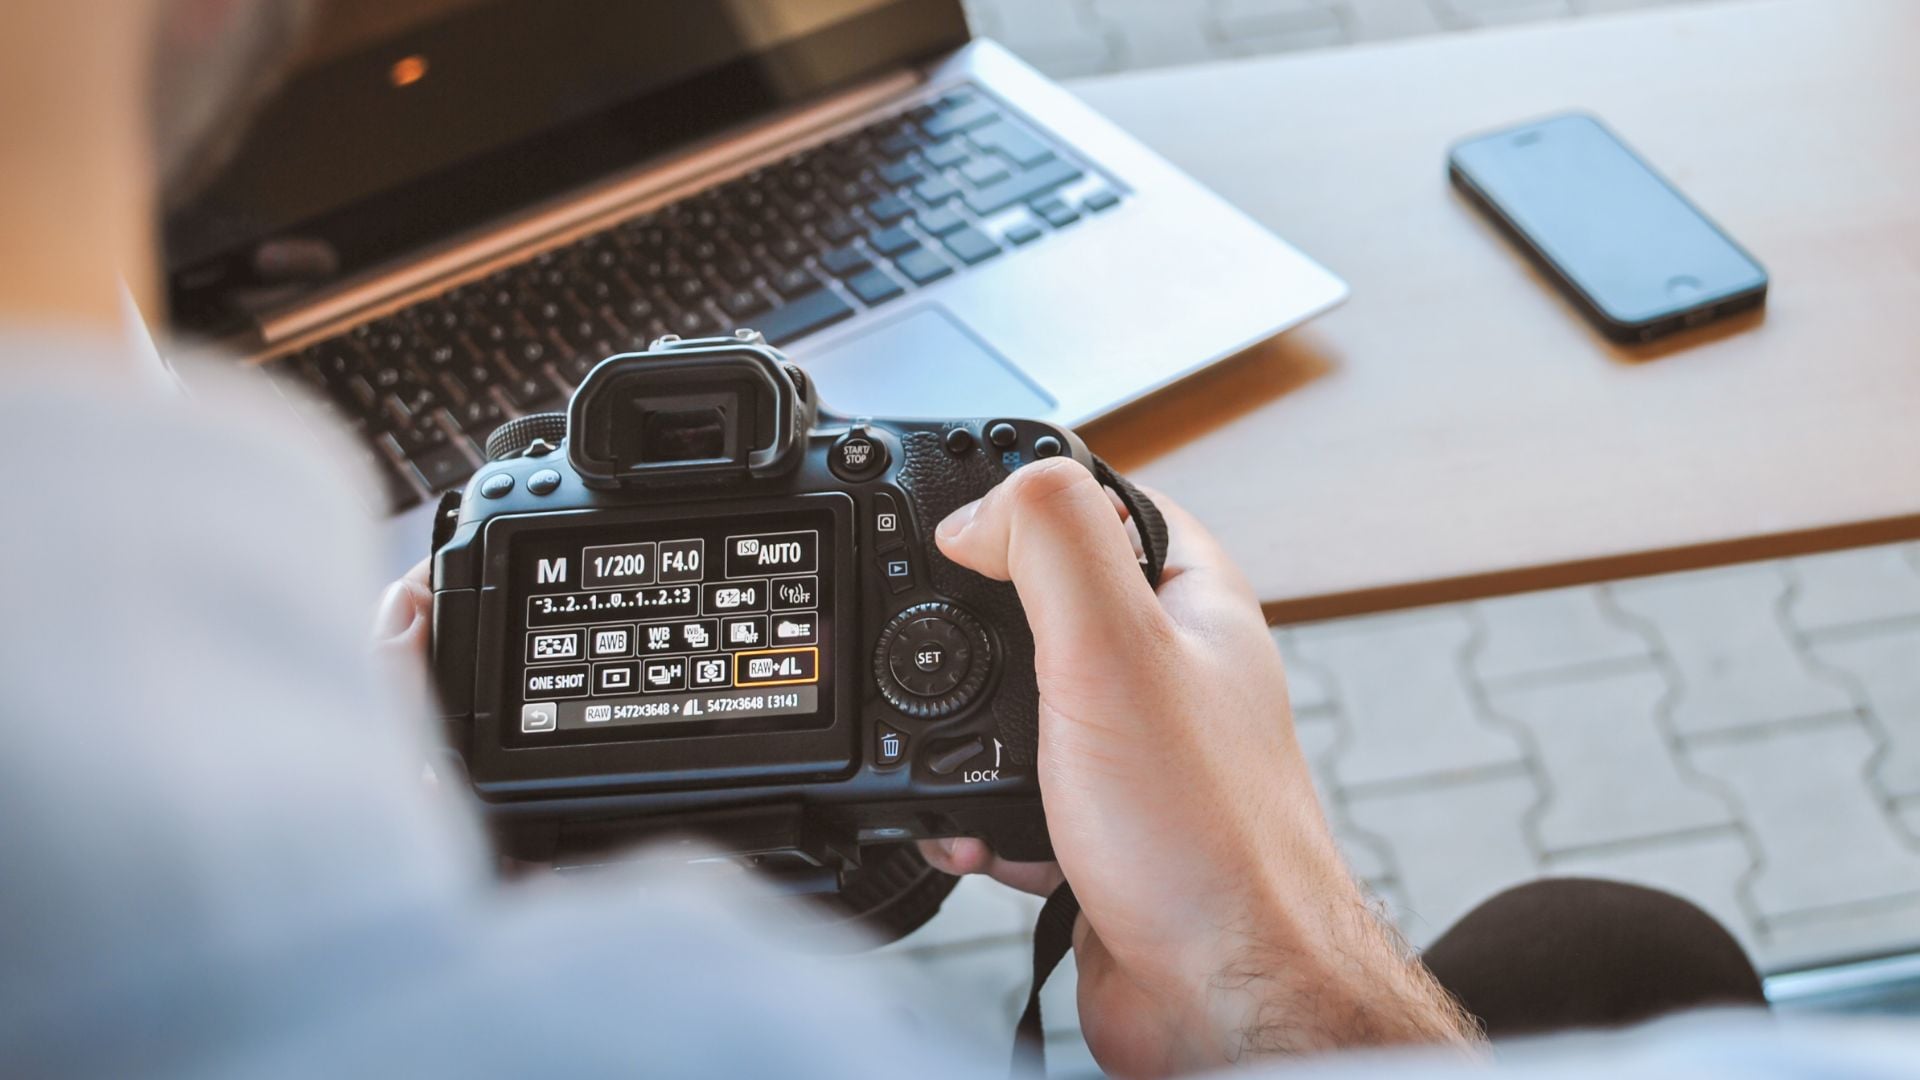
Understanding camera controls allows you to consistently capture high-quality product images regardless of lighting conditions or product characteristics. These technical foundations support all creative and compositional choices.
Exposure Control Settings
Aperture selection affects both depth of field and image sharpness. Most lenses work best at moderate apertures around f/8 to f/11, providing excellent sharpness while maintaining reasonable depth of field. Very wide apertures may not provide enough depth of field for three-dimensional products, while very narrow apertures can reduce overall image sharpness due to diffraction.
ISO Management
ISO settings control your camera’s sensitivity to light. Modern cameras perform well at ISO 400 to 800, but product photography typically benefits from lower ISO settings when possible. Use tripods and adequate lighting to keep ISO low and maximize image quality.
Shutter Speed Considerations
Shutter speed prevents motion blur but becomes less important when shooting static products on tripods. However, be aware that very slow shutter speeds can introduce camera shake if your tripod isn’t perfectly stable. Generally, shutter speeds faster than 1/60th second work well for handheld product photography.
Color and White Balance Settings
White balance ensures accurate color reproduction across different lighting conditions. Set custom white balance using a gray card for the most accurate results, especially when mixing different light sources or working with colored backgrounds that might influence automatic white balance systems.
Custom White Balance Setup
Using custom white balance provides the most accurate color reproduction for product photography. Place a neutral gray card in your lighting setup, take a reference photo, and set your camera’s white balance using this reference image.
Mixed Lighting Challenges
Working with mixed lighting sources requires careful white balance management. When combining natural and artificial light, choose one dominant source for your white balance setting and use color correction gels on secondary lights to match the primary source.

File Format Considerations
Choosing the right file format affects your workflow efficiency and final image quality. Understanding format differences helps you make informed decisions based on your specific needs and intended use.
RAW Format Benefits
RAW format provides the greatest advantages for professional product photography:
- Captures maximum image data for greatest editing flexibility
- Essential for professional commercial work requiring color accuracy
- Provides better highlight and shadow recovery options
- Allows non-destructive editing workflows
JPEG Format Limitations
JPEG format has significant drawbacks for serious product photography:
- Creates smaller files but reduces image quality through compression
- Limits post-processing flexibility significantly
- Best reserved for quick previews or extreme storage limitations
- Not recommended for professional product photography work
Color Space Selection
Color space selection affects how colors are captured and displayed. Adobe RGB captures a wider range of colors than sRGB, making it preferable for product photography where color accuracy is important. However, sRGB works better for images destined primarily for web display.
Post-Processing for Product Photos

Digital editing transforms good product photos into great ones while maintaining natural, believable results. The goal is improvement, not obvious manipulation that might mislead customers about product appearance.
Basic Editing Fundamentals
Basic adjustments form the foundation of professional product photo editing. Start with exposure correction to ensure proper brightness levels. Adjust highlights and shadows to reveal detail throughout the tonal range. Fine-tune contrast to make products appear vibrant without looking oversaturated.
Color Correction Techniques
Color correction ensures accurate product representation, which is essential for customer satisfaction and reducing returns. Use white balance adjustment to neutralize color casts from mixed lighting. Adjust individual color channels to match actual product colors as closely as possible.
Sharpening and Detail Enhancement
Sharpening improves product details without creating obvious artifacts. Apply sharpening selectively to product edges and important details while avoiding smooth areas like backgrounds. Over-sharpening creates halos and unnatural-looking results that can actually harm image quality.
Background Cleanup
Background cleanup removes distracting elements and creates professional-looking results. Use cloning and healing tools to eliminate dust, scratches, or unwanted reflections. Replace complex backgrounds with simple ones when necessary, but maintain realistic lighting and shadows for believable results.
Advanced Editing Techniques
Professional product photographers use sophisticated editing methods to overcome technical challenges and create images that stand out in competitive markets.
Composite Editing Methods
Composite editing allows you to combine the best elements from multiple shots into one perfect image, especially useful for reflective products where achieving perfect lighting in a single exposure proves impossible.
Frequency Separation
Frequency separation separates image texture from color information, allowing surface smoothing without losing important product details. This advanced technique helps clean up product imperfections while maintaining natural texture and appearance.
Focus Stacking in Post
Focus stacking merges multiple images at different focus points for front-to-back sharpness impossible with single exposures. Software like Helicon Focus or Photoshop automates this process for professional results.
Color Grading for Brand Consistency
Color grading goes beyond basic correction to create specific moods and brand aesthetics through subtle color adjustments. This technique helps maintain visual consistency across product lines and reinforces brand identity.
Workflow Optimization

Developing efficient post-processing workflows saves time and ensures consistent results across large product catalogs. Create action sets or presets for common adjustments that can be applied to similar products.
Batch Processing Capabilities
Batch processing capabilities in software like Lightroom or Capture One allow you to apply similar adjustments to multiple images simultaneously, dramatically reducing editing time for large product shoots.
Quality Control Standards
Establish quality control standards for your edited images to maintain professional consistency. This includes checking for proper exposure, accurate colors, clean backgrounds, and appropriate sharpening levels before delivering final images.
Common Product Photography Mistakes to Avoid
Recognizing and avoiding frequent errors saves time and improves results across all your product photography projects. These mistakes happen at every skill level but become easier to spot and correct with experience.
Lighting Mistakes
Poor lighting creates the most noticeable problems in product photography. Here are the main lighting errors to watch for:
- Harsh shadows – Hide important product details and create unprofessional appearance
- Mixed color temperatures – Different light sources create color casts making products look unnatural
- Insufficient lighting – Dark or underexposed images make products appear low quality
- Wrong light direction – Improper placement can hide important features or create unflattering shadows
- Flat lighting – Makes products appear lifeless and cheap without dimension
Understanding how to control shadows separates amateur work from professional results. Shadows should add dimension and depth without hiding important product features or creating distracting dark areas.
Composition and Technical Errors
These fundamental mistakes can instantly identify amateur work and hurt your product’s perceived value:
- Cluttered backgrounds – Distracting elements compete with the main product for attention
- Incorrect white balance – Wrong colors lead to customer dissatisfaction and increased returns
- Focus problems – Soft focus or wrong focus points reduce professional impact immediately
- Inconsistent framing – Different positioning across product series creates unprofessional catalog appearance
- Improper perspective – Distortion makes products appear different from reality
Maintaining visual consistency across product lines requires careful attention to framing, lighting, and styling choices. Develop style guides that specify exact positioning, lighting setups, and background choices for different product categories.
Post-Processing Mistakes
Even good photos can be ruined by poor editing choices:
- Over-editing – Heavy-handed adjustments destroy natural appearance and damage customer trust
- Inaccurate colors – Products that don’t match reality lead to returns and negative reviews
- Poor quality control – Allowing substandard images to reach customers damages brand reputation
- Excessive sharpening – Creates unnatural halos and artifacts that scream amateur work
- Unrealistic compositing – Obvious digital manipulation that misleads customers about actual products
How to Take Product Photos: Step-by-Step Process

Taking professional product photos becomes much easier when you follow a systematic approach. This process works for any product type and ensures consistent, high-quality results every time.
Preparation Phase
Start by cleaning your product thoroughly and removing any dust, fingerprints, or packaging residue. Gather all necessary props, backgrounds, and equipment before beginning your shoot. Plan your shots by sketching out desired angles and compositions.
Proper product preparation often determines the difference between amateur and professional results. Remove all protective films, clean all surfaces, and ensure products are in perfect condition before photography begins.
Setup Phase
Position your product on a stable surface with your chosen background. Set up lighting equipment starting with your key light, then add fill lights and background lights as needed. Mount your camera on a tripod and compose your first shot.
Create a comprehensive equipment checklist to ensure you have everything needed for successful shoots:
- Camera and backup batteries
- Lenses and cleaning supplies
- Tripod and remote trigger
- Lighting equipment and modifiers
- Backgrounds and props
- Memory cards and storage devices
Shooting Phase
Take test shots to check exposure, focus, and composition. Adjust lighting and camera settings as needed. Capture multiple angles including front, back, sides, top, and detail shots. Take several frames of each angle to ensure you have sharp, well-exposed options.
Develop standardized shot lists for different product categories to ensure complete coverage and consistent results. This systematic approach prevents missing important angles and reduces shooting time.
Review Phase
Check images on your camera’s LCD screen for focus, exposure, and composition issues. Retake any shots that don’t meet your standards. Download images to your computer for detailed review before concluding the shoot.
Develop critical evaluation skills to assess image quality objectively. Look for technical issues like focus problems, exposure errors, and composition weaknesses that might not be immediately obvious on small camera screens.
Taking Your Product Photography to the Next Level
Product photography combines technical skill with creative vision to create images that sell products and build brands. Success in this field requires understanding your equipment, mastering lighting techniques, and developing composition skills that serve commercial purposes rather than just artistic expression.
The most important takeaway is that consistency matters as much as individual image quality. Develop standardized approaches for similar products while staying flexible enough to adapt techniques for unique items or special requirements. Professional product photographers balance technical excellence with efficient workflows that deliver reliable results every time.
Remember that good product photography serves your customers first and your creative vision second. Your images should accurately represent products while making them look their absolute best. This balance builds trust with customers and creates long-term business success rather than short-term visual impact.
Keep learning and experimenting with new product photography techniques as technology advances and consumer preferences shift. Study successful e-commerce sites, analyze competitor imagery, and practice with different product types to expand your skills. The investment in learning proper product photography techniques pays dividends through better sales results and stronger brand perception in today’s competitive marketplace.

Darlene Lleno
Darlene Lleno brings a unique perspective to DIY Photography as someone who grew up surrounded by camera gear but chose words over lenses. With five years of writing experience, she specializes in photography content that’s both technically informed and genuinely passionate. Growing up with a photographer twin brother meant camera talk was everyday conversation in her household. While he mastered capturing moments, Darlene discovered she preferred being the subject and the storyteller behind the scenes. As a travel enthusiast and mother of two, she understands the importance of preserving life’s precious moments. When not exploring new destinations or writing for DIY Photography, you’ll find her reading or tending to her garden. Her approach to photography writing is refreshingly authentic, she may not be behind the camera, but she knows exactly what it takes to help others capture the shots that matter most.
Related Posts
 The Ultimate Food Photography Guide: Tips, Techniques, and Gear
 The Ultimate Guide to Photographing College Football: Gear, Tips, and Techniques
 This simple product photography walkthrough offers everything you need to know to get started in product photography
 The Ultimate Guide to Concert Photography: Gear, Settings, Techniques & More
Join the Discussion
DIYP Comment Policy
Be nice, be on-topic, no personal information or flames.