


Lighting a beauty shot – The Lighting Series #6
Dec 28, 2018
Stefan Kohler
Stefan Kohler is a full-time retoucher. He’s from Germany and likes bacon. In the last years, he built up a broad community around his retouching classes at the Infinite tool’s website.
Share:

This looks simple, but it’s a bit more complex than you think. When you are creating images that are intended for high-end retouching, you need to pay particular attention to creating a defined but actually relatively flat illumination.

The lighting series is a comprehensive lighting guide. We talk about flash photography, lighting, posing, color, and walk you through a series of lighting setups. Some will be simple, some complex, but in the end, they are all tools to add to your photography toolbox. Here is a complete list of the lighting tutorials.
Lighting setup
A beauty shoot can sometimes be very simple; on other occasions, it’s more like product photography. This photo falls into the second category.
The main light is a beauty dish, which has been supplemented by a strip light for the hair. For the background, there’s a very gentle light with a normal reflector. To lighten the shadows, there was a large parabolic umbrella.
The choice of light shapers is not really critical here; it’s more about creating clear and clean light-shadow transitions and not creating too-deep shadows in the image.
We want to have a definition everywhere: in the highlights and in the shadows.
Lighting gear
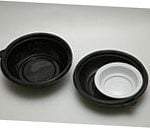
- A white Beauty dish with a diffuser on a 1000Ws monoblock
- A strip light on a 1000Ws monoblock
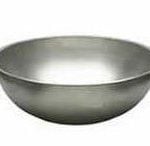
- Normal reflector with a 500Ws monoblock
- 200cm parabolic umbrella on a 1000Ws monoblock
Individual light sources

The main light used here is a beauty dish, as it gives a relatively soft light but does not soften the shadows. You need to pay particular attention to the nasal shadow here as it should not protrude above the nasolabial fold and neither should it go up or over the lower lip.

The main light used here is a beauty dish, as it gives a relatively soft light but does not soften the shadows. You need to pay particular attention to the nasal shadow here as it should not protrude above the nasolabial fold and neither should it go up or over the lower lip.

This is a gentle light that should complement your model’s skin tone. In this instance, the colour was selected in post-processing but you could just as easily use a gel and do it in-camera.

If the shadows are too dark, for example under the chin and on the cheek, use a large, unobtrusive brightener. The parabolic umbrella is perfect; used subtly it doesn’t register as a new light source.
Downloads
For the pictures in the article, we used the light simulation Set.A.Light 3D. You can download the lighting setup and try everything for yourself. You can also download this series as a free ebook.
If you’ve never worked with Set.a.Light before, you should give it a try! There is also a free demo version on the website, which you can use to open these setups.
Filed Under:
Tagged With:

Stefan Kohler
Stefan Kohler is a full-time retoucher. He’s from Germany and likes bacon. In the last years, he built up a broad community around his retouching classes at the Infinite tool’s website.

Join the Discussion
DIYP Comment Policy
Be nice, be on-topic, no personal information or flames.
4 responses to “Lighting a beauty shot – The Lighting Series #6”
1000ws lights.. ?? are you OK
Powerful strobes have some advantages. The biggest one is fast recycle times at similiar power and that way less missed shots.
Also: I use what I have :D
Stefan Kohler 500ws is more than enough at this distance, and recycle time is fast enough.
if those where the actual distances even using speedlights could have done the job perfectly… i do admire a lot the end result and definitively will study this light setup and variants of it.
Thank you for sharing brother.