


How to color backgrounds with light – The Lighting Series #2
Dec 2, 2018
Stefan Kohler
Stefan Kohler is a full-time retoucher. He’s from Germany and likes bacon. In the last years, he built up a broad community around his retouching classes at the Infinite tool’s website.
Share:
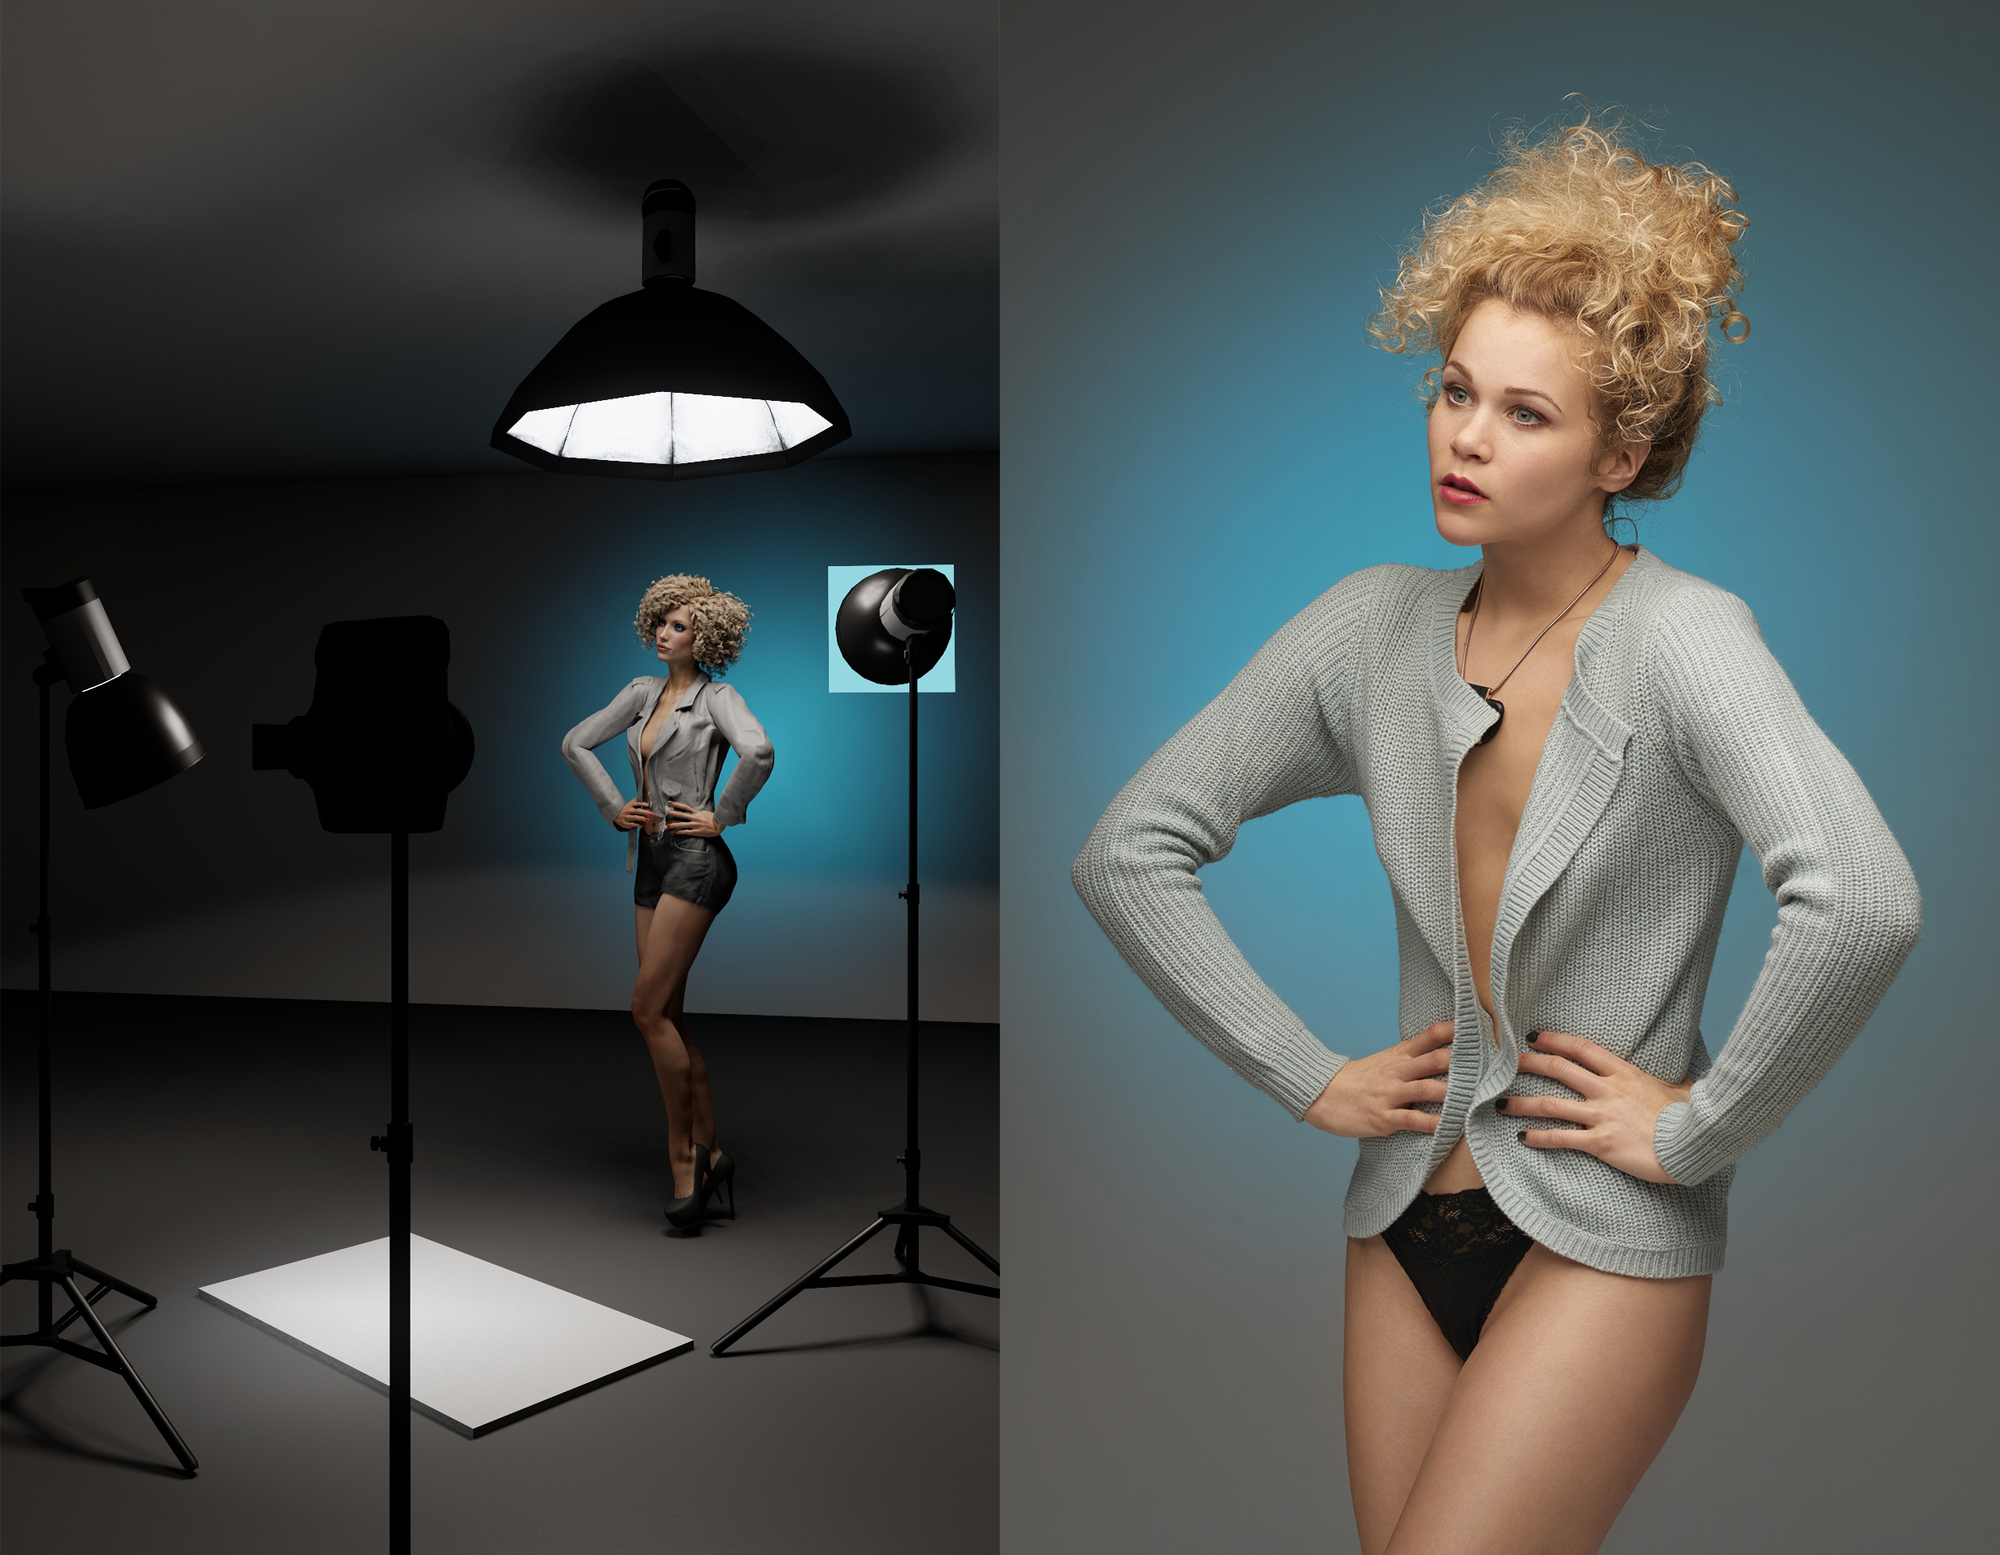
For this picture, we colored the background by using light. What sounds as if it should be straightforward does come with its pitfalls, as you’ll see. We chose cyan as the background color because it complements the model’s blond hair and the bare skin in the picture. Her clothes were, therefore, neutral in tone: a gray jacket and black underwear.

The lighting series is a comprehensive lighting guide. We talk about flash photography, lighting, posing, color, and walk you through a series of lighting setups. Some will be simple, some complex, but in the end, they are all tools to add to your photography toolbox. Here is a complete list of the lighting tutorials.
Lighting Equipment
- White background
- 1x standard reflector with grid on 500Ws monoblock
- 1x standard reflector to 500Ws monoblock
- 1x Octabox 90cm with net honeycomb and ceiling mount (gallows would also work) to 1000Ws monoblock
- 1x Color gel Cyan (Lee # 118 Light Blue)
Setup

The main light in this image is a 90cm octabox, which was easily attached to the ceiling in front of the model. The technique used here is called feathering.
It works like this: The light fall-off from the source that occurs over the model is balanced by the positioning of the light. Each softbox is slightly lighter in the middle than at the edge, so the faint edge is used at the top (close to the softbox), while the middle of the softbox, which produces more light, is used for the legs (further away from the softbox).
The result? Defined shadows and even illumination that doesn’t resemble street lighting.
To brighten up the shadows, a standard reflector was placed on the floor in front of the model. This creates a large reflective surface, which produces a nice catchlights in the eyes.
The white background is relatively distant from the model so it receives some light and is almost evenly gray. A standard reflector with a grid (honeycomb) and color foil creates a nice, round gradient in the background.
The Individual Light Sources
Key light

Fill light

Background

Feathering
This technique is awesome because the light is simple and very even without blurring the shadows. I really like this setup. Nevertheless, you have to be careful and instruct the model to the nearest centimeter.
Model too far back


Right position


Model too far forward


Downloads
For the pictures in the article, we used the light simulation Set.A.Light 3D. You can download the lighting setup and try everything for yourself. You can also download this series as a free ebook.
If you’ve never worked with Set.a.Light before, you should give it a try! There is also a free demo version on the website, which you can use to open these setups.

Stefan Kohler
Stefan Kohler is a full-time retoucher. He’s from Germany and likes bacon. In the last years, he built up a broad community around his retouching classes at the Infinite tool’s website.


Join the Discussion
DIYP Comment Policy
Be nice, be on-topic, no personal information or flames.
One response to “How to color backgrounds with light – The Lighting Series #2”
great simple setup
the final image is wonderful!
great tips