


DIY Photography Backdrops and Studio Setups You Can Make at Home
Jun 13, 2025
Dunja Đuđić Kalinin
Dunja Djudjic is a multi-talented artist based in Novi Sad, Serbia. With 15 years of experience as a photographer, she specializes in capturing the beauty of nature, travel, concerts, and fine art. In addition to her photography, Dunja also expresses her creativity through writing, embroidery, and jewelry making.
Share:

DIY Photography Backdrops and Studio Setups
If you’ve ever tried setting up a photo shoot at home, you know the struggle: limited space, tight budget, and the never-ending search for gear that does what you need without draining your wallet. That’s exactly where DIY photography steps in—not just as a workaround, but as a superpower. Whether you’re into portraits, products, or creative concepts, building your own backdrops and studio gear gives you total control, saves cash, and honestly… it’s fun.
In this guide, we’ll walk you through a bunch of practical and creative ideas for making your own backdrops and studio setups. From DIY lighting hacks to building a backdrop stand out of PVC pipes, or turning a kitchen foil roll into a fashion set—you’ll find loads of inspiration here. You’ll also get some ideas for DIY camera accessories, because let’s face it: once you start building your own gear, it’s hard to stop.
Ready to stretch your creativity (not your budget)? Let’s dive in.
DIY Backdrops You Can Make at Home
Creating stunning DIY photography backdrops doesn’t have to be expensive or complicated. In fact, it can be as simple as hanging a bedsheet behind your subject. But of course, I’ll kick it up a notch, and not just because you’ve probably already tried shooting with a bedsheet for a backdrop. I want to give you as many ideas as I can come up with, so you have plenty of alternatives for DIY backdrops and can use them for various genres. So, here are some of the best DIY backdrop ideas, inspired by solutions that save both money and space.
DIY Canvas Backdrops
DIY Mottled Backdrop on a Budget
Although you may see them as vintage, mottled backdrops are still a thing, and they are fantastic! They add depth and texture to portraits and still life photography. Plus, you can create those cringeworthy 80s-inspired portraits just for fun. But instead of shelling out big bucks for a professional-grade canvas, you can make your own. You’ll need a large blackout window blind, blackboard black paint, a large sponge, a large paint brush or a roller, and some white chalk.
This is a fun, creative project you can do on your own or recruit your friends to help you out. In this article, you’ll find more detailed instructions and plenty of examples, tips and tricks.
[Related Reading: DIY Portrait Photography: A Complete Guide to Stunning Portraits on a Budget]

DIY Canvas Backdrop
You can also create a fully customized canvas backdrop from scratch. All you need is a primed canvas, acrylic exterior flat paint in two complementary shades, a textured roller, a sponge, and some free time. You can go for a 72″ x 216″ canvas roll and cut in half for two backdrops, and use different colors.
Start by thinning the lighter paint with water and rolling it onto the canvas. Then, layer the darker shade from the edges inward to create a natural vignette effect. Finally, use the sponge to splatter paint from the edges toward the center, giving it organic texture and dimension.
This method gives you complete creative control over the look and feel of your backdrop. You can use any colors and shades you like, the sky’s the limit! And in this article, you’ll find more detailed guidelines for making this DIY canvas backdrop. Or, if you have £20 and want a canvas-style backdrop, check out this tutorial!
DIY Paper Backdrops
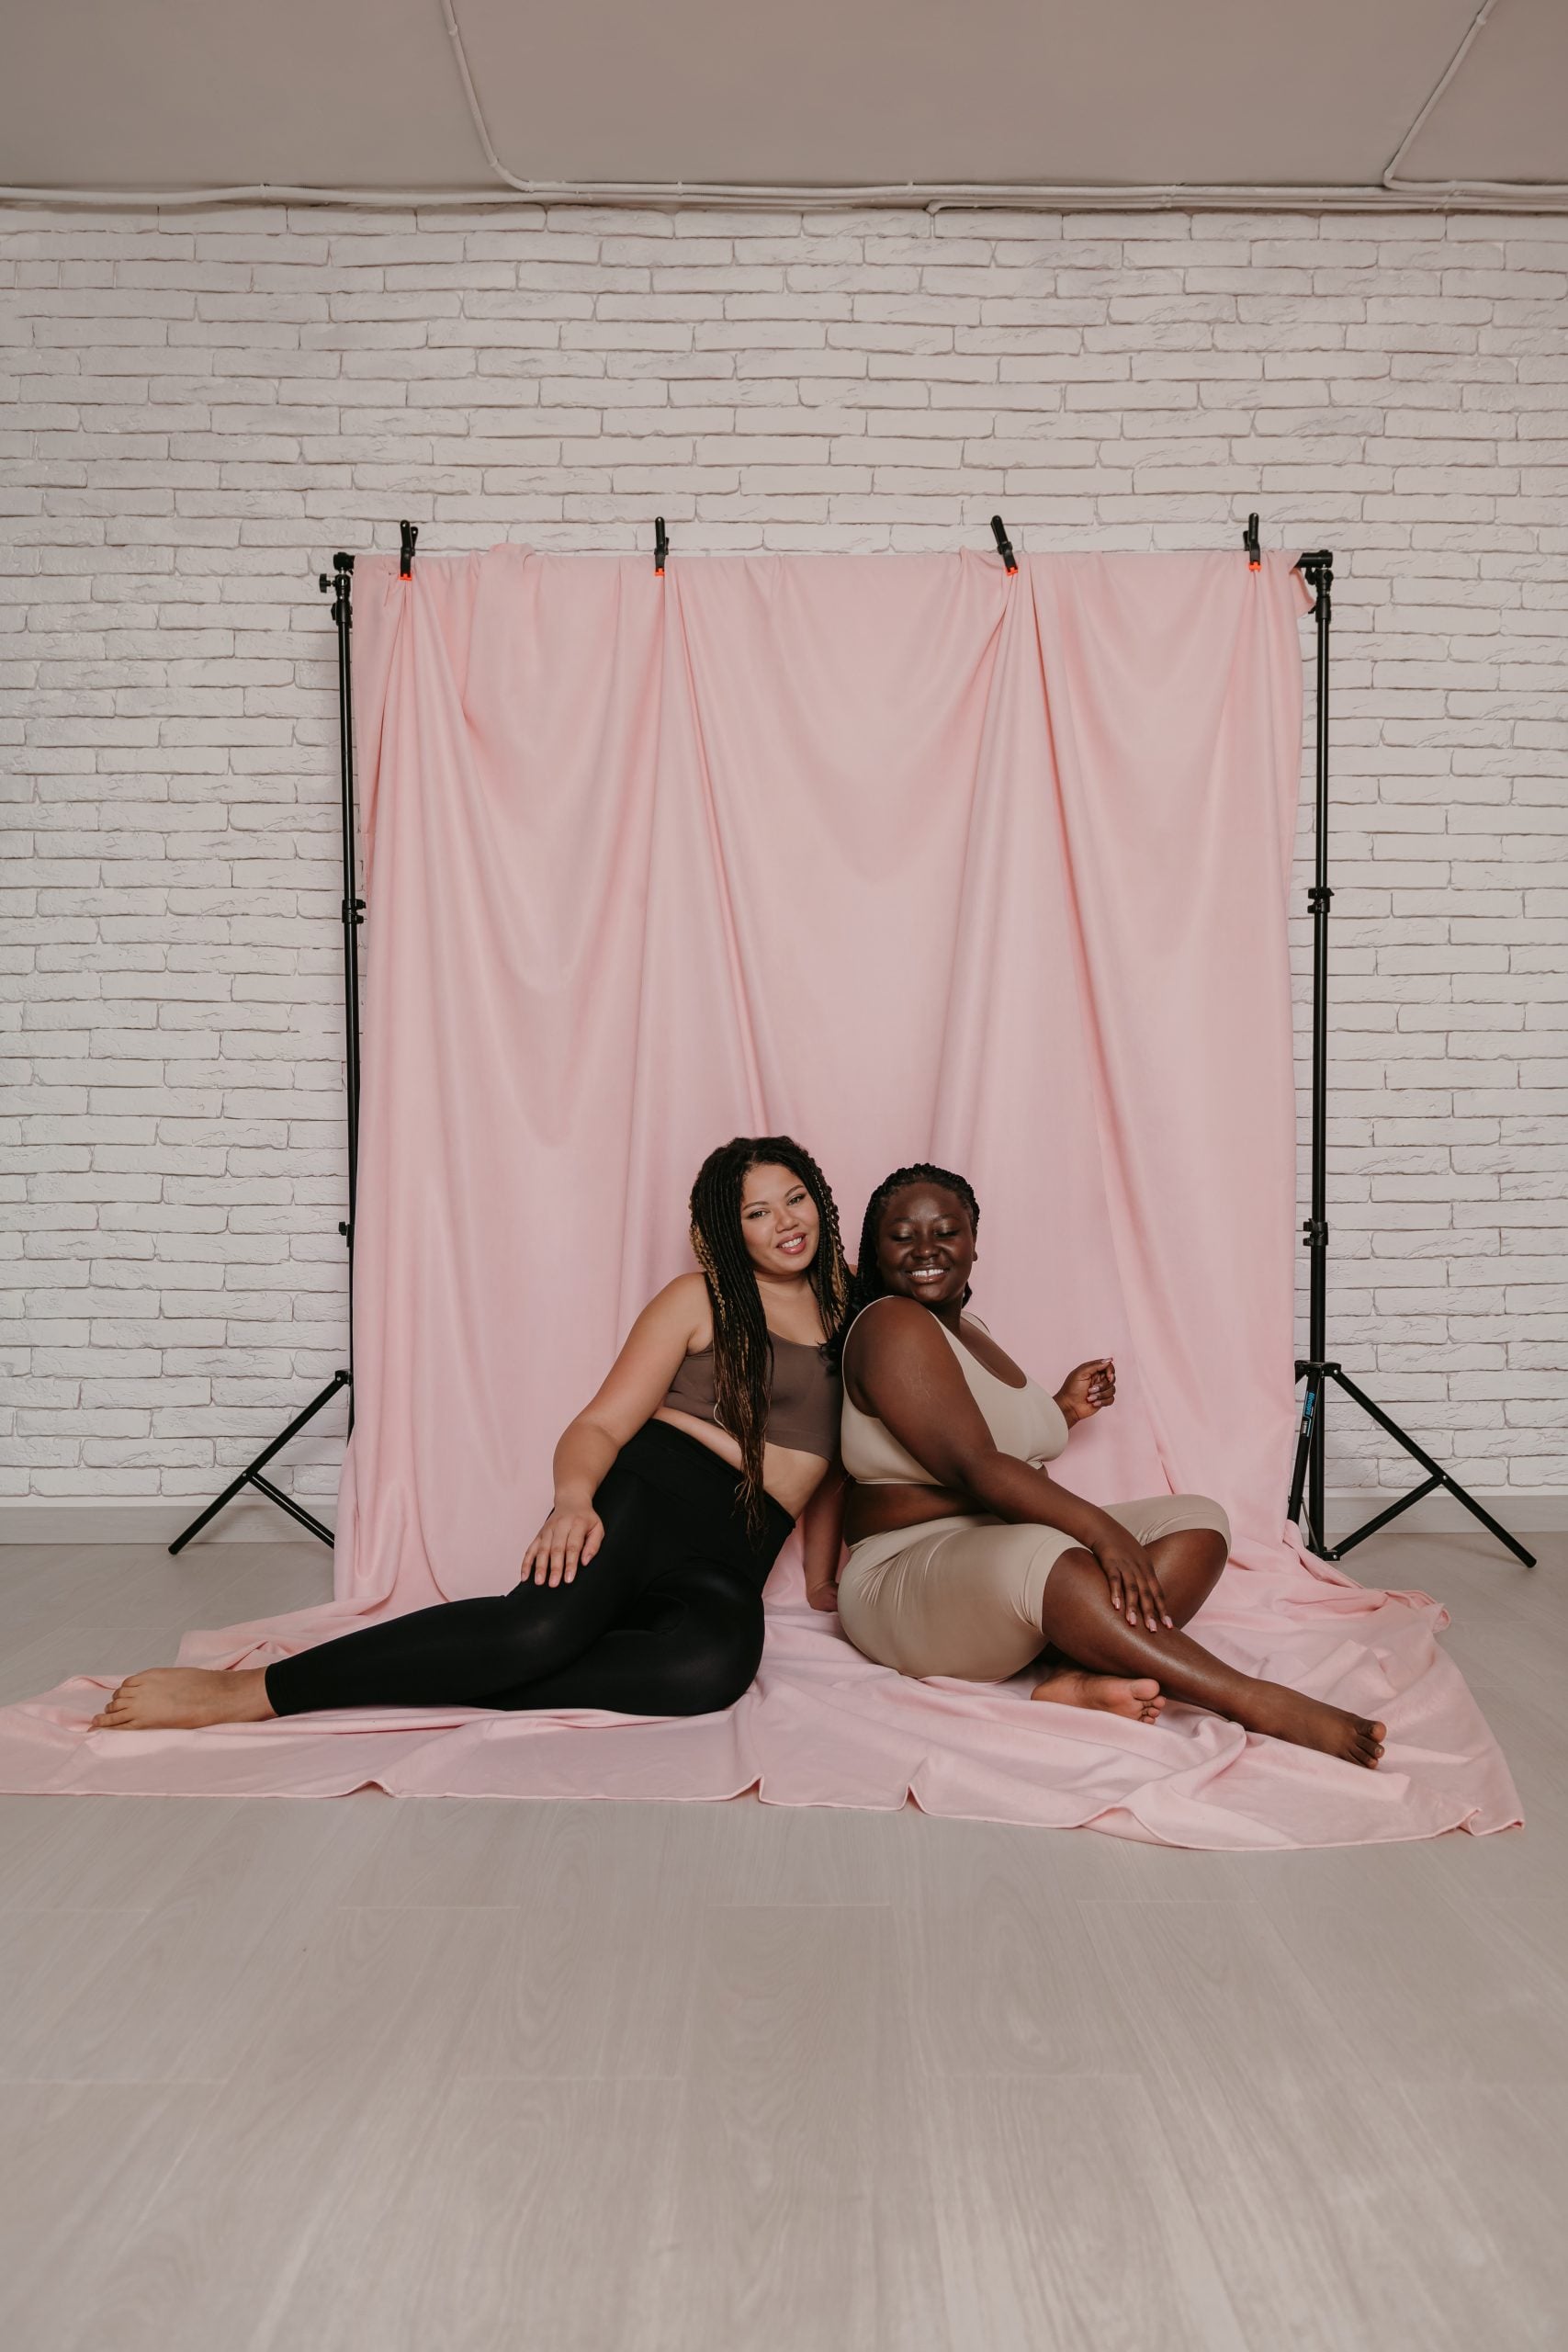
If you’re after a clean, minimal look, seamless DIY paper backdrops are the way to go. But traditional backdrop rolls can be expensive and difficult to store. Luckily, there are plenty of DIY alternatives. For your DIY photography backdrops, you can use white craft paper, bedsheets, wallpapers, or large sheets of inexpensive butcher paper.
[Related reading: Best Tips for Working with Seamless Paper Backdrops]
Building a DIY Backdrop Stand
You can hang your DIY paper backdrops on a dedicated stand. But hey, we’re here for DIY photography, aren’t we? So, instead of buying the backdrop stand, you can build one on your own. And all you’ll need are PVC pipes and some clamps to attach your backdrop to the makeshift stand. In this article, you’ll find a full guide for assembling, along with some example shots. Another great thing about this build is that it’s very easy to unmount and store. And when you need it again, you can reassemble it in minutes. Pretty cool for small studio spaces!
[Related reading: How to Build a PVC Soft Screen]
Creative DIY Backdrop Ideas to Try
If you want something more imaginative and creative, you can move away from canvas and paper backdrops and experiment further. There are so many things to try, and here are some low-cost DIY photography backdrop ideas. Don’t let the low price full you though, all of these have a great visual impact!

Gobo Backdrop
By cutting shapes into cardboard or foam board, you can create a gobo. It’s a “go-between” object that normally goes between the light and the subject, casting patterned shadows. But hey, this one can serve you both as a creative backdrop, and it costs $0. You’ll need a large piece of cardboard and you’ll need to poke some holes through it. It goes behind your subject, with the light behind the backdrop. And there you have it – a festive, sparkly backdrop straight from the recycle bin.
[Related reading: Use cardboard to make the $0 2-in-1 backdrop and gobo]
Tinfoil Backdrop
Who knew kitchen foil is so versatile in DIY photography projects? Other than using it for a DIY reflector or trippy photos like this, the regular kitchen tinfoil also makes a wonderful backdrop! Crinkle it, shape it, or smooth it for different effects. When lit creatively, it throws dazzling bokeh and reflections, perfect for surreal or fashion-inspired looks. Here’s a great example of how to use tinfoil to transform a simple shot into something magical.
Peel-and-Stick Wallpaper
Need a fast and removable backdrop? Try peel-and-stick wallpaper or shelf liner. You can choose any pattern you like: from plain, single-color ones to patterns like faux brick, woodgrain, or colorful tiles. Anything that matches your theme and style. This DIY photo booth is a prime example of how versatile peel-and-stick wallpaper can be, even if you’re just shooting in a hallway or a small studio. And when you’re done – you can just peel it off and reuse it next time.

DIY Photography Backdrops for Product Photography
If product photography is your thing, good news – you can go even further experimenting with backdrops. The reason is that you need a smaller backdrop, so you can use smaller objects behind your subject. Here are some ideas:
- Acrylic sheets (Plexiglass or Perspex): Offering a sleek, professional look thanks to their glossy, matte, or frosted finishes. They work great for reflective surfaces, geometric layers, or glowing backlit setups—and you can save money by getting custom-cut pieces from local sign shops instead of buying studio props.
- Painted MDF or hardboard: Provides a smooth, versatile surface that’s perfect for creating matte finishes, seamless curves, or even faux-wood textures for food photography. Just make sure to use interior matte paint to avoid unwanted glare.
- Repurposed furniture and secondhand finds: Old wooden tabletops and other textured, rustic pieces can instantly add character to your shots. Distressed finishes, scratches, or worn textures aren’t flaws—they bring depth and authenticity to lifestyle or beverage product images.
- Water and liquid effects: They add movement and atmosphere to your compositions. A shallow tray filled with water or layered with floating acrylic sheets can create soft ripples or reflections, and placing your subject slightly above the surface using blocks gives you better control over light and angles. You can even use this effect for portraits!
- AI-generated or digital backgrounds: These are a great solution for when the perfect physical backdrop just doesn’t exist. Whether you’re aiming for surreal, themed, or environmental looks, you can composite your product into a digitally created scene. You can use a TV screen behind the setup to create realistic reflections.
- Unconventional materials: Think outside the box. Completely outside the box: ping pong balls, mount board, or rolled paper: all of these can become visually striking props with just a bit of creativity. A few painted spheres or a bent card can transform a basic setup into something clean, modern, and high-impact.
[Related reading: How to Make Striking DIY Backgrounds for Product Photography]
Tips on Storage and Setup
Storing backdrops might seem like an afterthought—until they start developing creases, flat spots, or weird color casts from being left out. Instead of laying your backdrop rolls flat (which causes dents over time), go vertical. You can mount inexpensive PVC pipe connectors onto a wooden board and fix it high on the wall for upright storage. It’s simple, space-saving, and keeps your rolls in better shape. If your backdrop rack ends up in your shooting area, consider hanging a black curtain in front of it to prevent unwanted color reflections on your subject.
[Related reading: How to build your own seamless backdrop DIY storage racks on the cheap]
For faster switching and smaller spaces, you can cut seamless paper into shorter sheets (around 5 feet long) and sandwich them between PVC pipes with clamps. Hang the whole unit on a C-stand with a boom arm, and now you’ve got quick-change access to multiple colors—perfect for headshots or styled portraits. You can even staple a weighted rod into the bottom of each sheet to help with unrolling and flipping without curling the edges. It’s an ideal setup for solo shooters or anyone with a variety of backdrops but not much room to work with.
[Related reading: A COVID-19 DIY Project: Quick access to many seamless backdrops]
DIY Studio Setups and Accessories
Small Studio, Big Problem? Not Anymore
When it comes to working in a small photography studio setup, the tiny space can be your biggest concern or strongest creative fuel (or both). Whether you’re squeezing between a bed and a desk, dodging ceiling fans, or trying not to trip over backdrops and light stands, you’re not alone. Many of us started (or still shoot) in living rooms, closets, or studio apartments we also live in. The secret is not more space, it’s smarter use of what you’ve got.
Start by thinking inside the frame. Anything outside the camera view doesn’t matter. Keep your unused lights stored neatly. Stack them to the side, in front of your backdrop, or even hide them in a wardrobe. Use walls for storage, too. Mannequins, props, light stands: they can all double as part of your space-saving system. And that desk chair, of course. In my flat, it doubles as a wardrobe, but that’s a different story.
[Related reading: Shooting in a small space – a brief tour of my tiny home studio]
When it comes to lighting, you’d be surprised how many single-light setups and bounced light can do for you! For portraits, try bouncing a soft light off a low ceiling or a sheet suspended above your subject for dreamy, top-down diffusion. Want that high-end edge light effect without studio height? Reflect a spotlight off silver Mylar clamped overhead. Even adding a softbox with a CTO gel can give your subject a warm glow that separates them beautifully from the background. You don’t need extra gear, just smart modifiers and careful positioning.
[Related reading: How to shoot great one-light portraits in a tiny home studio]
The best part? You don’t need a Hollywood setup to get cinematic results. You just need a plan, a bit of PVC or Mylar. A DIY photography backdrop will do just fine. No, better than fine! And of course, you’ll need the flexibility to turn your kitchen, hallway, or home office into a space that works for your style. Small space, big results.
[Related reading: Lighting setup: Bounced top light in small studios]

One-Light Setup Ideas That Actually Work
Since I’ve mentioned the one-light setups, giving you some ideas would only be fair. Thankfully, there are many ways to use just one light for your portraits, products, and other types of photography. You will need a speedlight or continuous lighting, some DIY light modifiers, a white wall, and voila! Here are some articles you can read and get inspiration and guidance on how and where to set up your lights and subjects for the best results:
- Follow these three tips to create dramatic portrait lighting with a single light
- How I made a quick and simple single light setup with colour
- The Simplest, Fastest and Most Effective One Light Setup I’ve Ever Used
- Create these five different portraits looks using just one light
- How to shoot an Annie Leibovitz-Style Portrait with One Light
DIY Studio Gear to Add to the Mix
Since we’ve covered DIY photography gear separately, we’ll briefly reflect on some of it here. DIY gear is gear that you can add to your studio setup for even more versatility and creative control. We’re talking V-flats, light stands, ideas to keep your gear nice and organized… And more! Below you’ll find some ideas to try… Or just to get those creative DIY juices flowing.
- How to build a low-budget DIY camera cart from a $100 tool cart
- How to make two DIY foldable V-flats for $150
- How to make a DIY light support system on a budget
- A Simple Fold Away Light Box
- How to build out your own DIY white seamless studio cyclorama on a budget
- Use this DIY trick to shoot a commercial video on $0 budget
Ready to Set Up your DIY Photography Studio?
You don’t need a giant studio or a mountain of gear to make great photos. Honestly, half the fun of DIY photography is figuring it out as you go. Taping stuff to walls, balancing DIY photography backdrops on broom handles, and using your car sunshade or a serving tray as a reflector (been there).
So whether you’re working with a tiny corner of your living room or transforming your hallway into a set for the afternoon, just roll with it. Build weird things. Light stuff creatively. Make mistakes. Then fix them (with duct tape). Your DIY photography studio doesn’t have to be perfect, it just has to be yours and give you a space to play in. After all, we all gotta start somewhere. And who knows, it might turn out that awesome that it will be more than enough for your needs! So now, go. Make something awesome!

Dunja Đuđić Kalinin
Dunja Djudjic is a multi-talented artist based in Novi Sad, Serbia. With 15 years of experience as a photographer, she specializes in capturing the beauty of nature, travel, concerts, and fine art. In addition to her photography, Dunja also expresses her creativity through writing, embroidery, and jewelry making.


Join the Discussion
DIYP Comment Policy
Be nice, be on-topic, no personal information or flames.