


Photoshop tutorial: five ways to make colors pop
Jan 3, 2018
Dunja Đuđić Kalinin
Dunja Djudjic is a multi-talented artist based in Novi Sad, Serbia. With 15 years of experience as a photographer, she specializes in capturing the beauty of nature, travel, concerts, and fine art. In addition to her photography, Dunja also expresses her creativity through writing, embroidery, and jewelry making.
Share:

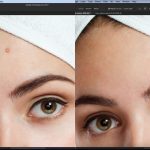
There are plenty of ways to enhance colors in Photoshop. Nathaniel Dodson of Tutvid shares five tips that will help you make the colors more prominent, or in other words – make them “pop”. The tips are different and you can use them for various types of photos, no matter if you work on portraits, landscapes or some other kind of images.
1. Using Lab mode
Go to Image > Mode > Lab Color. When you add a Curves adjustment layer, you’ll have different channels: Lightness, a, and b. Go to the “a” channel and make the curve steeper, and then repeat the same with the “b” channel.

If you want to go back to the RGB mode but preserve the adjustment layer you’ve made, do the following: hold Ctrl/Cmd and click both layers. Right click on them and convert them to a smart object. Now go to Image > Mode > RGB Color and when Photoshop asks you if you want to rasterize the layer, click No.
You’ll retain all the changes you’ve made, but the Lab color mode image will be locked up within the smart object. To change the Curves adjustment layer, double-click on the layer thumbnail and you’ll get to make adjustments to the Curves which will remain in Lab mode.
2. Camera Raw Filter
Open the image and go to Filter > Camera Raw Filter. Now, use the Targeted Adjustment Tool. With this tool, right-click anywhere in the image and choose what you want to change. Nathaniel targets mostly Hue, Saturation, and Luminance. When you select what you want to edit, click and drag up or down.
3. Color Balance adjustment layer
This method works particularly well with sunrise and sunset photos. Open the image you want to edit and add a Color Balance adjustment layers. Start with the midtones and add some reds, magentas, and blues. Then edit the highlights and shadows and play with the colors, depending on the mood you want to achieve. Of course, if it looks overly-edited, you can always reduce the opacity of the adjustment layer.
4. Curves adjustment layer (partial enhancement)
This technique is a bit more complicated, but it’s useful when you want to enhance only specific parts of a photo. In Nathaniel’s case, he wants to enhance the color of the building and the sky.
Start by adding a Curves adjustment layer to the photo you want to enhance. Drag the black point upward, add another point and drag it down, and drag the brighter part of the curve back up. Something like this:

Now go to Red, Green and Blue curves and adjust them so you add or remove the colors as you like. You can learn more about Curves here.
Now, go to the Blending Options of the Curves adjustment layer. Under the Blending options, go to the Blend If slider. Hold the Alt/Option key and drag the slider from left to right to get rid of the effect you got with the Curves adjustment layer. This way, you will only affect the highlights. Nathaniel does the same to the Blue channel within this dialog box.


Nathaniel adds a Color Balance adjustment layer and makes some minor changes: adds some additional reds and magentas to the midtones, and some reds, magentas, and blues to the shadows. He applies the same technique to this adjustment layer so it doesn’t add the changes to the foreground colors.
5. Gradient + Hue/Saturation adjustment layer
Open the image you want to edit and make sure to set the foreground color to black and background color to white. Enter the Quick Mask mode (hit “Q” on the keyboard) and grab the Gradient tool and use a foreground-to-transparent gradient.
Next, hold the Shift key and make the gradient from the bottom upward. Exit the Quick Mask mode and add a Hue/Saturation adjustment layer. You’ll automatically get a layer mask with a gradient, so only the saturation of the foreground will be targeted. Apply the Hue/Saturation changes of your preference.
Nathaniel adds another Hue/Saturation adjustment layer to change the background colors. Finally, he adds a Gradient Map adjustment layer going from brown to very bright yellow, almost white: 
After adding the Gradient Map adjustment layer, change the blending mode to Soft Light. This makes a photo with strong contrast, which you can reduce with a Curves adjustment layer.
These were five ways to make the colors pop in different kinds of images. I often play with the Gradient Map adjustment layer and the Color Balance, but I’ve never or rarely used the others. What are your favorite methods for enhancing colors?
[Five Ways to Make Colors Pop in Photoshop | Tutvid]

Dunja Đuđić Kalinin
Dunja Djudjic is a multi-talented artist based in Novi Sad, Serbia. With 15 years of experience as a photographer, she specializes in capturing the beauty of nature, travel, concerts, and fine art. In addition to her photography, Dunja also expresses her creativity through writing, embroidery, and jewelry making.


Join the Discussion
DIYP Comment Policy
Be nice, be on-topic, no personal information or flames.
One response to “Photoshop tutorial: five ways to make colors pop”
Nice tutorial! Each and every step clearly explore no any confusion to follow it.. Thanks!!