


Enable any 35mm Camera to Take True Panoramic Photographs (No Mask or PC Required)
Dec 4, 2025
David Prochnow
Our resident “how-to” project editor, David Prochnow, lives on the Gulf Coast of the United States in Ocean Springs, Mississippi. He brings his expertise at making our photography projects accessible to everyone, from a lengthy stint acting as the Contributing How-To Editor with Popular Science magazine. While you don’t have to actually build each of his projects, reading about these adventures will contribute to your continued overall appreciation of do-it-yourself photography. A collection of David’s best Popular Science projects can be found in the book, “The Big Book of Hacks,” Edited by Doug Cantor.
Share:

Never buy a dedicated panoramic film camera, ever, again. Why? Because just about any 35mm film camera can be easily converted into a true panoramic camera with just a couple of steps. Nope, you won’t have to modify your camera, nor will you need to insert a mask into the light chamber. Furthermore, this project doesn’t require any computer prestidigitation, either. Alright, so what does this conversion process involve?
First of all, there are two important attributes that your camera must possess:
1. The chosen 35mm film camera must have a dedicated film sprocket drive release button. This button is also sometimes called a “rewind button.” In other words, pressing this button enables you to rewind the exposed film back into its cartridge for removal and processing.
2. A camera with a wide angle lens, whether fixed or interchangeable, will generate the best looking panoramic photographs. Ideally, this lens should have a 20mm – 28mm focal length. While a 35mm wide angle lens could be used in a pinch, the final photograph won’t seem near as panoramic or grandiose.
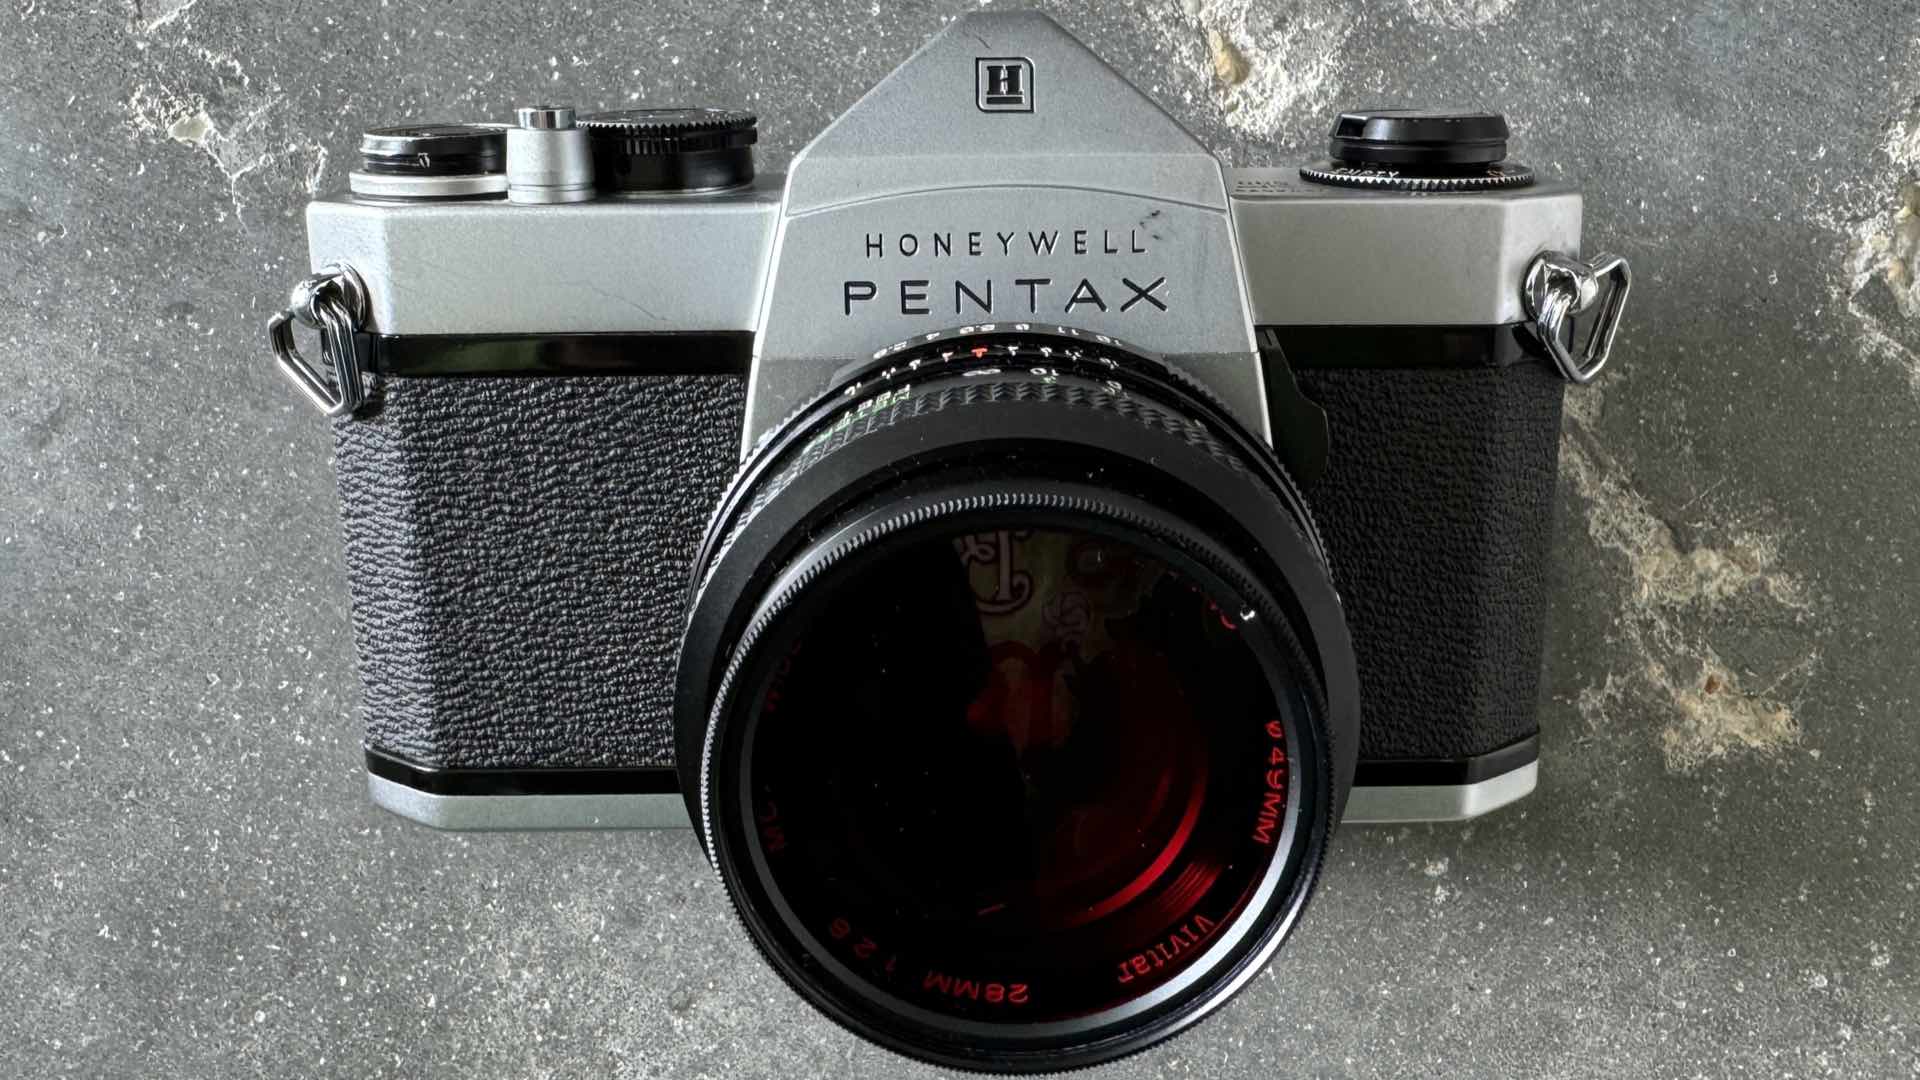
Modern 35mm film cameras can be used, but your best choice is a vintage 35mm camera, like a Pentax Spotmatic. No, you don’t have to use a 50-year old Pentax for this project, almost any vintage brand camera will work with this technique. Just be sure to follow these instructions and adapt them to your selected camera.
Measure Once, Shoot Forever
Before you start pursuing perfect panoramas, you will need to calibrate your camera. Actually, this isn’t as painful as it sounds. You just have to determine how far the camera’s film advance lever moves for transporting the film’s frame across the internal light chamber. Huh? In other words, the panoramic trick espoused in this article relies on abutting two adjacent film frames together. And, in order to achieve this tight juxtaposition, you must know when to stop advancing the film. Therefore, you must calibrate your camera. Here’s how it works.
[Pro Tip: Create a reusable, exposed, but not developed, roll of film. This “dummy” or “demo” roll is perfect for loading into a camera and testing its operation.]
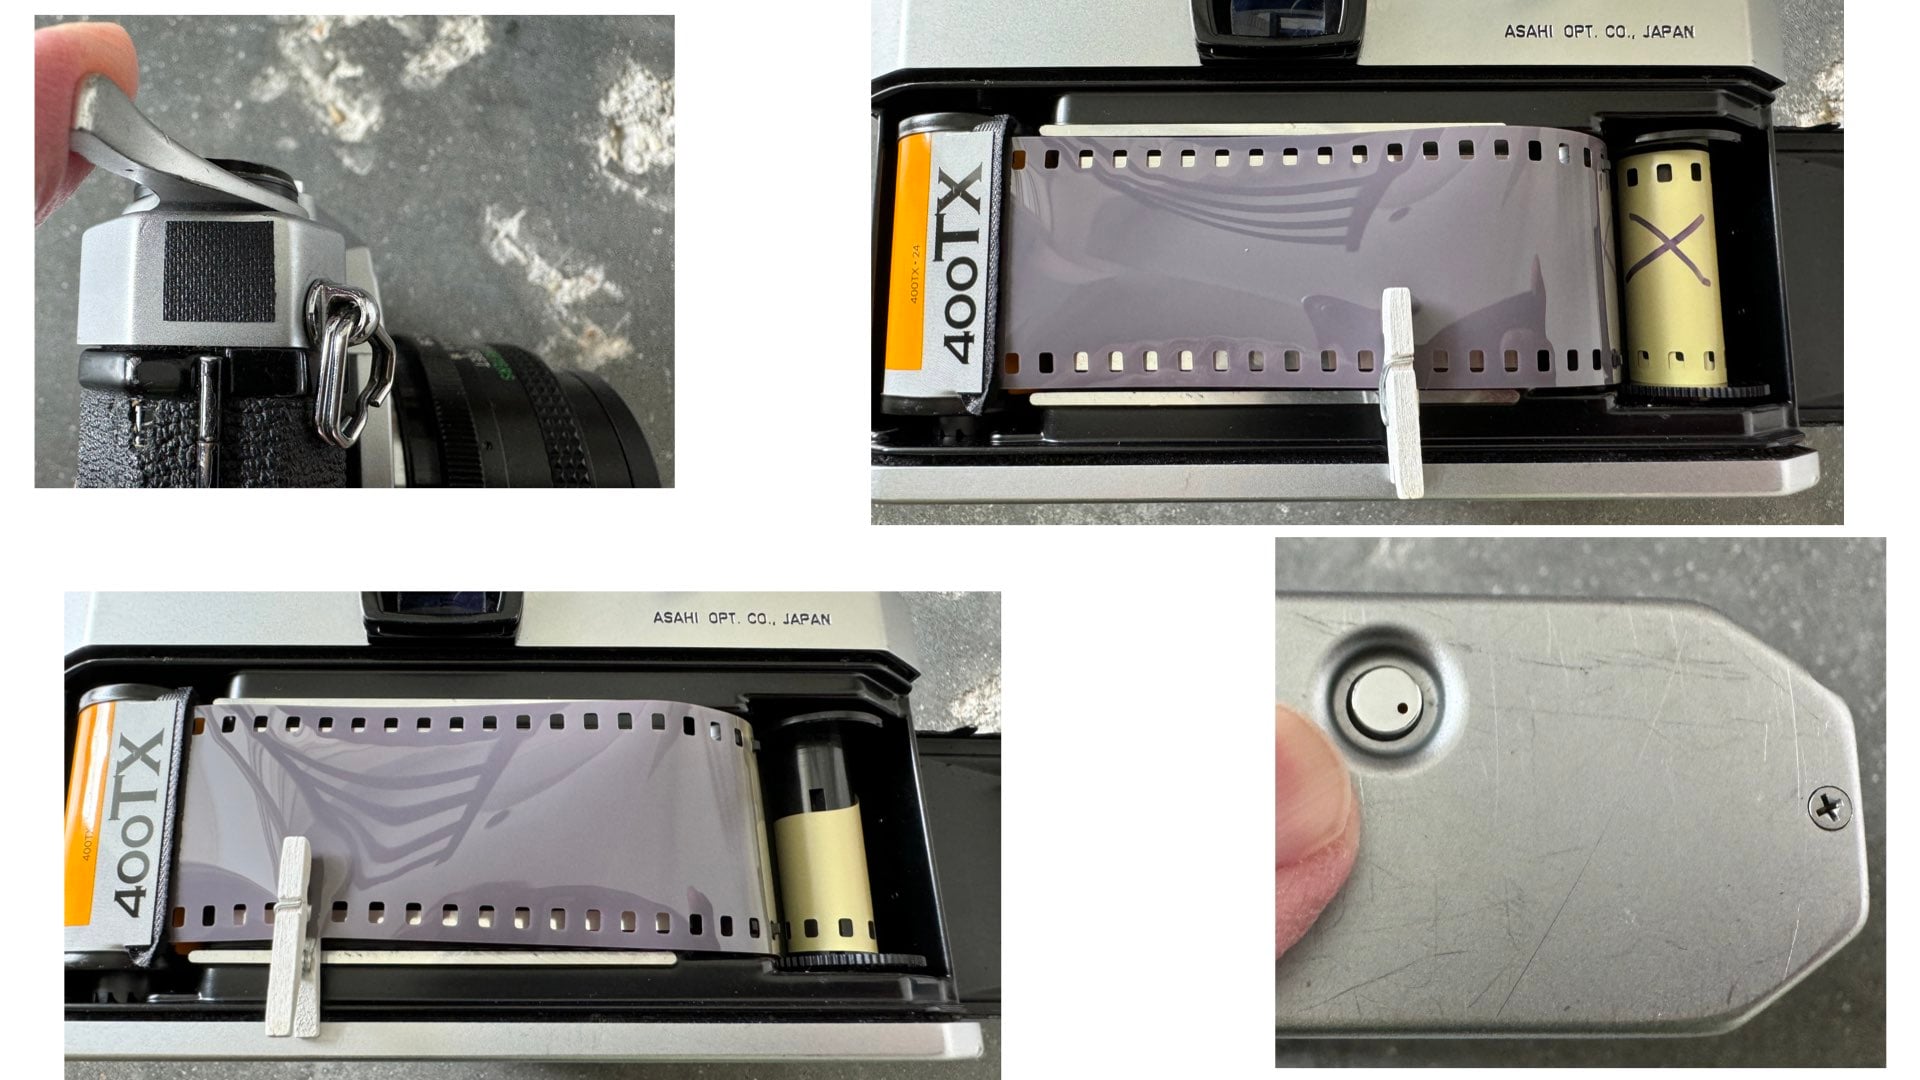
Load a blank demo roll of film into your camera and do not close the back. Find the lefthand edge of the film frame in the light chamber and make a mark aligned with this spot. Now, slowly stroke the film advance lever and watch the mark move across the light chamber. When the mark aligns with the righthand edge of the film frame, STOP and make another mark on the camera’s exterior that indicates the current position of the film advance lever. This exterior mark represents the distance that the film will move without creating a frame separation space between two adjacent exposed negatives.
It’s OK to partially rewind the demo roll of film and repeat the above test to verify that the external film advance lever mark is correct. You are now ready to test your calibration with a fresh roll of film. During the exposure of this test roll, you will be creating real panoramas. So, locate a couple of suitable landscape locations for your tests.
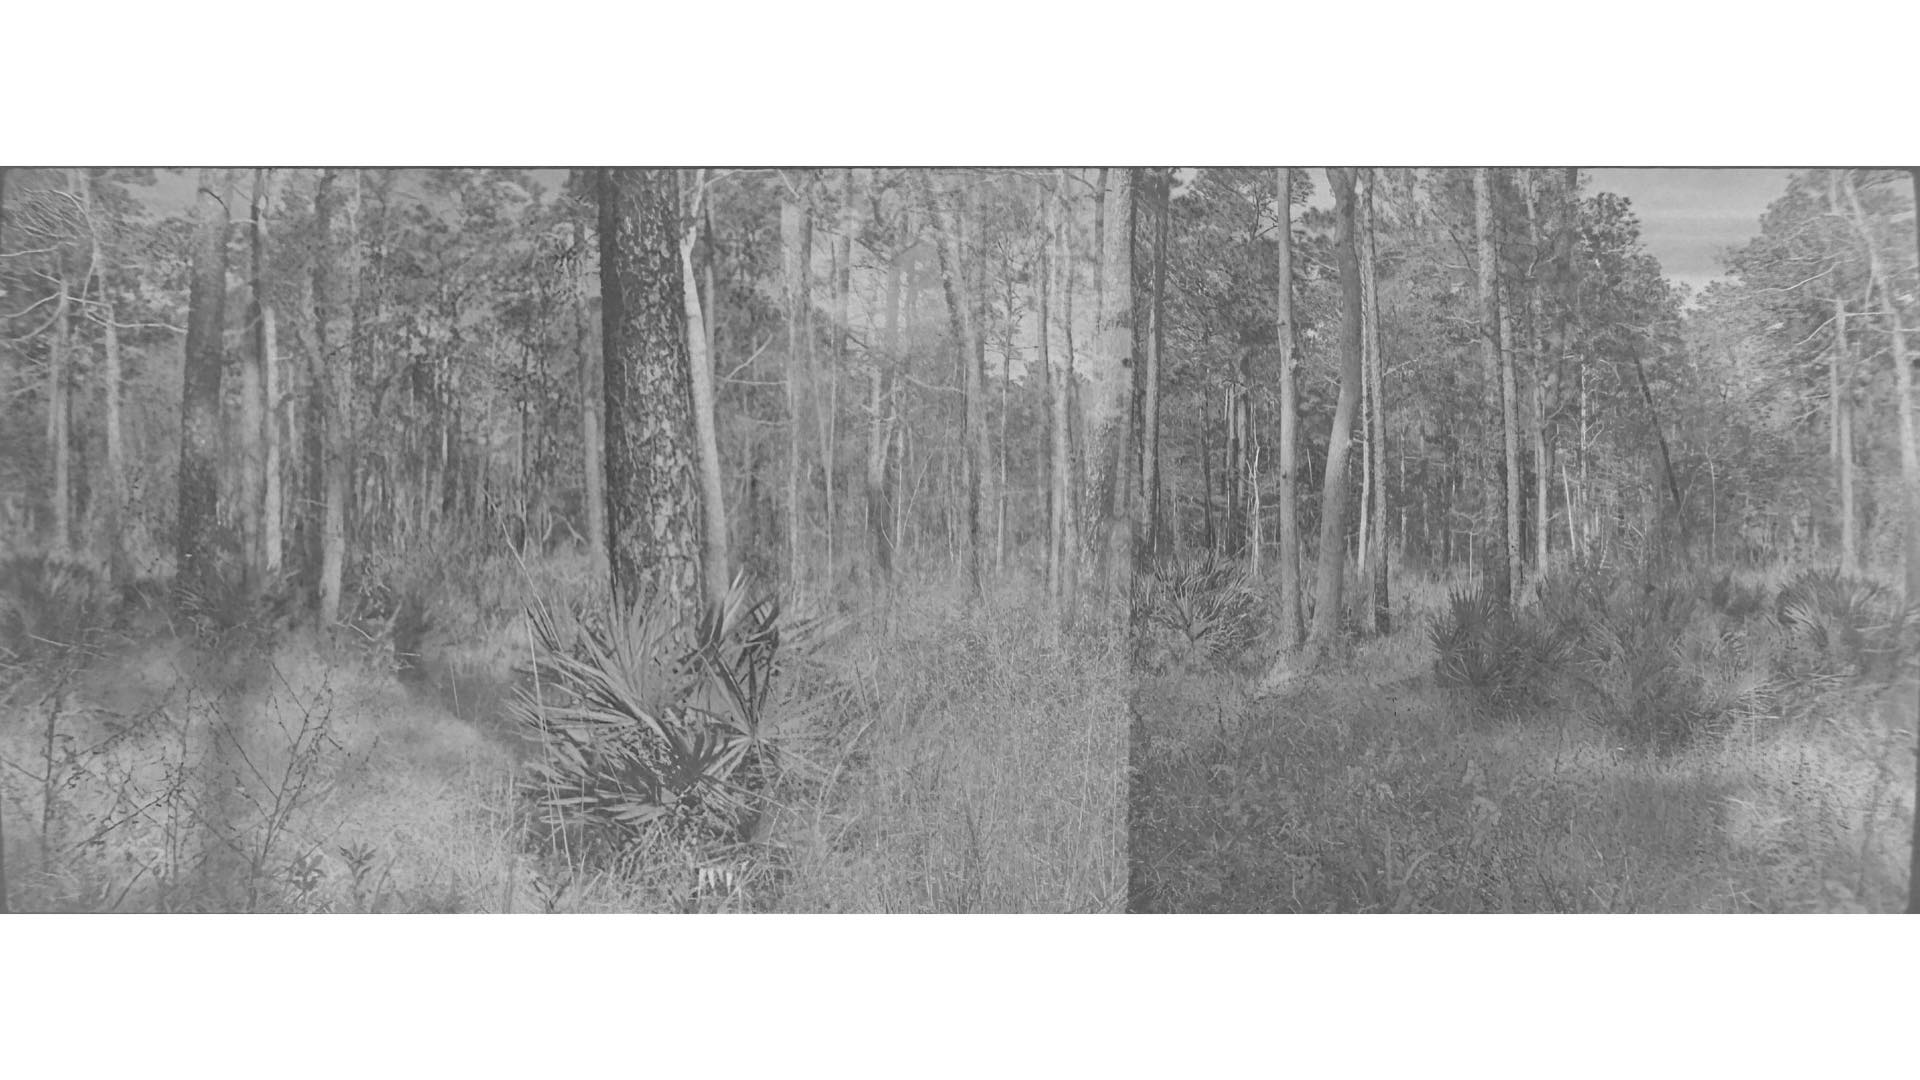
There’s only three little techniques that you must master for practicing panoramic photography. Basically, you’ll be making two exposures for each panorama. Therefore, your first technique is to study your subject through the camera’s viewfinder and locate a center spot. From this center spot, you’ll make one exposure, followed by a second exposure. Both of these negatives should meet along the edge of each other at this preselected center spot.
After taking the first exposure, only advance the film lever to the exterior mark on the camera’s body and STOP AND HOLD the lever. Now press and hold the film sprocket drive release button or rewind button. At this point, you may continue to finish the film advance lever stroke. This odd action will arm the camera’s shutter system without moving the film inside the camera.
Now make the second exposure…remembering where the center spot is from the first exposure. You should now have a perfect panoramic photograph on the film inside your camera.
And this brings up the third, and final, little technique that you must master. After taking your second exposure, place your hand over the lens and fully stroke the film advance lever and make a blank exposure. Seasoned 35mm double-exposure film photographers will tell you that this “blank” shot is necessary to ensure that the film sprocket drive system correctly reengages the film, as well as resets the rewind button. Otherwise, you could accidentally make additional exposures on top of your precious panoramas which could ruin them. Regardless, remember only practice will help to make perfect panoramas without using a dedicated panoramic camera.
Enjoy.

David Prochnow
Our resident “how-to” project editor, David Prochnow, lives on the Gulf Coast of the United States in Ocean Springs, Mississippi. He brings his expertise at making our photography projects accessible to everyone, from a lengthy stint acting as the Contributing How-To Editor with Popular Science magazine. While you don’t have to actually build each of his projects, reading about these adventures will contribute to your continued overall appreciation of do-it-yourself photography. A collection of David’s best Popular Science projects can be found in the book, “The Big Book of Hacks,” Edited by Doug Cantor.


Join the Discussion
DIYP Comment Policy
Be nice, be on-topic, no personal information or flames.