


How to Shoot Portraits in Harsh Sunlight Without Looking Washed Out
Oct 20, 2025
Darlene Lleno
Darlene Lleno brings a unique perspective to DIY Photography as someone who grew up surrounded by camera gear but chose words over lenses. With five years of writing experience, she specializes in photography content that’s both technically informed and genuinely passionate. Growing up with a photographer twin brother meant camera talk was everyday conversation in her household. While he mastered capturing moments, Darlene discovered she preferred being the subject and the storyteller behind the scenes. As a travel enthusiast and mother of two, she understands the importance of preserving life’s precious moments. When not exploring new destinations or writing for DIY Photography, you’ll find her reading or tending to her garden. Her approach to photography writing is refreshingly authentic, she may not be behind the camera, but she knows exactly what it takes to help others capture the shots that matter most.
Share:
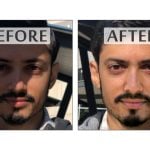
Harsh sunlight photography tests every photographer’s skills. That brutal midday sun creates dark shadows under the eyes. It makes people squint. Skin tones wash out and look flat.
But you can’t always pick your shooting time. Wedding photographers face this reality constantly. The ceremony ends at noon. Family portraits happen when the sun blazes overhead. Client schedules don’t care about golden hour.
Good news: direct sunlight doesn’t have to wreck your portraits. Pro photographers use simple tricks to handle these tough conditions. You can learn them too. Most techniques work right in your camera. Others need basic positioning that anyone can master.
You’ll create stunning portraits even when the sun fights you. You just need to understand how light works. Then have a game plan ready to go.
Why Harsh Sunlight Wrecks Portrait Photos
Harsh sunlight shows up between 11 AM and 2 PM. The sun sits high overhead during these hours. Light comes straight down on your subject. This angle creates problems that make people look bad.
Overhead light casts shadows in terrible spots. Under the eyes. Beneath the nose. Along the neck. These shadows make every skin detail pop out. Blemishes show more. Pores look bigger. Small wrinkles become obvious. Your subject looks tired or older than they really are.
Direct sun also creates wild contrast between bright and dark areas. Your camera can’t capture both at once. Either the bright spots blow out to white. Or the shadows go black. Sometimes both happen in one shot.
Then there’s the squint factor. Nobody looks good with scrunched up eyes. Your subject feels miserable in the heat. They sweat more. Natural expressions become impossible. All this shows in your final photos.
Knowing these problems helps you fix them. Understanding causes lets you build solutions.

Setting Up Your Camera for Harsh Sunlight Photography
Your camera settings make or break shots in bright conditions. Wrong settings fight against you. The right ones give you full control.
Getting your technical setup correct is the foundation. You can have perfect positioning and great poses. But if your settings are off, the shot fails. Let’s walk through what actually works.
Switch to Manual Mode
Manual mode saves your life under bright sun. Auto modes see all that brightness and freak out. Your camera thinks everything should be darker. It underexposes your subject’s face while the background stays bright.
Manual gives you control over everything. You pick aperture. You choose shutter speed. You set ISO yourself. This means you can expose for your subject’s face properly. Let the background do whatever it wants.
Most times an overexposed background looks way better than a dark face. Your subject matters more than what’s behind them. Exposure decisions should reflect this priority.
Open Up Your Aperture Wide
Wide apertures help soften how harsh light hits skin. Wedding pros often shoot between f/1.2 and f/2.5 for outdoor portraits. The shallow depth of field blurs distracting backgrounds. It also creates a softer look on skin.
Big apertures reduce how much texture shows up. Pores become less obvious. Minor blemishes fade. Your subject looks smoother without any editing magic. The trade-off? Your depth of field gets razor thin at f/1.4.
Focusing becomes harder when shooting wide open. One tiny focus error ruins the shot. Take your time. Double check your focus point. Lock it in before you shoot.
Start With These Numbers
Try ISO 100 to keep noise down. Set shutter speed around 1/400 of a second. This freezes movement while giving you room to adjust. Pick your aperture based on how much blur you want.
A solid starting combo: ISO 100, 1/400s, f/2.8. Adjust from there using your light meter. Check what you see in the viewfinder. Watch your histogram to protect face highlights.
Some pros slightly underexpose in harsh light on purpose. Shadow detail often matters more than highlight detail. You can recover shadows in editing. Blown highlights stay blown forever.
Moving Your Subject Changes Everything
Where you put your subject transforms how light falls on them. Smart positioning turns harsh sun into beautiful light. This matters more than most people realize.
You don’t need fancy gear for this. Just understand light direction. Then put your subject in the right spot. These simple moves solve most harsh light problems instantly.

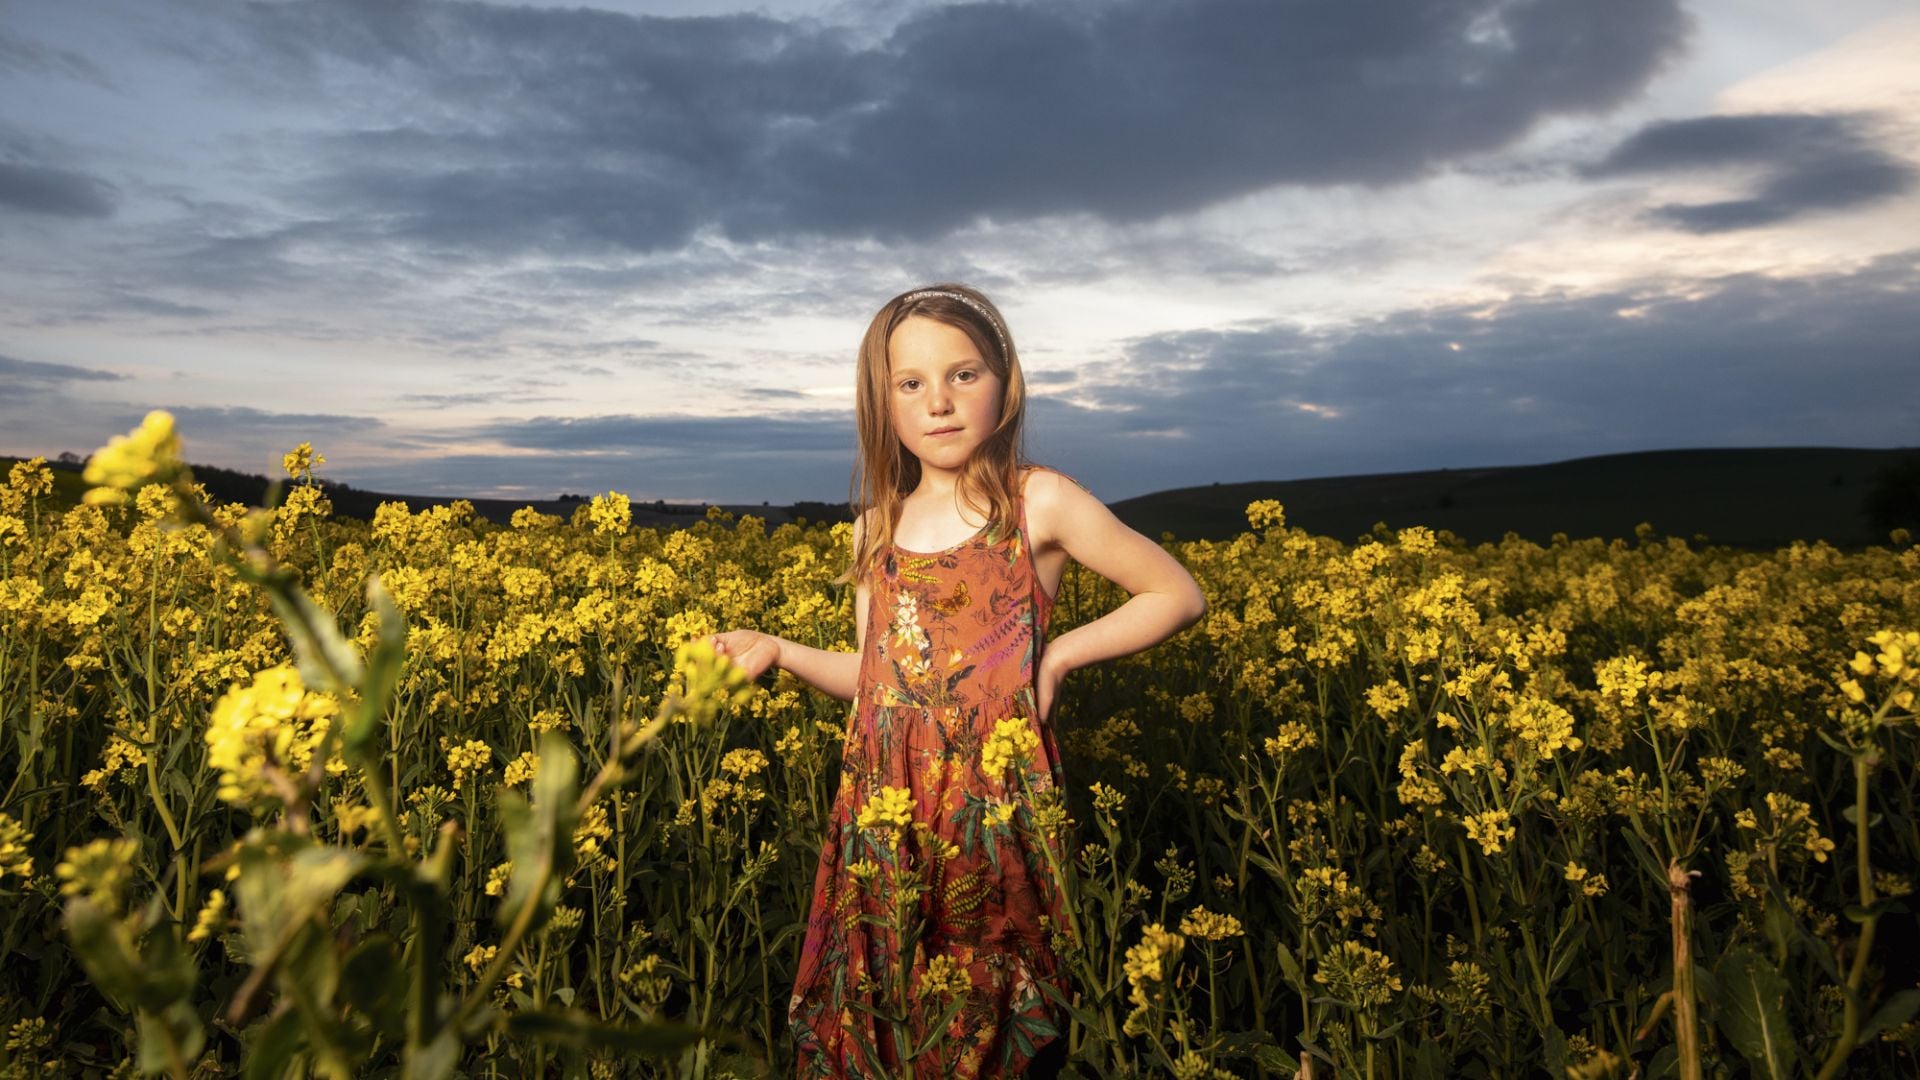
Put Sun Behind Them
Backlighting ranks as the easiest fix. Move your subject so the sun hits from behind. Their face sits in even shadow. A nice rim of light glows around their hair and shoulders.
This kills the squint problem instantly. Your subject opens their eyes normally. They’re not staring into blinding light. The even shadow on their face creates flattering skin tones. No harsh shadows under eyes or nose.
That rim light from behind adds depth. It separates them from the background. Creates a professional glow that looks polished. Works great when your subject has longer hair to catch light.
You’ll expose their face when backlighting. The background will probably blow out to white. That’s fine. Bright backgrounds pull eyes to your properly exposed subject.
Find or Make Shade
Shade offers instant relief from direct sun. Trees work great. Buildings too. Doorways, overhangs, even big umbrellas block harsh light. The light filtering into shaded spots becomes soft and pretty.
Pick solid shade over dappled shade. Light through sparse leaves creates spotty patterns on faces. Solid shade from thick trees or buildings gives even light. Your subject’s face gets consistent illumination across every part.
Have them face toward the open sky when in shade. This brings soft light onto their face from the bright area outside. The effect copies studio lighting but uses natural light instead.
According to Digital Photography School, finding shade is one of the most effective ways to handle harsh sunlight without additional equipment.
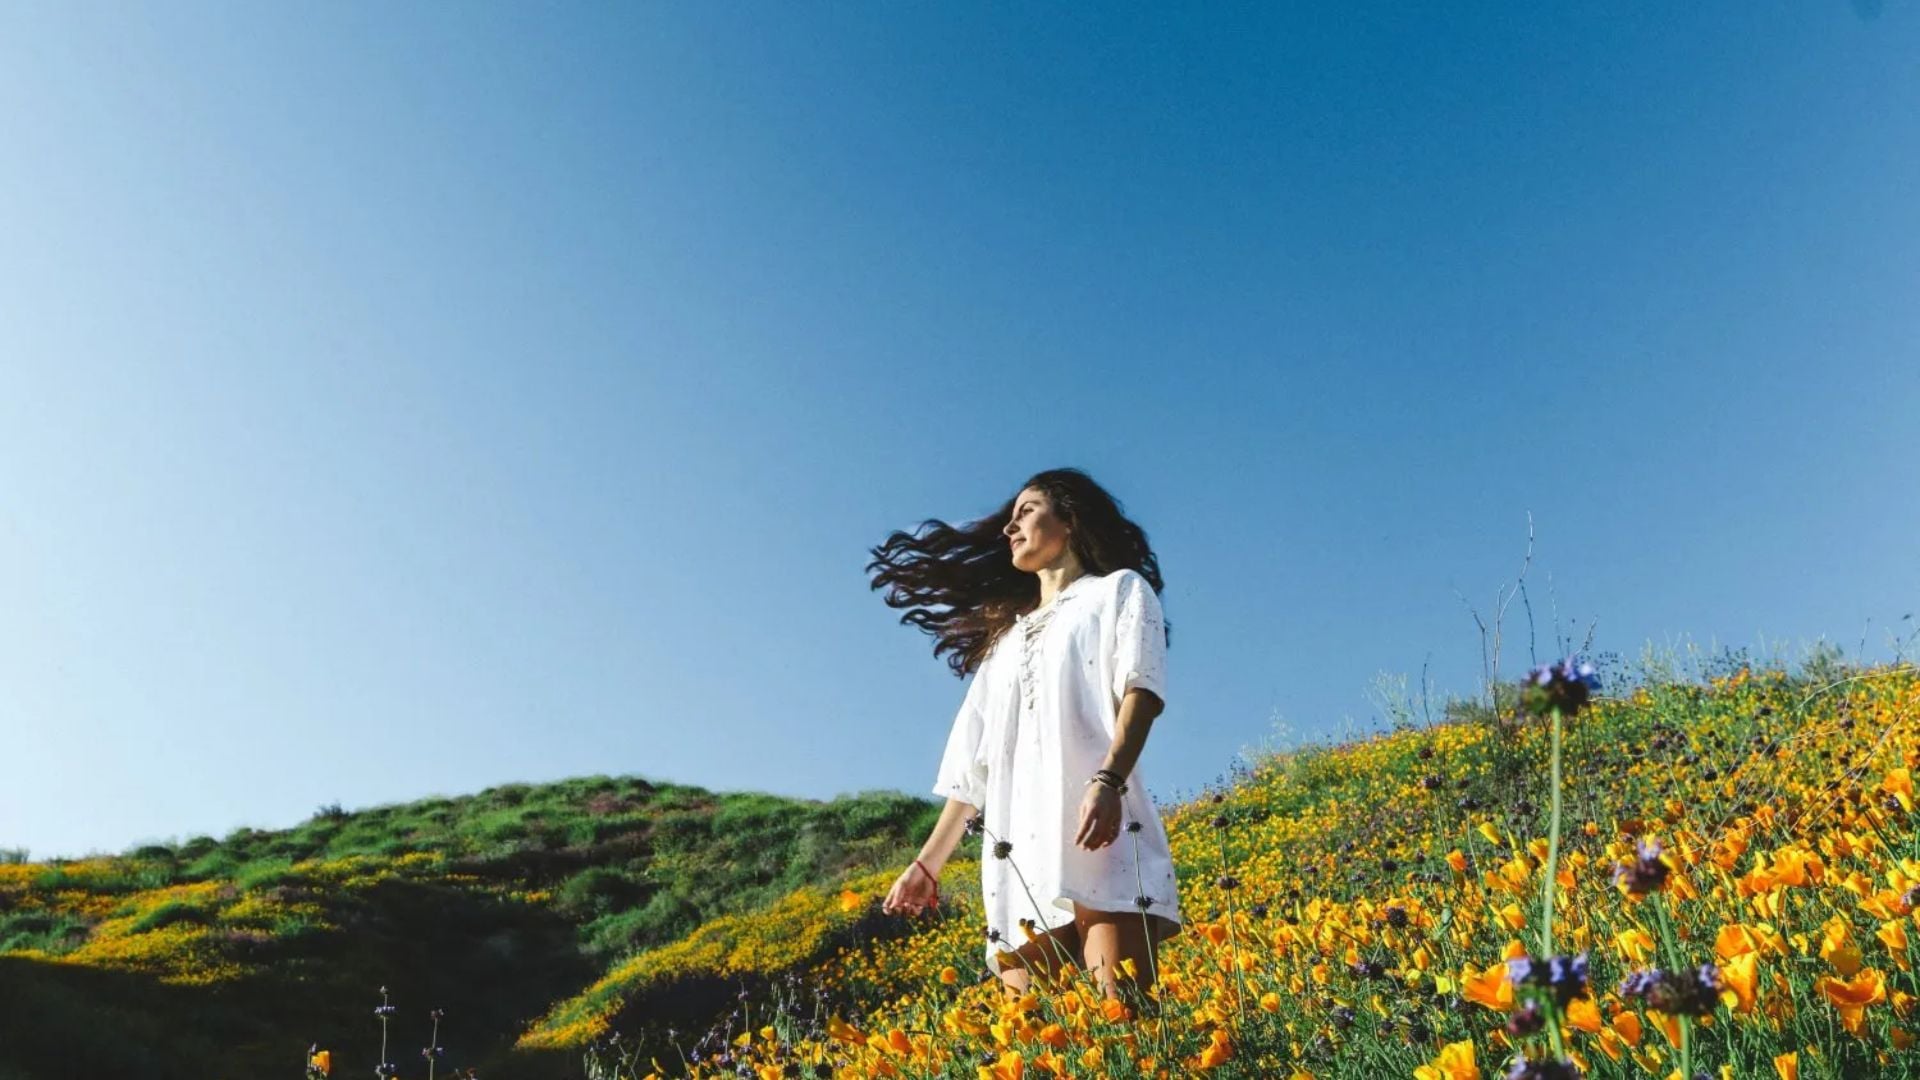
Use the Sun’s Natural Angle
The sun rarely sits perfectly overhead. Usually it angles somewhat, even at midday. You can work with this. Have your subject face their body toward the sun. Then turn their head to catch light at a better angle.
Profile shots shine in harsh sunlight. Angle your subject so the sun hits from the side. Face and body point toward light. But they don’t look directly at it. Ask them to close their eyes. Count to three. Have them open on three. No squinting.
Shoot from below while your subject faces up toward the sun. This creates interesting compositions. Harsh light becomes a creative choice instead of a problem. Look for shadow shapes and lines. Use them in your composition.
Tools That Help Control Harsh Sunlight Photography
Sometimes moving your subject isn’t enough. A few simple tools help you shape light better. You don’t need expensive stuff. Basic modifiers work great.
These tools give you more control over your final look. They let you create the exact lighting you want. Even when nature doesn’t cooperate with your vision.
Reflectors Do Double Duty
Reflectors don’t just bounce light back. They can block the sun and create shade too. Hold one above your subject’s face. It blocks the overhead sun. Creates even light across their face like building shade.
For bouncing light, white reflectors keep skin tones natural. Silver adds brightness but can look harsh. Gold warms things up for a bronzed look. Pick based on your style.
Natural reflectors exist everywhere around you. Light sidewalks bounce light up. White walls reflect back. Light sand at beaches fills in shadows. Even light colored clothes can work. Use what’s already there before pulling out gear.
Diffusers Soften Direct Light
A diffusion panel works like a portable cloud. Hold it between sun and subject. It softens that harsh direct light. Diffused light spreads out. This reduces contrast and creates gentler shadows.
Diffusers work best for close portraits and headshots. You need someone holding it. Or set it on a stand. Full body shots need huge diffusers. That becomes impractical fast.
White shower curtains work fine. Translucent white fabric too. Professional collapsible diffusers do the same job. They all scatter light the same way. This makes your light source bigger and softer.
Flash Fills the Shadows
Adding flash in bright sun sounds weird. But it totally works. Flash provides fill light that balances harsh shadows from the sun. The sun becomes your main light. Flash fills shadow areas with detail.
Keep flash subtle though. You want to lift shadows just enough to see detail. Not eliminate them completely. Set flash to about -1 or -1.5 stops compensation. This looks natural instead of obviously lit.
Off-camera flash gives better control over direction and quality. Position it roughly where your camera sits. Fill light looks more natural this way. You can adapt single flash techniques for bright outdoor conditions.
Making Harsh Sunlight Work for You
Some photographers stop fighting harsh light. They use it as a creative tool instead. These approaches turn tough conditions into unique styles.
Not every shoot needs soft, flattering light. Sometimes harsh sun creates the exact mood you want. Learning to work with it expands your creative options dramatically.
Create Intentional Flare
Let the sun create lens flare on purpose. Position your subject so the sun sits just outside your frame. Or have their head partially block it. Light spilling into your lens creates a dreamy washed look.
This technique fits lifestyle and fashion portraits perfectly. The bright airy feel screams summer. Embrace blown highlights and low contrast. Make it look intentional instead of accidental.
Use Shadows as Design Elements
Harsh shadows aren’t always your enemy. They can become graphic parts of your composition. Look for cool shadow patterns from trees or buildings. Position your subject so shadows fall across them in interesting ways.
This works great for editorial or artistic portrait styles. Strong contrast and bold shadows create drama. Your subject becomes part of a bigger graphic design.
Play Up Vibrant Colors
Harsh sunlight makes colors pop. Direct light creates saturation that soft light can’t match. Bright clothes look amazing. Colorful backgrounds come alive. Vivid environments benefit from this punch.
Pick locations and outfits that use this strength. Bold colors that feel too intense in soft light look perfect under bright sun. Deep rich shadows add contrast and depth to everything.
Fixing Harsh Light Photos in Post
Even perfect shooting technique needs editing help sometimes. These adjustments polish your harsh sunlight photography into final gems.
Post processing isn’t about fixing mistakes. It’s about bringing your vision to life. The right edits make good photos great while keeping them looking natural.
Balance Your Tones
Pull down highlights to recover blown bright areas. Push up shadows to reveal dark area detail. This brings exposure closer to what your eyes saw. The camera’s dynamic range can’t capture everything at once. Editing bridges that gap.
Don’t go too far though. Over recovered highlights look gray and dead. Over lifted shadows show noise and look fake. Make subtle moves that keep the image’s mood intact.
Soften Skin Hot Spots
Harsh sun creates bright spots where direct light hits skin. Foreheads, noses, and cheeks get these hot areas. They need targeted fixing.
Use a brush tool to gently darken these bright spots. Desaturate them slightly too. Sample nearby skin tone and paint over at low opacity. This evens things out without looking obvious. Add tiny amounts of noise to match the surrounding texture.
Correct Color Casts
Bright sunlight often creates weird color shifts. Skin can look too yellow. Or too red. Use white balance controls to fix these.
Cool down temperature if skin looks orange. Warm it up if skin looks washed out and pale. Small adjustments make big differences. Stop when skin tones look natural and pleasing.
Mistakes That Make Things Worse
Learning what not to do helps as much as learning right moves. These mistakes make harsh sunlight photography harder than it needs to be.
Avoiding common errors saves you time and frustration. More importantly, it saves your shoots from preventable problems that wreck otherwise good photos.
Fighting Instead of Adapting
The biggest mistake is forcing soft light techniques in harsh conditions. Different light needs different approaches. Accept what you have and adapt your method.
Don’t expect golden hour quality in midday sun. Don’t try creating studio strobe looks outside at noon. Work with your light. Not against it.
Ignoring Your Histogram
Camera LCD screens get hard to see in bright conditions. You think exposure looks good. But the screen is just too bright to judge right. Always check your histogram for real exposure info.
The histogram shows true tone distribution in your image. A spike on the right means blown highlights. Spike on the left means crushed shadows. Aim for full range without spikes at either end.
Mixing Light Types
Putting half your subject in the sun and half in shade creates exposure nightmares. Your camera can’t expose both areas properly at once. Pick one or the other. Keep everyone in matching light for consistent results.
This matters most for group portraits. Position everyone in the same light quality. All in sun or all in shade. Mixed lighting makes some people look great while others look terrible.
Handling Different Portrait Situations
Different types of shoots need adjusted approaches to harsh sunlight photography. What works for weddings won’t work for families. Adapt your strategy to fit the situation.
Real world shooting means dealing with real world problems. These practical tips help you handle common scenarios you’ll actually face with clients.

Wedding and Event Photography
You can’t control timing at weddings, ever. First looks happen at noon. Bridal party photos take place in full sun. Family formals get scheduled whenever the ceremony ends.
Scout for shade before everything starts. Look for covered spots, tree lines, or building overhangs. Have backup locations ready to go. If you must shoot in direct sun, use backlighting and work fast.
For direct camera shots in harsh sun, wait for clouds. Or move everyone into shade. These hero images need even face light. Shoot other angles and poses in harsh light. But protect those looking at camera shots.
Family Portrait Sessions
Families with young kids need faster sessions. You don’t have time for complex setups. Keep things simple and find natural shade when possible.
Doorways work perfectly for families. Porches too. Building overhangs provide ideal light. The indirect light coming into these spaces flatters everyone. Position the family facing out toward light for best results.
If direct sun is your only option, keep the family interacting. Have them look at each other instead of the camera. Candid moments where they connect avoid squinting. Create authentic joyful images naturally.
Individual Portrait Sessions
One subject gives you more flexibility and time. You can fine tune positioning more easily. Use modifiers without rushing. Take advantage to create polished controlled images.
Experiment with different lighting approaches that match your style. Try backlighting. Test side lighting. Play with creative angles. Use reflectors or diffusers to shape light exactly how you want.
Individual sessions let you wait for perfect moments too. If a cloud passes over and softens light temporarily, pounce on it. If harsh light isn’t working, pause and reposition without pressure.
Building Your Harsh Light Skills
Practice is the only way to truly master harsh sunlight photography. Each situation teaches you something new about light. How to see it. How to control it. How to use it.
Real improvement comes from doing, not just reading. Get out there and shoot in terrible midday light. Make mistakes. Learn from them. Build confidence through repetition.
Start Practicing Now
Experiment with friends or family in harsh conditions. Try all the techniques covered here. See which ones fit your style best. Which ones you can execute quickly under pressure.
Take test shots in different positions. Try different settings. Review them right away. Notice what works and what flops. Understanding why certain approaches succeed helps you apply them later.
Keep Learning Notes
Write down what worked in different situations. Over time you’ll develop instincts for handling harsh light. You’ll walk into a location and immediately spot where to position subjects. Which techniques to use first.
Remember that even pros struggle with harsh sunlight sometimes. Perfection on every shot isn’t the goal. Having enough tools to create good images regardless of conditions is the goal.
Building Confidence in Harsh Sunlight Photography
Harsh sunlight photography doesn’t have to be scary. With the right techniques, this challenging light becomes manageable. Sometimes it even becomes your preferred look for certain styles.
The key is understanding how harsh light behaves. Have multiple strategies ready to deploy. Some situations need shade. Others work better with backlighting. Sometimes you need reflectors or diffusers.
Camera settings matter just as much as positioning. Shoot in manual mode. Use wider apertures to soften skin. Watch your histogram to protect highlights. These technical foundations support everything else you do.
Don’t fear harsh light as a creative tool either. Strong shadows work great sometimes. Vibrant colors pop beautifully. Dramatic contrast creates stunning images that softer light never could. Your style determines whether harsh light is a problem or opportunity.
Practice these techniques until they become automatic. The confidence you build handling difficult light improves every part of your photography. Master hard light and easy light feels effortless.

Darlene Lleno
Darlene Lleno brings a unique perspective to DIY Photography as someone who grew up surrounded by camera gear but chose words over lenses. With five years of writing experience, she specializes in photography content that’s both technically informed and genuinely passionate. Growing up with a photographer twin brother meant camera talk was everyday conversation in her household. While he mastered capturing moments, Darlene discovered she preferred being the subject and the storyteller behind the scenes. As a travel enthusiast and mother of two, she understands the importance of preserving life’s precious moments. When not exploring new destinations or writing for DIY Photography, you’ll find her reading or tending to her garden. Her approach to photography writing is refreshingly authentic, she may not be behind the camera, but she knows exactly what it takes to help others capture the shots that matter most.


Join the Discussion
DIYP Comment Policy
Be nice, be on-topic, no personal information or flames.