


Building a Computer on a Budget for Photography and Video
Oct 27, 2025
John Aldred
John Aldred is a photographer with over 25 years of experience in the portrait and commercial worlds. He is based in Scotland and has been an early adopter – and occasional beta tester – of almost every digital imaging technology in that time. As well as his creative visual work, John uses 3D printing, electronics and programming to create his own photography and filmmaking tools and consults for a number of brands across the industry.
Share:

For creative professionals, a high-performance computer is essential – but it doesn’t need to cost thousands more than it should. With the right balance of parts, you can build a machine that handles real-world editing tasks smoothly without overspending on unnecessary hardware.
Before we dive into the parts list, you might be wondering: why build your own PC instead of buying an off-the-shelf system? Building your own lets you pick exactly the components you need, avoid paying for flashy extras you’ll never use, and often save money compared to prebuilt workstations.
It also gives you full control over future upgrades. You can swap out or add individual components as your needs grow, instead of replacing the whole machine. For creative professionals, that flexibility and long-term value are especially important.
Note: This build has been supported in part by Crucial, which has provided RAM and SSDs. Crucial has not had any editorial input, nor have they seen this article before it was published. We reached out to them to request these specific components as they are what we chose to use in this system, and Crucial was kind enough to help out.
Below is a breakdown of an AMD-based PC build designed for efficiency, performance, and value:
- Case: MSI MAG Forge 120A Airflow Mid-Tower
- PSU: Corsair RM650e (2025 Edition) Fully Modular, Cybenetics Gold Efficiency Rating
- Motherboard: MSI X670E Gaming Plus WiFi
- CPU: AMD Ryzen 5 9600X (6 cores / 12 threads, 65W TDP)
- Cooler: Thermalright Peerless Assassin 120 SE
- RAM: Crucial Pro DDR5-6000 64GB (2x32GB) Kit
- Storage (OS/Apps): 2TB Crucial P310 NVMe SSD
- Storage (Active Projects): 4TB Crucial T500 NVMe SSD
- GPU: NVIDIA RTX 3060 (12GB)
Value-First Component Selection
Before diving into specifics, it’s important to understand the philosophy behind this build: choosing components that deliver strong real-world performance without waste. Spending extra on hardware you’ll never fully utilise adds cost without improving your workflow.
Each part here was chosen because we believe it strikes the best balance between capability, efficiency, and cost. This does not mean it’s a cheap PC. You can certainly find or build computers for less, but if you want a smooth and seamless editing experience for the next few years, there are some things you’ll need to think about.
Case Selection: Where It All Begins
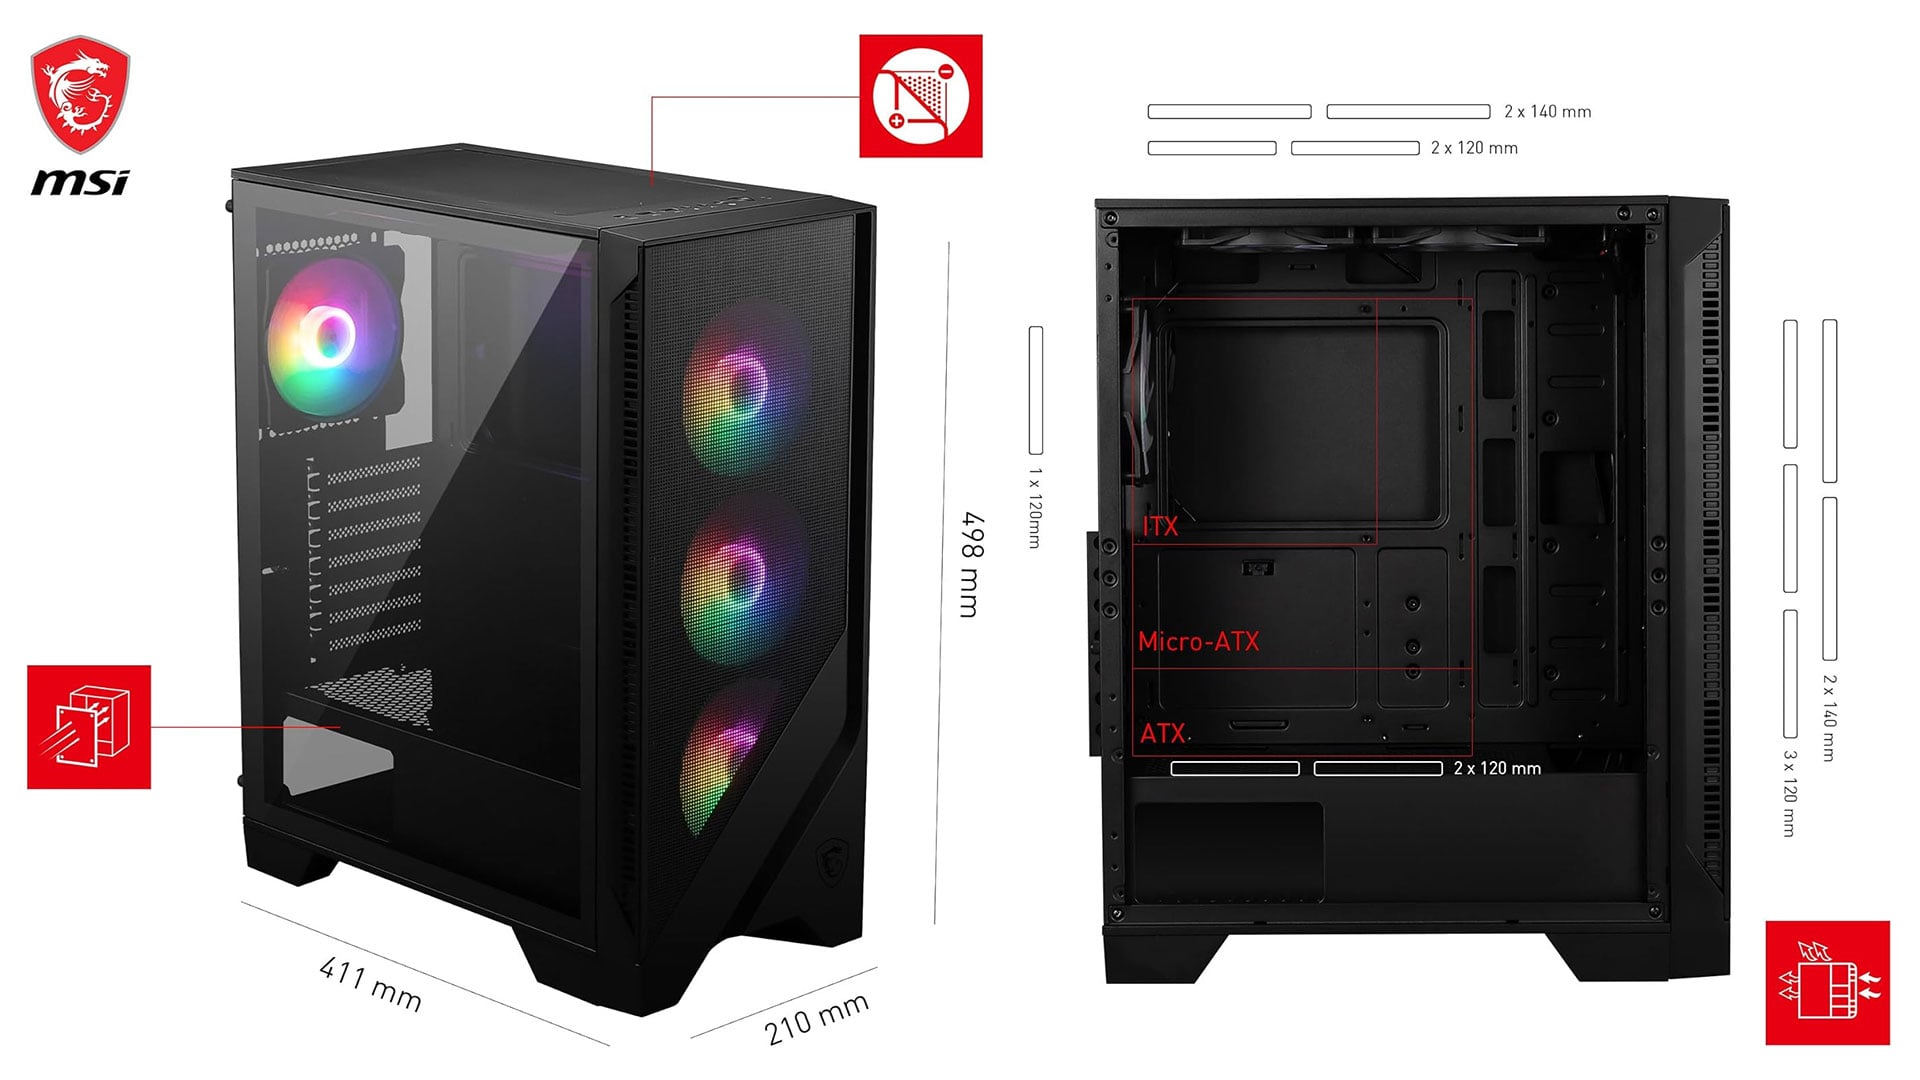
The case is often overlooked, but it’s critical for long-term performance and comfort. I haven’t photographed this one, because I don’t have the space here to do it justice. But here’s an image from MSI, showing the dimensions of the case, and fan configurations.
Although we’re listing this first, it should probably be the last thing you choose – because until you know what hardware you’re actually going to use, you don’t know what size or style of case you need. Buying the case first can limit your component choice to certain motherboard form factors or smaller GPUs, as larger ones may not fit.
This build utilises the MSI MAG Forge 120A Airflow Mid-Tower, which offers a good balance between affordability and effective cooling design. Availability on this specific case seems spotty, even from retailers within a single country, let alone across the world. So, pick one that fits your aesthetic, but do note the points below.
When selecting a case, here are the key things to check:
- Airflow: Look for mesh front panels and multiple fan mounts. Good airflow keeps components cooler and quieter. Long renders and exports generate continuous heat, not just short bursts like gaming.
- GPU clearance: Ensure the case is large enough for the graphics card you plan to use, especially for higher-end GPUs, which can be quite long.
- CPU cooler clearance: Large air coolers, like the Peerless Assassin 120 SE, require plenty of vertical space.
- Cable management: Cases with ample routing channels and tie-downs make for a cleaner, easier build.
- Future expandability: Extra drive bays, radiator mounts, or PCIe slots give room to grow if your needs expand.
The MAG Forge 120A offers strong airflow out of the box, solid GPU clearance, and a straightforward layout that makes it well-suited for a budget-conscious but capable creative workstation.
Power Supply: The Foundation of Stability
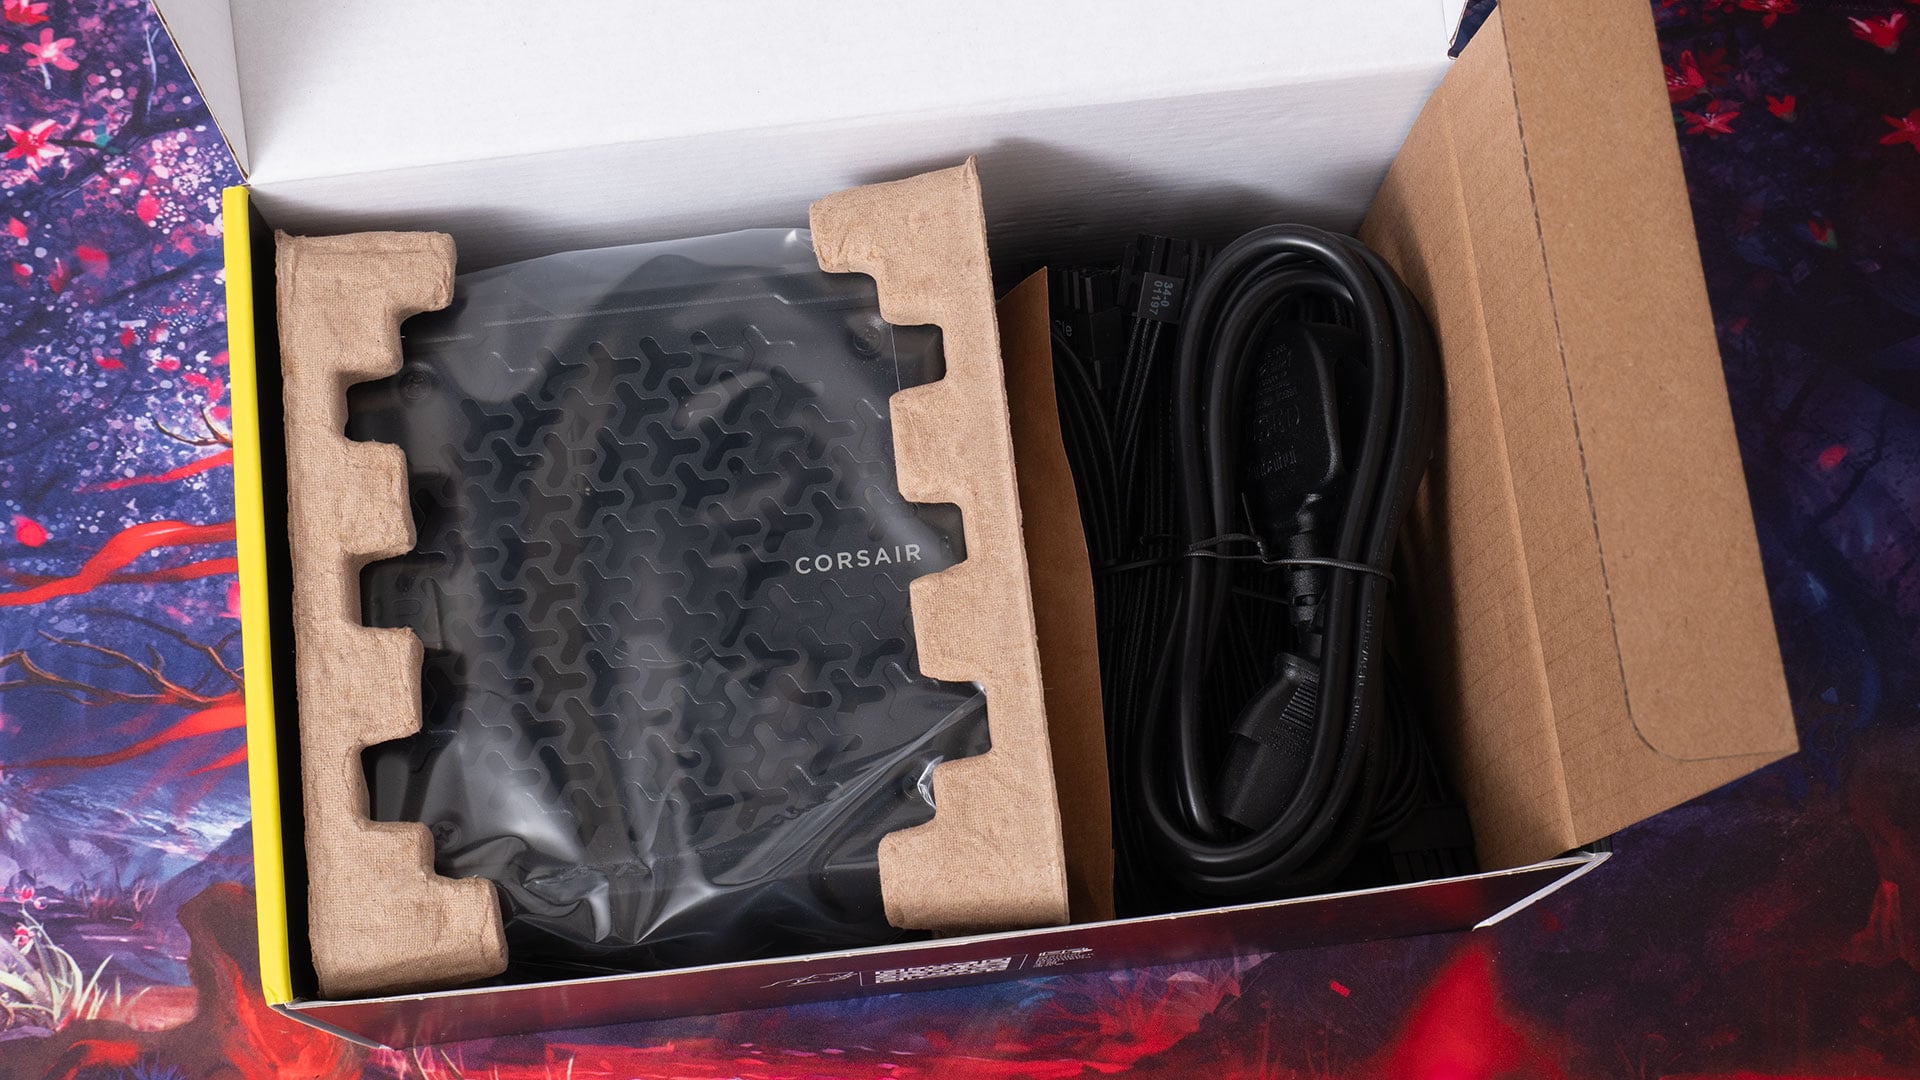
A reliable power supply is critical. This build uses the Corsair RM650e (2025 Edition). This is a fully modular power supply unit with Cybenetics Platinum efficiency (89–92%) and NVIDIA RTX 50 series support. Others may disagree, but to me, the PSU is probably the most important component when building any PC.

Why careful PSU selection matters:
- Stable voltage: Dodgy PSUs with fluctuating voltages can reduce component lifespan or make the system unstable.
- Efficiency: Gold-rated units waste less power as heat, keeping systems cooler and bills lower.
- Modularity: Fully modular PSUs enhance airflow and cable management, allowing you to connect only the cables you need.
- Future-ready: ATX 3.1 and PCIe 5.1 compliance ensure compatibility with modern GPUs and motherboards.
While it’s tempting to cut corners here, the PSU is one place you should never cheap out. A high-quality unit like the RM650e protects your investment and helps ensure reliable, long-term performance.
A note on modular PSUs (they’re a good thing): Modular PSUs might seem like a pricey extravagance. I mean, they basically do the same job as their less expensive, fully wired counterparts. However, as well as looking neater, having fewer cables makes them easier to route for improved airflow in yoru case. This helps to keep your components running cooler and quieter, increasing their longevity.
Motherboard Selection: AM5 Chipsets Compared
Before we can place any other components inside the PC, we need to pick a motherboard. The motherboard is the glue that binds all of the other components together. Everything else connects to this to allow seamless communication between them.
But choosing a motherboard can be confusing for those who’ve never built their own PC before and don’t know what the different chipsets offer, or what a chipset even is.
A chipset is essentially the control hub of the motherboard. It determines what kind of features your system supports: how many storage devices you can add, how many USB ports are available, what type of graphics and expansion cards you can install, and how much room you have to upgrade in the future. Picking the right chipset ensures your system can handle your current needs and gives you flexibility for growth.
Here’s how the current AM5 chipsets break down, ordered from entry-level to high-end:
- B650 / B650E (Entry-Level AM5)
- These boards can be tempting for budget builds, but they’re generally limited. Fewer PCIe lanes, weaker VRM designs, and restricted expansion make them less appealing for a workstation. While they technically support AM5 CPUs, their long-term upgrade potential is poor.
- In short, they may be viable in very tight budgets, but for creatives who want stability and room to grow, B650/B650E is not recommended.
- X670 / X670E (Mid-Range)
- X670 provides PCIe Gen5 support for storage only, while X670E extends PCIe Gen5 to both GPU and storage.
- Excellent choice today since Gen4 NVMe and RTX 30/40 GPUs already cover most real-world needs.
- X870 / X870E (High-End)
- The X870E is the successor to X870, bringing refinements like native USB4, better memory overclocking, and extended PCIe Gen5 support.
- Real-world benefits for creatives are minimal right now unless you plan to adopt bleeding-edge GPUs or ultra-fast storage in the near future.
For future-proofing, I’d go for an “E” (“Extreme”) motherboard over a non-E variant. The B650E/X670E/X870E typically offer better PCIe 5.0 support over the B650/X670/X870 non-E models.
Bottom line: For photographers and filmmakers, X670E boards already provide more than enough bandwidth and features. X870E boards will be attractive down the line as USB4 becomes more common, but aren’t necessary for a stable, cost-efficient creative workstation today.
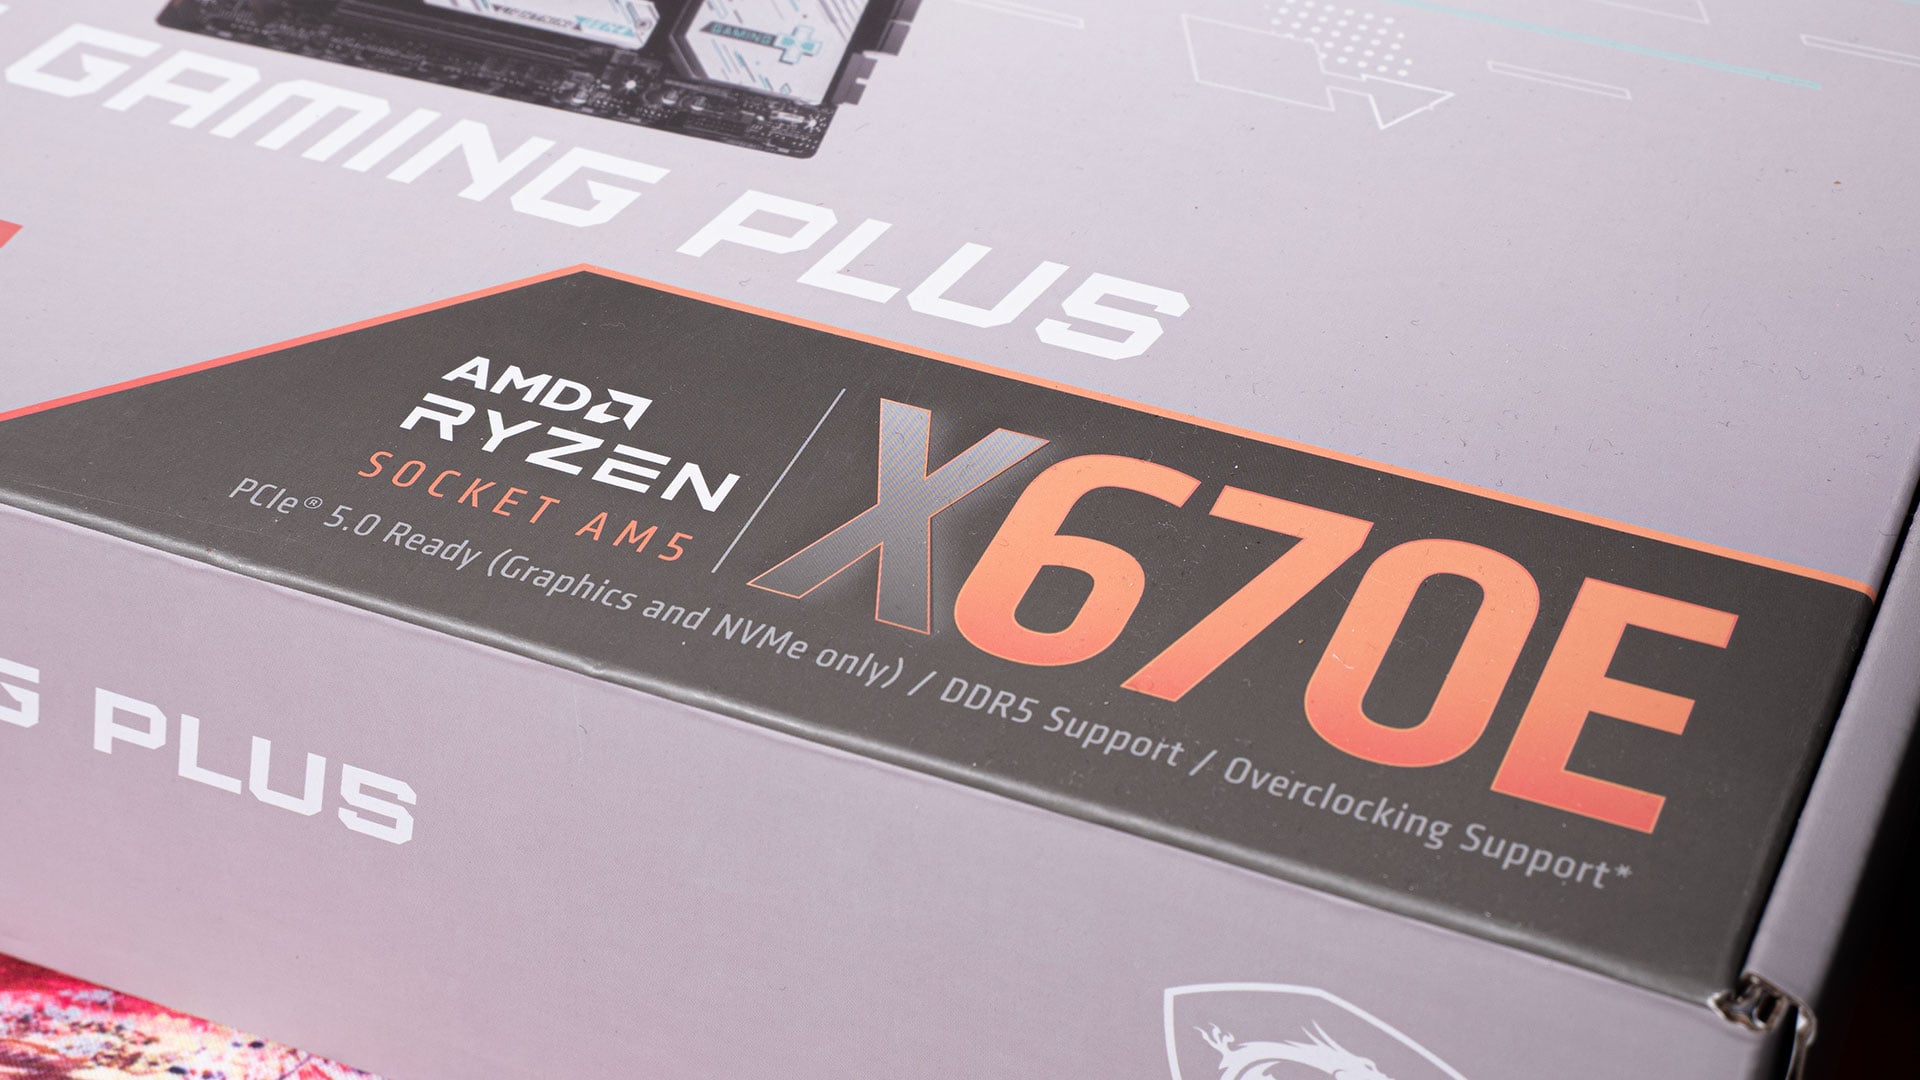
For this build, we’ve chosen the MSI X670E Gaming Plus WiFi as it presents a good balance of cost vs performance. Despite being a relatively low-cost motherboard, it supports the latest PCIe Gen5 devices, like the Crucial T710 SSD and NVIDIA RTX 50 Series GPUs.

A Balanced, Budget-Friendly CPU Choice
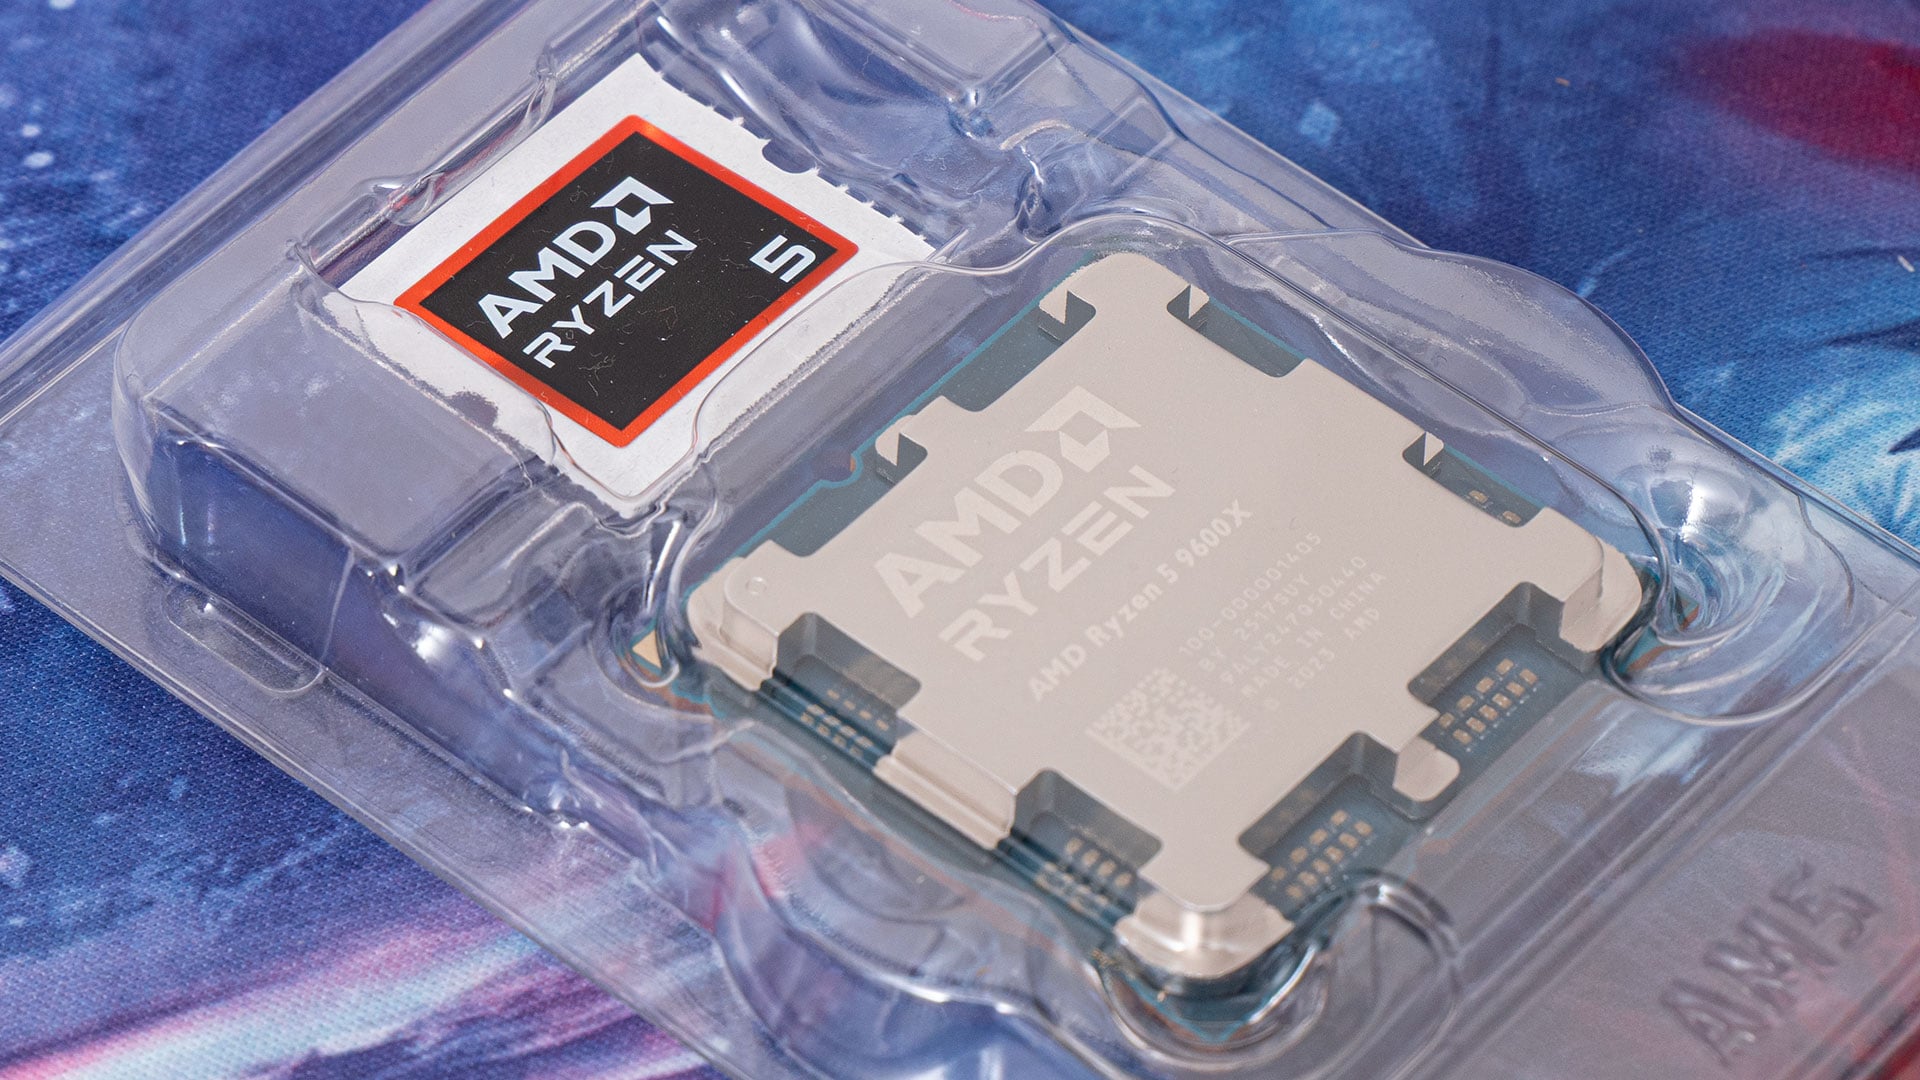
We’re going with the AMD Ryzen 5 9600X for this build because it’s a great performer at a budget-friendly price. It balances speed, efficiency, and cost extremely well – making it ideal for most creative professionals.
Here are some key features of the AMD Ryzen 5 9600X:
- Everyday performance: It has more than enough power for smooth photo editing and 4K video work without overspending.
- Power draw: It only draws 65W, so it’s very efficient. It stays cooler and uses less power, costing you less to run it.
- Future-ready bandwidth: It supports PCIe Gen5 for the latest SSDs and GPUs. So, it’s ready for anything your future upgrades might throw at it.
Another bonus is that the 9600X includes built-in Radeon graphics. For very light users, that means a dedicated GPU isn’t strictly required – the integrated GPU can handle basic display output and even some lightweight creative tasks. More importantly for professionals, it provides redundancy: if your graphics card ever fails, you still have display outputs to keep you working while waiting for a replacement – although, don’t expect it to be useful in DaVinci Resolve or Blender.
While higher-end Ryzen 7 or 9 chips exist, the real-world performance gains for most editing workflows don’t justify the price jump. For photographers and filmmakers who want a reliable balance of speed and cost, the 9600X hits a practical sweet spot.
Considering Older CPUs vs Current Gen
An important question for budget-conscious builders is whether to stick with a proven older-generation CPU like the Ryzen 7 5800X on the AM4 platform, or to invest in a newer AM5 chip.
Pros of older CPUs (e.g., 5800X):
- Often available at lower prices on sale or used markets.
- AM4 motherboards and DDR4 memory are generally cheaper.
- Still strong performers for photo and 4K video editing tasks.
Cons of older CPUs:
- AM4 platform is at end-of-life – no future CPU upgrades.
- DDR4 memory has lower bandwidth than DDR5, which can limit performance in some tasks.
- PCIe Gen5 and native USB4 support are absent, restricting long-term upgrade paths.
Pros of current-gen CPUs (e.g., 9600X):
- Access to the AM5 platform, which will support multiple future CPU generations.
- DDR5 memory and PCIe Gen5 provide higher bandwidth for storage and GPU upgrades.
- Better efficiency – the 9600X runs cooler and uses less power than many older CPUs.
Cons of current-gen CPUs:
- Higher upfront cost for CPU, motherboard, and DDR5 memory.
- Real-world gains over something like a 5800X may not always exist for mid-level workloads.
Bottom line: If you already own an AM4 platform, upgrading to a 5800X or similar can stretch its life at minimal cost. But for new builds, AM5 with a CPU like the 9600X offers longer-term value and upgrade flexibility.
Cooling, Efficiency & Future-Proofing
Since the Ryzen 9600X doesn’t ship with a stock cooler, pairing it with the Thermalright Peerless Assassin 120 SE makes sense. This dual-tower air cooler offers performance well above its price point, keeping temperatures comfortably low while staying quiet.
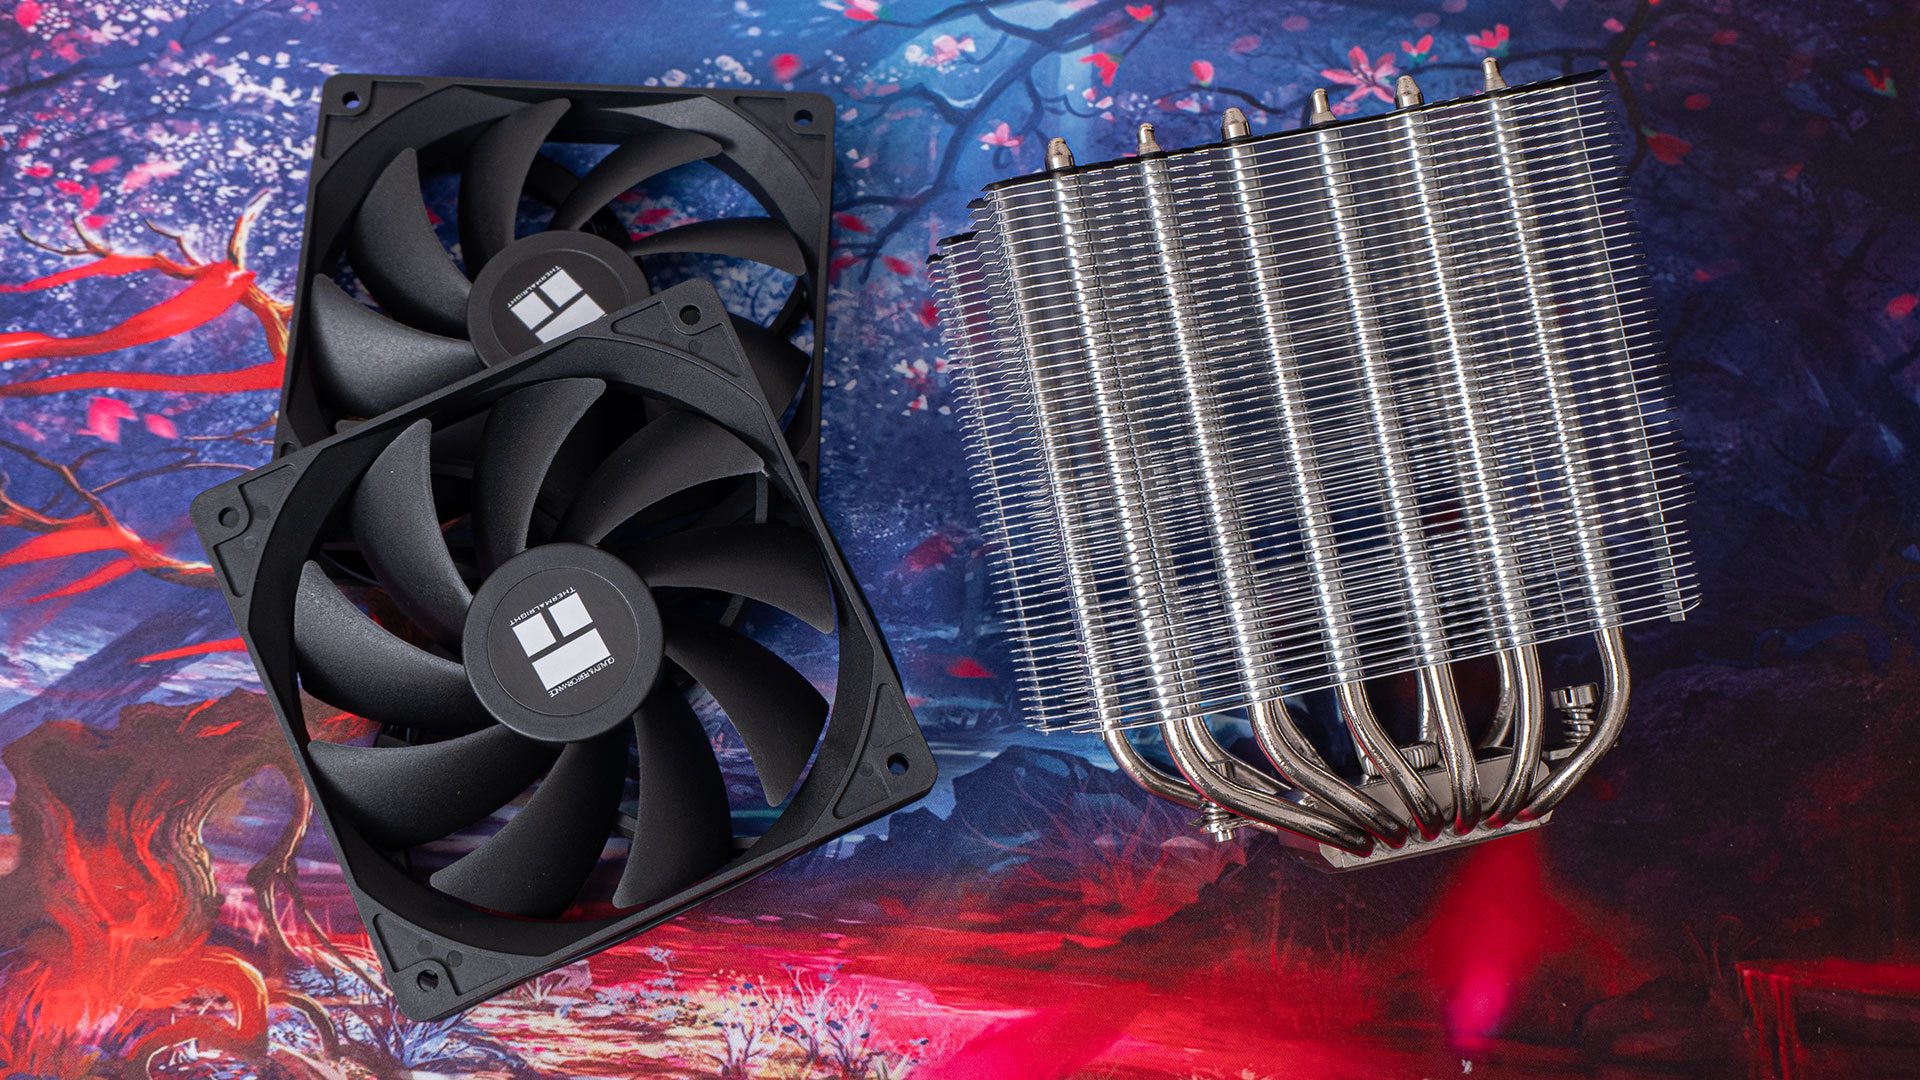
With the Peerless Assassin 120 SE, the emphasis is stability and headroom:
- Quiet, reliable operation during long editing sessions.
- Ample thermal capacity so the CPU doesn’t throttle under heavy loads.
- A platform (AM5) that also supports future CPUs, DDR5, and PCIe Gen5 upgrades when needed.
In short, the CPU provides the performance, and the cooler ensures it can sustain that performance quietly and reliably.
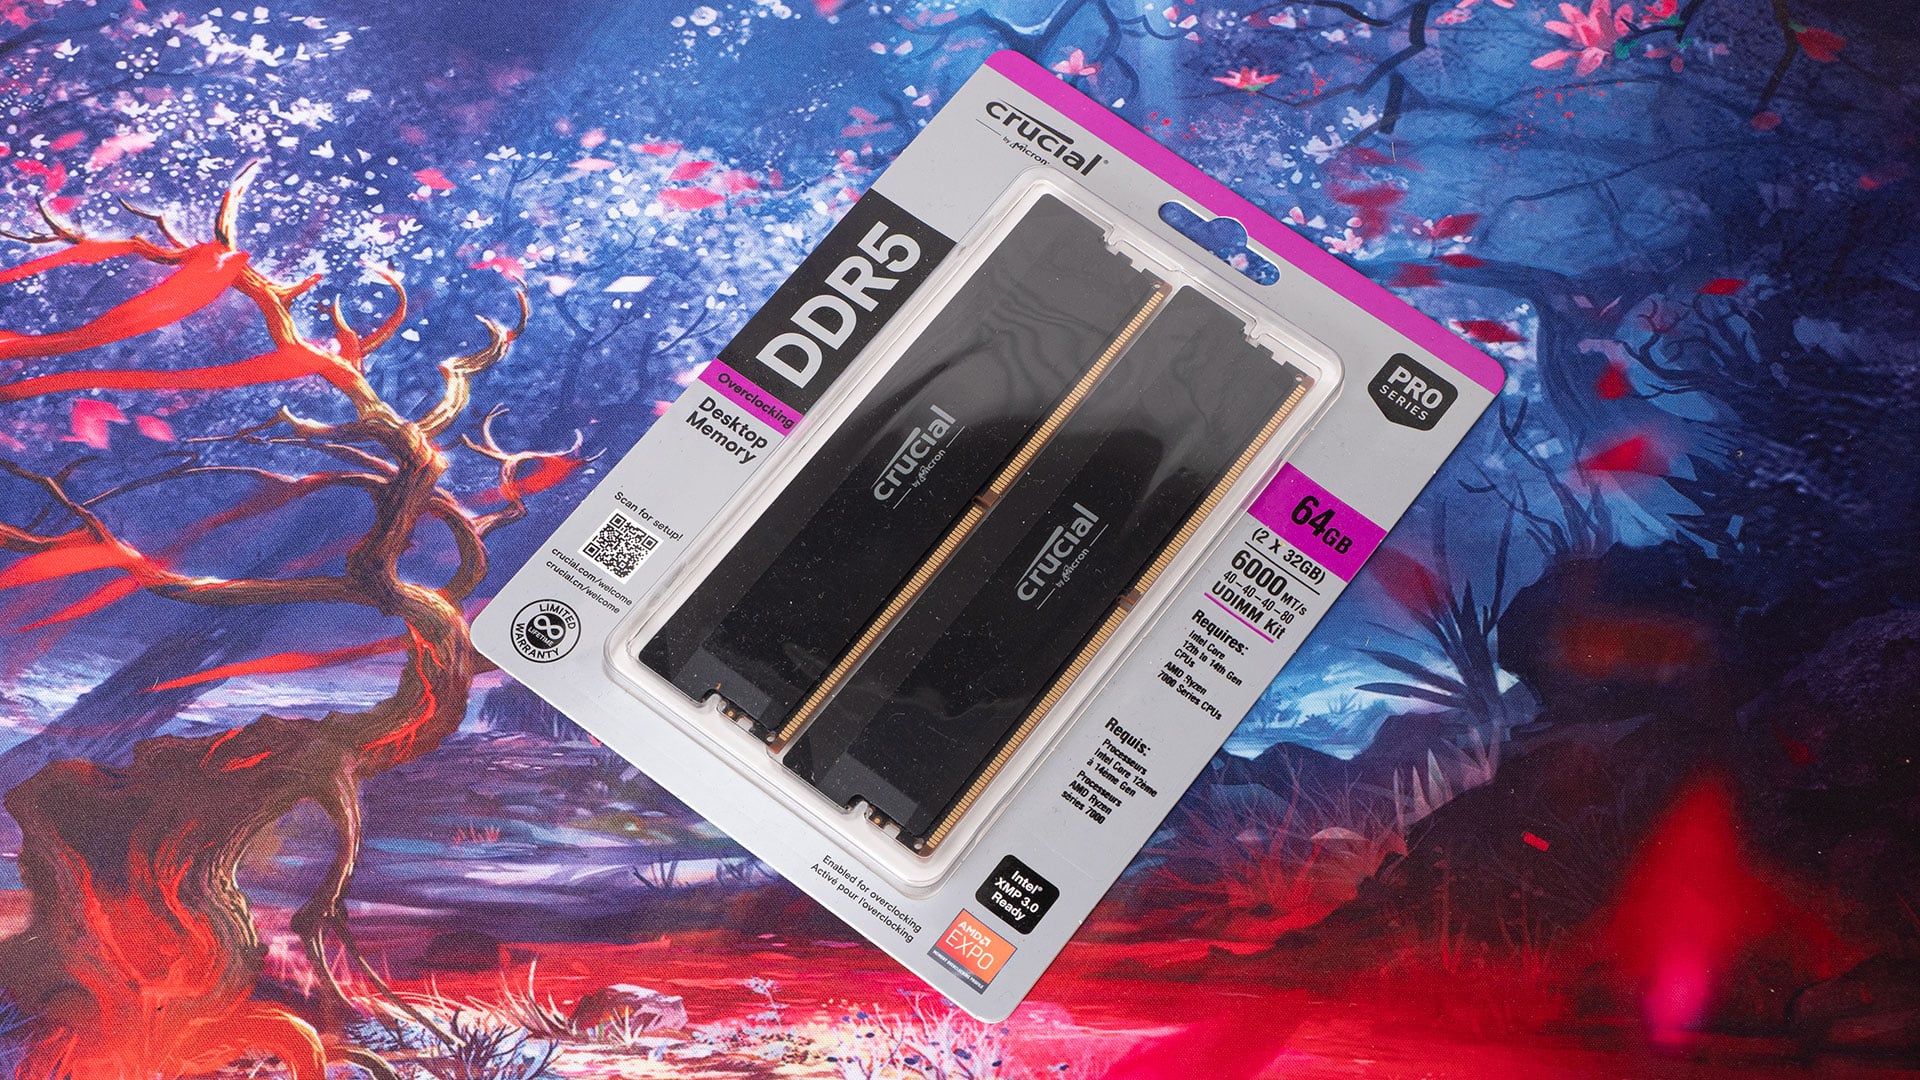
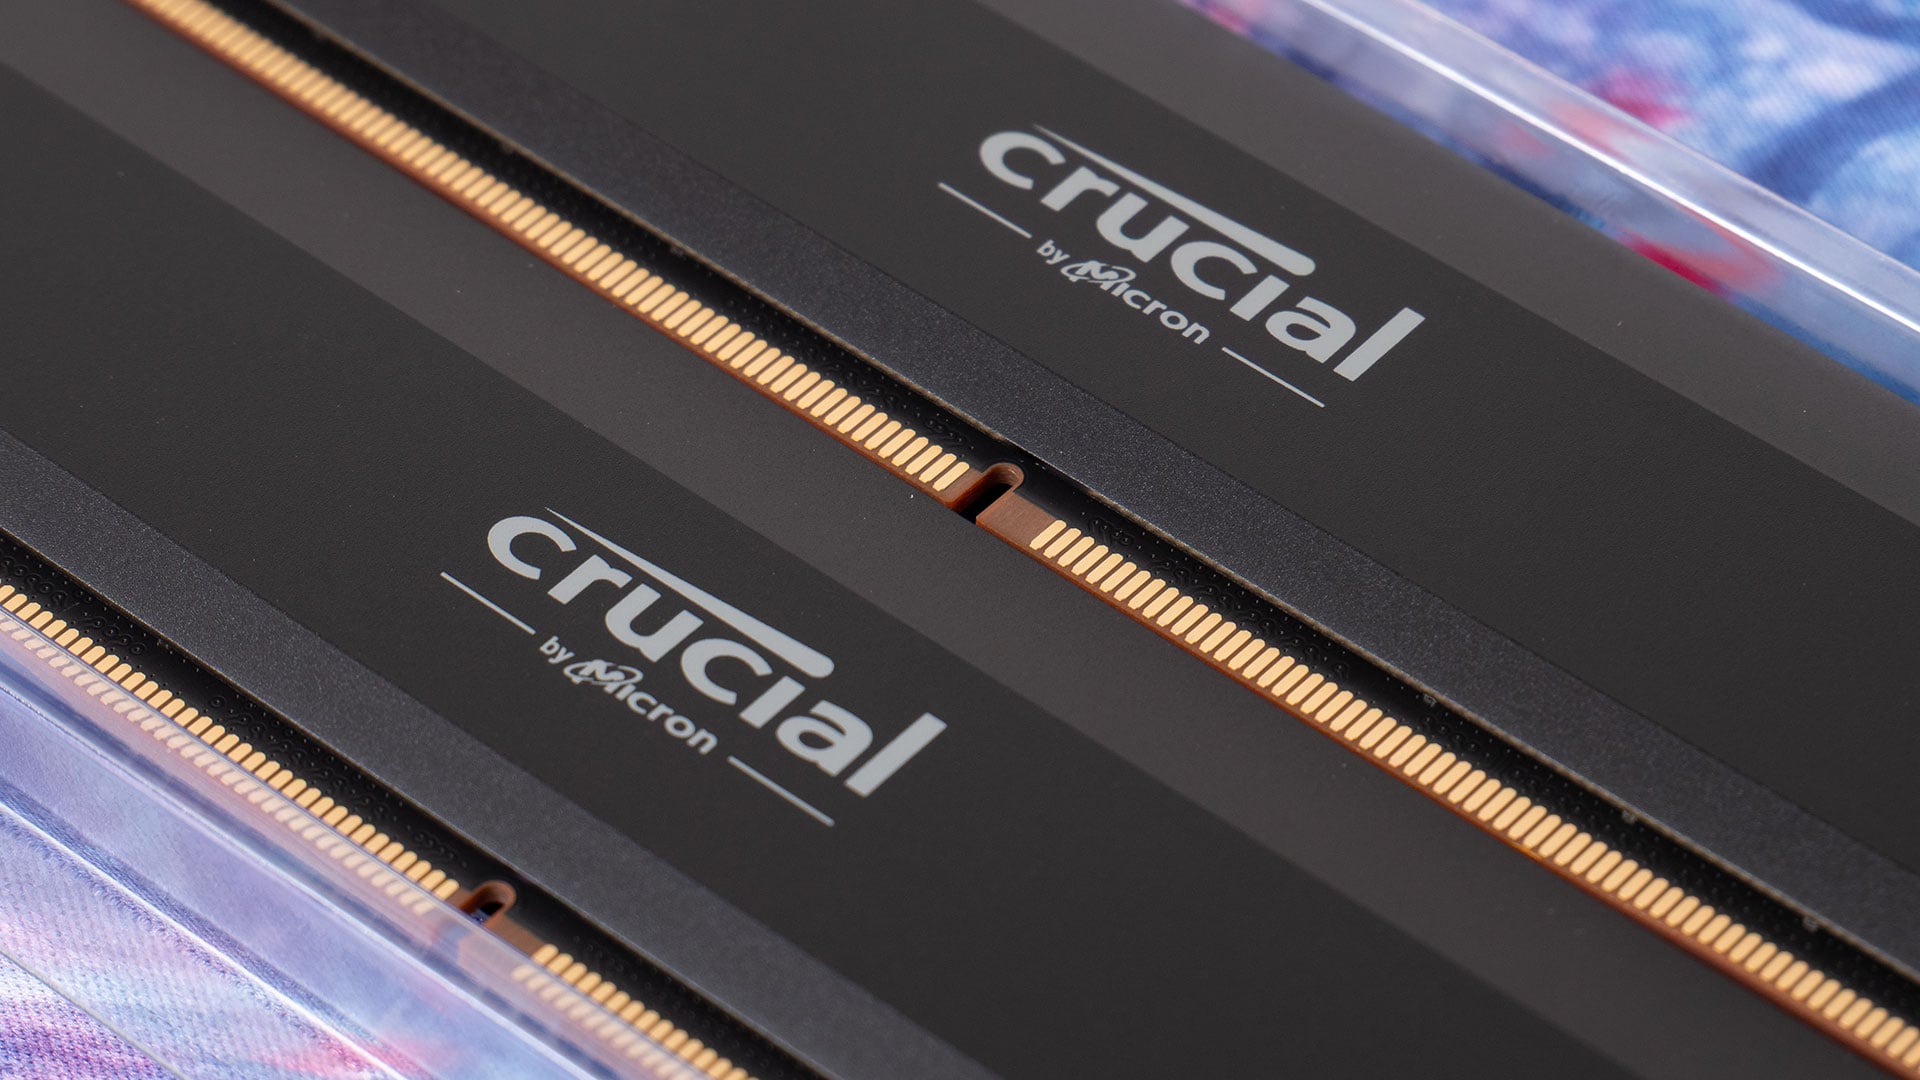
RAM: Memory Matters
This build uses 64GB (2x32GB) Crucial Pro 6000MHz DDR5 RAM, which we consider the sweet spot capacity for creative professionals. RAM size directly impacts how smooth your editing and multitasking experience will be, and the right amount depends on your workload.
Here’s a breakdown of how different RAM amounts affect real-world use cases:
- 32GB: Suitable for lighter photo editing or basic 1080p video projects. However, it quickly becomes restrictive once you start working with large RAW batches, 4K timelines, or multitasking with multiple creative apps. You may encounter slowdowns as the system falls back to disk-based caching.
- 64GB: The balanced choice for most photographers and filmmakers. It provides ample headroom for high-resolution photo catalogues, complex timelines in Premiere Pro or DaVinci Resolve, and comfortable multitasking across editing, grading, and export tasks. This is why we’ve selected it for this build.
- 128GB: Reserved for heavy-duty workflows. If you handle massive video projects, 8K+ footage, advanced visual effects, or extremely large multi-application setups, 128GB ensures no bottlenecks due to memory. While not necessary for most users today, the platform supports it, should your workload demand it.
In short: 32GB can work for entry-level needs, 64GB is ideal for most creatives, and 128GB is a future-proof option for extreme workloads. 128GB gives you the capacity to have multiple applications loaded simultaneously for easy Alt+Tabbing between them.
Storage Strategy That Matches Creative Workflows
Storage is where many creative professionals either overspend or under-plan. The key is to separate your system, projects, and archives so each drive is doing the job it’s best at:
- 2TB Crucial P310 NVMe SSD (OS + Applications)
This QLC-based drive was chosen for the system because OS and applications generate many small reads and writes, not massive sustained transfers. Its cache is unlikely to be saturated in this role, ensuring smooth responsiveness without overspending. - 4TB Crucial T500 NVMe SSD (Active Projects)
This TLC-based drive is used for working media – photo libraries, video timelines, RAW files, and assets. TLC NAND provides stronger sustained read/write performance, which is ideal for handling large video footage and continuous project work. It also strikes a good balance between performance and cost.
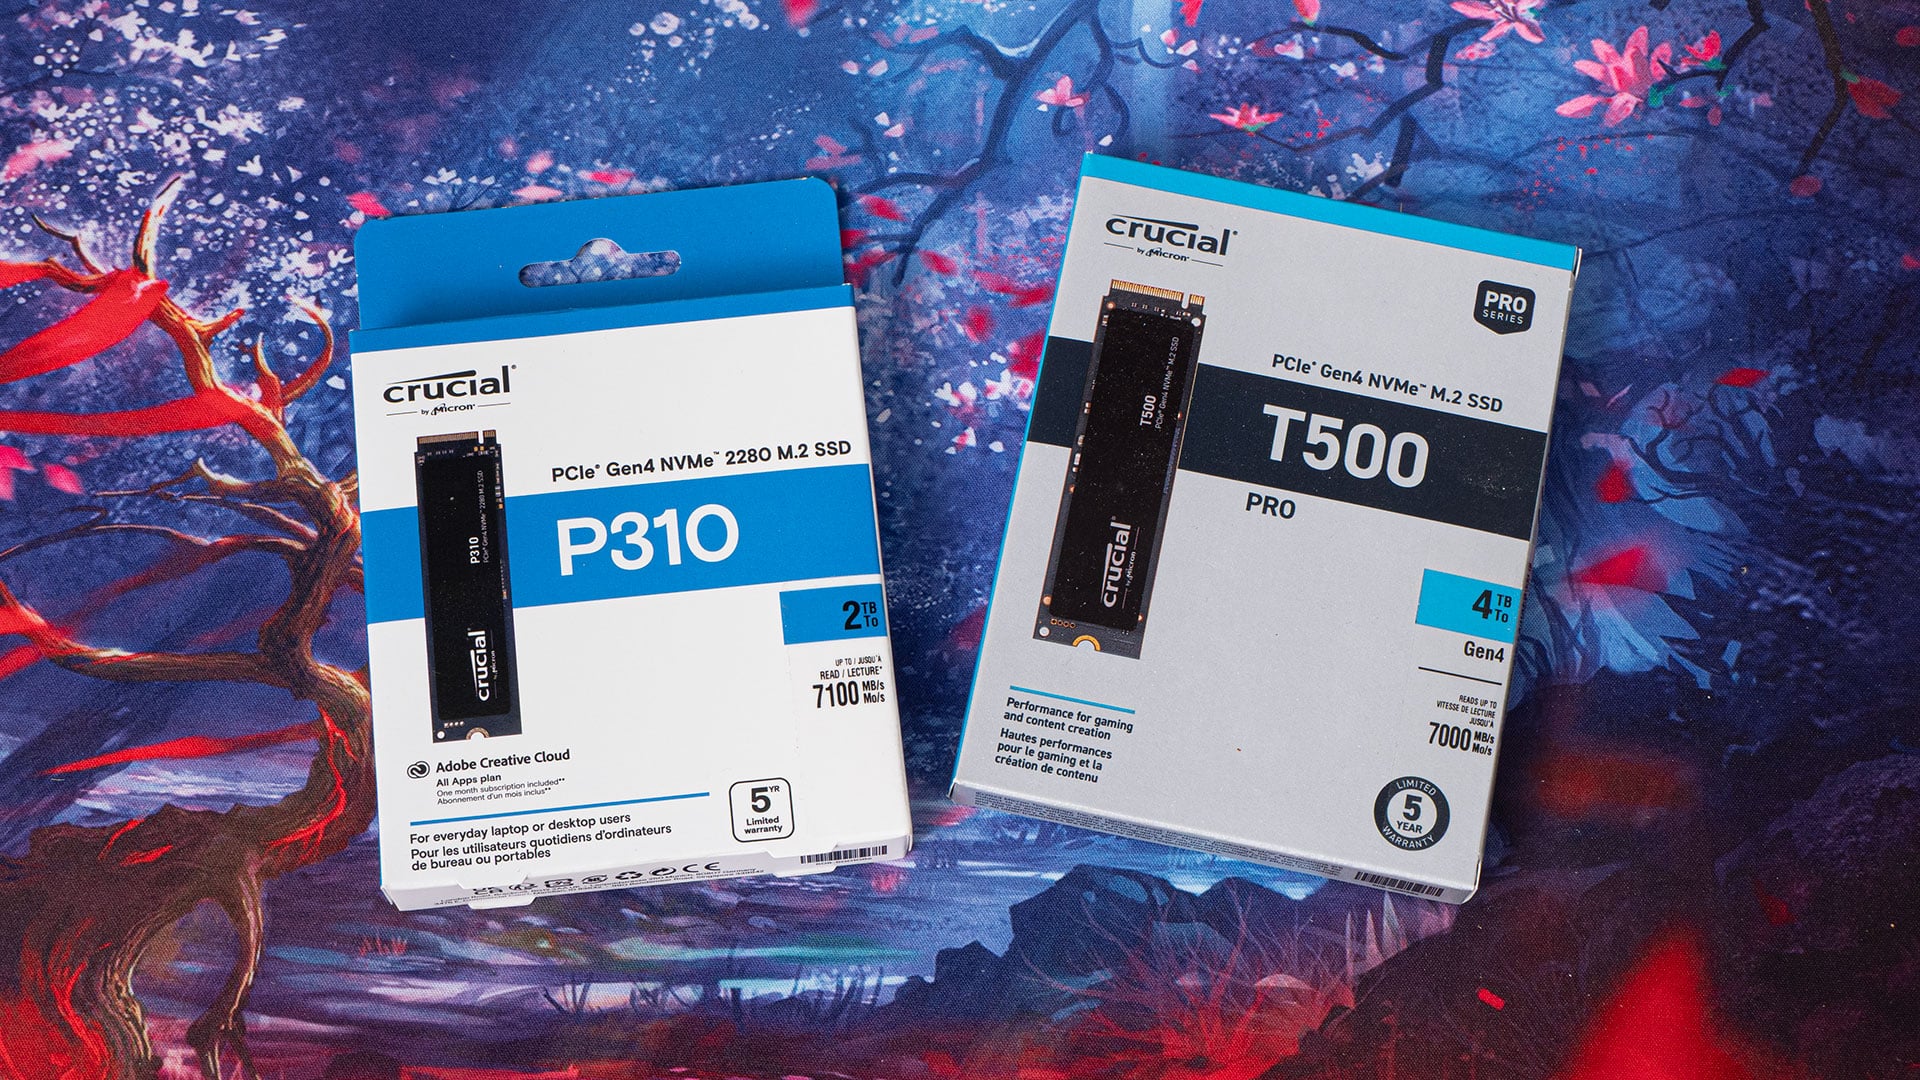
QLC vs TLC NAND simplified: QLC is cheaper but slows down on long writes, TLC costs a little more but keeps speed up even on huge files.
- Optional: 1TB Crucial P310 NVMe SSD (Scratch / Cache)
For heavier workflows in Photoshop, Premiere Pro, or DaVinci Resolve, a dedicated scratch disk can keep temporary render files and cache data separate. This helps avoid filling your system or project drives, reduces wear on TLC drives, and ensures smoother performance during large exports. This doesn’t need to be a huge drive, but having a drive dedicated to the task does help to speed things up. - Optional: NAS or Cloud Storage
Once projects are delivered, they can be moved off your main workstation. Some creatives use a NAS (even repurposing an old PC for the job), while others prefer cloud storage. Just keep in mind that neither a NAS nor a cloud account alone counts as a full backup – you still need at least two additional copies stored in separate places to protect against failure or loss.
This separation of duties keeps performance consistent, avoids bottlenecks, and makes it easy to scale storage as your needs grow.
GPU Considerations for Creative Work
Despite being a little older, the NVIDIA RTX 3060 (12GB) provides excellent value for creatives at a great price. It supports hardware-accelerated encoding (NVENC), speeds up previews and rendering in editing software, and has enough VRAM for most photo and 4K video workflows.
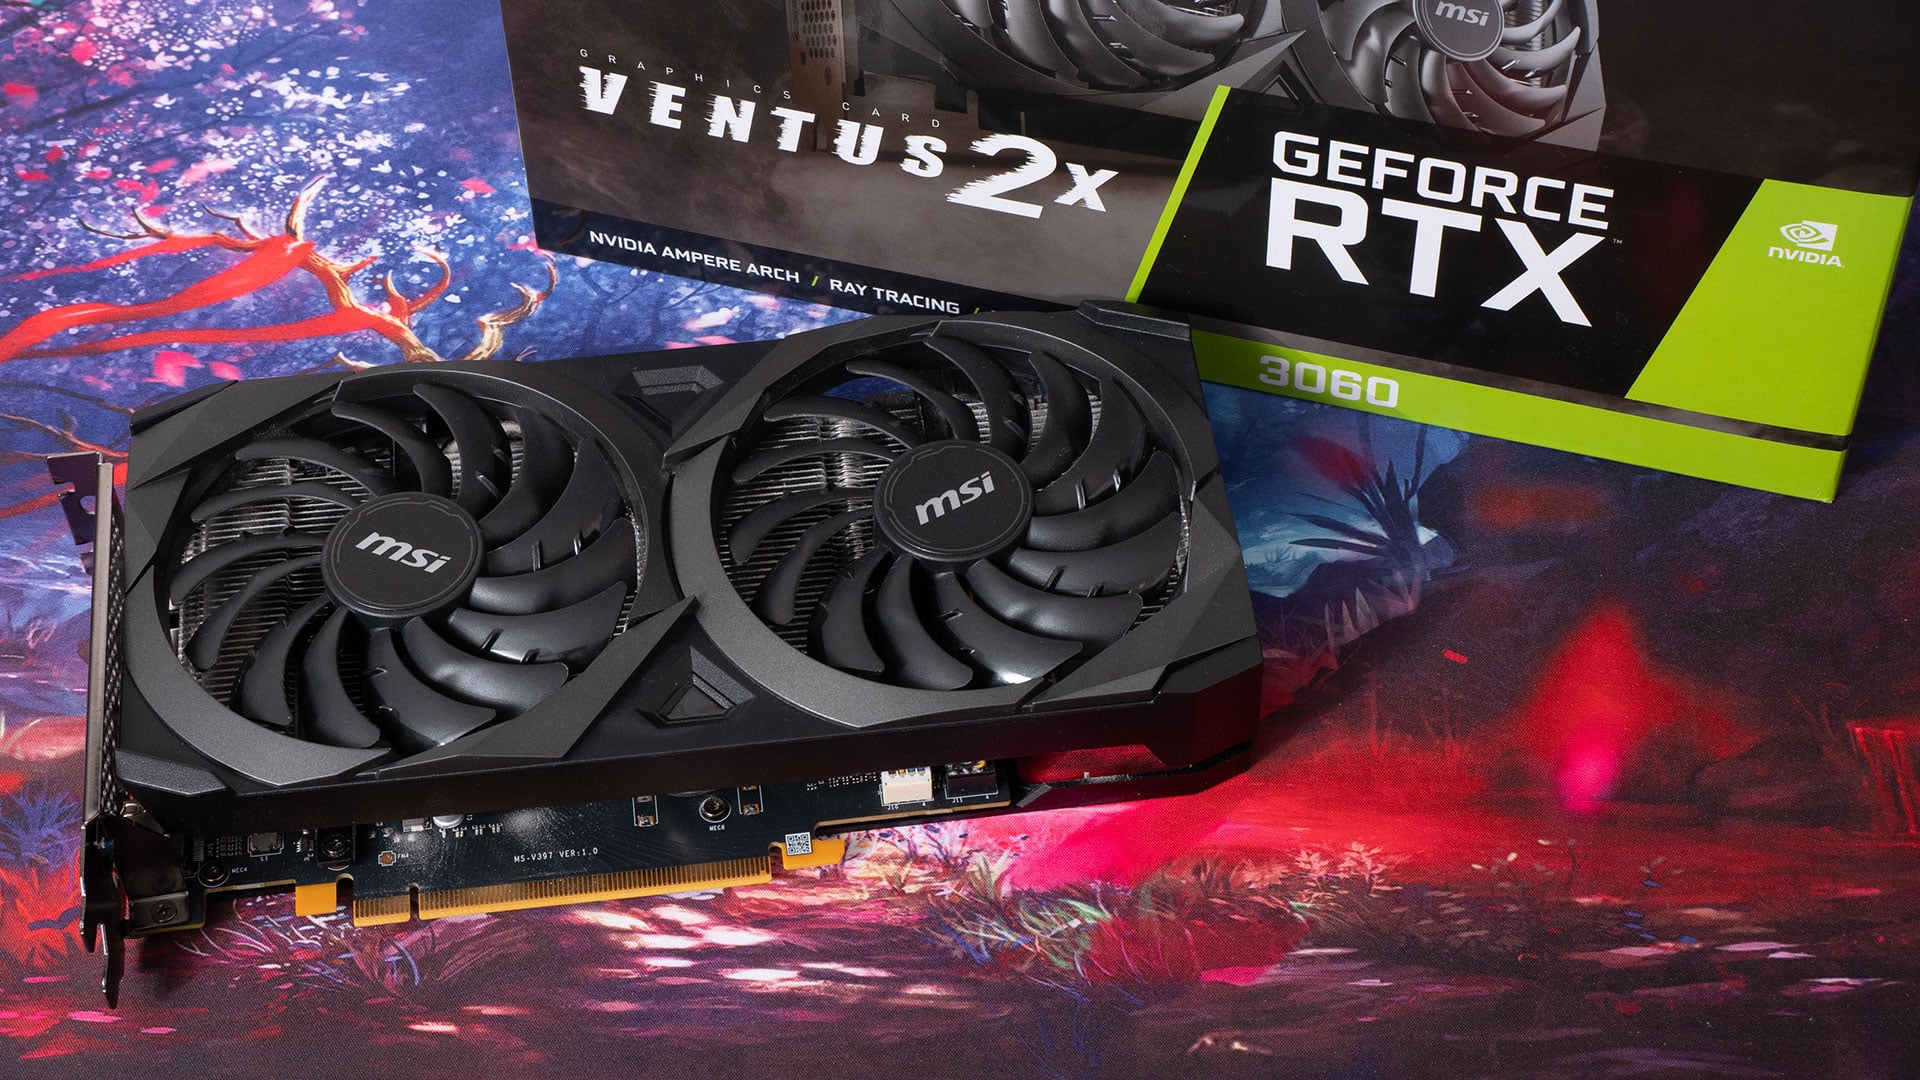
Why VRAM matters: Many modern creative apps (DaVinci Resolve, Premiere Pro, Photoshop) use GPU memory heavily. Cards with only 8GB or less VRAM can struggle with high-resolution textures, large RAW photo batches, or 4K+ video timelines, leading to stutters or forced reliance on slower system memory. The RTX 3060’s 12GB buffer provides a safer margin for complex projects, especially as software demands grow.
Higher-end GPUs deliver more raw power, but unless you’re working with heavy VFX pipelines or 8K video, the performance jump isn’t worth the cost for most users. That being said, if you’re willing to invest a bit more, the newer NVIDIA RTX 5070 (12GB) is a strong alternative. It offers roughly 70% more performance than the 3060, while keeping the same VRAM capacity. For those with heavier editing needs or who want longer-term headroom, it’s a worthwhile consideration.
A note on AMD GPUs: While AMD graphics cards are very good, most software companies typically focus on optimising for NVIDIA first. So, even though the difference in performance for a given NVIDIA card vs its price-equivalent AMD card might be negligible for some uses, they could be night and day for others – especially if it’s AI-related.
Potential Upgrade Paths
While this build is designed to deliver great performance on a reasonable budget, there are clear upgrade paths if your needs grow or you want to extend the system’s life. These aren’t upgrades you should feel pressured to buy immediately – consider them a menu of possibilities. They’re ways to expand when you truly need it, whether that’s more storage, more RAM, or a stronger GPU:
- CPU Upgrade (Ryzen 9 9950X3D or similar): This upgrade adds significantly more cores and cache, delivering substantial boosts for multi-threaded workloads such as heavy batch exports, complex project timelines, and effects-heavy rendering. While many modern editing programs lean heavily on the GPU, CPU upgrades still matter for tasks such as background encoding, multi-application workflows, and anything else that scales with core count.
- RAM Upgrade (128GB DDR5): Beneficial if you work with extremely large photo catalogues, massive video timelines, or run multiple demanding applications at once.
- PCIe Gen5 NVMe SSD: Faster sustained read/write speeds help for scratch disks, which are read and written very often and very quickly, and when working with very large 8K video files or complex timelines. Useful if you regularly handle extreme throughput workloads. Do be aware that most motherboards only support a single PCIe 5.0 M.2 NVMe SSD at full speed.
- GPU Upgrade (NVIDIA RTX 5070 (12GB) or higher): Provides stronger performance for GPU-accelerated editing, colour grading, and AI-assisted creative tools. Another option is to look at older, higher-end cards, such as a used RTX 3090 (24GB). For roughly the same price as a new RTX 5070, it can offer more raw power and VRAM capacity. However, the downsides are significant: reduced power efficiency, increased heat, and a lack of newer architectural features of the 5000-series cards. This trade-off makes it a viable option for those who prioritise VRAM and raw compute, but less ideal for efficiency and future-proofing.
- USB4 Expansion: If high-speed external storage or modern peripherals are part of your workflow, consider adding a PCIe USB4 expansion card. Be sure to check your motherboard’s compatibility first, since not all X670/X670E boards support this option. Alternatively, switching to an X870E motherboard provides native USB4 support out of the box, ensuring maximum bandwidth and future-ready connectivity.
- Water Cooling Consideration: As you upgrade to more powerful CPUs or GPUs that run hotter, traditional air cooling may need louder, faster fans to keep up. This can create unwanted noise, especially if your PC is in the same room where you record voiceovers, podcasts, or YouTube videos. A custom or all-in-one water cooling setup can handle higher heat loads more quietly, though it’s not an operation for the faint of heart. It’s worth considering if silence is as important to your workflow as raw performance.
Each of these upgrades offers targeted benefits, so you can expand the system gradually as your creative needs increase.
Cost Breakdown
Prices vary depending on region and retailer, and many of these parts frequently go on sale. Treat the following as a snapshot rather than a fixed cost.
Here’s the approximate cost breakdown for this build at the time we acquired these components:
- Case: MSI MAG Forge 120A Airflow Mid-Tower – $99
- PSU: Corsair RM650e (2025 Edition) – $105
- Motherboard: MSI X670E Gaming Plus WiFi – $209
- CPU: AMD Ryzen 5 9600X – $199
- Cooler: Thermalright Peerless Assassin 120 SE – $35
- RAM: Crucial Pro DDR5-6000 64GB (2x32GB) Kit – $169
- Storage (OS/Apps): 2TB Crucial P310 NVMe SSD – $120
- Storage (Active Projects): 4TB Crucial T500 NVMe SSD – $345
- GPU: NVIDIA RTX 3060 (12GB) – $299
Total: ~$1,580
As you can see, building a solid workstation doesn’t have to cost the earth. With smart part choices, you can achieve professional performance without overspending. Sure, it’s still not what one would call a cheap PC, but it’s not ridiculously expensive, either, especially for a solid workhorse built to generate an income.
Note: Prices accurate as of the time of compiling. But it’s worth remembering that prices fluctuate often on computer components. RAM, for example, has seen a massive increase in October 2025, almost doubling on some kits.So, do some shopping around to find the best prices.
Other Things You’ll Need to Buy
A workstation isn’t complete without the peripherals that let you actually use it. While these aren’t part of the “core build,” they can make just as much difference to your daily workflow as the main components:
- Keyboard and Mouse: Choose something comfortable for long editing sessions. Mechanical keyboards and ergonomic mice are good options if you spend hours working. I use an old ASUS Strix Tactic Pro that I got in 2018, and it still works perfectly so I’m sticking with it.
- Monitor: A colour-accurate display is essential for photo and video work. Look for an IPS or OLED panel with good colours (at least 100% sRGB/Rec. 709) and sharp detail – ideally at least 1440p or 4K resolution. This helps ensure your edits look consistent across different screens and in print. We haven’t included a monitor in this build as there’s such a huge range out there now and many people will likely choose to stick with the monitor(s) they already own.
- Graphics Tablet: A Wacom, XP-Pen, or Huion tablet adds precision for photo retouching, masking, and detailed video adjustments. I would suggest that these days, you’ll want to get a display tablet, not just a plain graphics tablet. Having the built-in display makes things so much easier when it comes to retouching and navigating software.
- Creative Control Surfaces: Devices like the Logitech MX Creative Console, the Loupedeck CT (if you can find one), or the Elgato Stream Deck can streamline editing with customizable dials, sliders, and buttons mapped to your favourite software.
We’re not making specific recommendations for these peripherals here because the options are vast, and the best choice depends on your own use case and personal preferences. You may also already own these items and are perfectly happy to stick with them on your new build.
The key is to pick tools that genuinely support your workflow, not just whatever’s trending.
The Operating System
Despite Microsoft doing everything they can to force their spyware on its Windows users, many of us are locked into it due to the nature of the tools we use. Adobe’s non-web tools are Windows and macOS only, and there still isn’t really a solid Linux alternative to Photoshop – no, GIMP isn’t a solid alternative.
While there are either Linux versions of popular software for creatives, such as DaVinci Resolve, Blender and Reaper, Linux still isn’t quite ready to become a mainstream creator desktop OS – unless you’re happy to skip the Windows-only apps.
If you’re not sure if you want to try Linux, install it on your fresh PC and give it a go for a few days or weeks. If you don’t like it, or it can’t give you what you need, you can always wipe it and install Windows. Or, add another SSD and dual-boot, with Windows on one drive and Linux on the other.
If you do put Windows 11 on your PC, go with Windows 11 Professional, so you’re not tied to a Microsoft account, and can disable many of the auto-update and spyware features.
Final Thoughts
For photographers and filmmakers, the smartest PC isn’t the most expensive one – it’s the one that matches your actual workflow. By focusing spending where it matters and skipping hype-driven upgrades, you end up with a machine that works hard without draining your budget.
This build demonstrates that you don’t need top-tier parts to get professional results. A mid-range CPU, plenty of RAM, fast but sensible storage, and a balanced GPU are more than enough for smooth editing and reliable day-to-day work.
Sure, it’s not the cheapest PC out there, but over the long term, it is the most cost effective, as you can easily upgrade as you go.
The AM5 platform gives you confidence for the future. If your needs grow, you can add more RAM, upgrade the GPU, or step up to a stronger CPU without replacing the entire system. Think of this machine as a strong foundation. It’s capable for photo and 4K video today, quiet and efficient for everyday use, and flexible enough to grow with your creative ambitions.
That balance – power where you need it, efficiency everywhere else – is what makes this a smart, budget-friendly build for real creatives

John Aldred
John Aldred is a photographer with over 25 years of experience in the portrait and commercial worlds. He is based in Scotland and has been an early adopter – and occasional beta tester – of almost every digital imaging technology in that time. As well as his creative visual work, John uses 3D printing, electronics and programming to create his own photography and filmmaking tools and consults for a number of brands across the industry.
Related Posts
 Quick DIY Tips To Boost Your Props And Set Building Game While Working On A Budget
 Tips and tricks for building a DIY home studio on a budget
 [Strong Graphics] Big Ideas, Small Budget – How To Create Fun Conceptual Images On A Small Budget
 Home Studio Photography: Your Complete Guide To Building A Photography Studio At Home
Join the Discussion
DIYP Comment Policy
Be nice, be on-topic, no personal information or flames.
2 responses to “Building a Computer on a Budget for Photography and Video”
my takeaway here is the modular PSU. thanks for that.
They’re a life changer, lol. These days, especially when we’re not loading PCs with HDDs and CD/DVD/Blu-Ray drives anymore, not having those extra cables taking up space in the case and just hanging all over the place makes life so much easier! :)