


Loupedeck CT review: a mighty editing tool for filmmakers
Jan 17, 2023
Amit Maymoni
Amit Maymoni is a filmaker based in Tel Aviv, Israel. He runs a boutique production house – Apex Media – specializing in commercial filmmaking. He is a seasoned filmmaker with 17 years of experience, has produced videos for local and global brands like DJI, Rapyd, and others, and shot festivals worldwide, including Tomorrowland, EDC Vegas, and Green Vally brazil
Share:

If you got here to decide if you want to buy the Loupedeck CT, let me share a TL;DR before I go into the in-depth review: It’s the piece of gear you needed and didn’t even know you wanted.
If you’ve never heard about Loupedeck, they are a company that makes keyboards with knobs and buttons that are dedicated to editing. Their gear works with both photography (e.g. Photoshop, Luminar) and video software (e.g. Premiere, Resolve). For me, I was out to test if the Loupedeck CT can help my video editing workflow.
[Related: One up your editing game by using a gaming mouse]
What is a Loupedeck CT?

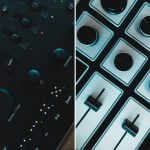
If you look from high enough, the Loupedeck CT is a keyboard. But it’s not just any keyboard, it’s a keyboard dedicated to making your workflow better. This is why instead of standard keys, it has six knobs, twelve buttons, a huge rotary dial, and eight more profile buttons. Yea, not your standard keyboard. In fact, the only thing that is common between the Loupedeck CT and a “regular” keyboard is the USB-C cable that connects the keyboard to your computer.
Using the Loupedeck CT
To make use of all those knobs, dials, and buttons, you need to tell the Loupedeck CT the program it works with. This is called a profile, and the CT has eight quick profiles to choose from. It comes with preconfigured profiles for Photoshop, Adobe Premiere, DaVinci Resolve, Lightroom, a “Generic” desktop workflow, and a bunch of others. I mostly work with Adobe Premiere, so I started with the CT default Premiere profile.


You know how memorizing all the keyboard shortcuts is one of the biggest pains? As an added bonus, the graphics on the central buttons change as you change the profile or even use the shift and control keys. This is an incredible tool to help you memorize the shortcuts “on the go”, instead of using an external cheat sheet. After a while, it just becomes a habit.
Aside from assigning functions to the different buttons, you can also assign macros or even change the graphics on the big dial and the function buttons. See if you can spot the DIYP logo here.

As of now, the Loupedeck CT is an integral part of my workflow. But to help you understand how it actually works and saves time, here are two of my most common use cases.
Loupedeck CT use-case I- culling
When I get back from a shoot, I unload and back up all the materials and then start culling and selecting the footage I will use. Pre CT, I used to do with the mouse and keyboard. This is an OK process, I mean, I survived so far, but the Loupedeck CT made a big change to this process to be faster and more accurate.
I use the big dial to move through the timeline. And some combos to shrink and expand the timeline. This is a big advantage over using the mouse and keyboard for two reasons: 1. It is single-handed with much better speed control. And 2. it is smoother, so I don’t accidentally skip parts or fiddle with mouse positioning. I defined one button for cutting and another button to “lift” the selected shot into another track.
Loupedeck CT use-case II – color grading
This is the biggest change that the CT brought to my workflow. I use each of the knobs to control a different grading aspect: highlights, shadows, saturation, and so on. Using the knobs, I can really fine-tune the process without moving my eye from the monitor. I know this may sound trivial, but I am constantly getting better grades and take less time to grade this way. I apologize for the cliche’, but this was a game changer to my workflow.
Loupedeck CT use-case III – editing on a plane
The last thing that impressed me was the convenience of the device. I fly a lot and work under tight deadlines, so I sometimes have to edit on the plane. (oh, the joys of freelancing). I found the CT in tandem with my MacBook Pro to be an incredible combo for flight-editing. The footprint of the Loupedeck CT is smaller than the footprint of the Mac’s keyboard, and something about having a tactile interface was just faster and easier to work in a confined space.
As the saying goes, you get used to good things fast. It took me very little time to get used to working with keeping my eyes on the monitor and not having to look at the keyboard. In fact, when I work without the Loupedeck CT, my workflow feels a bit crippled now.
The learning curve
If you are considering moving to a Loupedeck CT process, be aware there is a learning curve. Actually, two of them. Both are relatively small hurdles, but it’s something to consider if you are out to get one.
The first learning curve is letting go of your old habits. The “standard” shortcuts; your custom keyboard macros; and in my case, “forgetting” all the custom functions I configured in my G502 gaming mouse. It takes a while to move from the old editing habits to using the Loupedeck CT pad. The results will reward you with a faster process, but it does take time.
On the flip side of this, if you never learned the keyboard shortcuts to begin with (I’m talking to you, DaVinci Resolve!), the Loupedeck CT means you’ll never have to and will be a dream to learn in comparison.

The other learning curve has to do with configuring the Loupedeck CT to your specific workflow. Right out of the box, the Loupedeck CT has an impressive amount of profiles. And the ones that I tested are not bad. But they are also not specific to my workflow. Get ready. Changing the keys is possible, but the software leaves a bit to be desired. For one, it is overwhelming. There is a lot of information in there, and I think it can be better organized. Secondly, making changes is not as smooth as I thought it would be. There is a bit of stuttering and jittering every time you make a change. In comparison to configuring a macro on my G502 mouse, it was not as smooth. It is not a big deal and has no impact on actually using the keyboard, but if you have a lot of configurations to do, it can get a bit frustrating.
Final thoughts
The Loupedeck CT is an amazing device. I found it extremely useful for video, but I think Lightroom (and other creative) users will find a similar experience. It is not a cheap device at $549.00, but it will save you quite a bit on editing time. Be warned, it is hard to go back, though.

Amit Maymoni
Amit Maymoni is a filmaker based in Tel Aviv, Israel. He runs a boutique production house – Apex Media – specializing in commercial filmmaking. He is a seasoned filmmaker with 17 years of experience, has produced videos for local and global brands like DJI, Rapyd, and others, and shot festivals worldwide, including Tomorrowland, EDC Vegas, and Green Vally brazil


Join the Discussion
DIYP Comment Policy
Be nice, be on-topic, no personal information or flames.