


Photo Editing
Hollywood Color Meets Still Photography: DaVinci Resolve 21 is Here
Apr 14, 2026
Alberto Lima
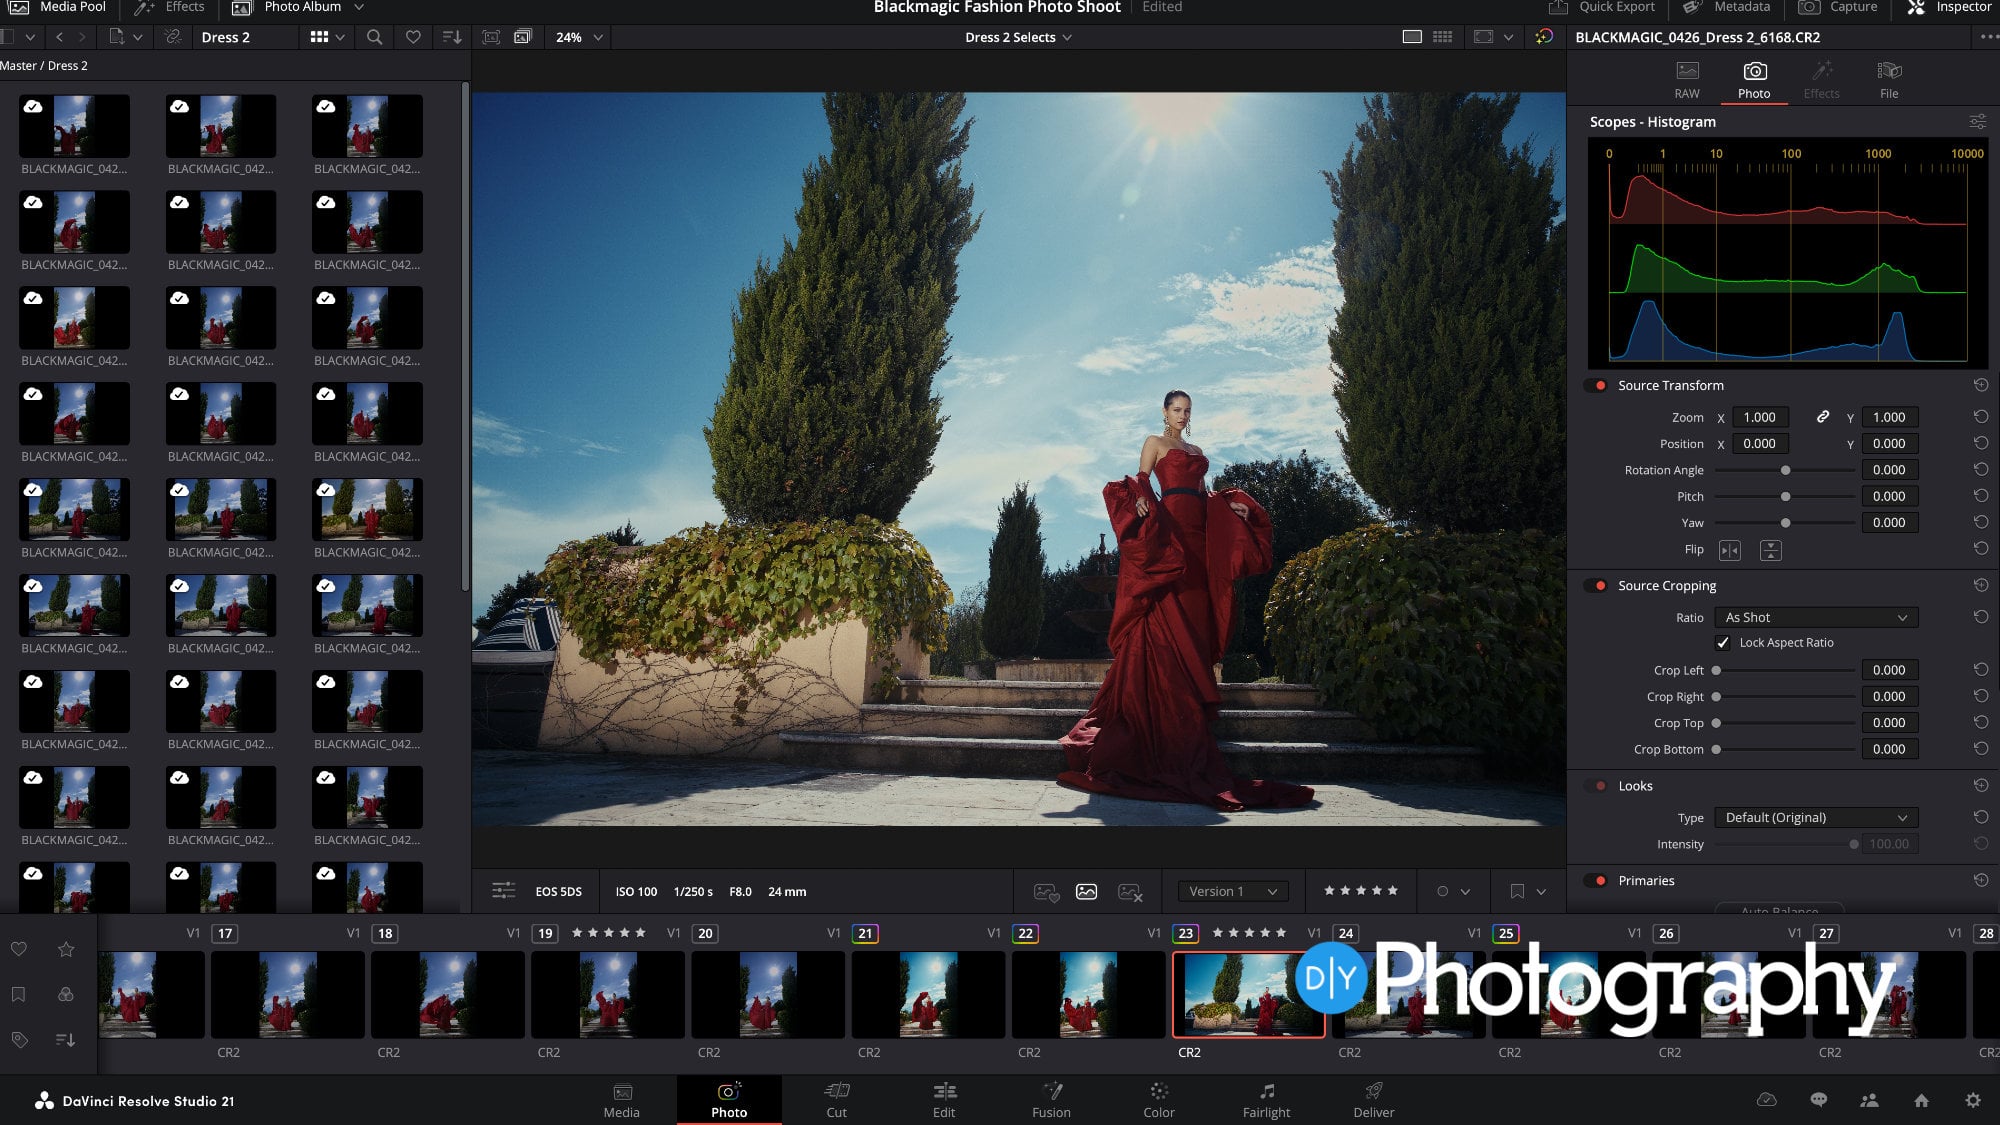
Gearing up for NAB 2026, Blackmagic Design has just pulled the curtain back on DaVinci Resolve 21, and it’s safe to say the line between “cinematographer” and “photographer” hasn’t just been blurred—it’s been professionally erased.

UK Patients Use AI-Edited “Fat” Photos of Themselves to Get Weight-Loss Jabs
Jan 9, 2026
Anzalna Siddiqui
A little bit of digital skill can change our reality. When you use a photo editor, you’re often looking to fix a blemish or adjust…

Photoshop in ChatGPT: Can AI Really Replace Traditional Photo Editing?
Jan 8, 2026
Anzalna Siddiqui
AI is predicted to dominate the world, but have you considered its role in your editing process? Adobe and OpenAI have joined forces, introducing a…

Zoner Studio Expands Photo Editing With AI Tools Focused on Speed and Control
Jan 5, 2026
Alysa Gavilan
Zoner Studio’s update adds offline AI tools for faster photo selection and image resizing, prioritizing speed, realism, and workflow efficiency.

How AI Photo Editing Tools Transformed Workflows in 2025
Dec 29, 2025
Alysa Gavilan
In 2025, AI-powered photo editing tools revolutionized workflows with smart masking, style transfer, upscaling, and context-aware enhancements.

Photo Editing Mistakes That Make Your Photos Look Fake
Nov 9, 2025
Anzalna Siddiqui
There’s usually that one image in our collection that screams “edited” and feels fake. It’s disappointing when you aim for a natural look that reflects…

Lightroom’s New Color Variance Slider: A Game-Changer for Photo Editing
Nov 3, 2025
Anzalna Siddiqui
When Adobe reveals new features at their Max conference, as a loyal Lightroom user, you sit there hoping for something that could really enhance your…

Affinity Just Went Free Forever, But Is It Too Good to Be True?
Oct 31, 2025
Alex Baker
At the beginning of the month, Affinity pulled all of its apps from the website and teased us that ‘something big’ was on its way….

Building a Computer on a Budget for Photography and Video
Oct 27, 2025
John Aldred
For creative professionals, a high-performance computer is essential – but it doesn’t need to cost thousands more than it should. With the right balance of…

A Real Whodunit: Who Killed the Camera? The AI Did It!
Oct 27, 2025
David Prochnow
[Please note: all photographs in this article are fake AI-generated images.] Dateline today-breaking news: the camera was found dead, today. The murder weapon? Artificial intelligence….