How to turn 360° footage into Tiny Planets using Adobe Premiere Pro
May 31, 2017
Share:
One of my favourite things to come out of the whole 360° camera thing is tiny planets. They’re getting pretty popular, too, almost to the point of cliché, but I still rather enjoy them. They’re often simple just fun and unusual. Sometimes, though, they can add an intriguing element to a story that would otherwise not exist.
For many compact 360° cameras, mobile apps are the typical solution. But if you want to do something more serious, you usually want to step up to the desktop. In this case, Adobe Premiere Pro CC 2017, and Justin Odisho is going to show us how it’s done.
Justin uses the GoPro Omni, GoPro’s rig consisting of half a dozen GoPro Hero 4 Black cameras. He doesn’t go over how all this lot stitches together, because it goes beyond the scope of this video. It’s also not that interesting to people using a regular 360° camera, either. Plus, he’s already covered that in a previous video. This is actually the third part of a series, but this process can be adapted to virtually any 360° camera.
The only real advantage offered with the GoPro Omni system is increased resolution. While it’s difficult to keep up with the detail of six stitched 4K cameras, 360° cameras are starting to close the gap. The GoPro Omni practically forces the use of a desktop system for editing. But the desktop does offer advantages for all 360 shooters. Specifically, decent editing applications. This tutorial uses the GoPro VR plugins, which come with AutoPano Video Pro, for Adobe Premiere Pro.
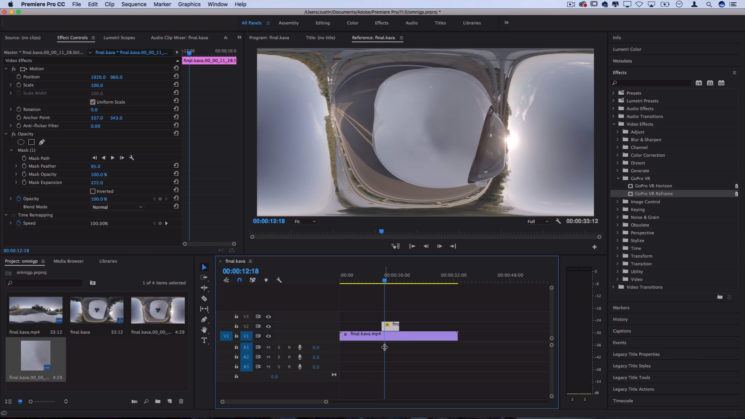
The first thing to do, though, is to load your footage up into Premiere Pro. With the GoPro VR Horizon, you can adjust what you see at the centre of the frame. Justin points it toward the suction cup mount that’s holding the rig to his car. Exporting this out to Photoshop allows Justin to create an image overlay which hides this from view in the final footage.
If you’re having blending issues trying to mask out your tripod, suction cup mount, or whatever else the camera’s sitting on, you can always just cover it with a logo. Once you’ve figured out a way which best hides it for you, though, you only really need to change one parameter. That’s the field of view in the GoPro VR Reframe plugin.
The field of view at which you start and stop is going to depend on what you like the look of. Lower numbers will simulate a more traditional camera lens. Higher numbers will send the lens really wide going from one side of the sky to the other, creating your tiny planet. You’ll also want to adjust the pitch of your camera to -90° to make it point straight down, too. otherwise, you’re probably going to end up looking at a tunnel.
One of the major benefits of using application like Premiere Pro is that you can set keyframes. These allow you to set various settings that go from one value to another gradually throughout the clip. This allows you to create smooth transitions from a regular camera angle to tiny planet and back again.
That’s pretty much all there is to creating the tiny planet. From here, it’s a case of experimenting to see what gives you something you like. That will depend on your personal tastes, the type of footage you’re working with, as well as how closely some objects are to the camera in relation to the rest of the environment.
There are, of course, other ways to create tiny planets, but using Premiere Pro offers up many options that mobile apps simply can’t provide. Although at around $600 for the AutoPano Video Pro software, it’s not the cheapest.
John Aldred
John Aldred is a photographer with over 25 years of experience in the portrait and commercial worlds. He is based in Scotland and has been an early adopter – and occasional beta tester – of almost every digital imaging technology in that time. As well as his creative visual work, John uses 3D printing, electronics and programming to create his own photography and filmmaking tools and consults for a number of brands across the industry.







Join the Discussion
DIYP Comment Policy
Be nice, be on-topic, no personal information or flames.
One response to “How to turn 360° footage into Tiny Planets using Adobe Premiere Pro”
Seems a little gimmicky.