


Loop Lighting Tutorial: Flattering Light for Any Face Shape
Dec 3, 2025
Darlene Lleno
Darlene Lleno brings a unique perspective to DIY Photography as someone who grew up surrounded by camera gear but chose words over lenses. With five years of writing experience, she specializes in photography content that’s both technically informed and genuinely passionate. Growing up with a photographer twin brother meant camera talk was everyday conversation in her household. While he mastered capturing moments, Darlene discovered she preferred being the subject and the storyteller behind the scenes. As a travel enthusiast and mother of two, she understands the importance of preserving life’s precious moments. When not exploring new destinations or writing for DIY Photography, you’ll find her reading or tending to her garden. Her approach to photography writing is refreshingly authentic, she may not be behind the camera, but she knows exactly what it takes to help others capture the shots that matter most.
Share:

Loop lighting creates gorgeous portraits that work for anyone. This technique produces a small curved shadow from the nose. The shadow points down toward the mouth corner. It gives faces natural depth without looking harsh. You can use loop lighting on round faces, angular faces, or anything in between.
Why Loop Lighting Works So Well
Loop lighting stands out among portrait lighting methods because it’s so versatile. The technique gets its name from the loop-shaped shadow on the cheek. That shadow sits opposite your light source. It adds dimension while keeping things soft and natural.
Professional photographers use loop lighting for editorial work and headshots. It flatters nearly everyone you photograph. Unlike Rembrandt lighting, which creates a dramatic triangle, loop lighting stays gentler. The effect looks more approachable.
The science here is pretty straightforward. You position your light at a specific angle. This creates just enough shadow to define facial features. Modern cameras handle this lighting beautifully. Their improved sensors capture both highlights and shadows with ease.
Setting Up Your Light for Loop Lighting
Place your main light about 30 to 45 degrees off your subject’s nose. Your subject should face the camera straight on. The light goes just beyond their shoulder line. The exact angle depends on your subject’s bone structure. Watch that shadow carefully as you adjust.
Height matters just as much as angle. Raise your light above eye level so it angles downward. This creates the loop shadow and lifts facial features slightly. Most studio setups place lights between 45 and 60 degrees above eye level.
You can create loop lighting with different light sources. Window light works great for natural setups. Strobes give you consistent results every time. LED lights let you see your shadows in real time. Speedlights offer portability for shooting on location.
Start with your light farther away. Move it closer gradually while watching the shadow pattern. The loop shadow should stay small. It should point toward the mouth corner. It shouldn’t touch the cheek shadow at all.
Spotting the Perfect Loop Shadow
The nose shadow tells you everything about loop lighting. Look for a small curved shadow dropping from the nose. It should angle toward the mouth corner on the opposite side. This shadow needs to stay distinct and separate.
The shadow can’t connect with the shadow from the cheekbone. When these shadows merge, you’ve created Rembrandt lighting instead. Check your camera’s LCD to verify the shadow stays independent.
This shadow pattern lifts the face naturally. It defines cheekbones without harsh lines. It adds depth around the nose. Both eyes stay well-lit and engaging. The result feels three-dimensional but never severe.
Shadow size matters too. A loop shadow that’s too large means your light sits too far sideways. Too small means you’re getting close to butterfly lighting. The sweet spot creates a loop about the size of your subject’s nose width.
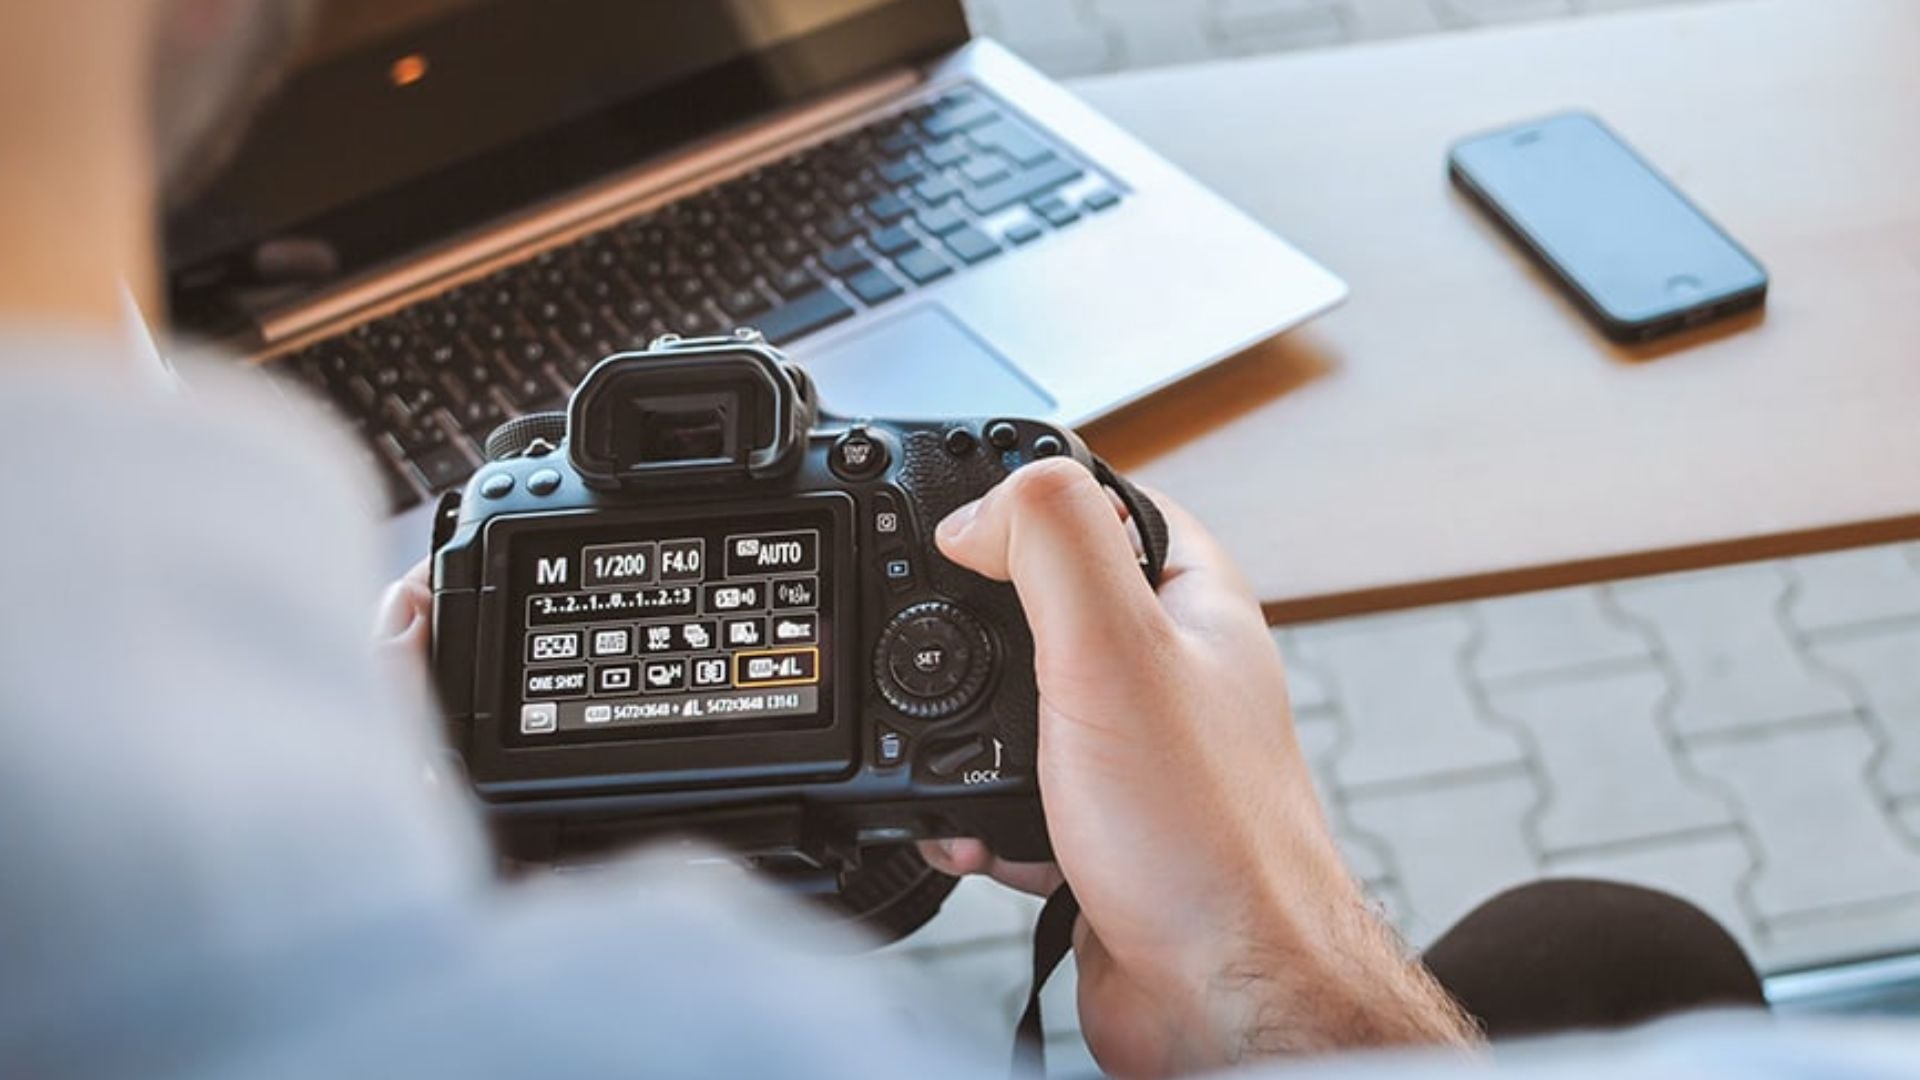
Camera Settings That Work
Most photographers shoot loop lighting in Manual mode. You can also use Aperture Priority. Manual gives you complete control over everything. Aperture Priority lets you adjust depth of field quickly.
Choose apertures between f/2.0 and f/5.6 for portraits. Wider apertures like f/2.0 create beautiful background blur. They work well for close-up portraits. Stopping down to f/4 or f/5.6 keeps more in focus. This suits full-face shots and group portraits.
Meter on your subject’s skin for proper exposure. Use spot metering to read from the cheek or forehead. This prevents your camera from getting fooled by bright backgrounds.
Modern mirrorless cameras excel at loop lighting. Their electronic viewfinders show real-time exposure. You see exactly how lighting affects the final image. ISO performance has improved dramatically too. You can shoot at ISO 400-800 without worrying about noise.
Shutter speeds typically fall between 1/125 and 1/250 with flash. For continuous light or window light, you might drop to 1/60. Just watch for motion blur if your subject moves.
Why You Need a Reflector
A reflector takes loop lighting from good to amazing. Position a white or silver reflector on the shadow side. This bounces light back into the shadows. It softens the transition between light and dark areas.
Here’s what different reflectors do:
- Silver reflectors add punch and work well for dramatic shots
- White reflectors create softer fill that looks more natural
- Gold reflectors warm skin tones but can look fake
Size matters with reflectors. Larger reflectors wrap more light around your subject. A 42-inch reflector works well for headshots. Full-length portraits need 60-inch versions.
Distance affects how much light bounces back. Move the reflector closer to brighten shadows more. Pull it back for subtle fill. Watch your subject’s eyes for the reflector’s catchlight. You want one main catchlight from your key light.
Some photographers skip reflectors for moodier portraits. This works for masculine shots or artistic images. For most commercial work, the reflector is essential.
Flattering Different Face Shapes
Loop lighting adapts beautifully to any face type. The technique’s balanced approach creates interest without exaggerating features. Small adjustments make it work perfectly for everyone.
Round Faces Get Definition
Loop lighting works wonders on round faces. The angled light creates the illusion of defined bone structure. Position your light slightly higher than usual. This creates more pronounced shadows under the cheekbones.
The gentle shadow from loop lighting avoids harsh looks. Flat frontal lighting emphasizes roundness. Loop lighting builds dimension naturally instead.
Angular Faces Stay Balanced
Angular or thin faces need careful handling. Loop lighting prevents the gaunt look that side lighting creates. Keeping the light relatively close to center maintains illumination on both sides.
The shadow adds just enough dimension. It doesn’t exaggerate prominent bone structure. Your reflector becomes extra important here. Strong fill light keeps shadows from getting too deep.
Watch shadow intensity on angular faces. If the loop shadow looks too dark, bring your reflector closer. You can also reduce the distance between subject and light.

Solving Glasses Problems
Loop lighting ranks among the best portrait techniques for subjects wearing glasses. The elevated light position angles down over the frames naturally. This reduces glare on the lenses significantly.
Start by raising your light even higher than usual. An angle of 50-60 degrees above eye level eliminates most reflections. Have your subject tilt their chin down slightly. This small movement angles the glasses away from your light.
Anti-reflective coatings help but don’t eliminate the problem entirely. You might still catch some reflection from your key light. Fine-tune by asking your subject to make small head adjustments.
When glare persists, try these fixes:
- Tilt the glasses temples outward to change the lens angle
- Move your light source a few inches higher or sideways
- Reduce the intensity of your reflector
- Ask your subject to look slightly off-camera
Some photographers remove lenses entirely for portrait sessions. This changes how eyes look though. It’s not always practical either. Loop lighting usually solves the issue without lens removal.
Creating Different Moods
Loop lighting serves as a great foundation for creative variations. Moving your light farther sideways transitions you toward Rembrandt lighting. Bringing it more centered shifts closer to butterfly lighting. These subtle changes let you customize mood while keeping flattering qualities.
Try adding a second light behind your subject for rim lighting. This backlight approach separates your subject from the background. It adds depth to the image. Keep the rim light less intense than your key light.
Hair lights complement loop lighting beautifully. Position a small light above and behind your subject. This adds highlights to hair and shoulders. It creates separation and adds professional polish.
Colored gels transform loop lighting into creative setups. A warm gel on your key light creates golden-hour effects indoors. Cool gels on background lights add color separation. Keep color subtle on your key light to maintain natural skin tones.
Mistakes You Should Avoid
Learning what not to do saves time and improves results faster. These common errors trip up many photographers starting with loop lighting.
Light Position Errors
The most frequent mistake is positioning the light too far sideways. When you pass the 45-degree mark, you create Rembrandt lighting instead. The telltale sign is that triangle of light on the shadowed cheek.
Another mistake is placing the light too low. When your light sits at or below eye level, the shadow flips upward. This looks unnatural since we expect light from above.
Missing the Details
Forgetting the reflector is a missed opportunity. Without fill light, loop lighting looks too contrasty. Your lighting basics should always include proper fill techniques.
Some photographers create loop lighting but ignore the far side of the face. Make sure that cheek receives enough light. It should be slightly darker than the near cheek. It should never fall into complete shadow.
Watch your light distance too. Placing the light too close creates harsh shadows with hard edges. Too far away and you lose the distinct loop shadow. Find the sweet spot where shadows stay soft but defined.
Advanced Techniques to Try
Professional photographers often use multiple lights while maintaining loop lighting as the dominant pattern. Add a subtle fill light on the opposite side instead of only using a reflector. This gives you more control over shadow intensity.
The lighting ratio refers to the difference between bright and shadow sides. A 3:1 ratio creates classic dimensional loop lighting. The key light is three times brighter than the fill. A 2:1 ratio produces softer, more even results. You can measure this using a light meter or by adjusting strobe power.
Try incorporating window light for natural loop lighting. Position your subject so window light hits them at the 30-45 degree angle. Use a reflector opposite the window for fill. This creates beautiful results without any artificial sources.
According to the Strobist lighting guide, combining loop lighting with specific lens choices amplifies the flattering effect. Telephoto focal lengths between 85mm and 135mm compress facial features slightly. This pairs perfectly with loop lighting’s sculpting effect.
Professional Photographers of America notes that wider lenses can distort faces. They work against the dimensional quality you’ve created with lighting.
Practice Makes Perfect
The fastest way to master loop lighting is through dedicated practice. Set up your light and reflector, then photograph the same subject from multiple angles. Study how small changes in light position affect the shadow dramatically.
Take test shots continuously as you adjust. Digital cameras make this easy since you review results instantly. Look for that sweet spot where the loop shadow appears distinct but not too prominent.
Photograph subjects with different face shapes. You’ll develop intuition for the slight adjustments each person needs. This hands-on experience beats theoretical knowledge every time.
Study professional portraits and identify which ones use loop lighting. Analyze the shadow patterns and light positions. See how photographers modified the basic setup for different effects.
Consider using light modifiers to refine your loop lighting. Softboxes create more diffused shadows than bare bulbs. Beauty dishes add contrast while maintaining softness. Umbrellas spread light broadly for an even softer effect. Each modifier changes the quality of your loop lighting.
Make Loop Lighting Your Go-To Technique
Loop lighting delivers consistently flattering results across all face shapes. The technique combines dimensional shadows with soft transitions beautifully. Position your light at 30-45 degrees off-center and above eye level. You’ll create that signature loop shadow that defines and sculpts naturally.
The addition of a reflector transforms loop lighting from good to exceptional. It fills shadows while maintaining dimensional quality. Whether you’re shooting with natural window light or professional equipment, loop lighting works reliably.
Practice with the basic setup first. Then experiment with variations to develop your personal style. Watch that nose shadow carefully. Keep your light elevated. Use your reflector strategically. These fundamentals will serve you throughout your photography journey.

Darlene Lleno
Darlene Lleno brings a unique perspective to DIY Photography as someone who grew up surrounded by camera gear but chose words over lenses. With five years of writing experience, she specializes in photography content that’s both technically informed and genuinely passionate. Growing up with a photographer twin brother meant camera talk was everyday conversation in her household. While he mastered capturing moments, Darlene discovered she preferred being the subject and the storyteller behind the scenes. As a travel enthusiast and mother of two, she understands the importance of preserving life’s precious moments. When not exploring new destinations or writing for DIY Photography, you’ll find her reading or tending to her garden. Her approach to photography writing is refreshingly authentic, she may not be behind the camera, but she knows exactly what it takes to help others capture the shots that matter most.


Join the Discussion
DIYP Comment Policy
Be nice, be on-topic, no personal information or flames.