


Tutorial: How To Create A Textured Face White Walker (From Any Portrait)
Dec 24, 2015
Share:

The year comes to an end and just before the busy days of watching StarWars and celebrating the holidays I’m rushing to finish some images and close this year off. One of the images that needed to be done was my contribution to the Dark Realm Collective – Black Christmas Art Pack.
I’ve been part of this collective since its conception and we’ve been making awesome dark images throughout the year, mostly themed around festive holidays and events. Naturally we needed to do a Christmas theme.
So for the Christmas art pack we had a few themes to pick from, the themes are more of a guide to get us started.
In the text below I am going to show you how it was done step by step. If you want to use any of the packages from this tutorial, the nice guys from the Image Manipulation Store agreed to provide a 20% off coupon (till Dec 30th), for any of the packages used here. Just use coupon code whitewalker4 on checkout.
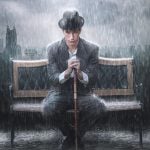
I wanted to do a dedicated shoot, but time was running out and I had to choose from work I had already shot a few months ago. The photo was shot during a different shoot of a female model, but I thought it would be fun to use her boyfriend in a shot or two. I was lucky I did because he proved to be the right image to use for my idea to create a Game of Thrones White Walker. (those creeps are scary!!)
Furthermore I had a bunch of photo’s I shot during a family outing in the woods, shots of trees, bark, moss etc. (but you can buy premade ones too)
Combined with the amazing packs from the Texture Store I was confident I would be able to compose a compelling image.
The secret to making this kind of edit look realistic is select different bark textures and then, use the transform warp tool to warp the image over the face, following the contours of the face closely. Then set the layer blending mode to overlay. Rinse and Repeat until the face is covered.


I’m posting the speed edit here and a walk through of what I’m doing and using. Feel free to use this as a guideline to create your own barky photographs:
00:03 The selected image
00:14 Lumenzia luminosity masking
00:27 Background selecting
00:30 Gradient Mapping the background
00:36 selecting broken bark images
00:37 select a part of the bark that looks interesting
00:37 copy to image, desaturate and set to blending mode overlay
00:38 use the transform warp tool to warp the image over the face, following the contours of the face closely (or at least until it looks good)
01:19 continue using different bark images (or whatever texture you want)
01:36 additional skull image to deepen the eye sockets
01:40 using the Retouching Toolkit Dodge and Burn options
01:58 color grade the model to reduce redness, for a more icy skin
02:10 using the Smoke Pack to blend the foreground and background together and add ambiance
02:14 experimenting with different backgrounds, but I found the original was just fine
02:26 more Smoke
02:41 using curves to adjust brightness and paint in highlights on the edges
02:49 working on the eyes, using the Eye Brush by Faevre
03:05 more Smoke, here I changed the color balance to a more blueish shade and blend it using the screen blend mode
03:11 add snow from the Snow Pack
03:18 I thought some Dust particles would be nice to add to the image background
03:25 More Particles but now from the Water & Rain Pack
03:41 Here I’m building a tree layer to act as an out of focus foreground element, this adds more depth to an image
03:52 Liquifying (using the Smart Liquify from the Retouching Toolkit)
3:58 curve adjustment color grading, making a custom vignette
04:05 experimenting with the Ice Pack, but not using it in the end. Just looking if it works in some way
04:08 instead I add some flares from the Light Ray pack to add some off screen glare.
04:15 to counter the blue color, thats dominant in the image I add some orange sparks from the Fire Pack
04:21 The eyes need more work
Happy Holidays!!
Filed Under:
Tagged With:

Roderique Arisiaman
Roderique “Dracorubio” Arisiaman is a professional photographer, photoshop wizard, and artist, using photography as his canvas to create beyond reality imagery and stories. you can follow Dracorubio on his site, facebook and G+ account.


Join the Discussion
DIYP Comment Policy
Be nice, be on-topic, no personal information or flames.
4 responses to “Tutorial: How To Create A Textured Face White Walker (From Any Portrait)”
Wow! absolutely fantastic! thank you for sharing!
James Davis
Amazing! Thank you!
Awesome!!