


A DIY 50MP|Quad Pixel Camera: What Does That Mean and Is it Any Good?
Dec 20, 2025
David Prochnow
Our resident “how-to” project editor, David Prochnow, lives on the Gulf Coast of the United States in Ocean Springs, Mississippi. He brings his expertise at making our photography projects accessible to everyone, from a lengthy stint acting as the Contributing How-To Editor with Popular Science magazine. While you don’t have to actually build each of his projects, reading about these adventures will contribute to your continued overall appreciation of do-it-yourself photography. A collection of David’s best Popular Science projects can be found in the book, “The Big Book of Hacks,” Edited by Doug Cantor.
Share:
So, you’d like to dip your big toe into the sea of large megapixel cameras, but you don’t want to spend a fortune entertaining this wishful whim. Well, Motorola has answered your fancy.
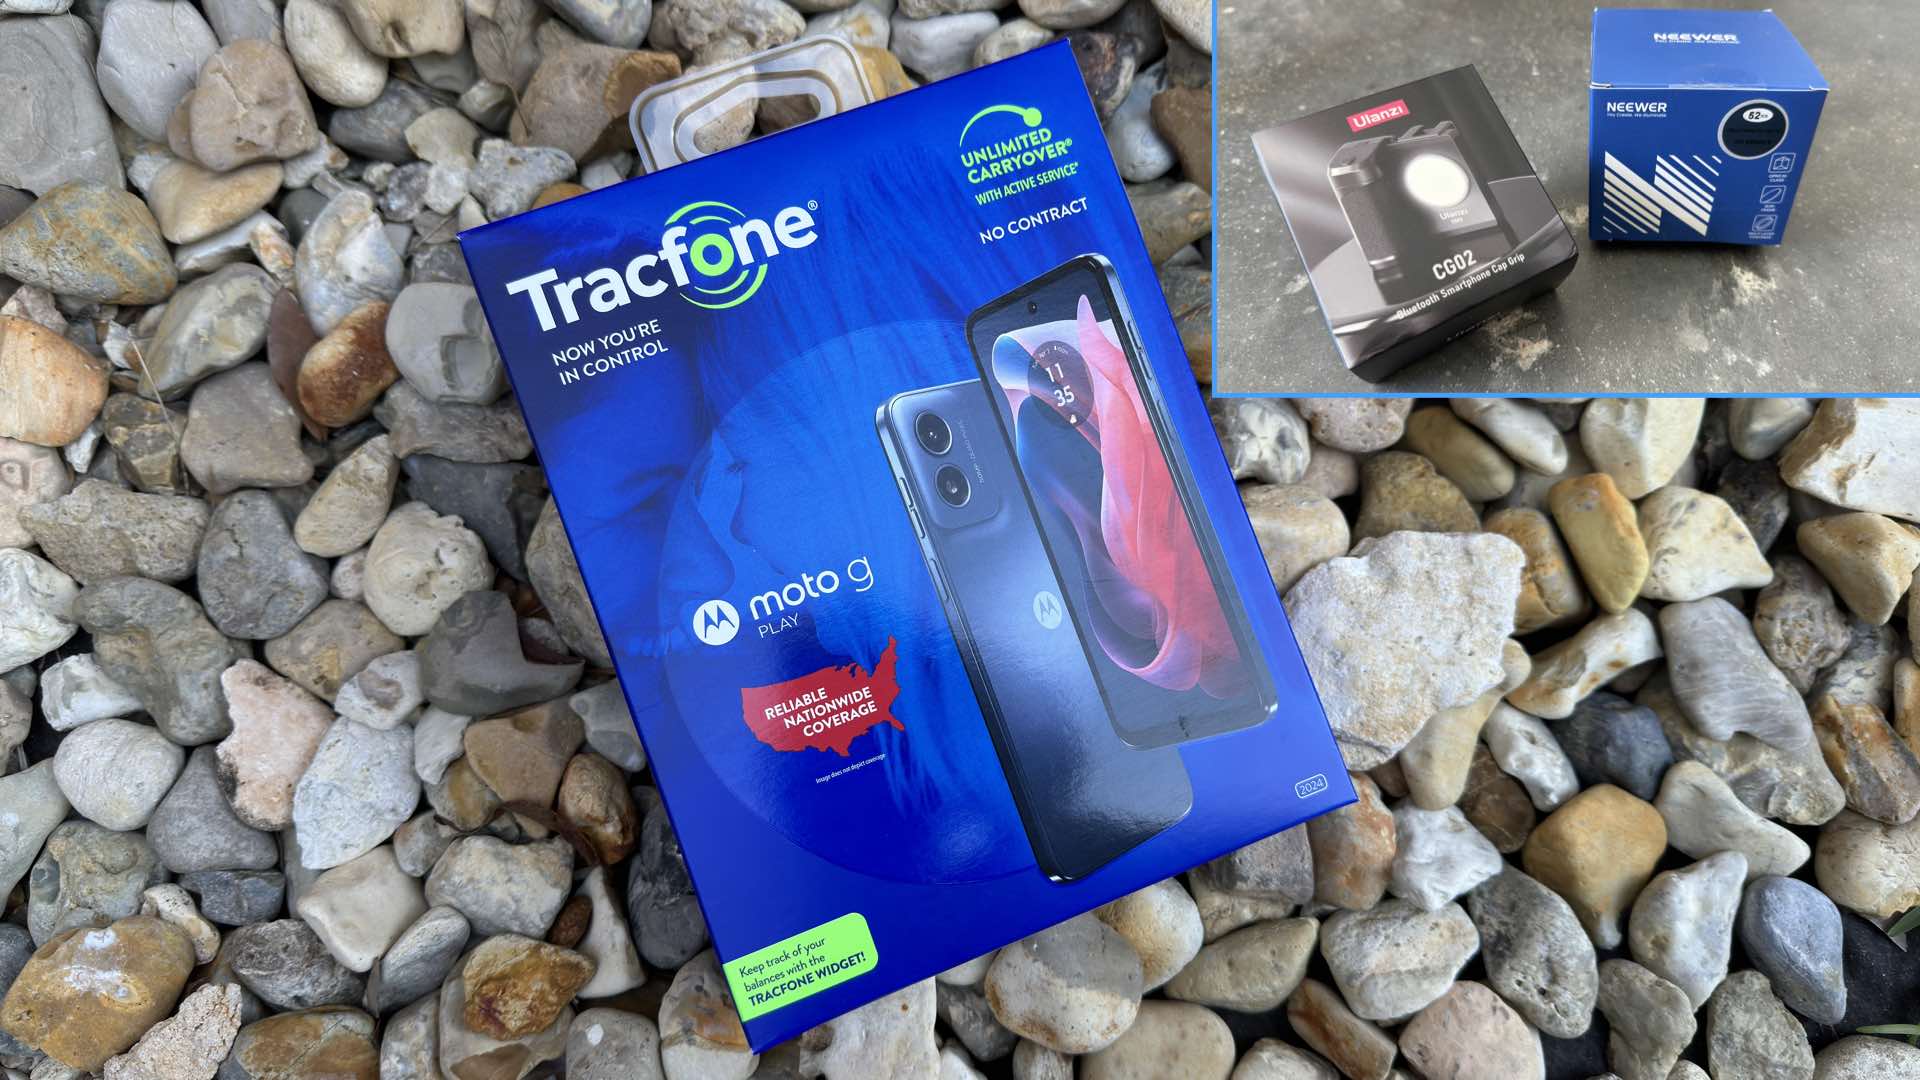
Motorola, you ask? Yes, specifically, the Motorola g Play 2024 Android smartphone. While typically priced at $110+, by using a little ingenuity you can purchase this device for less than $40. Wherein this low-cost smartphone will become the hub for building your own 50MP|Quad Pixel camera system.
Gulp, actually the 50MP claim is a bit of an exaggeration by Motorola. So, what does that term, “quad pixel,” mean? Well according to Motorola, the “50MP sensor combines 4 pixels into 1, for an effective photo resolution of 12.5MP.”
Therefore, the theoretical 50MP sensor is reduced to a factual 12.5MP. Is this reduction a condition for dismissal of this smartphone as a practical camera? Read on and learn how to make 12.5MP seem like 50MP.

Although, in real-world practice, the Motorola g Play 2024 produced an average sized 37.5MP JPEG photograph in Photo mode. In the Pro camera mode, however, the photographs were 9.4MP JPEGs, but 12.5MP DNGs.
According to the spec sheet for the Motorola g Play, a twin-lens 50MP|Quad Pixel sensor is coupled to an f/1.8 main camera and a secondary “macro” camera that are supported by 64GB of internal storage which is expandable with a user-supplied microSD card along with 4GB of onboard system RAM. Powering everything is a 5000mAh battery along with a 6.5″ LCD featuring a 90Hz refresh rate sitting snugly underneath a slab of Gorilla Glass 3 for external protection.
Beware, there is subtle name difference between two different versions of the Motorola g smartphone. The Motorola g Play 2024 variant (used in this project) uses a Snapdragon 680 4G mobile platform with an AI Engine, while a closely named Motorola g 2025 model features a MediaTek processor. Priced at $39.88 for the Moto g Play 2024 and $24.88 for the Motorola g 2025 smartphone, we’ll be focusing on the older of these smartphone siblings for this project: the Motorola g Play 2024.
Supporting the building of a 50MP camera using this selected smartphone are two additional products:
1. Ulanzi CG02 Bluetooth Smartphone Cap Grip for $24.95.
2. Neewer Cellphone Filter Kit for $23.49.
Before You Start, Throw This Away
You’ll notice that the cited Motorola g Play 2024 smartphone is “locked” to a Tracfone service plan. We don’t care about using this cell plan. Therefore, before you even power on your device, eject the SIM card tray, remove the Tracfone SIM card, and discard it.
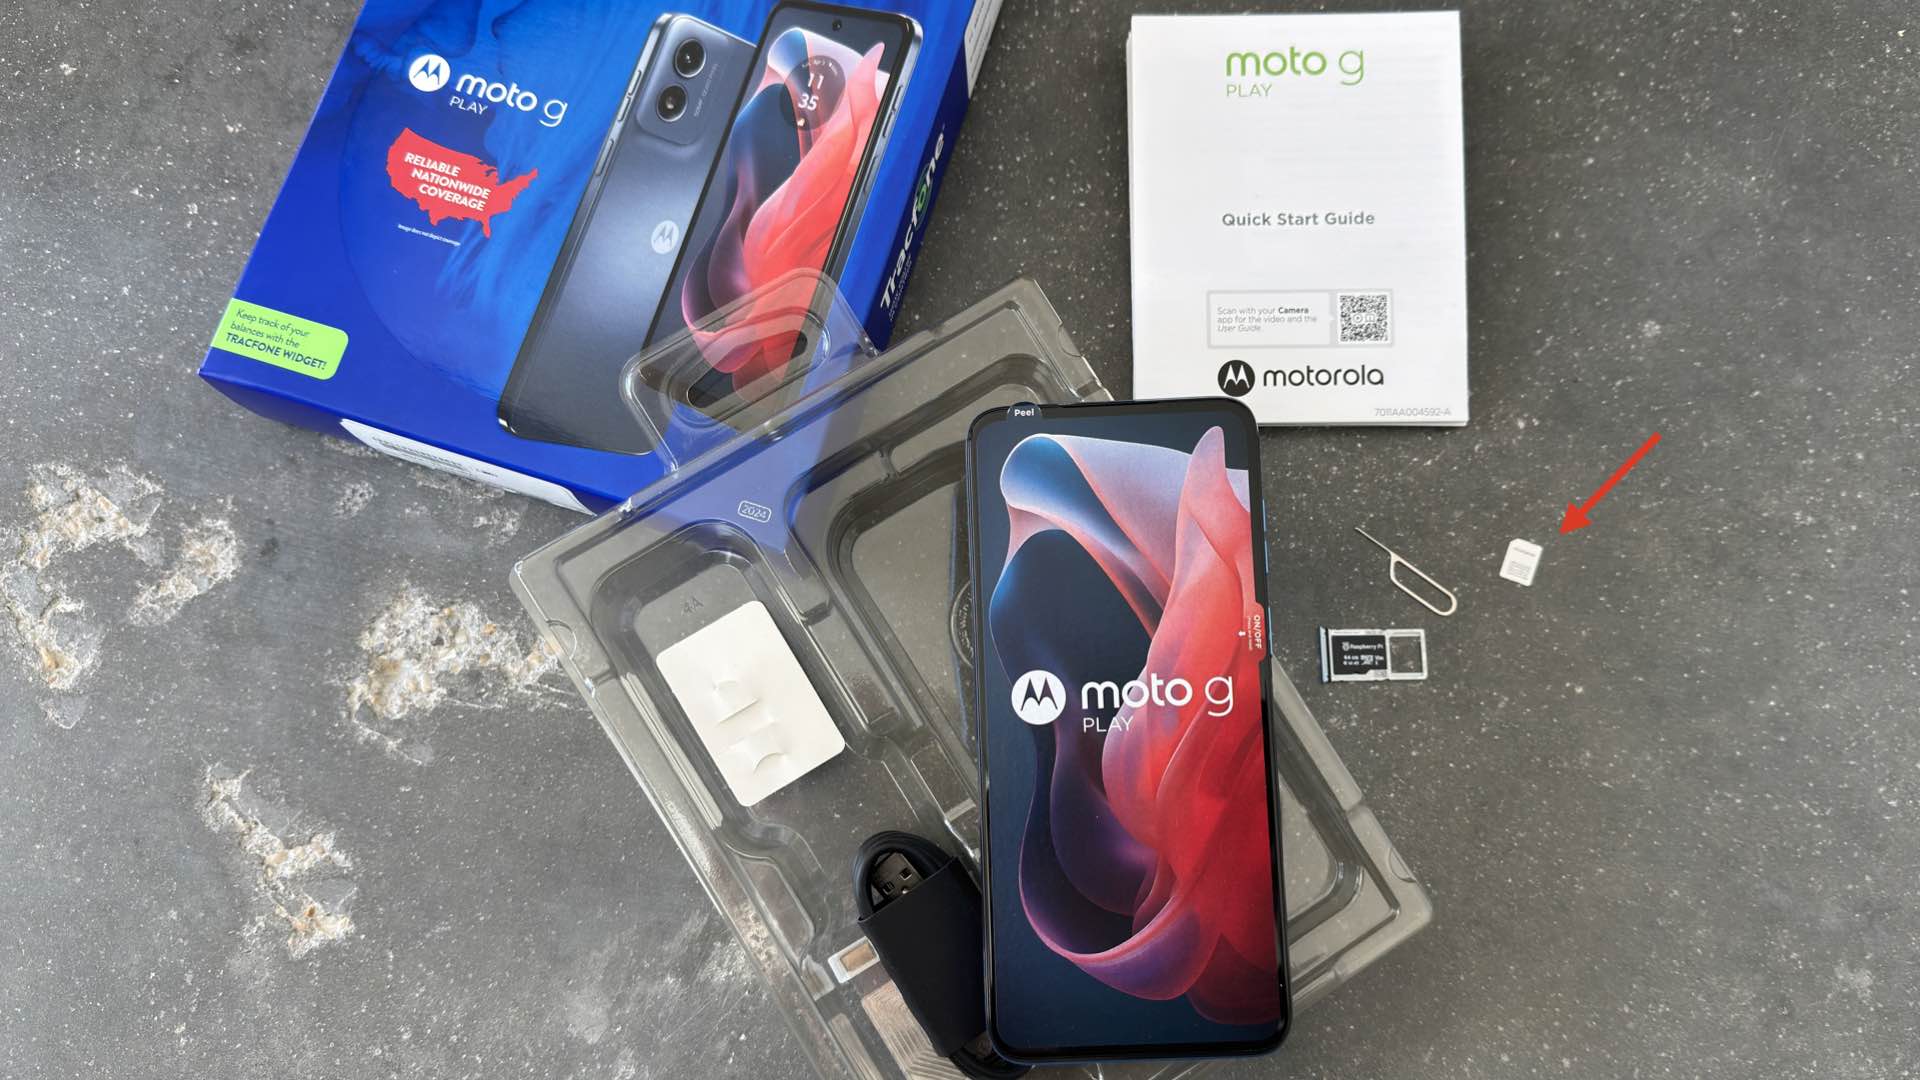
We’ll be using this camera system strictly as a WiFi-only smartphone/camera. Additionally, you’ll be configuring your device to use “RAM Boost” mode. Therefore, you should insert a microSD card (e.g., a minimum 32GB capacity card) for storing photographs into the same tray that was holding the newly discarded SIM card.
Insert the tray back into the Motorola g Play and turn the device on. After the setup of a Google account, you will activate the, previously mentioned, RAM Boost mode (Settings > System > Performance). This mode “simulates” user memory by utilizing a portion of the device’s storage media as RAM. Set your total RAM Boost memory size to 8GB. You are now ready to add those two additional products to your Motorola g Play.
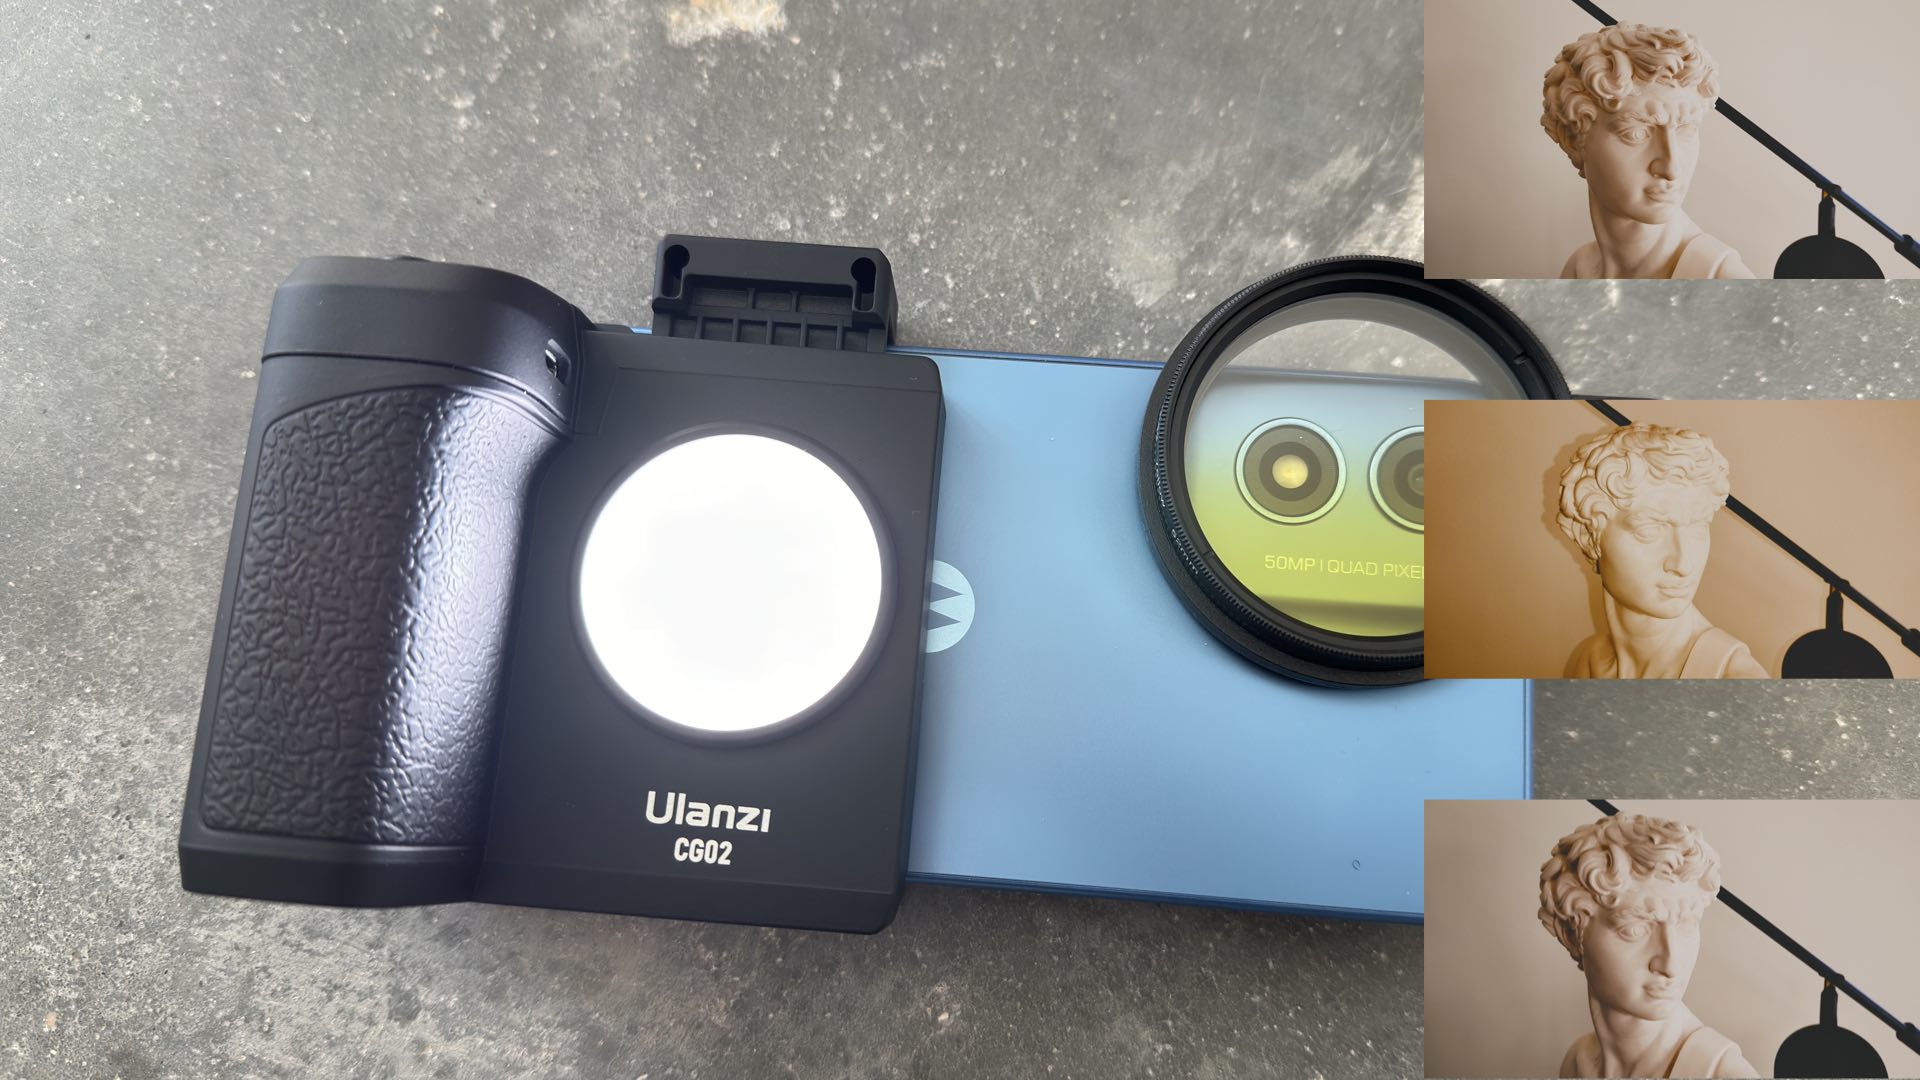
If you’ve ever tried a magnetic phone grip, then you know that they have a tendency to slip off the phone. The Ulanzi is different. It uses a spring-powered clamp for providing a rock-solid grip on the smartphone, along with a removable Bluetooth shutter release, and an onboard variable-intensity LED light.
During testing of the Ulanzi grip, however, the Bluetooth shutter release was not 100% reliable. Sometimes the camera would recognize a shutter press, sometimes it would not, even with repeated pressings. There was no easy, consistent technique for ensuring that the shutter button would always be recognized by the camera. Although, pressing and holding the button until the LED would flash provided the most reliable method for making the shutter release work.
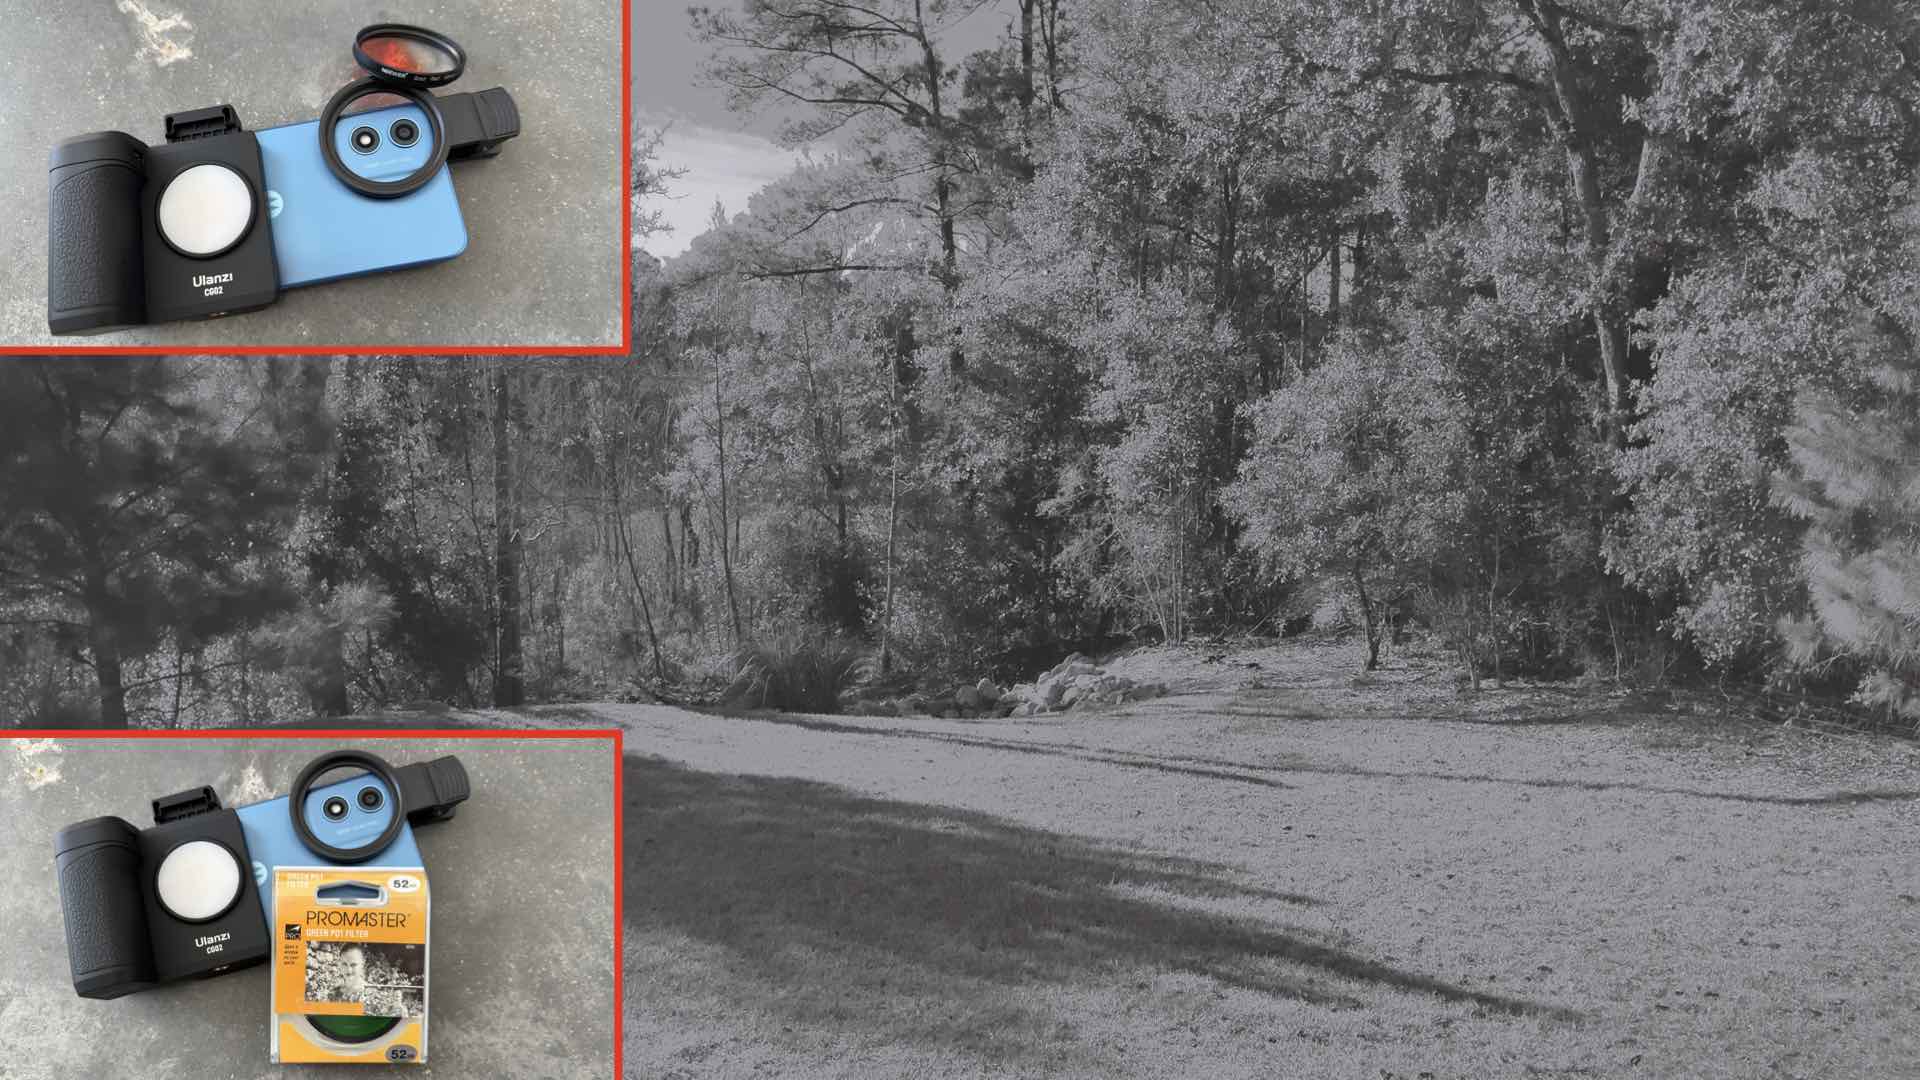
Likewise, the Neewer filter holder clamps onto the device and provides a reliable threaded filter interface for the two on-board rear camera lenses. Furthermore, by selecting a conventional camera filter diameter (e.g., 52mm) when purchasing the Neewer holder, additional camera filters can be optionally added to the Motorola g Play.
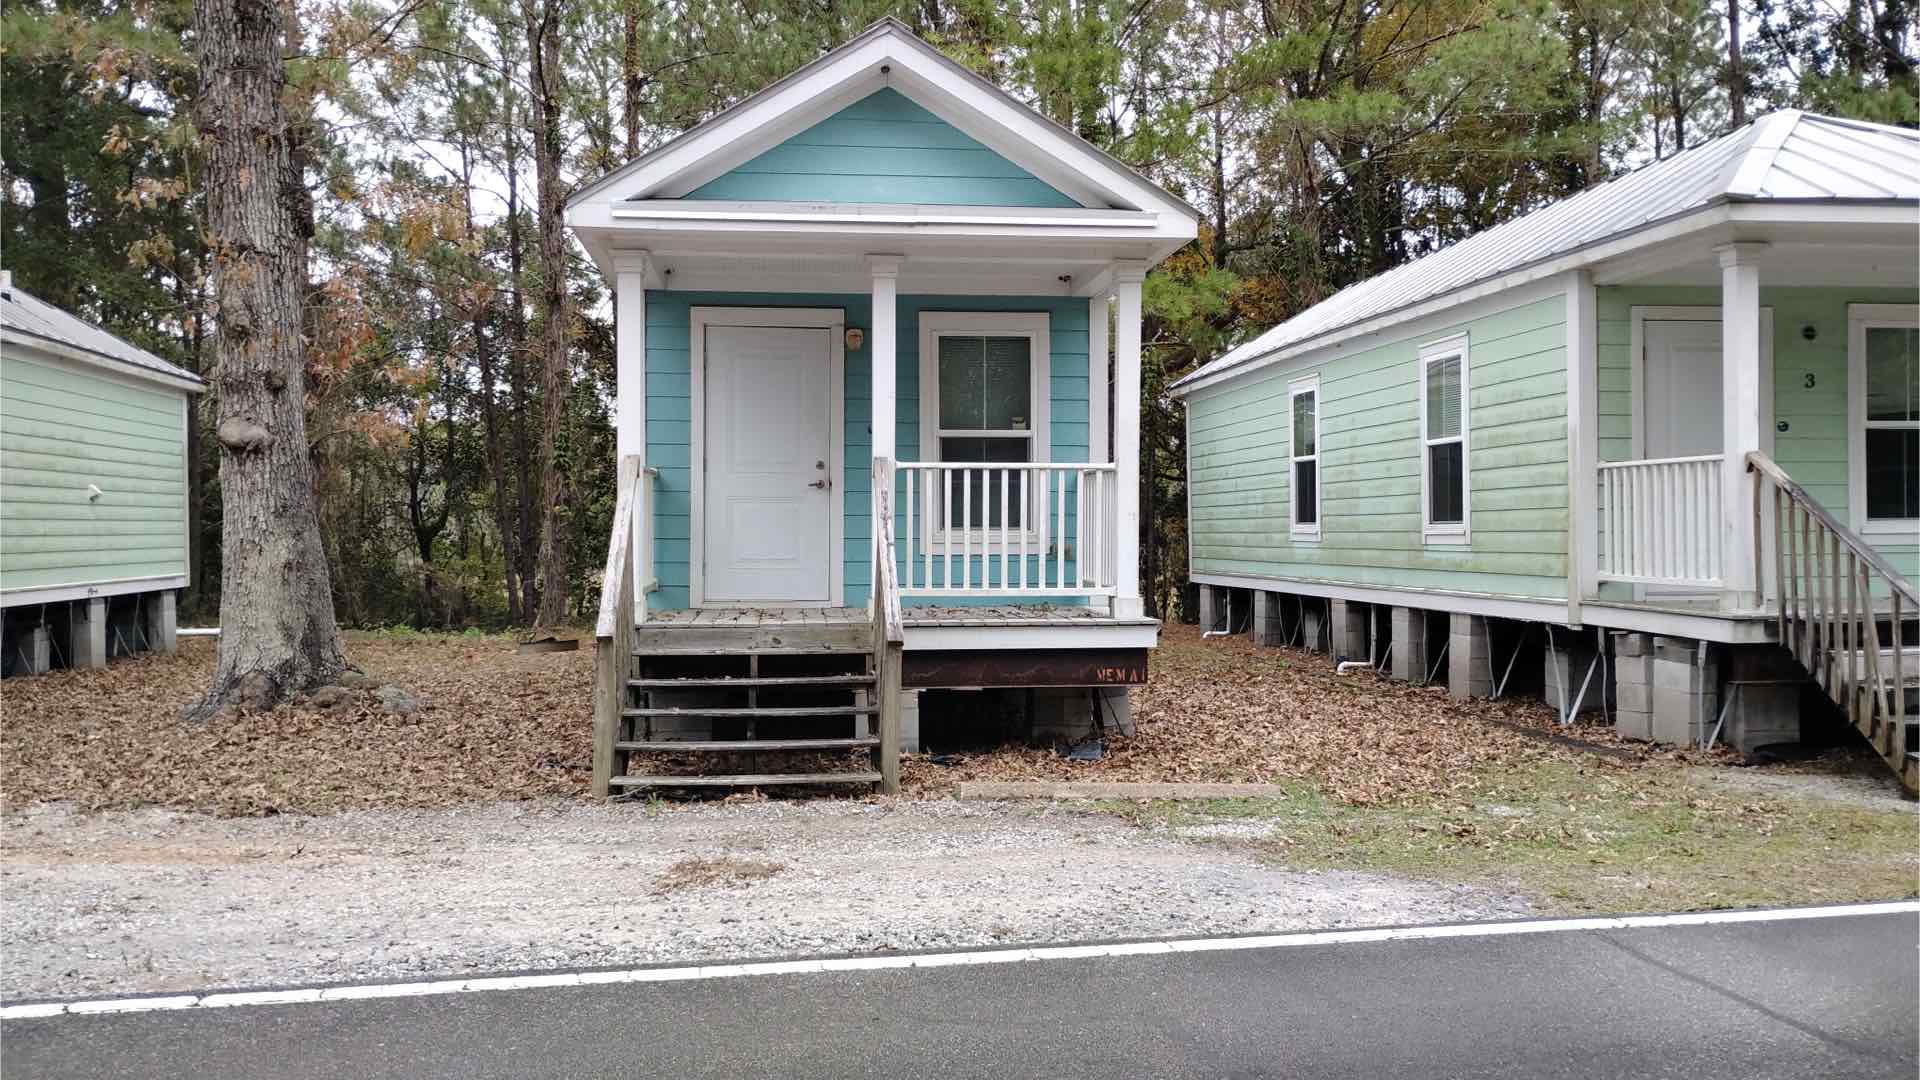
Your 50MP/12.5MP camera system is now ready for use. Once you’ve captured some powerful photographs, you can easily transfer them to your computer for further editing via Bluetooth sharing. Judge these results for yourself:


Here’s a short configuration “cheat sheet” for this DIY camera system:
- Set RAM Boost to 8GB.
- Deactivate all device locks…swipe UP to open is OK for this smartphone/camera.
- Set the display timeout to 30 minutes.
- Uninstall all extraneous Apps.
- Use the onboard Camera App in Pro mode for better control over each exposure.
- The Bluetooth shutter release button isn’t reliable in all photographic situations. Just be prepared for some hiccups when using the Bluetooth shutter release.
- An exception to Pro mode is when using Black & White color conversion filters. In this case, use the standard Photo mode and select the Black & White filter for monochrome photography.
- Clamp the Ulanzi grip onto the phone and establish a Bluetooth pair.
- The Bluetooth connection must be reestablished each time the smartphone/camera is turned ON.
- Snap the Neewer filter holder into place over both rear camera lenses. Thread filters and filter combinations onto the holder.
It’s refreshing to be able to indulge in a 50MP|Quad Pixel chameleon camera that’s perfectly happy taking 12.5MP photographs without breaking your budget. Even better is that the entire system will fit inside a coat pocket. This combination leaves you fully prepared whenever the next photographic whim strikes.
Enjoy.

David Prochnow
Our resident “how-to” project editor, David Prochnow, lives on the Gulf Coast of the United States in Ocean Springs, Mississippi. He brings his expertise at making our photography projects accessible to everyone, from a lengthy stint acting as the Contributing How-To Editor with Popular Science magazine. While you don’t have to actually build each of his projects, reading about these adventures will contribute to your continued overall appreciation of do-it-yourself photography. A collection of David’s best Popular Science projects can be found in the book, “The Big Book of Hacks,” Edited by Doug Cantor.


Join the Discussion
DIYP Comment Policy
Be nice, be on-topic, no personal information or flames.
3 responses to “A DIY 50MP|Quad Pixel Camera: What Does That Mean and Is it Any Good?”
In other words, you’re just taking cellphone pictures. This used to be a great website for photography makers, but how it has fallen.
Aren’t there any serious diy photo projects to talk about ?
I found a site that does highlight DIY projects. macgyverphotography.wordpress.com.