


Travel Photo Editing: How to Enhance Your Images Without Losing the Story
Jan 23, 2026
Dunja Đuđić Kalinin
Dunja Djudjic is a multi-talented artist based in Novi Sad, Serbia. With 15 years of experience as a photographer, she specializes in capturing the beauty of nature, travel, concerts, and fine art. In addition to her photography, Dunja also expresses her creativity through writing, embroidery, and jewelry making.
Share:

Editing is a crucial step in travel photography. Not because your photos are “bad” without it, but because editing helps you refine what you saw and felt when you were on location and pressed the shutter. Keep in mind, though – travel photo editing isn’t about faking a scene, but should be about removing distractions, guiding the viewer’s eye, shaping a visual language, and conveying emotions.
If shooting is about observation and intention, editing is about clarity. It’s that final step that rounds everything up. In this article, we’ll cover how to edit travel photos thoughtfully, which tools actually matter, how to create a cohesive look, and where to draw the ethical line in an age of AI-heavy apps.
[Related Reading: Travel Photography: The Ultimate Guide to Shooting Stunning Images on the Road]
Why SOOC Is Not a Flex
When you travel, you’re constantly dealing with imperfect conditions. Harsh midday light, mixed color temperatures, haze, crowds, fast-moving subjects… You name it. While taking and sharing photos straight out of the camera (SOOC) is not wrong, editing takes your photos to a higher level. It helps you bring your photos closer to how the place felt, not just how the sensor recorded it.
Good travel photo editing does a few key things. It corrects exposure and color so the image feels natural. It removes small distractions that pull attention away from the story. It creates visual consistency across images taken in different locations and lighting conditions. It also helps define your personal style over time.
The goal is not to add heavy effects; it’s a totally different end of the SOOC spectrum. But everything between an untouched and overly edited image is your playground for sharing your vision. And it’s a huge and fun playground, if you ask me.
Mobile vs. Desktop Editing Apps
You don’t need a full desktop setup to start editing travel photos. I always think of my sis who’s a great photographer, but she finds it too fussy and time-consuming to edit on her desktop in Lightroom and Photoshop. Like many other photographers, she now edits photos entirely on her phone, especially while on the road. And the results are excellent!
Mobile Editing Apps
So, if you shoot with your phone or just prefer a lightweight workflow, mobile editing apps are more than enough. Lightroom Mobile is one of the most powerful and most popular options available. It supports RAW files, selective adjustments, presets, and syncing with the desktop version if you wish to devote more time to editing later.
Snapseed is another great option, particularly for beginners. It’s also my personal favorite as Lightroom can be a little slow on my phone. Snapseed is intuitive, fast, and surprisingly deep. Tools like healing, curves, selective adjustments, and perspective correction make it a solid all-in-one editor. And it’s free, which doesn’t hurt.

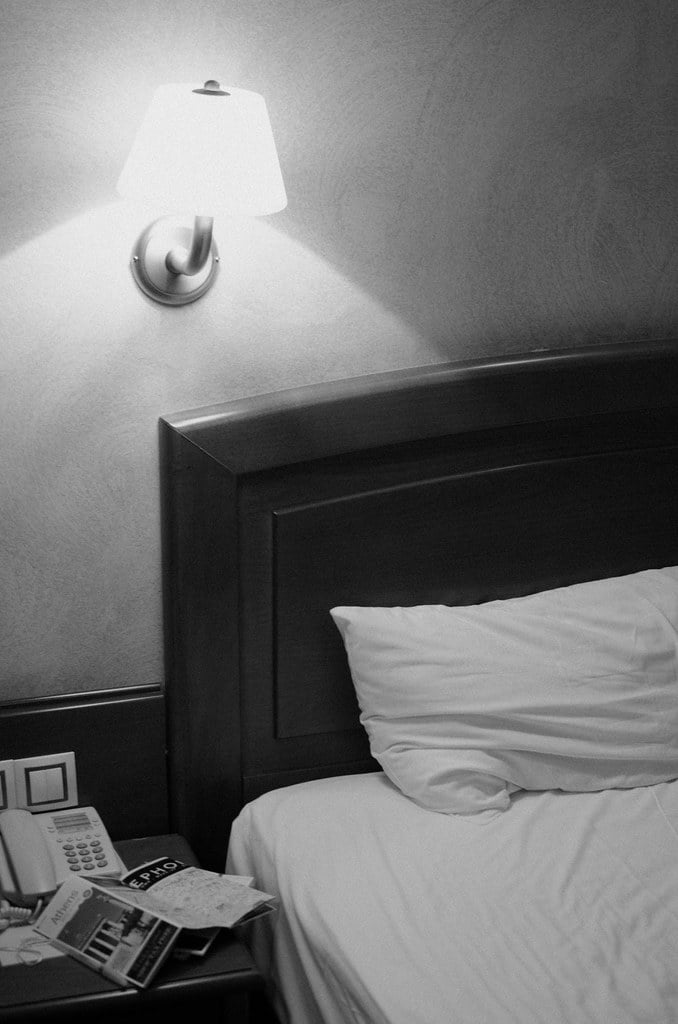
© Dunja Đuđić
Desktop Editing Apps
Desktop apps offer more precision and better performance when working with large RAW files or extensive edits. Adobe Lightroom and Photoshop remain industry standards, but they’re far from the only options. Luminar Neo, Capture One, DxO PhotoLab, and Affinity Photo all offer strong alternatives with different strengths, from AI-assisted tools to color accuracy and one-time pricing.
Many photographers use a hybrid workflow, doing light edits on mobile while traveling and finishing images on desktop once they’re home. Choose whatever works best for you and forget the narrative that “you’re not a real photographer if you only edit on your phone”. You most definitely are.
A Simple Workflow for Editing Travel Photos
One of the biggest mistakes you can make is trying to perfectly edit every image individually. I know this from experience, as this is how I started and it’s something I did for the good few years. That’s how you end up overwhelmed and staring at hundreds, if not thousands of untouched files. You know how everyone’s sharing their 2016 on social media right now? Well, I could share 2/3 of my unedited photos from Athens, Greece still sitting on my old desktop computer.
Anyhow, a more realistic travel photo editing workflow starts with culling. Be selective and keep in mind that not every photo deserves editing. You can keep them as mementos, but you don’t have to give them too much attention.
Once you have your selection, move on to global adjustments like exposure, contrast, and white balance before touching anything local. Now you already have a nice batch of edited images, and at least half of your work is done. Now you can make small, targeted adjustments such as dodging and burning, removing distractions, etc. If you feel overwhelmed or start rushing – step away and resist the urge to keep pushing sliders forever. Take a break and return to your photos later.
If you’re editing on the road, batching is a lifesaver. Apply similar edits or presets to photos from the same scene or day. It keeps your look consistent and saves you from editing paralysis later. Returning home to thousands of unedited RAW files is a mistake I mentioned in the beginning of this section. You’ll hate it and you’ll procrastinate editing forever. Yes, I know that from experience, too.
© Dunja Đuđić
Creating a Cohesive Look Across Your Travel Photos
Consistency matters, especially if you’re building a portfolio, a blog, or just want to develop a recognizable visual identity. A cohesive look doesn’t mean every photo looks identical. It means your images feel like they belong together. This could sound a little abstract and, in a way, more advanced. But the good news is that you will get there with time, practice, and devotion.
Lightroom presets for travel photography are a great starting point. Presets help you establish a baseline look and speed up your workflow. But keep in mind that they also need a bit of tweaking and they’re not magic buttons. Lighting, location, and subjects change constantly when traveling. So, apply your presets but don’t forget to fine-tune your images after that.
You can buy ready-made presets (which isn’t my preferred method; I would rather make my own). If you’re new to presets, we recently covered this AI preset generator that I think is pretty cool. It’s not always ideal, but it’s fun to play with and can also be a good starting point.
Color grading travel photos is where your style really becomes visible. It’s not about trendy color schemes (remember orange and teal from 10-ish years ago?), but about consistency. Think about what you prefer: for example, if it’s warmer or cooler tones, muted colors or punchy contrast; and how skin tones look across different locations. Draw inspiration from the movies you like, from paintings, other photos, TV series… Any visual art. With time, you’ll find your personal style. Or, actually, it will naturally start to form.
Travel Photo Retouching Tips
Retouching in travel photography should be minimal and purposeful. Removing sensor dust or stray branches and debris, straightening horizons, cleaning up small distractions, or correcting perspective are all fair game. There’s also color and contrast correction, color grading, vignette… In short, anything that keeps the scene real.
What retouching should not do is rewrite reality. Heavy skin smoothing, reshaping faces, or erasing culturally meaningful details removes honesty from the image. I’d argue sky replacement and other AI tools do the same, but, as always, that’s my two cents.
When photographing people, especially locals, be extra cautious. Wrinkles, textures, scars, and expressions are part of their story. Removing them doesn’t elevate the photo; it erases its authenticity and the person’s identity and story. You know that rule: if a flaw can’t be fixed in 10 seconds, don’t mention it? I apply something similar to editing people. If it can be fixed or will vanish soon anyway (a stain, a pimple, a weird wrinkle on their clothes), it’s okay to fix. If it’s something more permanent, like a scar, a birthmark, wrinkles – do not touch it.
Keeping Edits Natural and Ethical
Travel photography is rooted in real places and authentic experiences (and I emphasize real and authentic). That matters even more now, when AI-powered tools can generate skies, landscapes, and entire scenes in seconds.
Don’t get me wrong, AI tools can be useful. Removing trash from your scene, fixing a crooked horizon, or making selections has never been easier! The problem starts when editing creates a version of a place that never existed.
Adding fake skies, inserting dramatic elements, or generating people and animals that weren’t there undermines the purpose of travel photography. It turns documentation into fiction. This is especially important when photographing people or cultural landmarks. Over-editing skin tones, altering traditional clothing, or exaggerating conditions misrepresents reality and disrespects the people.
Feel free to play with AI tools and have fun with them, I certainly do. But if you share that work, please, please be transparent about these alterations.
Final Thoughts
Learning how to edit travel photos is a long-term process. Your style will evolve as your eye evolves. What matters is not chasing trends or perfect aesthetics, but staying honest to the places and moments you photograph.
Edit to clarify end emphasize your photos, not to fit them into current trends. You want your edits, just like your photos, to tell the story you experienced, not the one you think will perform best online. Approach editing with the same mindset you had while shooting: curiosity, respect, and intention.

Dunja Đuđić Kalinin
Dunja Djudjic is a multi-talented artist based in Novi Sad, Serbia. With 15 years of experience as a photographer, she specializes in capturing the beauty of nature, travel, concerts, and fine art. In addition to her photography, Dunja also expresses her creativity through writing, embroidery, and jewelry making.


Join the Discussion
DIYP Comment Policy
Be nice, be on-topic, no personal information or flames.