


How to create “orange and teal“ and many other looks using only two adjustment layers
May 9, 2017
Dunja Đuđić Kalinin
Dunja Djudjic is a multi-talented artist based in Novi Sad, Serbia. With 15 years of experience as a photographer, she specializes in capturing the beauty of nature, travel, concerts, and fine art. In addition to her photography, Dunja also expresses her creativity through writing, embroidery, and jewelry making.
Share:

The “orange and teal” look is quite a popular style of color grading, both in movies and photography. In this video, Denny Tang will show you how to create this look using only two adjustment layers in Photoshop.
Those of you who are annoyed by the popularity of the “orange and teal”, this video is for you, too. With this technique, you can get plenty of different color grading styles, so if this popular look isn’t really your cup of tea, you can still learn this technique and apply it to get the look you like.
As you already know, photos in Photoshop have a red, green and blue channel. To get the look we want, we’ll start by converting the photo from three to two channels. For this, start by adding a new Channel Mixer adjustment layer.

Now, go to the Blue channel and set green to 100% and blue to 0%. When you go to the Channels panel, you’ll see that Green and Blue channel now look exactly the same.


After you’ve done this, your image will have a red and teal look. At this point, you’ll have to shift the hue to get the orange and teal. Now it’s time to add the second adjustment layer. Add a new Hue/Saturation adjustment layer. Then, click on this tool:

This will let you click and drag anywhere on the image and change the saturation. If you hold the Ctrl key (Cmd on Mac), you will change the hue instead of saturation. So, hold the Ctrl/Cmd key, and click and drag on the red area to change its hue to orange.
Finally, select the two adjustment layers and press Ctrl/Cmd + G to group them. Adjust the opacity of the layer group, and you’re done. As usual, I applied the steps to one of my images for demonstration, and this is what it looks like before and after:

As I mentioned, other than “orange and teal,” you can get plenty of other looks by adjusting the hue and saturation further. You can end up with surreal photos like this (I don’t like how it looks, but hey, it might work for some images):

Then, you can add another adjustment layer – Curves. Here, you can experiment with tones and contrast further:

Since my image only served for illustrative purposes here, take a look at some way better examples Denny created using this technique, and he got several different looks:


[Make Your Photos ORANGE & TEAL with ONLY 2 layers – Photoshop Tutorial via Photoshop Tutorials]

Dunja Đuđić Kalinin
Dunja Djudjic is a multi-talented artist based in Novi Sad, Serbia. With 15 years of experience as a photographer, she specializes in capturing the beauty of nature, travel, concerts, and fine art. In addition to her photography, Dunja also expresses her creativity through writing, embroidery, and jewelry making.
Related Posts
 How to color grade in Photoshop using only Solid Color Adjustment Layers
 The reasons why “Orange and Teal” look is so popular in movies
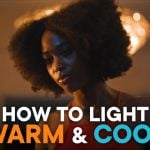 How to set up your lights and balance colour tones to get that orange and teal look in-camera
 This plane taking off into San Francisco orange skies looks like footage from Mars
Join the Discussion
DIYP Comment Policy
Be nice, be on-topic, no personal information or flames.
4 responses to “How to create “orange and teal“ and many other looks using only two adjustment layers”
This is such a great tutorial with loads of information done in an easy to understand way. I wish all tutorials were this well put together!
It might just be me, but most of these examples look better before the adjustments…
totally agree
Thank you for providing a text version of the tutorial. Videos are flashy but pretty useless because you have to go back and forth plus stop and start. Wish more people would realize that videos are more for them than for us.