


Cinematic Color Grading With Lightroom
Share:

We have posted a few really awesome cinematic color grading tutorials lately – but they all use Photoshop.
Instead of jumping over to Photoshop, I thought that I would try to achieve my interpretation of the “cinematic color grading” look right in Lightroom – continue reading to see my Lightroom workflow.
The Cinematic Color Grading Look
The de facto cinematic style color grading look that comes to mind right now is where the shadows have a blueish, teal or green hue, while the highlights are either neutral or shift slightly to a warm orange.
Love it or hate it, this is currently a very popular color palette for Hollywood blockbusters and it can give still photos an interesting look too.
While the best way to achieve this look is still Photoshop – I am always surprised at how amazing the tools in Lightroom are when it comes to manipulating color.
If you would like to stick with Photoshop, here are a few great Photoshop color grading tutorials:
- A Lesson In Color Grading
- An Experiment in Color Grading
- How To Do Cinematic Color Grading Like A Pro

Color Grading Approach
When we’re talking about color grading, it is important to remember that we are really just talking about creative color correction – so there is no right or wrong.
However, I think it is also important to point out that your color grading should match the style and mood of your photography – here is an excellent article on using color grading to manipulate viewer’s emotions.
In this case, I decided interpret my photos by sticking with the popular teal blue shadow and orange highlight color scheme while applying a bit of a faded look as well.
I though that the bluish green shadows worked well with the natural blues and greens in the background while the orange and tan highlights unified the look of the images between the desert vegetation, the color of the earth and the model’s skin tones.


In these example photos, the effects are applied quite a bit heavier than I normally would – for educational purposes – but I kind of like the final result none the less.
(In case you are wondering, this is what my wife and I do while on vacation in Vegas – take the rental car out into the middle of the desert on a cold windy overcast day – just 30 minutes from the strip and goof around taking selfies.)
Color Grading With Lightroom
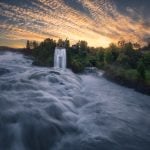
To show you how you can use the tools available in Lightroom to color grade your photography, I will show you my workflow using the following sample photo:


Remember there is no right and wrong way to color grade your photography, so to try to use the process below as a guideline and tailor the process to your own work instead of trying to plug in the exact edits that I am going to use for the example.
In Lightroom I started with my normal post processing workflow – correcting the white balance, exposure, highlights and shadows in the Basic Panel.

Then I started color grading with Lightroom’s split toning tools – choosing a teal color shadow color and a tan color highlight color and adjusting the saturation and balance by eye to suit.

I refined the color grading I was able to achieve through split toning by applying adjustments to the tone curves – adding a little additional blue to the the shadows region of the blue curve and removing a tiny bit of blue from the mid-tones and highlights.

To complete the color grading, I used the hue, saturation and luminance color adjustment sliders to further manipulate each individual color.

Finally, I applied the fade to the RGB tone curve by raising the tail of the shadow end of the curve and flattening out the remainder.

To finish of my Lightroom color grading, I went back up to the Basic Panel and made a few final tweaks – increasing the clarity and vibrance to add a little extra punch.

At this point I was happy with the color grading look, but there were a couple of other adjustments to make to finish my edits.
In Lightroom you can kinda mimic the look of high end Photoshop retouching frequency separation edits (where the colors are blurred but the texture and details are retained) by applying heavy noise reduction and sharpening the edges in the Detail Panel.

And finally to isolate the subjects from the background, I applied a few -1 exposure gradients from the top and bottom with the gradient tool and a vignette in the Effects Panel.

The last thing I did was to create a custom Lightroom Preset which allows me to apply the exact same color grading effect to other photos.

Because every photo is unique I only included the color grading adjustments with the preset – all of the basic adjustments would be made before applying the preset.

Here is an example of my new Lightroom color grading preset applied to a completely different photo.


If you are interested in a more detailed explanation, I ended up creating a video tutorial class on Skillshare that goes through the above process step by step. Click here to enroll in this class for free (limited to 50 free enrollments for DIYP readers – first come first served).
Skillshare also has an awesome promotion on right now where you can sign up with unlimited access to all classes for one month free, or for three months for $0.99 – just click here.
What Do You Think?
What do you think of this look?
Have you tried to color grade your photography with Lightroom?
How did it turn out?
Leave a comment below and let us know what you think!

JP Danko
JP Danko is a commercial photographer based in Toronto, Canada. JP can change a lens mid-rappel, swap a memory card while treading water, or use a camel as a light stand.


Join the Discussion
DIYP Comment Policy
Be nice, be on-topic, no personal information or flames.
8 responses to “Cinematic Color Grading With Lightroom”
What do I think? Simply that this orange/teal grading + brainless green tinting that’s done on most movies is ruining cinematography. Gone are the days of light mastery, we have orange/teal now. I’d prefer we go back to black and white.
This fad will end soon enough.
This is great! It goes to show the power of Lightroom. I love it!
Ah, the Hollywood teal… I guess it worked pretty well JP, for the people who actually likes the Hollywood gritty looks… honestly, I’m tired of movies that looks that way. But the technique itself works!
Final touches perhaps: pick some harsh textures and apply on top, ramp up contrast beyond what would be considered “sensitive”, same for sharpening tool, darken the f* out of it and then put some heavy vignetting on top, finish with some explosions in the back. xD
Because….cool guys don’t look at explosions, they blow stuff up and they walk away….? https://youtu.be/Sqz5dbs5zmo
Gotta love The Lonely Island
I’m in conflict with this article. I’ll start saying that I’m no color grading expert by any means, I do almost only interior photography, therefore I reproduce the colours as I saw them as much as possible, with only a slight warmer touch, and I’m just now starting trying to develop my own colour style for other projects.
On one hand I really don’t like how the grading you’ve shown works for the images above, with the man and the woman. The result is (personally) way too dark, oversaturated and lacks too much contrast. It hurts my eye to look at it, as it has happened in some of my failed experiments at grading.
OTOH it totally works for the image of the kid. I really like it, but I’m not really sure that the same settings have been applied, as the “after” image has the same, possibly more contrast than the “before”.
I’ll give it a shot and see if the settings you’ve shown are working for my images.
Super resources about lightroom, thanks for this good share