


Advanced Macro Photography Techniques for Incredible Close-Up Shots
Oct 16, 2025
Darlene Lleno
Darlene Lleno brings a unique perspective to DIY Photography as someone who grew up surrounded by camera gear but chose words over lenses. With five years of writing experience, she specializes in photography content that’s both technically informed and genuinely passionate. Growing up with a photographer twin brother meant camera talk was everyday conversation in her household. While he mastered capturing moments, Darlene discovered she preferred being the subject and the storyteller behind the scenes. As a travel enthusiast and mother of two, she understands the importance of preserving life’s precious moments. When not exploring new destinations or writing for DIY Photography, you’ll find her reading or tending to her garden. Her approach to photography writing is refreshingly authentic, she may not be behind the camera, but she knows exactly what it takes to help others capture the shots that matter most.
Share:

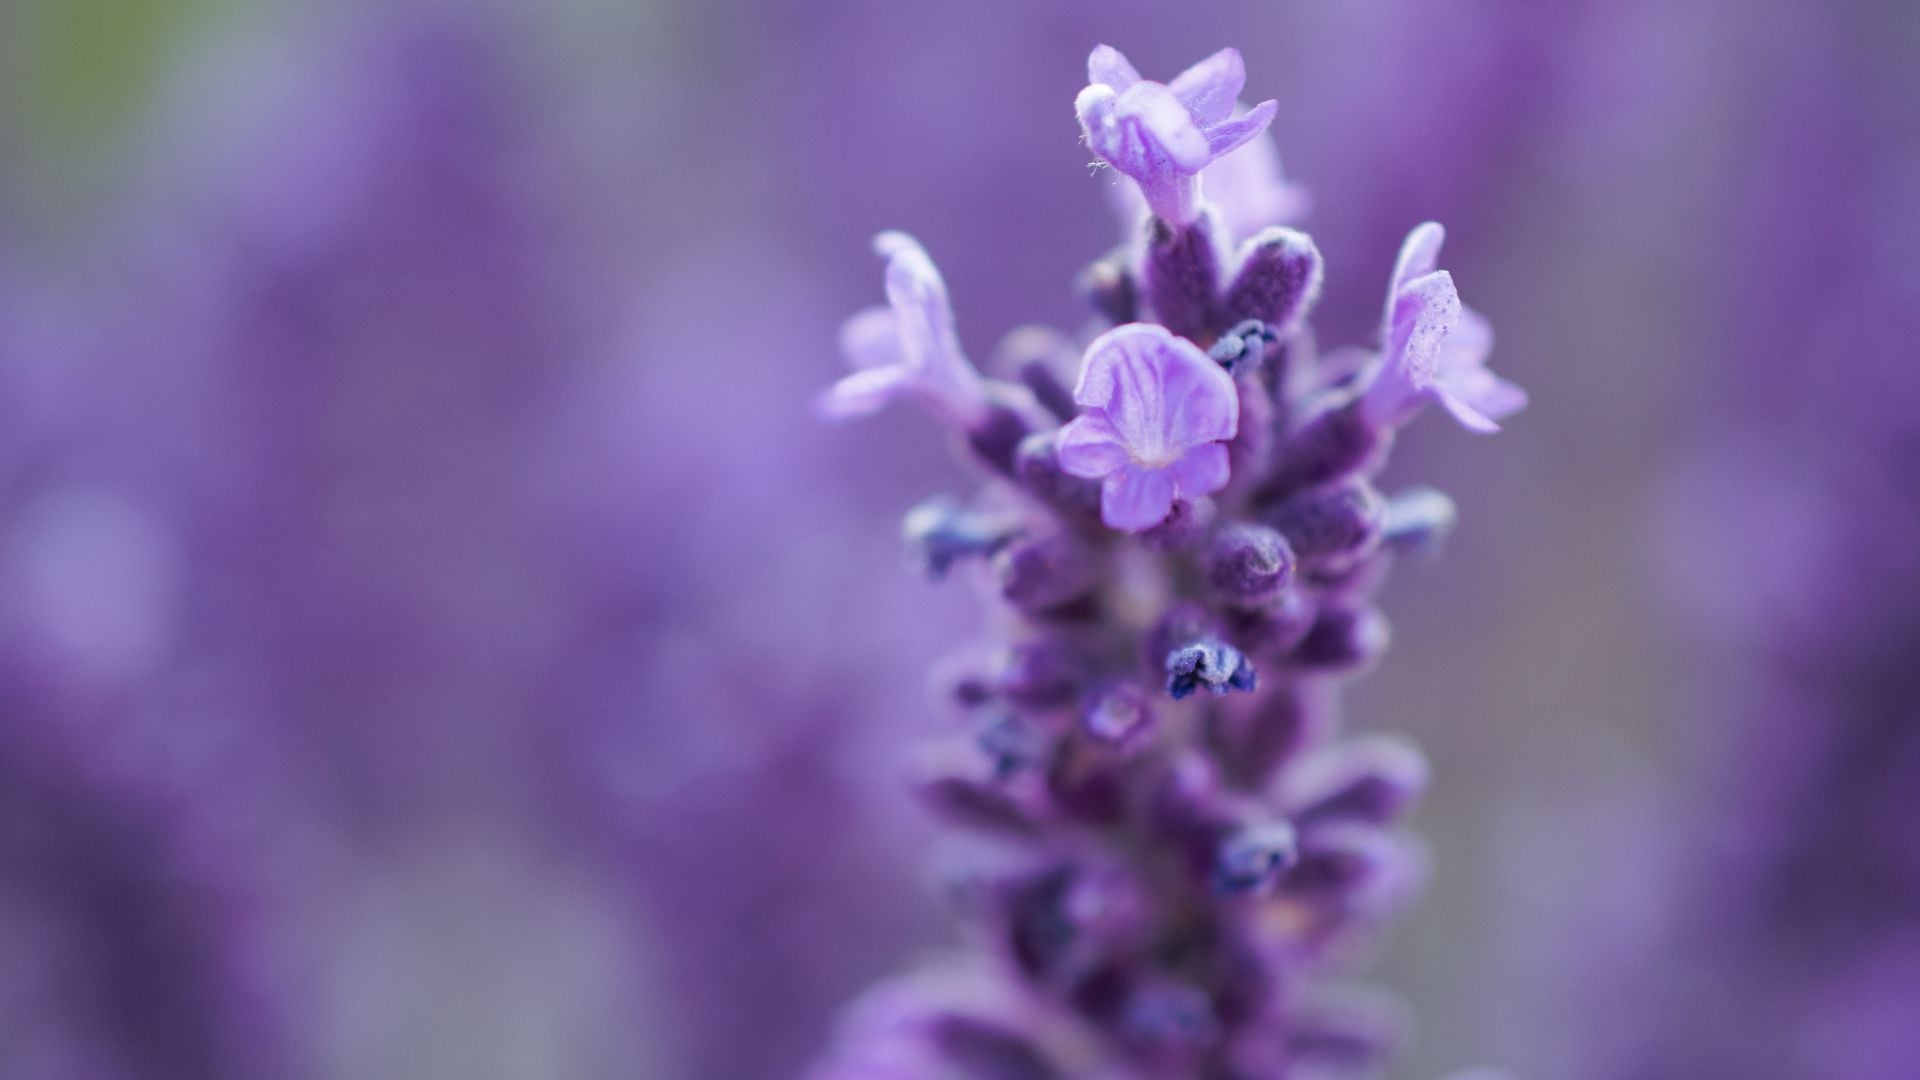
Macro photography techniques reveal a hidden world right under our noses. You can capture tiny details most people never see. Think about the delicate patterns on butterfly wings or water droplets clinging to flower petals. These small subjects become stunning when you know how to shoot them properly.
Getting great macro shots takes more than just getting close. You need specific skills and the right approach. This guide shows you professional methods that work. We’ll skip the basics and jump straight into techniques that actually make a difference.
Read more: Advanced Macro Photography Techniques for Incredible Close-Up ShotsWhat Makes True Macro Photography Different
Real macro photography works at 1:1 magnification. Your subject shows up life-sized on your camera sensor. A 15mm beetle takes up exactly 15mm of sensor space at true macro ratio.
Many “macro” lenses don’t actually hit 1:1. They might only reach 1:2 or 1:4 ratios. These still get you close-up shots. They just don’t qualify as true macro by technical standards.
Some specialized gear goes beyond 1:1 into super macro territory. We’re talking 2:1, 3:1, or even 5:1 magnification. At these extreme levels, subjects appear way bigger than real life.
Your magnification ratio determines how close you need to get. Higher magnification means working closer to your subject. This creates problems with lighting and focus. You’ll also spook living creatures easily. A 100mm macro lens lets you work comfortably at 1:1. A 60mm lens forces you almost on top of your subject.
Mastering Focus Stacking Techniques
Macro photography techniques demand serious focus control. Your depth of field gets incredibly shallow up close. Even at f/16, you might only get a few millimeters sharp.
Focus stacking solves this problem brilliantly. You take multiple shots at different focus points. Then you blend them together in editing. The final image shows sharp detail throughout.
This technique separates beginners from serious macro shooters. It takes practice but delivers professional results. You’ll see everything in crisp focus from front to back.
How to Stack Focus Manually
Mount your camera on a solid tripod first. Frame your subject and set your aperture between f/5.6 and f/8. Wider apertures actually work better here. You’re stacking images anyway.
Focus on the closest part of your subject. Take your first shot. Turn the focus ring slightly to move deeper. Take another shot. Keep going until you’ve covered everything.
The number of shots depends on your magnification and aperture. At 1:1 with f/8, you might need 10-15 frames. At 5:1 magnification, you could need 50 or more. Each focal plane needs to overlap slightly with the next.
Make sure your lighting stays consistent between shots. Any changes will show up in the final stack. Lock your exposure settings before you start shooting.
Using Automated Focusing Rails
Manual focusing works fine for still subjects. But turning the focus ring can shift your framing. This causes alignment headaches later.
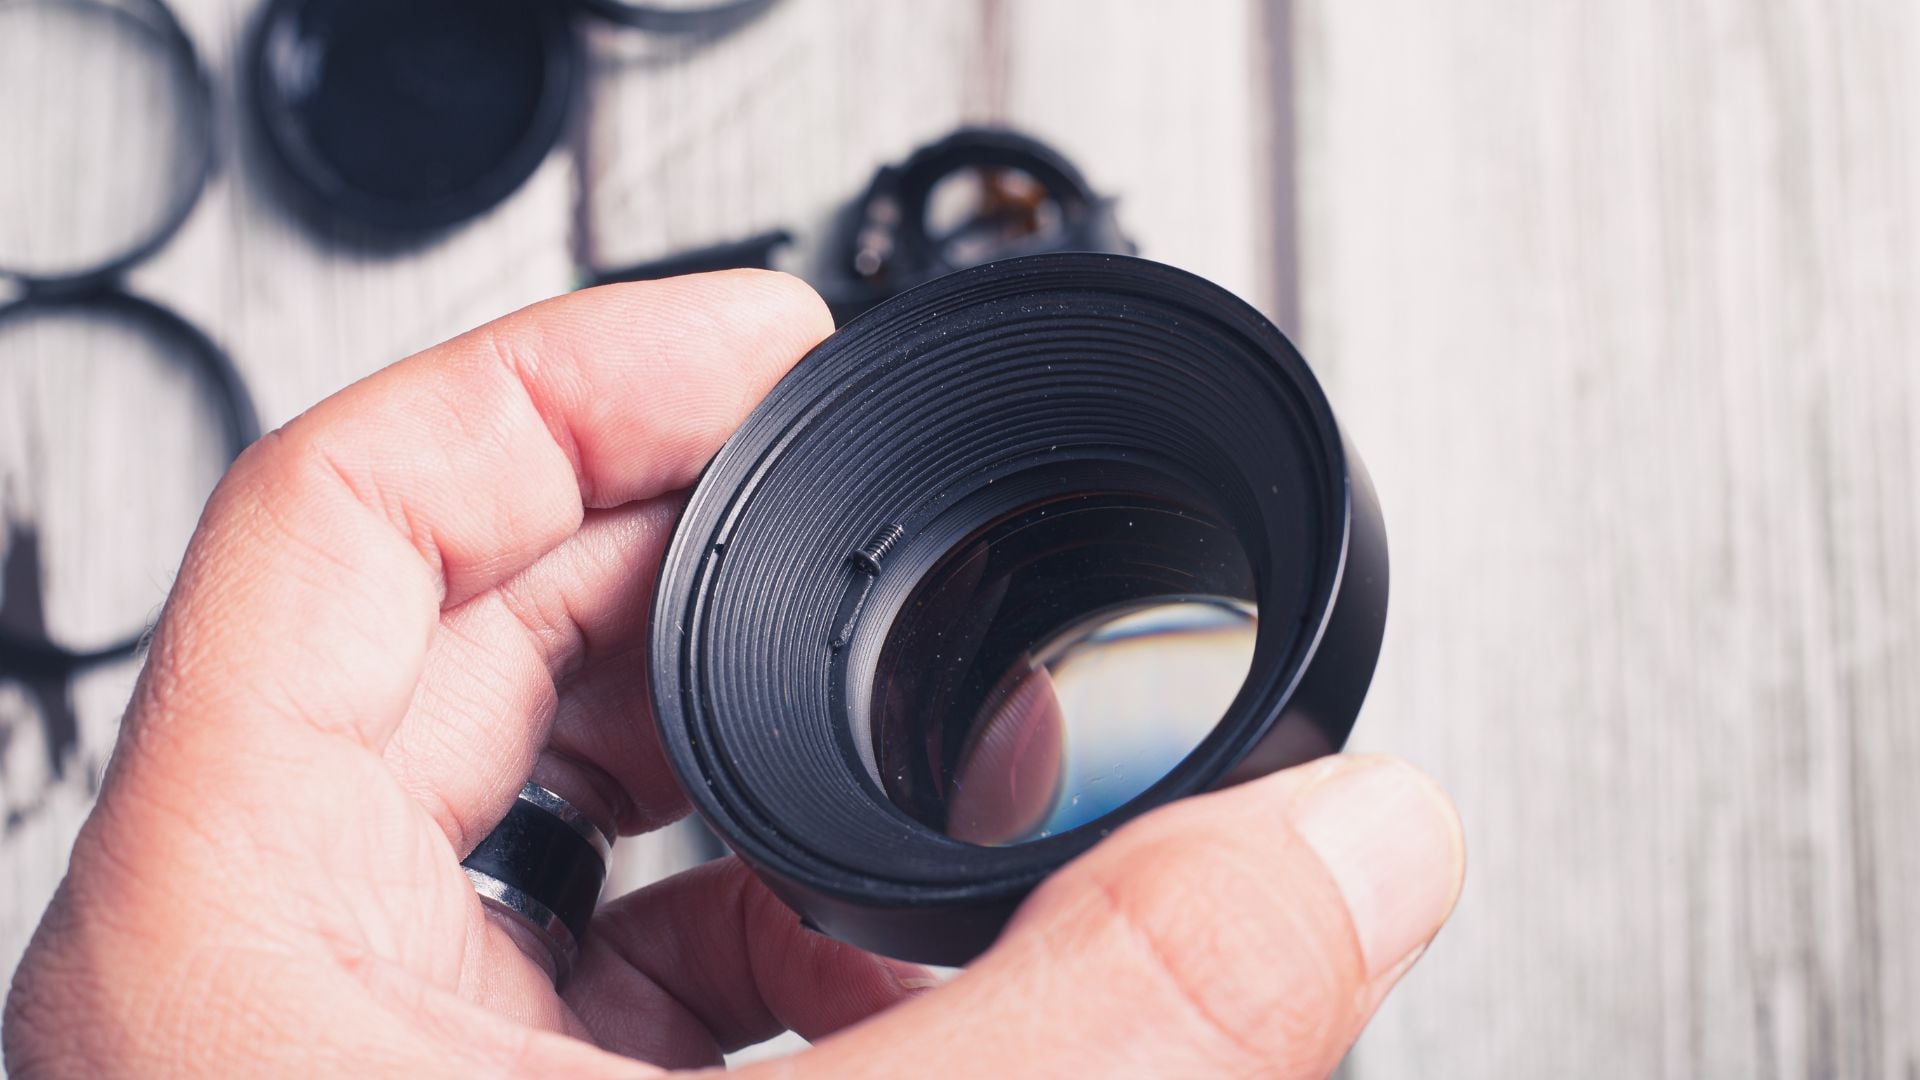
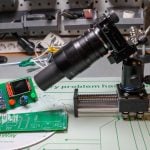
Motorized focusing rails fix this issue completely. These devices move your entire camera in precise steps. You set the start point, end point, and step size. The rail does everything automatically.
Budget manual rails cost around $50-80. They work well when you’re starting out. Mid-range automated systems like the WeMacro run $200-300. High-end options exceed $500. You can even build your own Arduino-controlled rail for under $100.
Choosing Focus Stacking Software
Three main programs handle focus stacking well. Photoshop works for basic stacks. Load your images as layers. Select them all. Choose Edit, Auto-Blend Layers, then Stack Images.
Helicon Focus gives you more control. It has multiple rendering algorithms. PMax works best for complex edges. Method A produces smoother results for organic subjects.
Zerene Stacker offers the most advanced features. DMap and PMax algorithms handle different challenges. The retouching tools help fix artifacts that pop up sometimes.
Cost matters here. Photoshop needs a subscription. Helicon Focus and Zerene Stacker offer one-time purchases. They run around $100-300 depending on the license.
Getting Your Lighting Right
Light behaves weird at macro distances. Your lens often blocks ambient light from hitting subjects. Shadows turn harsh quickly. Reflections create annoying hot spots everywhere.
Professional macro shooters spend as much time on lighting as they do on composition. Good light makes average subjects look incredible. Bad light ruins technically perfect shots.

Ring Flash Setup and Use
Ring flashes mount around your lens barrel. They provide even light from all directions. This kills shadows completely. You get a distinctive flat lighting style.
Medical photographers love ring flashes for documentation. The lighting looks clinical though. Many creative photographers avoid them for this reason. The catchlights show up as circles in shiny surfaces. It looks unnatural sometimes.
Budget ring flashes cost $80-150. Professional units run $300-600. Some let you adjust left and right power separately. This creates subtle directional lighting effects.
Twin Flash Systems
Twin flash setups use two small flashes on brackets. They mount around your lens. You control each flash independently. Position one as your main light. Use the other for fill. This creates depth that ring flashes can’t match.
Diffusion matters tremendously with any macro flash. Bare flash creates harsh lighting even at low power. Small diffusers made from translucent materials soften everything nicely. Some photographers use white paper. This adds a warm color cast you’ll need to fix later.
Twin flash systems cost $300-800 for complete setups. You can build DIY versions much cheaper. Use speedlights and homemade diffusers to save money.

Working With Natural Light
Direct sunlight rarely works for macro subjects. The light is too harsh. You get blown highlights and blocked shadows. Overcast days provide beautiful even light. It’s like shooting under a giant softbox.

Darlene Lleno
Darlene Lleno brings a unique perspective to DIY Photography as someone who grew up surrounded by camera gear but chose words over lenses. With five years of writing experience, she specializes in photography content that’s both technically informed and genuinely passionate. Growing up with a photographer twin brother meant camera talk was everyday conversation in her household. While he mastered capturing moments, Darlene discovered she preferred being the subject and the storyteller behind the scenes. As a travel enthusiast and mother of two, she understands the importance of preserving life’s precious moments. When not exploring new destinations or writing for DIY Photography, you’ll find her reading or tending to her garden. Her approach to photography writing is refreshingly authentic, she may not be behind the camera, but she knows exactly what it takes to help others capture the shots that matter most.
Related Posts
 This Arduino-powered DIY macro rail helps you shoot perfect stacked macro shots every time
 The Complete Macro Photography Guide: Master Close-Up Photography
 Get up close and personal with nature with Close-up Photographer of the Year 2024 shortlists
 Capture stunning close-ups: Four macro photography methods for any budget
Join the Discussion
DIYP Comment Policy
Be nice, be on-topic, no personal information or flames.