


Ilford’s crash course teaches you how to develop black and white film
Mar 1, 2018
Dunja Đuđić Kalinin
Dunja Djudjic is a multi-talented artist based in Novi Sad, Serbia. With 15 years of experience as a photographer, she specializes in capturing the beauty of nature, travel, concerts, and fine art. In addition to her photography, Dunja also expresses her creativity through writing, embroidery, and jewelry making.
Share:

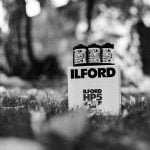
Despite all the new, high-end digital cameras, film photography has been regaining popularity in recent years. So, perhaps you’d also like to grab an old film camera and shoot a roll of black and white film. If this is the case, Ilford Photo has a great crash course for you. In this video, they’ll teach you how to develop your very first black and white film at home.
There are several techniques to develop black and white film, and you can even do it with beer. But, the video from Ilford uses conventional chemicals. So, if you follow their tutorial, you can save that bottle of Guinness to treat yourself after you’re done developing.
The video is divided into five segments, showing the process of developing from the preparation to hanging and drying the developed film. It starts with the items you’ll need:
- Black and white film
- Cassette and cap remover
- Scissors
- Developing tank
- Spiral
- Film clips or pegs
- Timer
- 3 x large measuring cylinders
- Small measuring cylinder
- Pipette
- Thermometer
- Squeegee tongs
- Rubber gloves
- Safety glasses
- Chemicals:
- Developer
- Stop bath
- Fixer
- Wetting agent
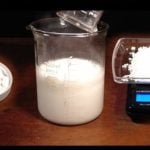
The second part of the video is dedicated to preparing the chemicals. Ilford points out that the volume and dilution of the chemicals you need to mix will vary. But, you can find more details in the relevant Technical Data Sheets on their website. When you mix the chemicals, make sure to rinse the measuring cylinders to prepare them for the next chemical.
After this, Ilford’s video teaches you how to load your film. You should do it in the complete dark or use a changing bag. They suggest you align the items in the logical order, so you know where to find them in the dark. Also, they advise you to practice loading film onto a spiral first with a roll of old or wasted film.
When you load the film onto the spiral, it’s time for processing the film. At this stage, pay attention to follow the instructions and keep track of the time for each stage of the development. When you’re done with the chemicals, rinse the film with water to remove chemical residue. For the final rinse add a drop of wetting agent to the water.
Finally, it’s time to hang and dry your film. Remove it from the developing tank and pull the film’s end out of the spiral. Unwind the film and remove excess water by running squeegee tongs or clean fingers down the length of the film. Hang it in a dry and dust-free place until it’s dry. You can cut the negatives into strips, examine them, and you’re good to go: your film can now be scanned or you can make prints.
Of course, make sure to watch the video for more detailed guidelines and precise measurements. Also, you can check out another tutorial here or here.
Over the past year, Bergger, Film Ferrania and Zorki Photo have launched black and white films. There’s no doubt that film photography has been increasing in popularity, so I believe tutorials like this can be very useful for all of you who want to start developing their own film. If you decide to give it a go: good luck!
[Processing black & white film |Ilford Photo]

Dunja Đuđić Kalinin
Dunja Djudjic is a multi-talented artist based in Novi Sad, Serbia. With 15 years of experience as a photographer, she specializes in capturing the beauty of nature, travel, concerts, and fine art. In addition to her photography, Dunja also expresses her creativity through writing, embroidery, and jewelry making.


Join the Discussion
DIYP Comment Policy
Be nice, be on-topic, no personal information or flames.