


How to create full colour photographs with only black & white film
Jul 25, 2018
John Aldred
John Aldred is a photographer with over 25 years of experience in the portrait and commercial worlds. He is based in Scotland and has been an early adopter – and occasional beta tester – of almost every digital imaging technology in that time. As well as his creative visual work, John uses 3D printing, electronics and programming to create his own photography and filmmaking tools and consults for a number of brands across the industry.
Share:
We all know that digital images are made up of red, green and blue “pixels”. Often, to capture this, sensors are in some kind of side-by-side pixel array, like with Bayer and X-Trans or layered, like Foveon. But that’s not the only way to create a full colour image. Many video cameras do it with the use of a prism splitter and three separate sensors capturing red, green and blue signals which are then merged together.
Mike and JohnBen at Clovehitch Productions wanted to try to replicate this last method using black and white film. They wanted to see if it was possible to capture just the red, green and blue parts of the spectrum on three separate shots, and then merge them back together to produce a full colour image.
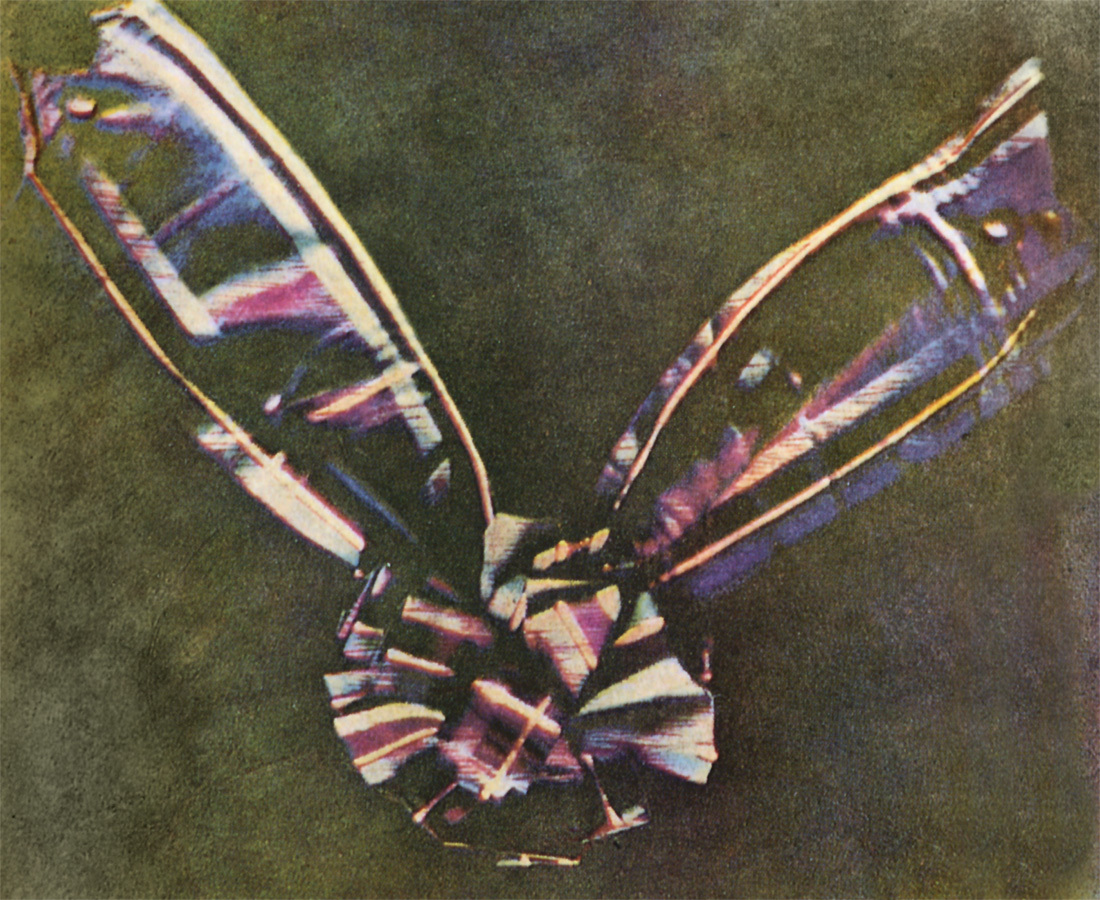
In theory, it should work. Because it did work. This was the method used to create the world’s first colour photograph way back in 1861. The photograph was made by James Clerk Maxwell and Thomas Sutton. They photographed a tartan ribbon three times, each time with a different colour filter (red, green, or blue-violet) over the lens. The three photographs were developed, printed on glass, then projected onto a screen with three different projectors, each equipped with the same colour filter used to photograph it. When superimposed on the screen, the three images formed a full-colour image.
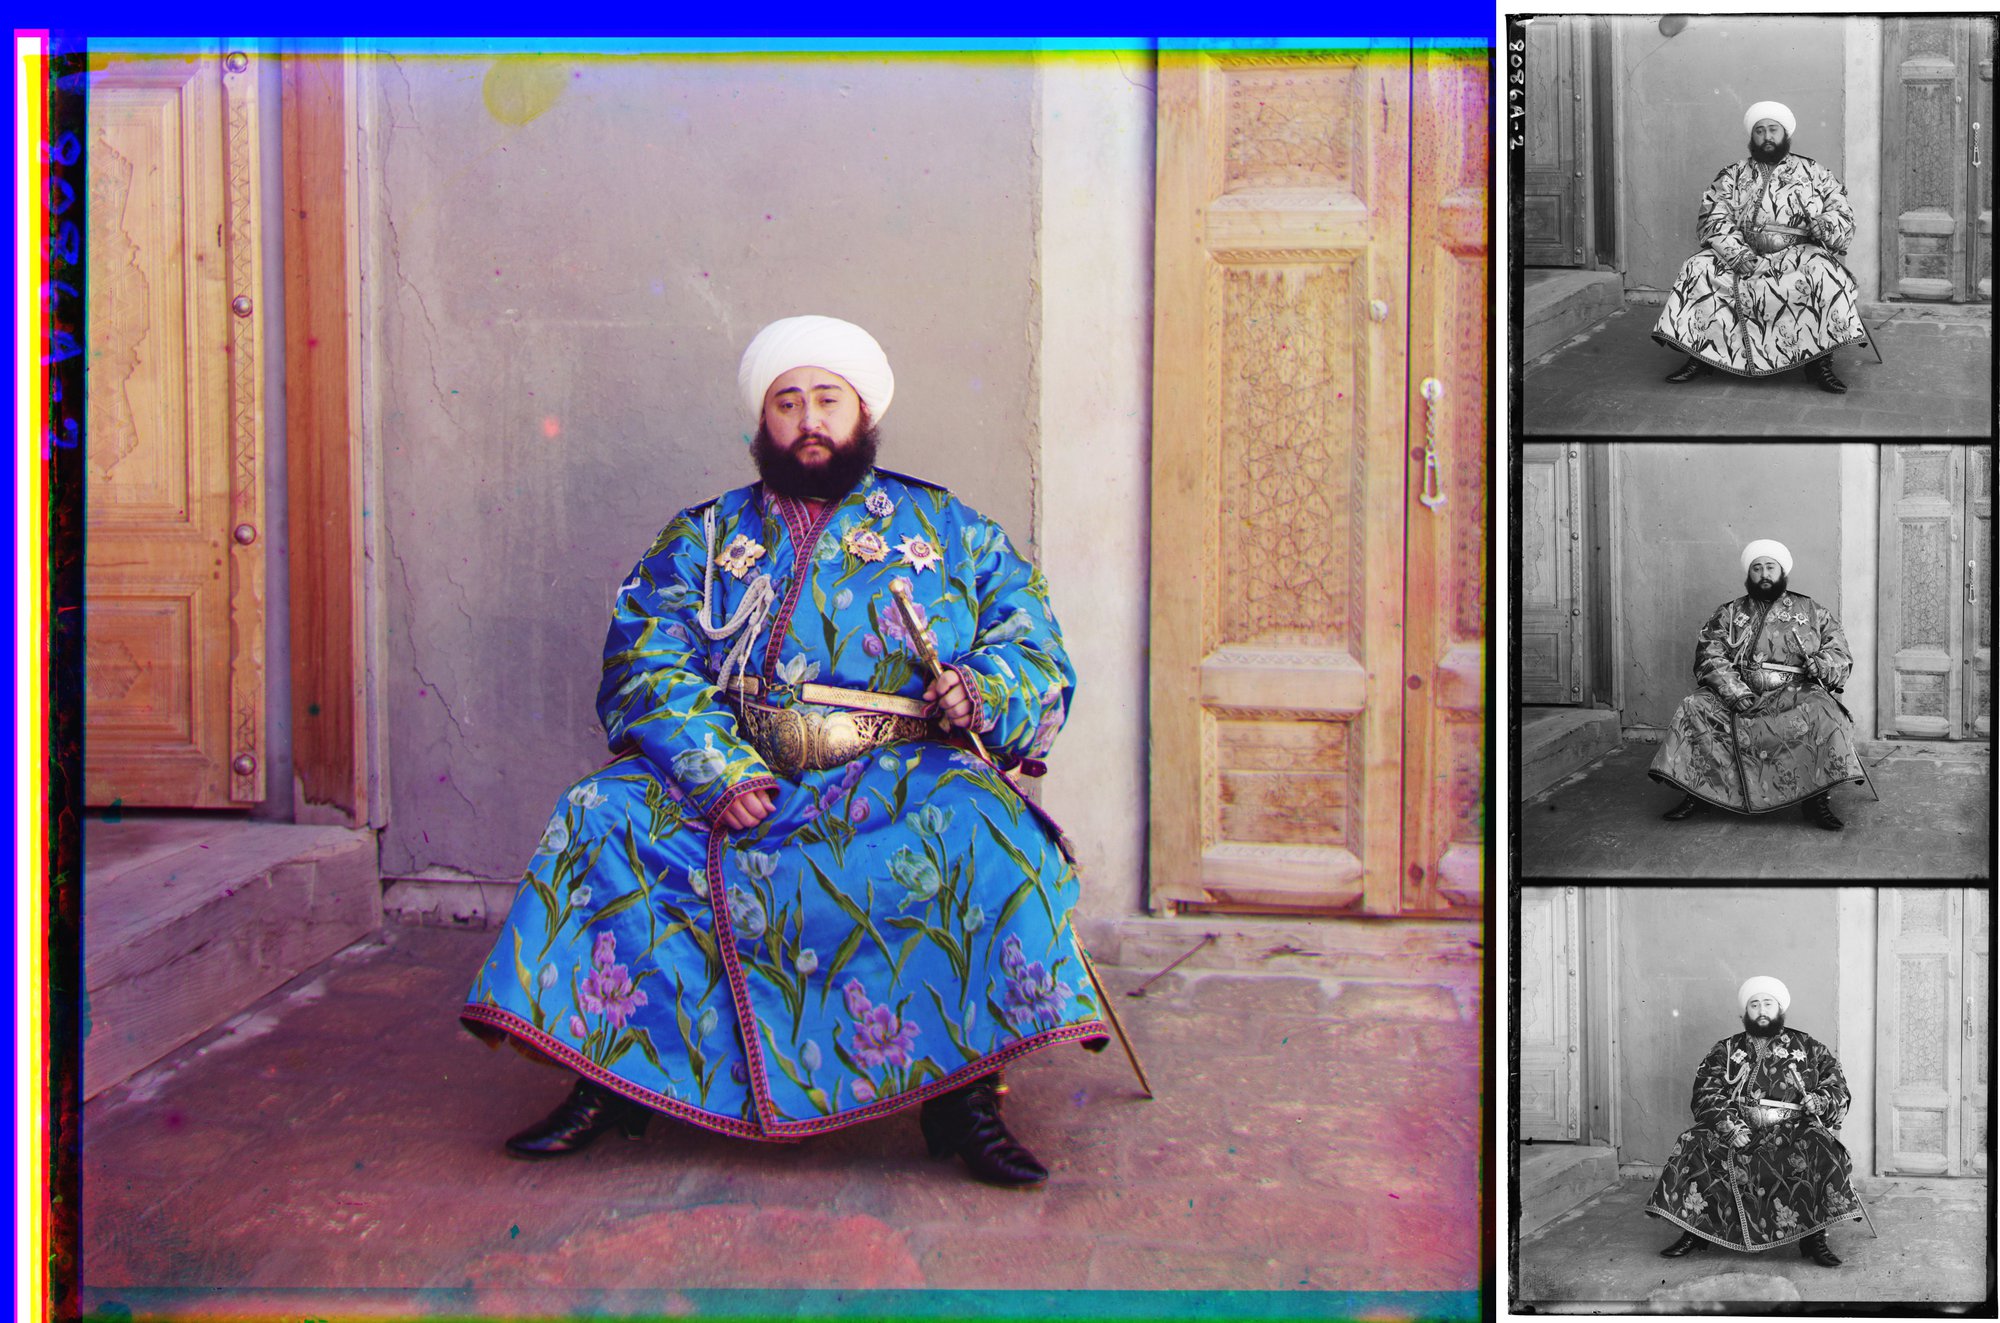
By 1911, the process had become somewhat more refined, as this image of the Emir of Burkhara, Alim Khan, shows.
But seeing that it’s been done already isn’t really an excuse to not experiment and try it for yourself. This is something I’ve wanted to try myself for years but have never gotten around to. It’s still on my list and will happen one day, but for now I’m happy to watch folks like Mike and JohnBen do it.
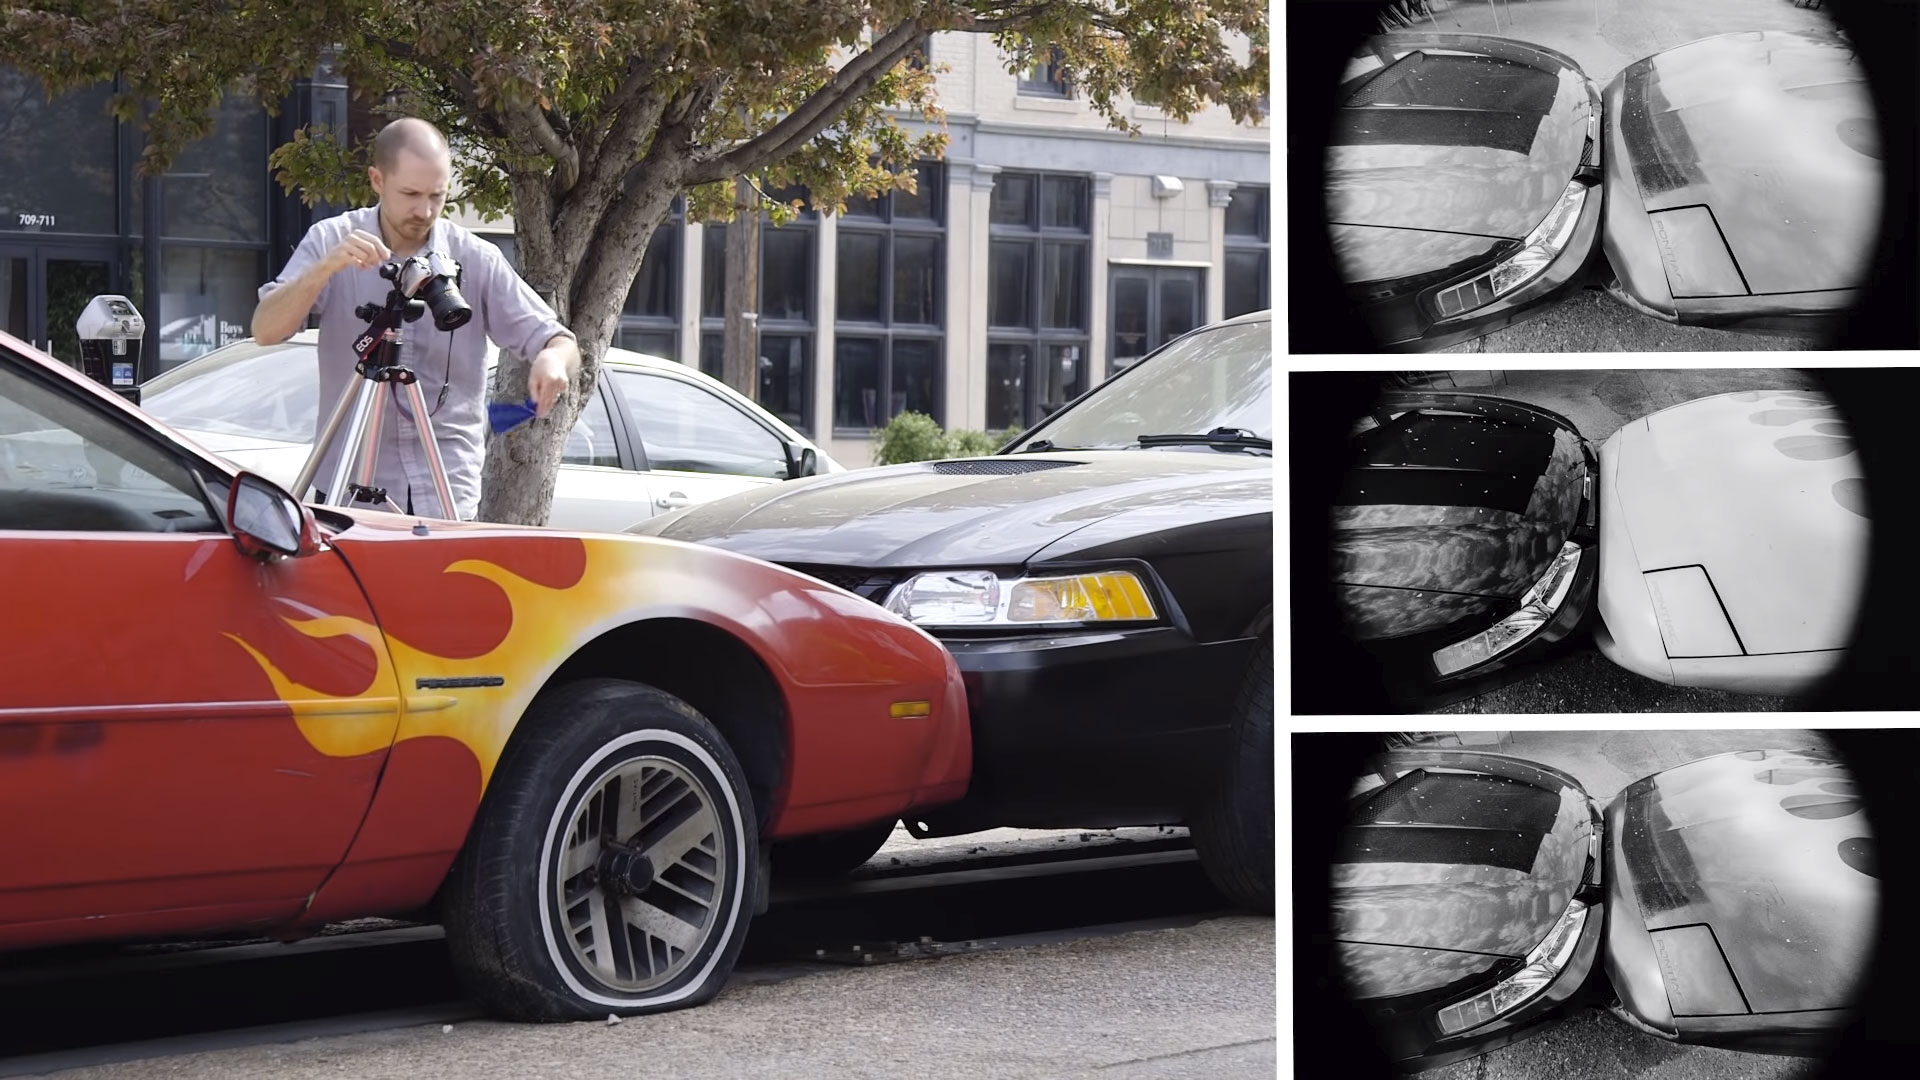
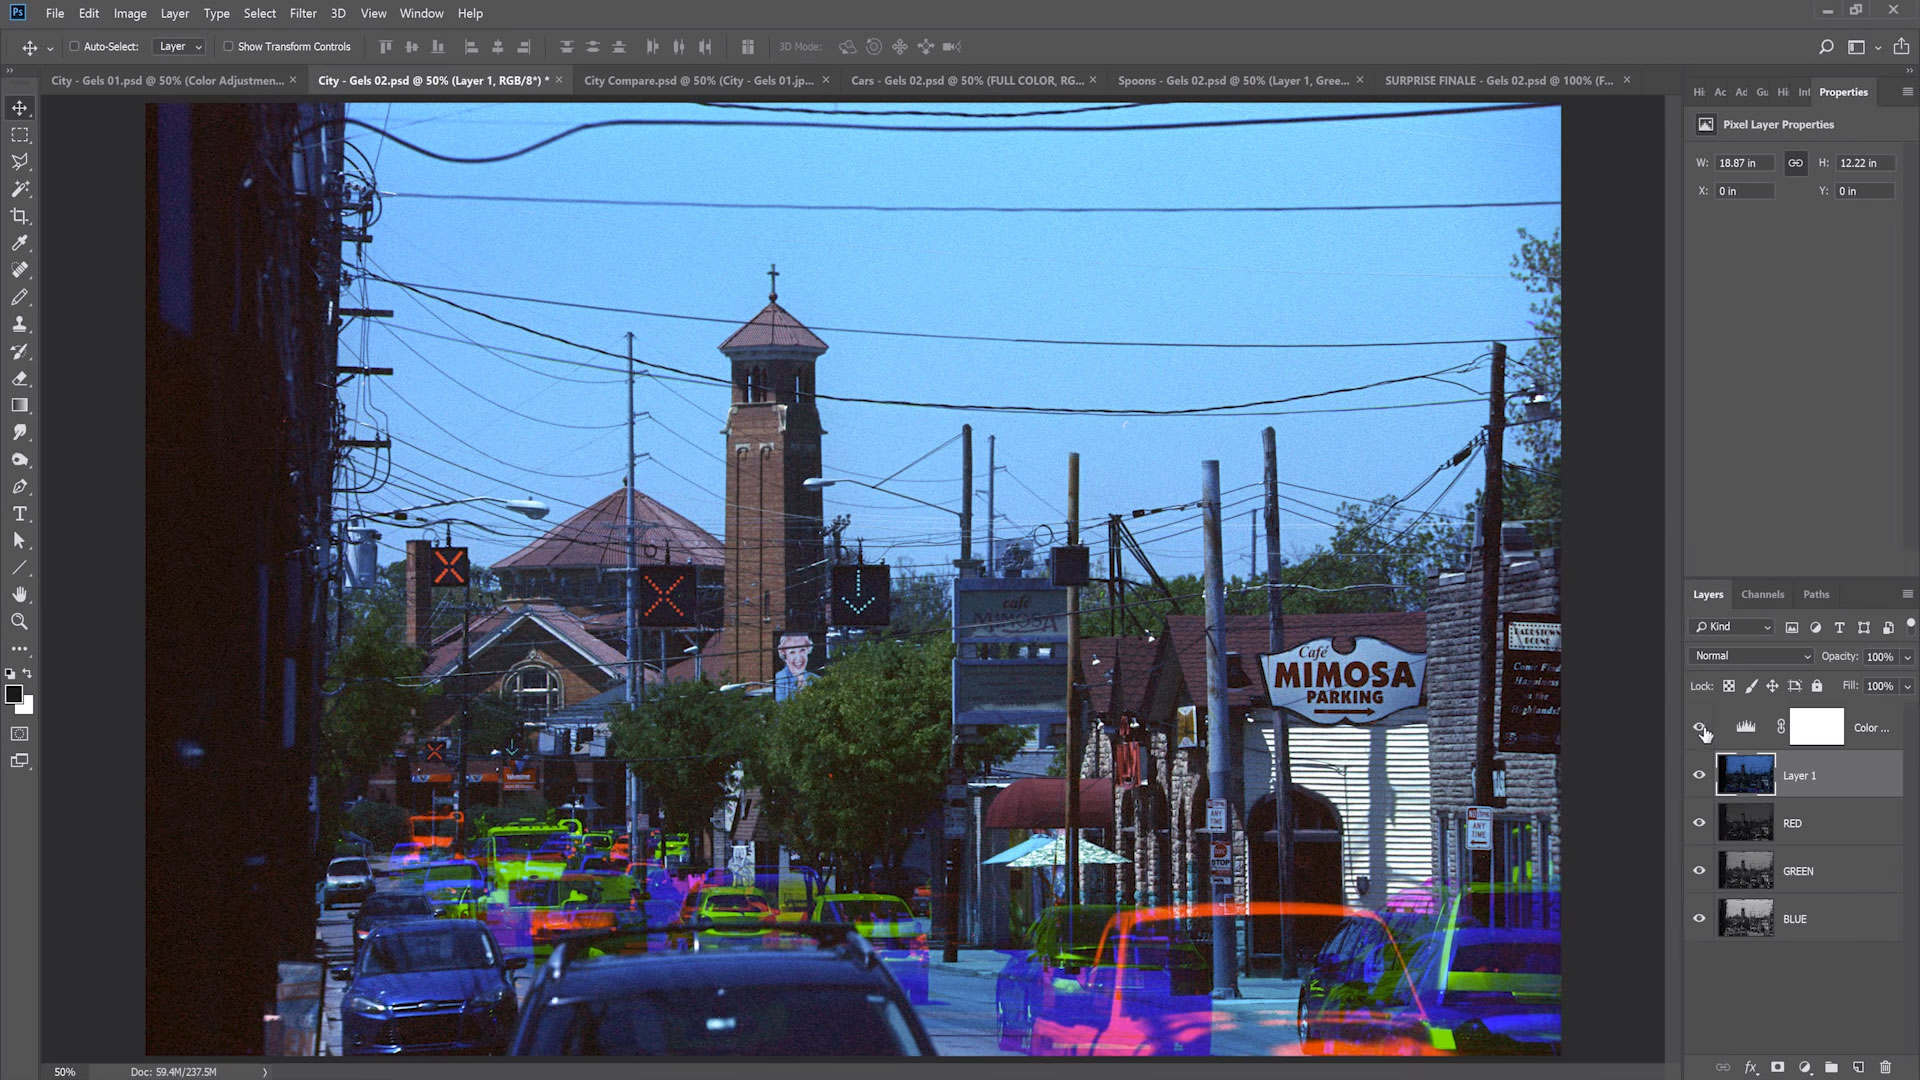
They started by loading up some Kodak Tri-X 400 film into a 35mm camera. Tri-X is a panchromatic film, meaning that it sees all colours in the visible light spectrum. They used two sets of three differently coloured filters to then shoot each of the photographs. One red, one green, and one blue. They used two sets because they were slightly different shades of each colour. This gives them a little more latitude for experimenting in post.
It’s interesting to see the looks that the differently coloured filters give to each black and white frame. And it’s these looks that were the reason why people used to use coloured filters with black and white film, to help add or decrease brightness and contrast in different parts of the image. When you see the images combined, though, it does look pretty cool.
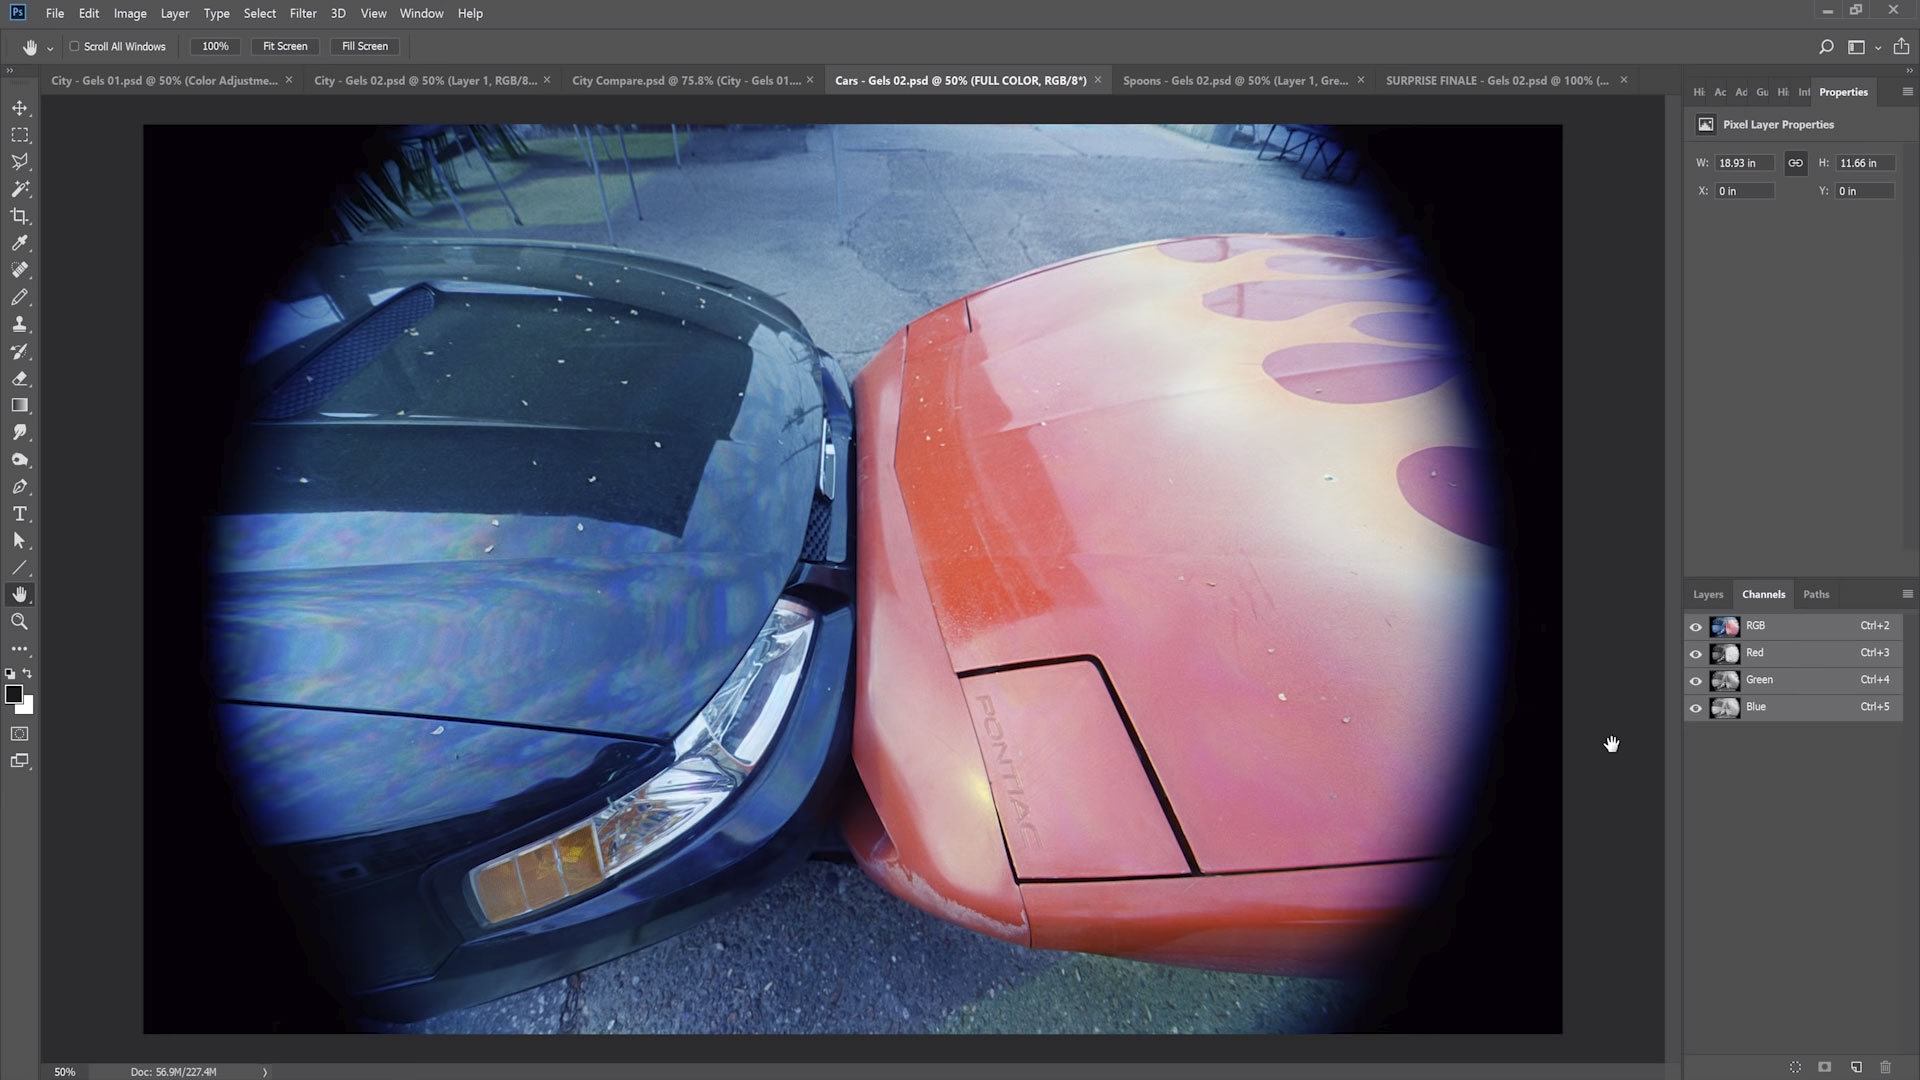
One obvious issue you can spot in the image above is that the cars don’t quite look right. That’s because, in each of the three individual shots that make up the final colour image, the cars are moving. So, each of those areas will see different amounts of red, green and blue, leading to this multicoloured ghosting effect.
For best results, you’ll want a scene that isn’t moving at all. And even then, you have to watch out for things that might move, like reflections of clouds travelling through the sky.
There’s really no practical use for this technique today, other than to experience it and experiment with it. I do like some of the multicoloured effects you see in certain images, though, where some elements aren’t quite lined up.
Plenty more examples are shown in the video, and they are pretty interesting.
Yeah, this one’s definitely staying on my to-do list.

John Aldred
John Aldred is a photographer with over 25 years of experience in the portrait and commercial worlds. He is based in Scotland and has been an early adopter – and occasional beta tester – of almost every digital imaging technology in that time. As well as his creative visual work, John uses 3D printing, electronics and programming to create his own photography and filmmaking tools and consults for a number of brands across the industry.
Related Posts
 Create Futuristic Photographs With Black Light And Office Markers
 This is why black & white film is more expensive to have developed than colour
 Use this Hollywood colour designer trick to elevate the emotion in your photographs
 Black & white film reversal process – how to turn your negatives into film positives
Join the Discussion
DIYP Comment Policy
Be nice, be on-topic, no personal information or flames.
2 responses to “How to create full colour photographs with only black & white film”
That was our first assignment at photo college in colour theory class.
I’ve been doing this technique for years. It’s the same technique printers used to use to make full color prints for magazines before computers came along. Here’s a tip to give the prints even more depth and richness. Take a fourth photo without any filter. Then either give it less time in the developer and print stage, or back it off to about 20-30% transparency in the computer and use it as a black layer to get the full CMYK effect.
You can also use red and green filters and reverse them with green and red inks for the print layers and get a Kinemacolor effect. Or you can use any number of color variations, such as a hexachrome (CMYKOG) so long as you print each layer with the opposite color of the filter used to make the exposure.