


Add an Electronic Flash to the Panasonic Lumix S9…YES, Really!
Feb 1, 2026
David Prochnow
Our resident “how-to” project editor, David Prochnow, lives on the Gulf Coast of the United States in Ocean Springs, Mississippi. He brings his expertise at making our photography projects accessible to everyone, from a lengthy stint acting as the Contributing How-To Editor with Popular Science magazine. While you don’t have to actually build each of his projects, reading about these adventures will contribute to your continued overall appreciation of do-it-yourself photography. A collection of David’s best Popular Science projects can be found in the book, “The Big Book of Hacks,” Edited by Doug Cantor.
Share:
When I was writing for Popular Science magazine, one of my most popular articles was “Set Up a High-Speed Audio-Triggered Flash“. Why? Because everybody loves photographing bursting balloons, splashing water drops, and exploding fruit. While the project was devilishly clever it involved purchasing a handful of electronic components and then soldering these pieces and parts together into a working circuit.
Luckily, today this exact same kind of circuitry can be used with the Panasonic Lumix S9 camera for adding an electronic flash to this unnecessarily-criticized camera. Better still, there is no need for any soldering in this updated project!
It’s Quiet, Almost Too Quiet
It’s almost embarrassing how simple this project is when compared to the original circuit. In this context, only one product is needed for firing a flash in conjunction with the release of the camera’s shutter.


First, a warning: you should be willing to experiment with your camera to obtain the best results with your electronic flash. There isn’t a simple formula for making this into a “foolproof” project. It could take a large number of test exposures before you’ve “cracked the code” for your particular setup.

The only product that you will need is a MIOPS Smart+ Camera Trigger priced at $279. Furthermore, if your flash doesn’t have a built-in Prontor-Compur (PC) socket, you will have to search for a suitable adapter. Some suggestions might be [Please note: these options have not been tested with the S9 and MIOPS trigger]:
- Kaiser 3.5 mm Mini to Hot Shoe Adapter
- Vello Universal Hot Shoe Adapter with 3.5mm Mini Phono and PC Connection
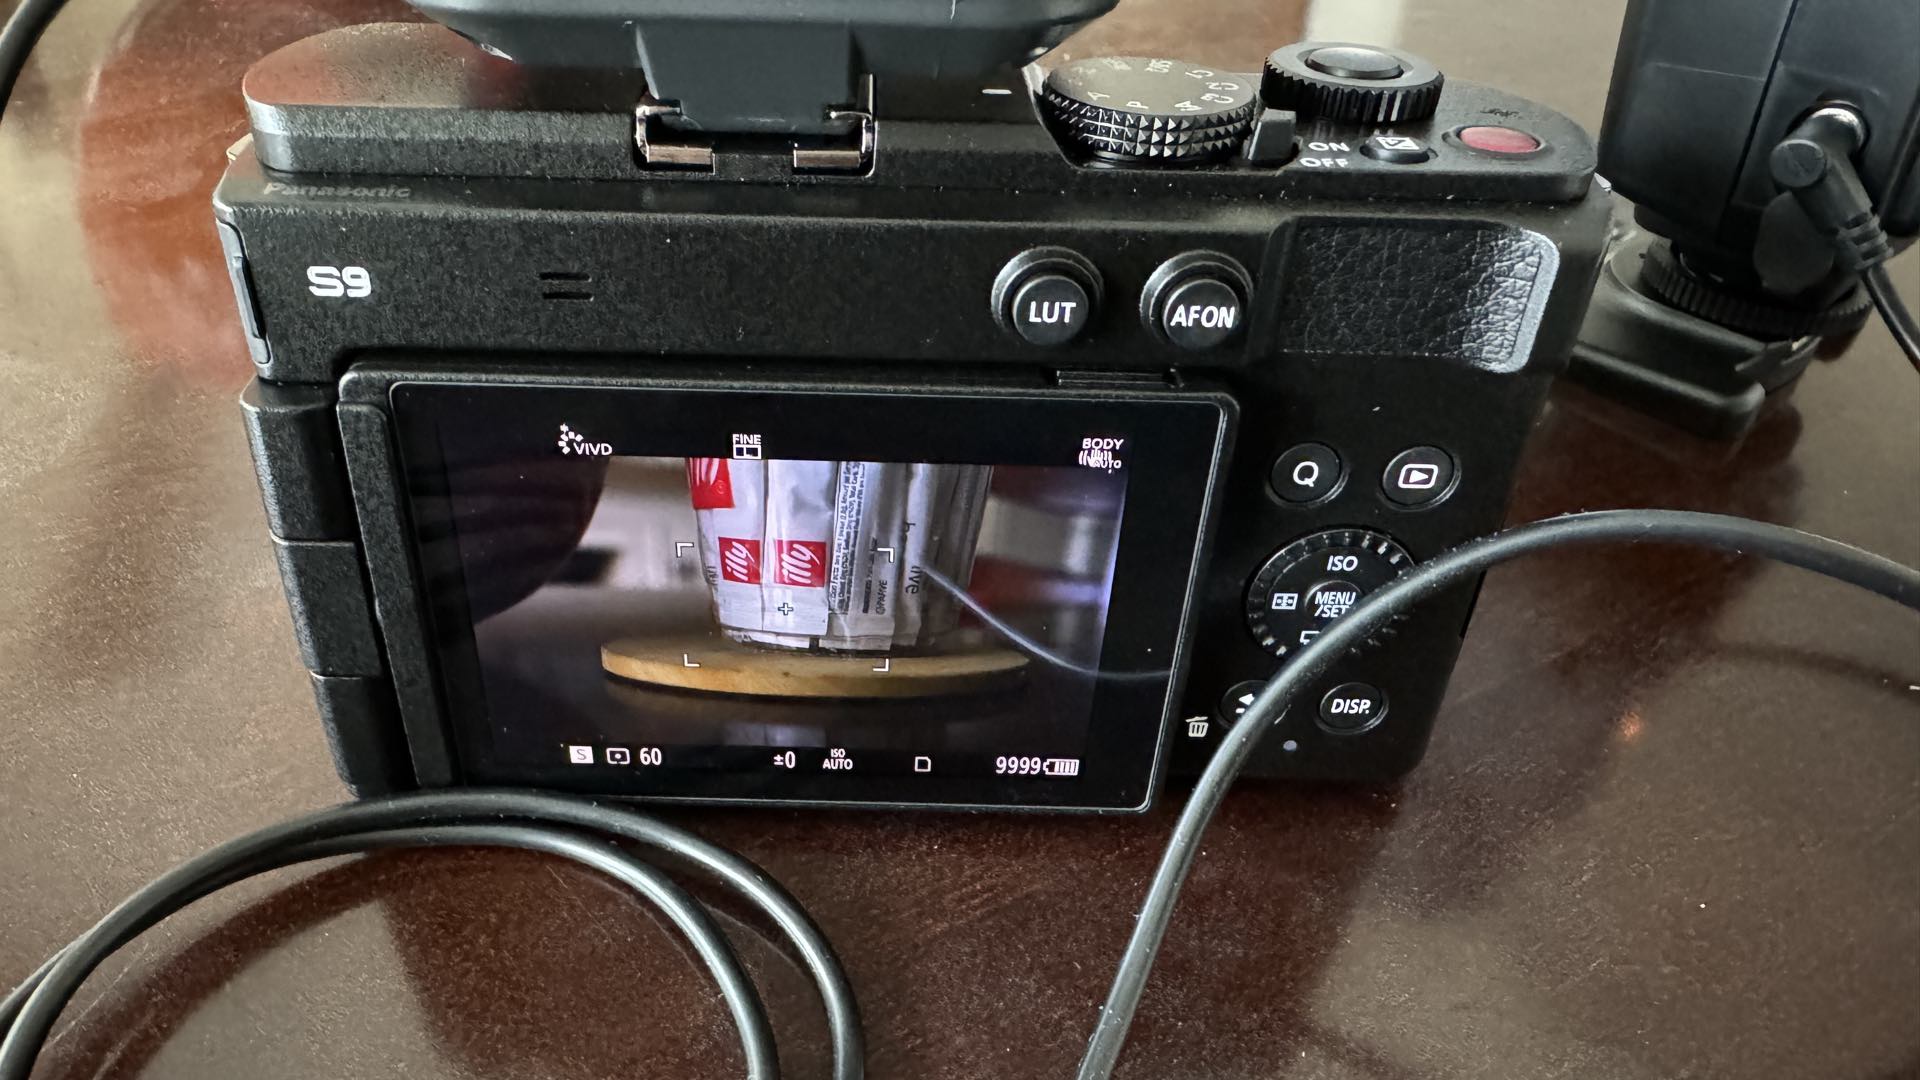
Basically, among its many other diverse applications, the MIOPS is a sound-activated trigger that can fire a flash. And the sound that will be used for firing this flash is the shutter sound from the Lumix S9 camera. After you’ve attached the MIOPS to the S9 cold shoe, there are three things that you will have to do for obtaining a suitable flash-triggered event. First, the S9 must be configured for a loud shutter release beep.

Here’s how: press the Menu button and scroll to the Wrench symbol and select the IN/OUT menu. Select Beep and increase Beep Volume to its loudest setting, but disable AF Beep Volume. Then increase Shutter Vol. to its loudest setting and select Shutter Tone #2.
The second thing that you must do for making the MIOPS reliably trigger a flash is perform a tiny bit of camera gymnastics. Huh? In order to amplify and focus the shutter sound you must partially cup your thumb over the rear camera speaker. This will take some practice to get it “right.” When you’ve “learned” the proper touch, the flash will fire accurately and reliably with every “click” of the shutter release.

Lastly, the third and final thing that you need to discover for obtaining perfect Lumix S9 flash exposures is finding the ideal shutter release time. Generally speaking, the slower the shutter speed the more likely your exposure will be perfect. Using high shutter speeds will usually result in a poorly timed shutter movement. In other words, a portion of the photograph will be black.
Slower speeds work very good and should be coupled with variable aperture diameters for fine-tuning the exposure. Begin your slow shutter speed experimentation with 1/8-second. Likewise, ambient light can affect the photograph and cause motion blur. Therefore, a tripod might be necessary.


Regardless, of how you finalize your newfound electronic flash + Panasonic Lumix S9 camera setup, the freedom of having a full-frame flash for this powerful camera is very liberating. Luckily, you can also use this same setup for photographing bursting balloons. All of this glory without any solder fumes!
Enjoy.
Filed Under:
Tagged With:

David Prochnow
Our resident “how-to” project editor, David Prochnow, lives on the Gulf Coast of the United States in Ocean Springs, Mississippi. He brings his expertise at making our photography projects accessible to everyone, from a lengthy stint acting as the Contributing How-To Editor with Popular Science magazine. While you don’t have to actually build each of his projects, reading about these adventures will contribute to your continued overall appreciation of do-it-yourself photography. A collection of David’s best Popular Science projects can be found in the book, “The Big Book of Hacks,” Edited by Doug Cantor.


Join the Discussion
DIYP Comment Policy
Be nice, be on-topic, no personal information or flames.