


DIY large format scrap camera
Sep 6, 2016
Gvido Mūrnieks

We love it when our readers get in touch with us to share their stories. This article was contributed to DIYP by a member of our community. If you would like to contribute an article, please contact us here.
Share:

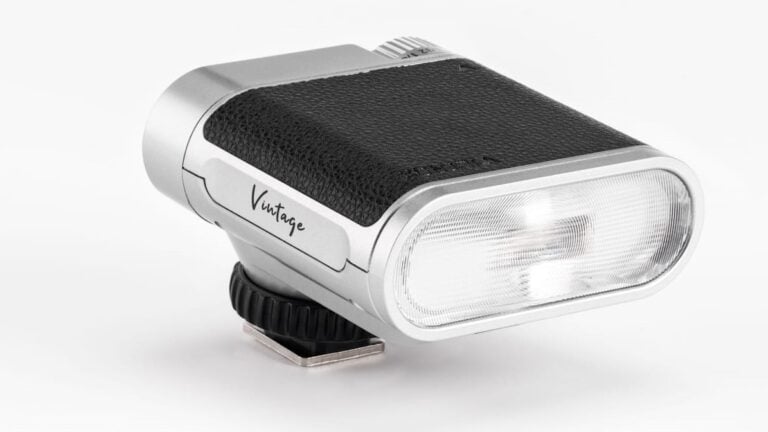
The idea of this camera started with vintage Profile Spotlight, that I wanted to restore, but found out, that some of internal lens elements were shattered. The only lens element, that was undamaged was the front element of it. Upon some closer inspection I discovered, that this element can project image circle big enough, to cover 8X10 area.
The obvious use of it was to create large format camera. but I didn’t want to bother with large format film and other hassles of creating proper large format camera, just for this weekend experiment. So, I decided to create something like Camera Obscura and photograph projected image with DSLR.
Below, you can see basic idea of the camera. As you see – the design is similar to any other large format camera, except this has DSLR added to it, to photograph projection on ground glass.

Fast forward two weekends and here is the finished camera:
Let me show you its features!

Because I didn’t want to invest much (anything) it this project – the camera was created from scraps and other trash lying around garage.
Lens was mounted in a piece of plywood, so I can flip it around, because the lens somewhat changes its look depending on which direction it is flipped. After some testing I found out, that focal length of this lens is roughly ≈450mm, that is equivalent ≈60mm in 35mm format.

Bellows were created from office paper and black trash bags. Folding bellows was hardest part of this project. For more information, I suggest to visit jbhphoto.com, where you will find .pdf file with the most comprehensive information about making bellows on the interwebs.

Ground glass was made from 2.5mm plexiglass, that I wet sanded with 800 grit sandpaper. At first I tried 1500 grit sandpaper, but I found out, that it was too fine and didn’t scatter light enough, to project clear image.
Also, the lens I chose for this project was Tamron 17-50mm f/2.8 VC that was used at its widest position. This allowed me to fill the frame with ground glass roughly 310mm. from camera’s image plane.

For focusing I made rod exertion, so I can focus the lens from back of the camera, while looking at live view.

To make this contraption usable on location – I tried to make it foldable and somewhat convenient to travel with. Well … as convenient as almost a meter long camera can be.

Now, let’s get to the important part of this project.
The photos!


The operation of this contraption is straightforward. At first I focused DSLR on ground glass and locked the focus. Then I used Live View to frame and focus the large camera.

Because my tripod head was barely stable enough to hold this contraption – I had to use self timer to avoid camera shake. Also, shooting in the wind with this thing was major pain in the rear.


Editing raw files was rather straightforward. After removing rather heavy vignetting – photo was edited like any other photograph.


Conclusions
This was very spontaneous project, so I didn’t do much planning. At first I thought, that this will be “make it and throw it out” kind of project, but after playing around with this camera I think, that this should be a “thing”.
I know that there are quite a few photographers with field cameras laying around, who would like to take them out for a spin once in a while, but don’t what to bother with process and cost of large format film. This should remove some of these problems.
Sure, this won’t satisfy everyone, but this is better than collecting dust.
Here are some tips for someone, who want to try something similar:
- Tripod: You should use sturdy tripod, with big quick release plate, for camera this big. Also, ball heads are not very convenient for operating camera this size.
- Ground glass: I suggest to make proper ground glass, by grounding glass with Silicon Carbide powder, or chemical etching. This should avoid most of sanding scratches. And a Fresnel lens in front of focusing screen should remove vignetting.
That is pretty much it!
About the Author
Gvido Mūrnieks is a photographer and tinkerer from Valmiera, Latvia. If you want to see Gvido’s other DIY projects, you can check out his blog. You can also see more of his photos on his Flickr stream and follow his site here. This post was also published here and shared with permission.
We love it when our readers get in touch with us to share their stories. This article was contributed to DIYP by a member of our community. If you would like to contribute an article, please contact us here.
Related Posts
 Get that 4×5 large format look by photographing the ground glass of a large format camera
 This photographer built a DIY talking camera from scrap components
 A primer on shooting 35mm, medium format and large format film
 Shooting Brenizer method portraits on medium format film to simulate a large format look
Join the Discussion
DIYP Comment Policy
Be nice, be on-topic, no personal information or flames.
10 responses to “DIY large format scrap camera”
Fantastic results, I love the unique images you were able to creat with this project
Thanks! Glad you liked it!
Additional note: After walking around the town with camera this size – I will never want to hear complaints about how “my DSLR is too heavy, so I should switch to mirrorless” anymore! :D
“This should avoid most of sanding scratches”
I think it is the sanding scratches that adds the ART to your images. If I were to try this I might consider making a variety of screens with different or varying sanding patterns to see what I might get. Yes, I do like the images you created with your Camera Obscura …
PS: I especially like this one or this would get my vote as best of the show ;)
https://www.diyphotography.net/wp-content/uploads/2016/09/dsc9242-1-670×536.jpg
My problem with those stripes is that they take away attention from what I thought was main focus of those images – the focus.
I mean, look at that shallow depth of field and the booooookeh! :D
But everyone is concentrating on those scratches. :(
Amazing tutorial!
Really weel done article, i think that the same effect could be possibile with the lomography lens Daguerreotype Achromat Art Lens, with the ‘photo filters’ included
http://medioformato.it/daguerreotype-achromat-art-lens/
It’s interesting how people are trying to degrade photographic images with weird lenses & filter & programs in order to make them more interesting / arty!
Thanks for this posting.I could really use that threaded rod mechanism for focusing to be more explained further.I can’t figure out how to make one on my own.I have a threaded rod but my set up works very clunky.Can you show more pics in focus?