


Shutter Priority Mode: When to Use Tv Mode for Photography
Dec 4, 2025
Darlene Lleno
Darlene Lleno brings a unique perspective to DIY Photography as someone who grew up surrounded by camera gear but chose words over lenses. With five years of writing experience, she specializes in photography content that’s both technically informed and genuinely passionate. Growing up with a photographer twin brother meant camera talk was everyday conversation in her household. While he mastered capturing moments, Darlene discovered she preferred being the subject and the storyteller behind the scenes. As a travel enthusiast and mother of two, she understands the importance of preserving life’s precious moments. When not exploring new destinations or writing for DIY Photography, you’ll find her reading or tending to her garden. Her approach to photography writing is refreshingly authentic, she may not be behind the camera, but she knows exactly what it takes to help others capture the shots that matter most.
Share:

Shutter priority mode puts you in the driver’s seat. You pick the shutter speed you want. Your camera handles the aperture automatically. It’s that simple.
This mode works perfectly when motion matters most. Action shots, flowing waterfalls, and handheld stability all depend on your shutter speed choice. You control how movement appears in your photos. The camera takes care of everything else.
Canon calls it Tv mode. Nikon, Sony, and most other brands label it S mode. Same function, different letters on the dial.
How Shutter Priority Mode Works
Turn your mode dial to Tv or S. Use your control wheel to pick a shutter speed. Your camera reads the light and sets an aperture that gives proper exposure.
Both values show up in your viewfinder or LCD screen. If the aperture number blinks, you’ve got a problem. The camera can’t find a workable aperture at your chosen speed. You need to adjust your speed, bump up your ISO, or add more light.
Modern mirrorless cameras make this even easier. The electronic viewfinder shows your exposure before you shoot. You see exactly what the sensor will capture. No guessing involved.
Freezing Fast Action
Fast shutter speeds stop motion completely. Sports, wildlife, and any quick-moving subject needs speeds that capture split-second moments clearly.
Sports Photography Settings
Set your speed to 1/500 second or faster for most sports. A soccer player mid-kick freezes perfectly at this speed. Basketball players jumping for shots look sharp and clear.
Pro shooters often use 1/1000 second or faster. That extra speed eliminates any trace of blur. Your ISO in photography will climb higher. Modern cameras from 2025 handle ISO 3200 or 6400 without major problems.
Outdoor sports bring constant light changes. Clouds pass overhead. Players move between sun and shadow. Shutter priority adjusts aperture instantly while keeping your action-stopping speed locked.
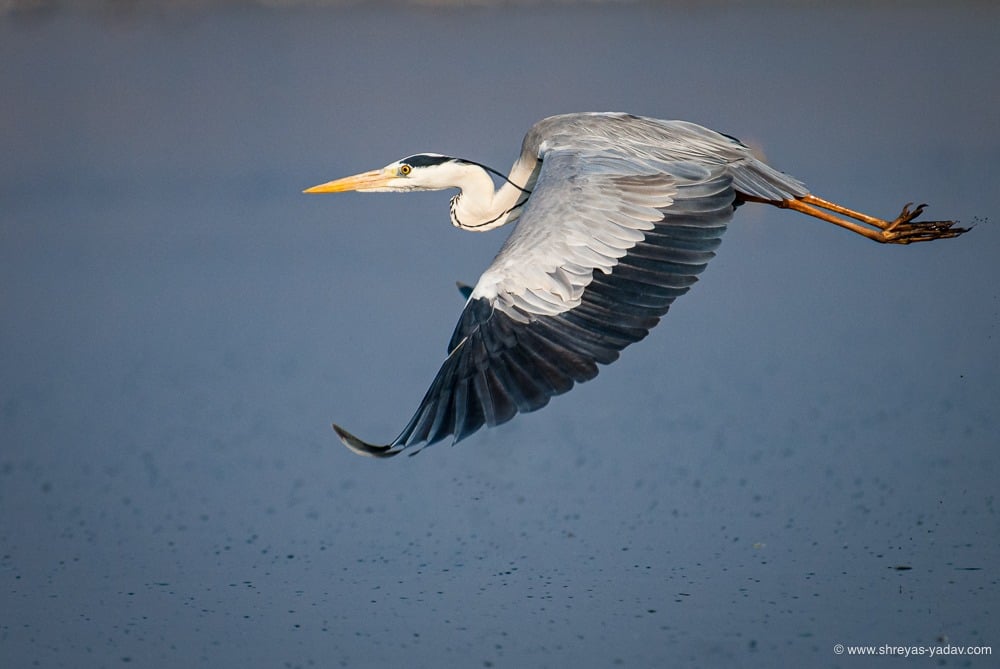
Wildlife and Birds in Flight
Birds need even faster speeds than most sports. Wings move incredibly fast. Start at 1/1000 second for most birds. Smaller birds with rapid wing beats need 1/2000 second or faster.
Ground animals are different. A running deer might freeze nicely at 1/500 second. A squirrel darting up a tree needs 1/800 second. You can adjust quickly when your subject changes behavior.
Wildlife photography demands patience and quick reactions. Changing just one setting saves shots you’d lose fumbling through manual controls.
Freezing Water Droplets
Water creates stunning frozen moments. Splashing drops or waves crashing against rocks both benefit from fast speeds. Use 1/250 to 1/1000 second depending on water speed.
Individual droplets need faster speeds. A splash from a stone hitting a pond requires 1/1000 second. You’ll capture perfect spherical drops suspended in air. Slower speeds turn those drops into streaks.
Creating Motion Blur Effects
Slow speeds transform motion into flowing visual elements. Water becomes silky smooth. Lights trail across your frame. Static scenes gain energy through movement.
Silky Waterfall Photography
Set your speed between 1/2 second and 5 seconds for waterfalls. The water smooths into milky white streams. It contrasts beautifully with sharp rocks and foliage.
You absolutely need a tripod at these speeds. Even the steadiest hands can’t hold still for multiple seconds. Modern in-body stabilization helps but can’t overcome physics at these exposures.
Your camera picks the aperture automatically. It will likely choose f/11 or f/16 on bright days. If the aperture maxes out at f/22 and still overexposes, you need a neutral density filter.
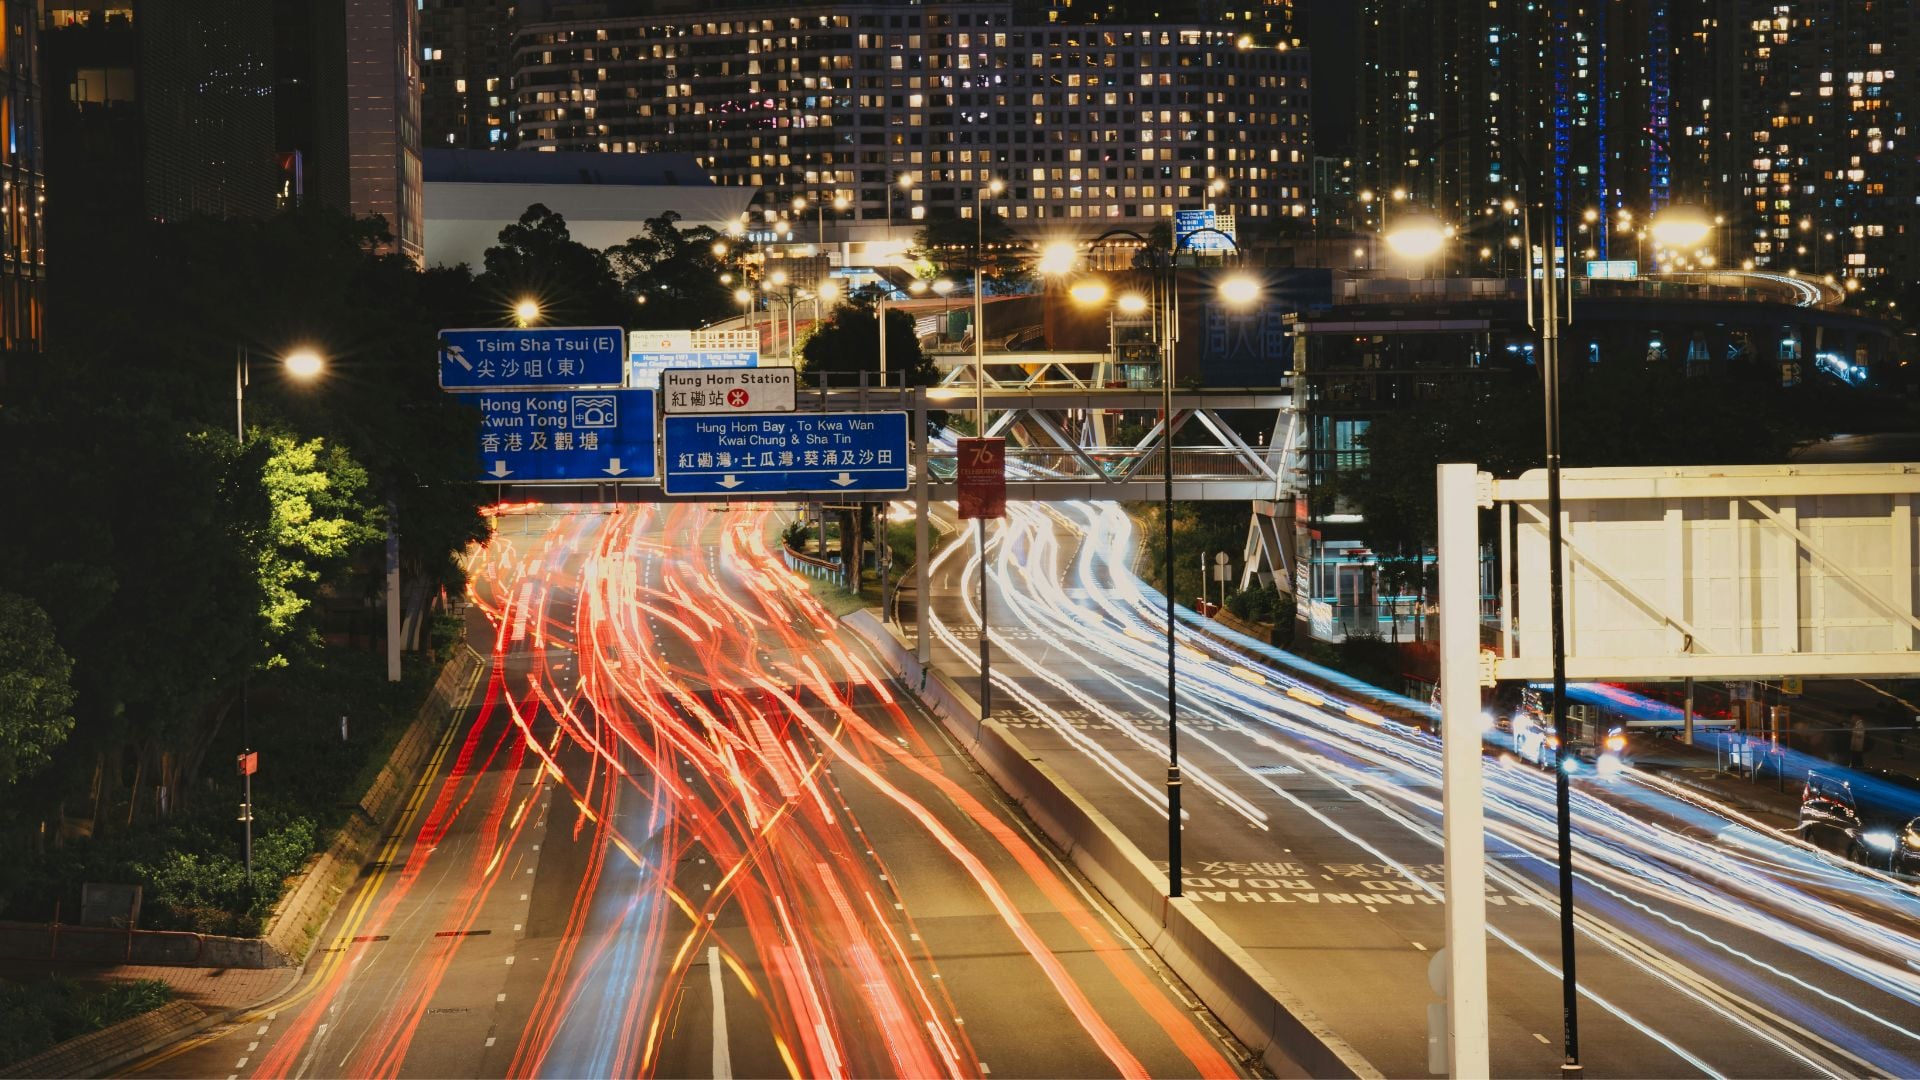
Light Trail Photography
City nights transform through long exposures. Car headlights and taillights paint glowing streams through your frame. Set your speed to 5 to 20 seconds depending on traffic.
Busy intersections need shorter times. Too many cars create a solid blob of light. Less trafficked roads allow longer exposures. Individual trails stretch across more of your frame.
Your camera closes the aperture as far as possible. If it can’t get proper exposure even at f/22, conditions are too bright. Wait for twilight or full darkness. The blue hour right after sunset offers perfect conditions.
Panning for Dynamic Motion
Panning combines slow speeds with camera movement. Track your moving subject while using 1/15 to 1/60 second. The subject stays sharp while the background blurs into motion lines.
This technique takes practice. The speed needs to blur the background but keep some sharpness on your subject. Too slow and everything blurs. Too fast and you lose the motion effect.
Start with 1/30 second. If your subject appears too sharp with minimal background blur, slow down to 1/15 second. If everything blurs too much, speed up to 1/60 second.
Preventing Camera Shake
Camera shake ruins otherwise perfect images. Your hands introduce tiny movements that blur photos. This happens especially at slower speeds or with longer lenses.
The Reciprocal Rule
Your minimum shutter speed should match your focal length. A 50mm lens needs at least 1/50 second. A 200mm lens requires 1/200 second or faster.
This rule comes from film photography but still works today. Digital cameras show camera shake just as clearly. The difference is you can check images immediately and adjust.
Crop sensor cameras multiply this effect. A 100mm lens on an APS-C sensor equals 150mm. Use 1/150 second as your minimum, not 1/100 second.
How Image Stabilization Helps
Modern stabilization systems push these limits dramatically. They provide 5 to 8 stops of shake reduction. That 100mm lens that needed 1/100 second now works handheld at 1/3 second or slower.
Don’t blindly trust these numbers though. Stabilization effectiveness varies with shooting conditions. Tired arms, caffeine jitters, or awkward positions all reduce performance.
Set a slower speed and review your images. If they show blur, increase the speed until you get consistent sharpness. Your personal minimum might differ from the rule by a stop or two.
When to Increase Speed
Low light pushes cameras to their limits. You want low ISO for clean images. But you also need enough speed to prevent blur. Shutter priority forces you to make this decision.
Watch your ISO indicator. If it climbs above ISO 6400, consider whether you need that fast a shutter speed. Modern cameras handle high ISO remarkably well.
Test your camera’s ISO performance. Take shots from ISO 100 through your camera’s maximum. Find where noise becomes unacceptable to you. That’s your practical upper limit.
Comparing Shooting Modes
Understanding when shutter priority works best improves your shooting efficiency. Each mode serves specific purposes.
Shutter Priority vs Manual Mode
Manual mode gives complete control. You set both shutter speed and aperture independently. This matters when you need specific depth of field and motion control together.
Shutter priority prioritizes motion control. If you only care about freezing action or creating blur, let the camera choose aperture. Your shooting becomes faster. You miss fewer moments.
Manual mode works better in controlled environments. Studio photography with consistent lighting benefits from locked settings. Outdoor photography with changing light favors shutter priority’s adaptability.
Shutter Priority vs Aperture Priority
Aperture priority reverses the equation. You control depth of field while the camera manages shutter speed. This mode suits landscape and portrait photography.
Use shutter priority when motion exists in your scene. Moving subjects, camera movement, or deliberate blur all call for direct speed control. Use aperture priority when depth of field matters most and nothing moves significantly.
Some photographers switch between these modes constantly. A wedding photographer might use aperture priority for posed portraits. Then switch to shutter priority for the dancing reception.

Advanced Techniques
Experienced photographers push beyond basic applications. These techniques expand what’s possible with shutter priority.
Auto ISO with Shutter Priority
Auto ISO combined with shutter priority creates a powerful system. You lock your desired speed. The camera adjusts both aperture and ISO to maintain exposure.
Set your Auto ISO parameters carefully:
- Establish a maximum ISO value you’re comfortable with
- Set a minimum shutter speed as a safety net
- This prevents speeds that cause camera shake
This combination works brilliantly for event photography. Concert lighting changes constantly. Your subject moves unpredictably. Locking a fast speed while letting the camera manage the rest keeps you shooting.
Using Exposure Compensation
Exposure compensation adjusts your camera’s metering interpretation. If images consistently appear too bright or dark, dial in +1 or -1 compensation.
Shutter priority applies this through aperture changes. The camera maintains your chosen speed while opening or closing the aperture. If the aperture reaches its limit, ISO changes instead.
Snow scenes often need +1 or +2 compensation. Bright white snow fools meters into underexposing. Dark concert venues might need -1 compensation to preserve mood.
Electronic vs Mechanical Shutters
Mirrorless cameras offer both electronic and mechanical shutters. Electronic shutters operate silently and achieve faster speeds. However, they can create rolling shutter effects with fast motion.
Use electronic shutters for still subjects where silence matters. Wildlife photography where noise might scare animals benefits greatly. Switch to mechanical shutters when shooting fast action or under artificial lighting.
Common Mistakes to Avoid
Even experienced photographers make these mistakes. Recognizing them helps you avoid problems.
Blinking Aperture Warning
When the aperture value blinks, your camera can’t maintain proper exposure. This happens in extremely bright or dark conditions.
In bright light, your aperture maxes out at f/22. The camera can’t close down further. Solutions include lowering ISO, adding a neutral density filter, or accepting a slower speed.
In low light, the aperture opens fully but can’t gather enough light. Increase ISO, slow your speed, or add light. Push ISO as high as necessary before compromising on speed.
Forgetting ISO Settings
Fixed ISO with shutter priority causes problems. You might set ISO 100 for outdoor shooting. Then move indoors and wonder why images blur from slow speeds.
Enable Auto ISO as your default. Set reasonable maximum values. This prevents most ISO problems while maintaining motion control. Check your ISO when you switch locations.
Over-Relying on One Mode
Shutter priority works beautifully for motion-centric photography. But it’s not ideal for every situation. Depth of field control matters more for some subjects.
Switch modes based on your creative priorities. Don’t stay in shutter priority just because it worked last time. Portrait photography needs precise depth of field control through aperture priority.
Learn all your camera modes. Use each where it serves your vision best. Shutter priority is powerful but it’s one of several tools.
Real-World Shooting Scenarios
These situations show when shutter priority makes the most sense. Each presents unique challenges that this mode handles well.
Kids and Pets Photography
Children and pets move unpredictably. They don’t hold poses or follow directions reliably. Shutter priority helps you capture spontaneous moments sharply.
Use 1/250 second as your starting point. Active play needs faster speeds, maybe 1/500 second. Calmer moments might work at 1/125 second. You maintain control over motion blur while the camera handles changing light.
Indoor play presents challenges. Lower light demands higher ISO. But you still need that fast speed to freeze movement. Modern cameras make this balance easier with improved performance.
Street Photography Movement
Street photography captures life as it happens. People walk, cars pass, and moments unfold quickly. Shutter priority lets you decide how much motion appears.
Fast speeds like 1/500 second freeze everything crisply. Slower speeds around 1/60 second introduce slight blur that adds energy. Very slow speeds at 1/15 second create dramatic blur while keeping static elements sharp.
Experiment with different speeds for different effects. A walking figure might blur pleasantly at 1/30 second. A cyclist needs 1/250 second or faster to avoid becoming a streak.

Dance and Performance
Stage performances combine movement with challenging lighting. Dancers move continuously. Stage lights change dramatically throughout shows.
Lock your speed at 1/250 to 1/500 second depending on choreography. Let the camera adjust aperture and ISO for lighting. Your images consistently freeze action while maintaining proper exposure.
Flash is typically prohibited at performances. This makes high ISO inevitable. Plan for ISO 3200 or higher. Know your camera’s noise limits before the show.
Handheld Night Photography
Night shooting handheld requires balance between speed and ISO. Too slow creates blur from shake. Too high ISO adds excessive noise.
Start at 1/60 second if you have stabilization. Increase ISO until exposure looks correct. Modern cameras shoot at ISO 6400 or 12800 with acceptable results.
City lights provide more illumination than expected. Lit storefronts, street lamps, and car headlights all contribute. You might successfully shoot at ISO 3200 and 1/60 second in well-lit urban areas.
According to Cambridge in Colour, understanding exposure modes helps photographers work more efficiently. The Digital Photography School also emphasizes practicing with different shutter speeds to build intuition.
Taking Control with Shutter Priority
Shutter priority gives you targeted control where it matters most. Motion defines photography in many ways. How you capture movement shapes the story your images tell.
This mode eliminates friction between you and your creative vision. You decide how motion appears. The camera handles exposure details. That division lets you focus on timing and composition.
Start experimenting with different speeds today. See how 1/1000 second versus 1/500 second changes your action shots. Compare 2 seconds versus 5 seconds for waterfall smoothness. Understanding these differences through practice builds intuition that serves you for years.

Darlene Lleno
Darlene Lleno brings a unique perspective to DIY Photography as someone who grew up surrounded by camera gear but chose words over lenses. With five years of writing experience, she specializes in photography content that’s both technically informed and genuinely passionate. Growing up with a photographer twin brother meant camera talk was everyday conversation in her household. While he mastered capturing moments, Darlene discovered she preferred being the subject and the storyteller behind the scenes. As a travel enthusiast and mother of two, she understands the importance of preserving life’s precious moments. When not exploring new destinations or writing for DIY Photography, you’ll find her reading or tending to her garden. Her approach to photography writing is refreshingly authentic, she may not be behind the camera, but she knows exactly what it takes to help others capture the shots that matter most.


Join the Discussion
DIYP Comment Policy
Be nice, be on-topic, no personal information or flames.