


Program Mode vs Auto Mode: Understanding the Difference
Dec 7, 2025
Darlene Lleno
Darlene Lleno brings a unique perspective to DIY Photography as someone who grew up surrounded by camera gear but chose words over lenses. With five years of writing experience, she specializes in photography content that’s both technically informed and genuinely passionate. Growing up with a photographer twin brother meant camera talk was everyday conversation in her household. While he mastered capturing moments, Darlene discovered she preferred being the subject and the storyteller behind the scenes. As a travel enthusiast and mother of two, she understands the importance of preserving life’s precious moments. When not exploring new destinations or writing for DIY Photography, you’ll find her reading or tending to her garden. Her approach to photography writing is refreshingly authentic, she may not be behind the camera, but she knows exactly what it takes to help others capture the shots that matter most.
Share:

Program mode vs auto mode matters when you want better photos. Most beginners stick with auto and never switch. But program mode gives you creative control without the hassle of manual settings.
Cameras in 2025 pack serious tech. Both modes use smart metering and AI features. The question is how much control you want over your final image.
What Auto Mode Actually Does
Auto mode runs your entire camera for you. You point and shoot. The camera picks aperture, shutter speed, and ISO. It also locks your white balance and metering mode.
Think of it as full autopilot. You can’t change the color temperature. You can’t adjust how the camera reads light. Flash becomes automatic too. The camera decides when to pop the flash on models that have one.
This works fine for quick snapshots. Family parties, casual travel shots, or moments you need to capture fast. But you lose creative vision because you can’t shape how the camera sees the scene.
Modern auto modes analyze scenes using algorithms. Cameras recognize faces and detect motion. Some 2025 models use machine learning to predict your shot type. Still, the camera guesses what you want.
How Program Mode Works Differently
Program mode vs auto mode gets clearer here. The camera still picks aperture and shutter speed for correct exposure. But now you control settings that shape your image look.
You can set ISO manually or choose acceptable ranges. Modern cameras handle ISO 12800 with minimal noise. Program mode lets you pick clean images or push sensitivity when needed.
White balance control changes photo mood instantly. Set it to cloudy for warmer tones on sunny days. Pick tungsten to fix orange indoor lighting. This transforms your image feel without any editing.
Metering modes become your choice. Switch to spot metering for precise subject exposure. Use center-weighted for portraits. Matrix metering handles landscapes with even lighting.
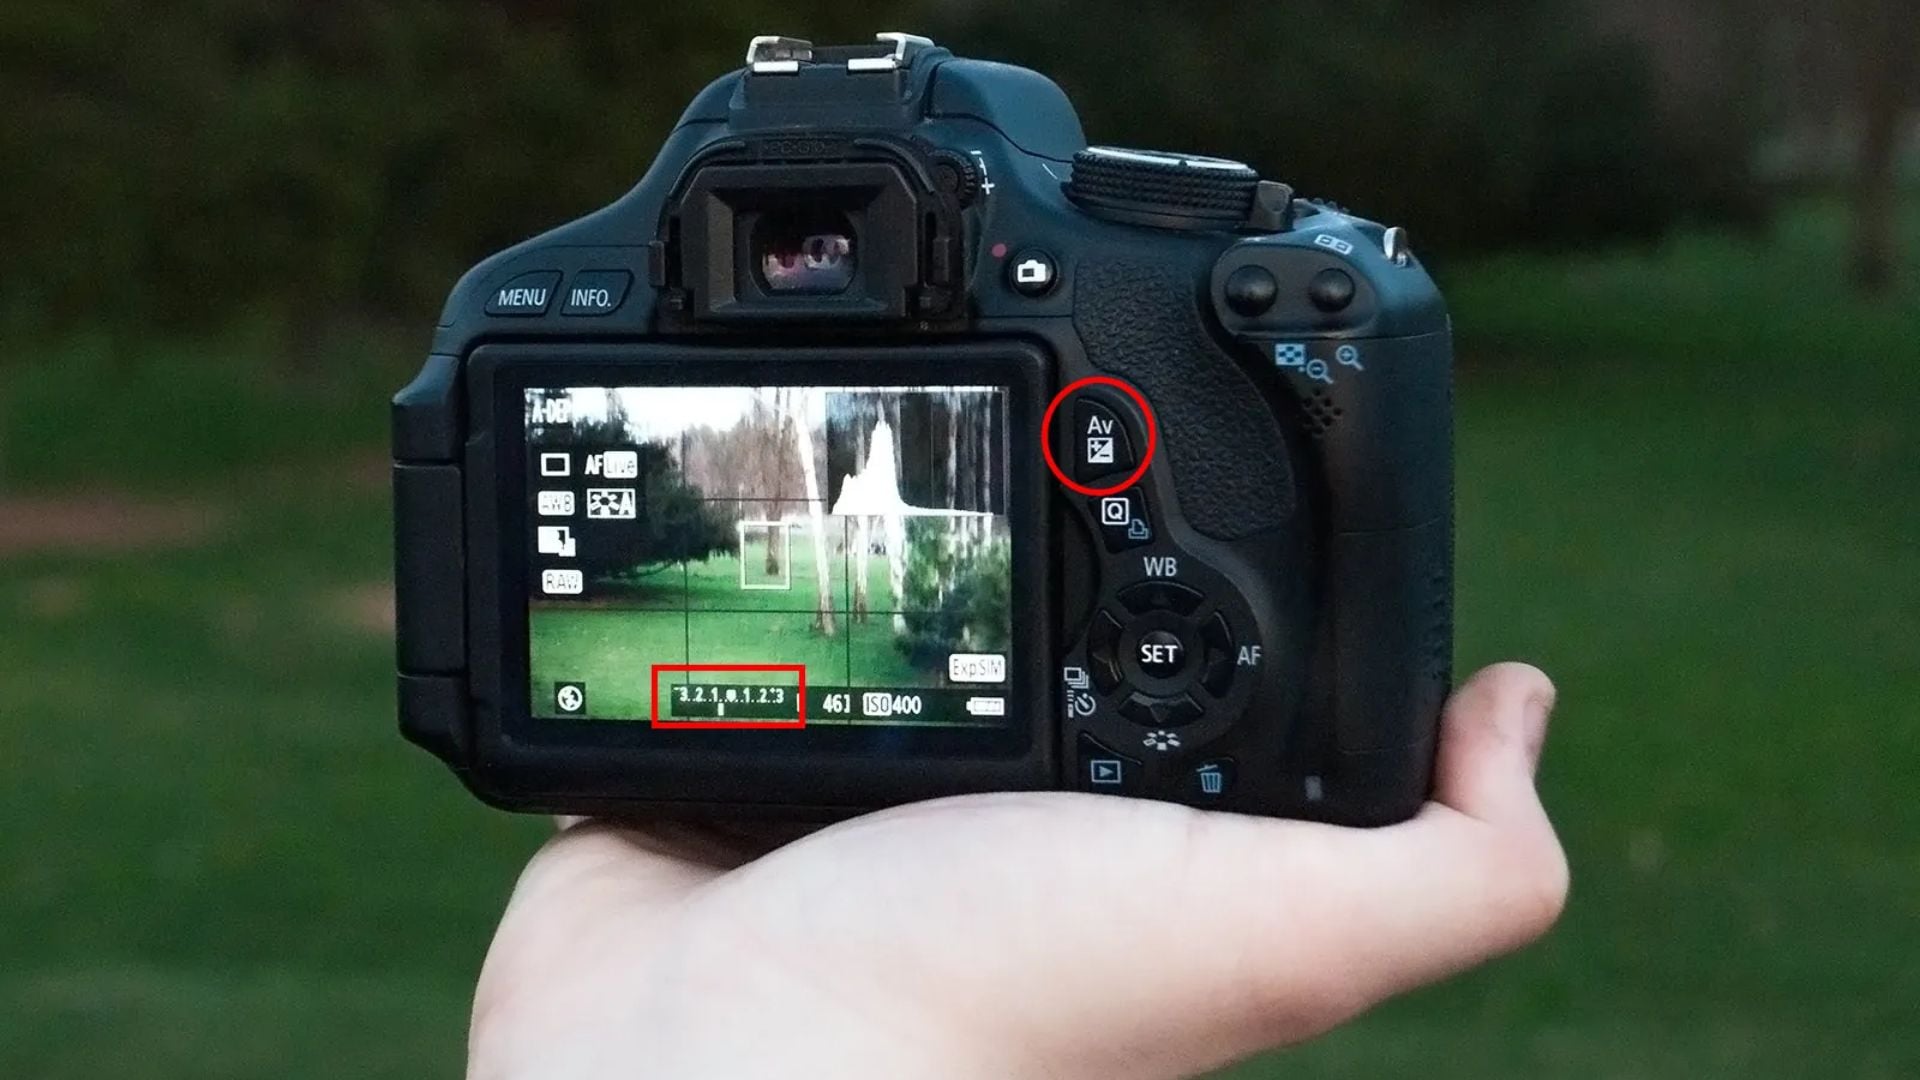
Exposure compensation gives you creative power. Add brightness to snow scenes. Subtract exposure for moodier shots. The camera adjusts settings while respecting your brightness choice.

Program Shift Adds Flexibility
Most cameras include program shifts. Spin a dial while in program mode. You shift the aperture and shutter speed combo. The camera keeps correct exposure but offers different creative options.
Need faster shutter speed to freeze action? Shift the program. The camera opens the aperture wider automatically. Want more depth of field? Shift the other direction for smaller aperture and slower shutter speed.
You get shutter priority or aperture priority benefits without switching modes. Program shift works differently across brands. Some need a button held while turning the dial. Check your camera manual for your specific model.
When Each Mode Makes Sense
Auto mode works for absolute beginners learning their camera. It helps when you hand your camera to someone else. Quick family photos at events work fine with auto mode.
Program mode shines when you want control without manual complexity. Street photography happens too fast for manual adjustments. Program mode lets you control ISO while the camera handles exposure.
Event photography benefits from program mode too. You adjust exposure compensation as lighting shifts. Set white balance to match venue lights. Switch metering when moving between bright dance floors and dim spaces.
Travel photographers prefer program mode often. You quickly adjust for different scenes without missing shots. The camera handles technical exposure while you focus on composition.
Creative Control Options
Program mode vs auto mode comes down to creative input. Auto mode assumes the camera knows best. Program mode assumes you have opinions about image look.
The camera still calculates exposure. You don’t need to master aperture, shutter speed, and ISO relationships. But you gain the ability to push images in creative directions.
Here’s what program mode unlocks:
- Color temperature choices affect emotional impact
- Exposure compensation changes mood and drama
- Metering selection influences how camera reads light
- ISO control prevents motion blur or manages noise
Many pros use program mode in specific situations. Wedding photographers switch to program mode during unpredictable moments. Wildlife photographers use it when animals move fast. Even portrait photographers grab it for behind-the-scenes shots.
ISO Control Makes Big Differences
Auto mode keeps ISO as low as possible. The camera wants clean images above everything. This sounds good but causes problems. You get blurry photos from slow shutter speeds in dim lighting.
Program mode lets you set ISO based on conditions. Indoor events might need ISO 3200 or higher. Modern cameras handle this well with noise reduction. Outdoor bright sun lets you keep ISO 100 for max quality.

Auto ISO in program mode works differently than auto mode. You set a minimum shutter speed to prevent blur. You set maximum ISO to control noise. The camera works within your limits instead of deciding everything.
This helps for concert photography where lighting changes dramatically. Set high enough ISO to keep fast shutter speeds. Let exposure compensation handle brightness between songs.
White Balance Shapes Images
Auto white balance works pretty well now. Cameras nail color temperature in most situations. But auto mode locks you out of creative white balance choices. Program mode opens these options.
Warmer images feel more inviting. Set white balance to cloudy even in neutral light. Food photography often benefits from warm tones. Portrait photography uses warmth for flattering skin.
Cooler images create different moods. Use tungsten white balance outdoors for moody blue tones. Custom white balance lets you dial exact color temperature when accuracy matters.
Many photographers shoot RAW and adjust white balance later. But getting close in camera saves editing time. Program mode lets you preview the effect before shooting. You see how white balance affects the scene in real time.
Metering Mode Control
Auto mode uses evaluative or matrix metering. The camera analyzes the entire frame. It averages exposure across multiple zones. This works for even lighting but struggles with tricky light.
Program mode unlocks other metering options. Spot metering reads light from a tiny center area. Perfect for backlit subjects where you want face exposure. Place your focus point on skin and take the reading.
Center-weighted metering prioritizes the middle but considers surrounding areas. Classical portrait lighting benefits from this approach. The subject gets proper exposure while maintaining background awareness.
Understanding metering helps with challenging lighting. Bright windows behind subjects, stage lights with dark backgrounds, and high-contrast outdoor scenes become manageable. Switch metering to match the specific challenge.
Exposure Compensation Power
Program mode vs auto mode shows biggest difference with exposure compensation. Cameras expose for middle gray by default. Sometimes you want brighter or darker for creative reasons.
Snow scenes fool cameras into underexposing. Bright snow makes the camera think there’s too much light. Add +1 or +2 stops to keep snow white instead of gray. Program mode handles this while auto mode leaves you stuck.
Dark subjects create opposite problems. A person in dark clothes against dark background can look too bright. Subtract exposure compensation to keep the moody darkness you want.
Backlit subjects need exposure compensation too. Add brightness to keep faces from becoming silhouettes. The background might blow out but your subject looks good. You decide what matters most in the frame.
Flash Control Options
Auto mode decides when to fire flash. The camera pops it whenever it thinks you need light. This often means unwanted flash during indoor events or dim restaurants.
Program mode puts you in charge of flash. Turn it off completely for available light photography. Enable flash only when you need it. Many cameras let you adjust flash exposure separately from ambient exposure.
Fill flash becomes possible in program mode. Add light to shadows without obvious flash look. Dial down flash power to kiss the subject with light. This works great for outdoor portraits on bright days.
External flash units gain more control in program mode. TTL flash metering works in both modes. But program mode lets you adjust flash ratios. Multiple flash setups become easier to manage.
Learning to See Light
Program mode helps develop photo skills. You make decisions about color temperature, brightness, and light reading. These choices teach you to see light differently.
Start experimenting with exposure compensation:
- Try the same scene at normal exposure
- Shoot one stop brighter
- Shoot one stop darker
- Compare results and pick your favorite
Switch metering modes to see how they change results. Photograph backlit subjects with evaluative metering. Then try spot metering on the face. The differences become obvious quickly.
Play with white balance settings. Shoot the same scene with auto white balance. Then try cloudy, shade, and tungsten settings. See how color temperature shifts emotional impact. This builds creative instincts you’ll use forever.
Making the Switch
Moving from auto mode to program mode doesn’t require mastering exposure math. You just need willingness to make creative choices. Start with program mode set to auto ISO, auto white balance, and evaluative metering.
Take control of one setting at a time. Fix ISO first if shooting in consistent lighting. Then tackle white balance. Add metering changes as you encounter situations where evaluative struggles. Build confidence with each new control.
Don’t fear program mode. Worst case you take bad photos while learning. Review your images and understand why choices didn’t work. Adjust and try again. Every photographer goes through this.
Program mode vs auto mode asks how much you want to participate. Auto mode lets the camera make all decisions. Program mode invites you to shape the result while keeping shooting speed.
Getting a Hang on Program Mode vs. Auto Mode
Program mode bridges to advanced shooting modes. Once comfortable with ISO, white balance, and metering, manual mode becomes less scary. You already understand most creative controls.
Some photographers stick with program mode permanently for certain situations. There’s nothing wrong with using a mode that works. Professional photographers use every mode depending on the situation.
Aperture priority gives depth of field control when that matters. Shutter priority lets you decide motion blur or freeze. Full manual provides complete control when you have time.
But program mode offers flexibility other modes can’t match. You get speed with creative options. The camera handles exposure while you focus on composition and timing. For many photographers, this combination proves perfect.
Your camera has these modes for good reason. Each serves specific purposes. Program mode vs auto mode isn’t about which is better. Match the tool to your needs and skill level. You’ll find yourself using different modes in different situations as you grow.

Darlene Lleno
Darlene Lleno brings a unique perspective to DIY Photography as someone who grew up surrounded by camera gear but chose words over lenses. With five years of writing experience, she specializes in photography content that’s both technically informed and genuinely passionate. Growing up with a photographer twin brother meant camera talk was everyday conversation in her household. While he mastered capturing moments, Darlene discovered she preferred being the subject and the storyteller behind the scenes. As a travel enthusiast and mother of two, she understands the importance of preserving life’s precious moments. When not exploring new destinations or writing for DIY Photography, you’ll find her reading or tending to her garden. Her approach to photography writing is refreshingly authentic, she may not be behind the camera, but she knows exactly what it takes to help others capture the shots that matter most.


Join the Discussion
DIYP Comment Policy
Be nice, be on-topic, no personal information or flames.