


Monitor Calibration for Photography: Get Accurate Colors That Match Prints
Oct 28, 2025
Darlene Lleno
Darlene Lleno brings a unique perspective to DIY Photography as someone who grew up surrounded by camera gear but chose words over lenses. With five years of writing experience, she specializes in photography content that’s both technically informed and genuinely passionate. Growing up with a photographer twin brother meant camera talk was everyday conversation in her household. While he mastered capturing moments, Darlene discovered she preferred being the subject and the storyteller behind the scenes. As a travel enthusiast and mother of two, she understands the importance of preserving life’s precious moments. When not exploring new destinations or writing for DIY Photography, you’ll find her reading or tending to her garden. Her approach to photography writing is refreshingly authentic, she may not be behind the camera, but she knows exactly what it takes to help others capture the shots that matter most.
Share:
Monitor calibration ensures your photos look the same on screen as they do in prints. This process adjusts your display so colors appear accurate and consistent across different outputs. Without proper calibration, you might edit for hours only to get prints that look nothing like your screen.
Mismatched colors waste your time and money. You burn through expensive photo paper on test prints. You lose client trust when delivered images miss the mark. Calibration fixes these headaches by creating a workflow you can actually rely on.
Why Monitor Calibration Matters for Photographers
Your monitor doesn’t show accurate colors straight from the factory. Manufacturers crank up brightness and saturation for movies and web browsing. These settings make photos pop on screen but wreck your prints every time.
Every monitor displays the same photo file differently. Your laptop shows different colors than your desktop. Your client’s screen shows something completely different from yours. Professional editing becomes impossible without a baseline you can trust.
Monitor calibration creates a standardized reference point for color work. It adjusts your display to match industry standards that printers use. This means your editing choices actually translate to prints and client devices correctly.
How Bad Monitors Wreck Your Edits
Most uncalibrated monitors run way too bright out of the box. You compensate by darkening everything you edit. Then your prints arrive looking muddy and flat. This cycle keeps repeating until you learn to guess adjustments blindly.
Color casts create another mess with default settings. Your screen might lean blue or green without you noticing. You edit photos to look neutral on your wonky display. Prints expose all the weird color shifts you added while fixing your monitor’s problems.
Consumer monitors pump up contrast beyond what any printer can handle. You craft beautiful shadow detail on screen. That detail vanishes completely in prints because the contrast was never printable.
What Monitor Calibration Actually Does
Calibration adjusts three main parts of your display. It sets the white point so pure white looks actually white. It fixes gamma curves that control how tones appear from black to white. It creates a color profile mapping your monitor’s output to standard color spaces.
The white point usually targets D65 at 6500K. This matches daylight and keeps whites looking neutral without weird tints. Some photographers pick D50 for print work since it matches viewing booth lighting at professional print shops.
Gamma curves control how input values translate to screen brightness. Most photographers stick with 2.2 gamma for digital work. This prevents ugly banding and keeps tonal transitions smooth across your exposure range.
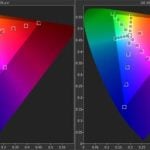
Picking Your Color Space
Your monitor profile needs to match your editing color space. Most photographers work in sRGB or Adobe RGB daily. sRGB covers less color but works everywhere on the web and with most printers. Adobe RGB gives you more colors for high-end printing but needs proper color management every step of the way.
Wide gamut monitors show colors beyond Adobe RGB capabilities. These displays rock for commercial work and fine art prints. But they demand careful calibration or you’ll create oversaturated images that no printer can match.
Types of Calibration Tools and Methods
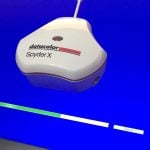
Hardware calibration devices give you the most accurate results possible. These colorimeters or spectrophotometers stick to your screen and measure actual color output. Software then tweaks your settings to hit target values. This removes guessing and delivers repeatable results every time.
Current popular devices include the Calibrite Display 123, Datacolor SpyderPro, and Calibrite Display Plus HL. These range from beginner-friendly to professional grade tools. Entry models start around $80 to $100 while pro versions can reach $400 or more.
Software-only calibration uses your eyes to judge test patterns. You make subjective calls about color and brightness by looking at samples. This costs nothing but produces wildly inconsistent results. Your eyes adapt to lighting and get tired over long sessions.
Choosing the Right Hardware
Entry-level colorimeters like the Calibrite Display 123 handle most photography needs just fine. They measure color accurately enough for standard printing and client delivery. The main limits show up with specialized displays like mini-LED or very high brightness screens.
The Calibrite Display 123 is currently the cheapest monitor calibrator available. It delivers excellent accuracy despite its low price. The software uses a simple 3-step wizard that makes calibration effortless. However, it can’t calibrate mini-LED displays or monitors exceeding 1000 nits brightness.
Mid-range options like the Datacolor SpyderPro support more display types. This includes HDR LCD displays, mini-LED panels, Apple XDR monitors, and OLED screens. These tools matter for photographers working with the latest display technology.
Professional spectrophotometers like the Calibrite Display Plus HL measure ambient light and handle extreme brightness levels. The Display Plus HL can calibrate displays up to 10,000 nits. These tools work for commercial photographers with demanding clients who need perfect color.

Consider Your Display Type
Modern displays come in different technologies that affect calibration needs. Standard LCD monitors work with any calibrator. Mini-LED displays need compatible devices like the SpyderPro or Display Plus HL. OLED screens require specific support that not all calibrators provide.
Apple’s Liquid Retina XDR displays in newer MacBook Pros use mini-LED technology. You’ll need a calibrator that specifically supports these high-brightness screens. The basic Calibrite Display 123 won’t work with these laptops.
Think about calibration frequency when picking a device. Monthly calibration keeps colors accurate as your monitor ages. Some photographers calibrate weekly during busy seasons. Durability matters when you’re using the tool regularly.
Step by Step Monitor Calibration Process
Let your monitor warm up for at least 30 minutes before starting. Display output changes as components heat up to normal temperature. Calibrating a cold monitor gives you bad results that shift as things warm up.
Clean your screen well before you begin calibration. Dust and fingerprints mess with how light comes through the display. Use a microfiber cloth made for monitors. Skip household cleaners that wreck screen coatings.
Reset your monitor to factory defaults before calibration starts. This gives the software a consistent baseline to work from. Turn off any auto-brightness features or blue light filters that interfere with measurements.
Running Your Calibration Software
Fire up your calibration software and follow the setup guide. Most programs ask about target settings for white point, gamma, and brightness. Standard values work for most photo work unless you have specific needs.
Place the calibration device on your screen exactly as the software shows. The colorimeter needs to sit flat against the display without any gaps. Keep ambient light steady throughout the whole measurement process.
The software shows color patches while the device measures your monitor’s output. Modern calibrators complete this in just a few minutes. Don’t touch your computer or change any settings during measurements. Small changes can trash the whole calibration.
Saving Your New Profile
Your software creates a custom color profile for your specific monitor. This profile loads automatically when your computer boots up. Some monitors store profiles in hardware for more reliable color across different computers.
Check before and after results using the software’s verification tools. The difference might shock you if you’ve never calibrated before. Your screen might look less vibrant at first. This accurate view is what your prints actually show.
Save your calibration profile somewhere safe with backups. You’ll need to reload this profile if you reset your computer. Keep it with your other important files for easy recovery.
Best Calibration Settings for Photography
Most photographers should aim for these standard targets. Set white point to D65 at 6500K for general photo work. Use 2.2 gamma for digital images and web publishing. Adjust brightness to around 120 cd/m² for comfortable viewing in normal office lighting.
These settings create a solid foundation for accurate color editing. Your edited images will translate properly to prints and other calibrated displays. Clients viewing your work on decent monitors will see colors matching your intent.
Print-focused photographers sometimes prefer the D50 white point instead. This warmer setting matches lighting used in professional print viewing conditions. The difference feels subtle but matters for critical color matching with physical prints.

Adjusting Brightness and Contrast
Screen brightness hugely affects how you see colors and tones. Too bright and you’ll darken everything, getting dark prints. Too dim and prints come out washed out and pale. The 120 cd/m² target works for most indoor spaces with mixed lighting.
Some advanced calibrators now include ambient light sensors. These measure your room lighting and recommend appropriate monitor brightness. This feature helps when comparing printed images with on-screen versions.
Match your room lighting to your monitor brightness levels. Don’t edit in pitch-black rooms where your screen becomes the only light. This extreme contrast tires your eyes and messes up your tone perception.
Contrast settings should usually stay at default or slightly lower. High contrast looks punchy on screen but causes print problems. Printers can’t reproduce the extreme tonal range your monitor displays.
Common Calibration Mistakes to Avoid
Skipping the warm-up period ranks as the biggest calibration mistake. Measurements on a cold monitor don’t reflect actual running characteristics. Wait at least 30 minutes before you start, ideally a full hour.
Calibrating with changing light produces unreliable results every time. Your ambient light affects how you perceive your monitor. Keep room lighting the same between calibration sessions and during editing work.
Running outdated profiles creates subtle color shifts as time passes. Monitors age and their color output drifts away from calibration. Recalibrate monthly at minimum for consistent results. Pro photographers often calibrate weekly for critical accuracy.
Room Conditions That Mess Up Accuracy
Window light changes all day and affects how you see your screen. Close blinds or curtains during calibration and editing sessions. Consistent artificial lighting beats natural light for reliable working conditions.
Colored walls bounce light onto your screen and shift color perception. Neutral gray or white walls work best for serious editing spaces. Even small amounts of colored light throw off your color judgment badly.
Your clothes can reflect onto glossy screen surfaces too. Bright or colorful shirts bounce light that changes what you see. Wear neutral colors when doing critical color work.
Checking Your Calibration Results
Print a test image with known color values after you calibrate. Use a file containing neutral grays, skin tones, and saturated colors. Compare the print to your screen under proper lighting conditions.
The print won’t match your screen perfectly due to fundamental differences in how light works. But overall color balance should line up closely between them. Skin tones provide the most obvious test of good calibration.
Use online color tests to verify your calibration worked. Sites like Lagom LCD test offer free diagnostic images. These tests show whether your monitor displays subtle tone changes correctly.
When You Need to Recalibrate
Monthly recalibration keeps colors accurate for most photographers working regularly. Professional work might need weekly calibration for consistency. Frequency depends on your monitor quality and how critical color accuracy is.
Monitor output fluctuates over time so periodic recalibration matters. Most calibrators remind you when another checkup is due. Set up these reminders to keep your workflow reliable.
Recalibrate right after any major changes to your workspace setup. Moving your monitor to a new spot changes ambient light conditions. Updating graphics card drivers can affect color output too.
Monitor age affects stability and needs more frequent calibration over time. Displays lose brightness and color accuracy as they get older. A five-year-old monitor might need weekly attention while new ones stay accurate for months.
Monitor Quality Matters for Calibration
Not all monitors can be calibrated effectively at all. Budget displays often lack the adjustment range needed for accurate calibration. They might not accept custom profiles or their hardware limits precision adjustments completely.
Photography-specific monitors offer better color accuracy and wider adjustment ranges. Brands like BenQ, EIZO, and NEC make displays designed for color work. These monitors cost more but provide the foundation for reliable color management.
IPS panel technology works better for photography than TN or VA panels. IPS displays keep color accuracy across wider viewing angles. This consistency matters when you move while editing or show work to clients.
Key Specs for Photo Monitors
Look for monitors covering at least 99% of sRGB color space. This ensures you can see all colors your camera captures and printers reproduce. Wide gamut monitors covering Adobe RGB or DCI-P3 help photographers doing high-end print work.
10-bit color depth displays 1.07 billion colors versus 16.7 million on 8-bit screens. This extra precision prevents ugly banding in smooth gradients like skies. The difference shows up clearly when editing landscape photography.
Newer display technologies like mini-LED and OLED offer better contrast and color. However, these screens need compatible calibrators that specifically support their technology. Check calibrator specifications before buying if you have these advanced displays.
Matte screen finishes work better than glossy for color work. Glossy screens show reflections that mess with accurate color judgment. Matte coatings kill reflections without hurting image quality on decent monitors.
Calibrating for Different Uses
Web-focused photographers should calibrate to sRGB color space exclusively. Most web browsers and mobile devices only understand sRGB properly. Using wider gamuts creates oversaturated images when people view them on normal screens.
Print photographers benefit from Adobe RGB calibration if their printer supports it. This wider color space captures more of what professional printers can reproduce. Check your print service’s specs before picking a calibration target.
Mixed workflows need careful planning to handle both outputs well. Some photographers keep two monitor profiles and switch between them. Others calibrate to sRGB and convert files to Adobe RGB only when sending to print services.

Soft Proofing for Print Matching
Soft proofing shows how your image will look when printed on paper. This feature needs accurate monitor calibration plus specific printer profiles. The simulation shows you exactly which colors will shift between screen and print.
Advanced calibrators now include soft proofing functions built into their software. These can simulate how printed output will look on your calibrated screen. You can preview results for specific printer, ink, and paper combinations.
Printer profiles describe how specific printer and paper combinations reproduce colors. Use profiles from your print service or create custom ones yourself. These profiles make soft proofing predictions actually accurate and useful.
Test prints validate your entire workflow from camera to final output. Print the same image before and after you calibrate your monitor. The improvement in color accuracy makes the calibration investment worth every penny.
Fixing Calibration Problems
Colors still looking wrong after calibration usually means your lighting changed. Edit in the same lighting you used during calibration sessions. Big lighting changes require recalibration or profile adjustments to compensate.
Profiles not loading at startup point to a software problem. Check your operating system’s color management settings carefully. Make sure the correct profile is set as default for your monitor.
Inconsistent results between calibration sessions suggest hardware problems developing. Displays develop faults as they age and wear out. Backlight issues affect color temperature and brightness across the whole screen.
Hardware Limits and Workarounds
Some monitors simply can’t hit target calibration values no matter what. Budget displays might lack enough adjustment range for proper calibration. You can still calibrate these monitors but results will be less accurate than pro displays.
Multiple monitors each need individual calibration for accurate color. Each display has unique characteristics that differ from others. Advanced calibrators can now calibrate an unlimited number of connected displays simultaneously. This ensures consistency across all your screens.
Studio Match features in modern calibrators help match color output across multiple monitors. This matters for photographers working with multiple displays side by side. The technology compensates for differences between screens.
Laptop screens present special calibration challenges you need to handle. They adjust brightness automatically based on ambient light sensors. Disable these features before calibrating or results will be useless. Consider using an external monitor for serious editing work instead.
Building a Complete Color Workflow
Monitor calibration forms just one piece of accurate color management overall. Your entire workflow needs coordination from camera through final output. Set your camera to capture in Adobe RGB or sRGB based on your needs.
Edit in color-managed applications like Lightroom or Photoshop exclusively. These programs respect monitor profiles and maintain color accuracy throughout. Basic editing apps often ignore color management completely and display wrong colors even on calibrated screens.
Convert images to the right color space before exporting files. Web images should be sRGB with embedded profiles for browsers. Print files might need Adobe RGB or specific printer spaces depending on your service.
Keeping Colors Consistent Across Devices
Mobile devices rarely support proper color management at all. Accept that your photos will look different on phones and tablets. Calibrate your main editing monitor and trust those results over how images appear elsewhere.
Client monitors probably aren’t calibrated either in most cases. Include viewing instructions with delivered files when possible. Suggest they view images in natural light or under neutral lighting. This reduces the impact of their uncalibrated displays on perception.
Transform Your Editing with Calibration
Monitor calibration transforms your workflow from guessing to precision work. The initial investment pays for itself quickly through reduced waste and happier clients. Consistent, accurate colors give you confidence in every editing decision you make.
Start with basic calibration and build your skills over time. Monthly recalibration maintains accuracy as your monitor ages and drifts. Pay attention to ambient lighting and keep conditions consistent between sessions.
Professional photography demands reliable color accuracy you can trust completely. Calibration provides that reliability and removes variables from your workflow. Your creative vision reaches your audience accurately when you control color from capture through delivery.

Darlene Lleno
Darlene Lleno brings a unique perspective to DIY Photography as someone who grew up surrounded by camera gear but chose words over lenses. With five years of writing experience, she specializes in photography content that’s both technically informed and genuinely passionate. Growing up with a photographer twin brother meant camera talk was everyday conversation in her household. While he mastered capturing moments, Darlene discovered she preferred being the subject and the storyteller behind the scenes. As a travel enthusiast and mother of two, she understands the importance of preserving life’s precious moments. When not exploring new destinations or writing for DIY Photography, you’ll find her reading or tending to her garden. Her approach to photography writing is refreshingly authentic, she may not be behind the camera, but she knows exactly what it takes to help others capture the shots that matter most.


Join the Discussion
DIYP Comment Policy
Be nice, be on-topic, no personal information or flames.