


Here’s how to take awesome night portraits with off camera flash
May 9, 2017
Dunja Đuđić Kalinin
Dunja Djudjic is a multi-talented artist based in Novi Sad, Serbia. With 15 years of experience as a photographer, she specializes in capturing the beauty of nature, travel, concerts, and fine art. In addition to her photography, Dunja also expresses her creativity through writing, embroidery, and jewelry making.
Share:

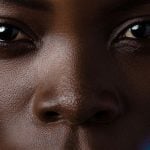
Recently, we published an article on overpowering the sun and shooting portraits in bright sunlight. But this time, we’re going to a completely different extreme. After daylight comes the dark, and Francisco Joel Hernandez will help you take portraits at night using off camera flash. If you’re new to this kind of portraits, you’ll find it really useful, and even the more experienced photographers can use it as a checklist.
Francisco shares advice for getting enough ambient light without ending up with overexposed subjects. He also provides some sample images and BTS shots to get you inspired and illustrate what he’s talking about.
1. Get the focus right
Getting the focus right is quite a challenge in dark, both for you and the camera, but there are a couple of solutions to get it right. You can use a flashlight on the subject until the camera finds the focus (or you focus manually). Another alternative is to use a transmitter with autofocus assist beams, which helps the camera focus accurately on your subject.
2. Open the aperture
When you shoot portraits at night, you don’t want the subject to be in complete darkness. So, open up that aperture and let the ambient light in.
3. Slow the shutter speed


To bring up the ambient light even further, you’ll also need to slow the shutter speed. This is tricky because of camera shake, so make sure to use tripod or image stabilization to reduce it.
4. Raise the ISO
Depending on the scene, you may also need to raise the ISO to get enough ambient light in the shot. Be careful not to overdo it, and go only to the point where you know the noise won’t overtake the image. If you really must shoot at high ISO, consider using in-camera noise reduction.
5. Use a low power speedlight

At night and with the settings above, you don’t need too much power for the portraits. Because of this, consider using speedlights with lower outputs instead of strong light sources like strobes.
6. Diffuse the light
If the light is still too strong even at the lowest power of speedlight, make sure to diffuse it. In my opinion, it’s good to diffuse it anyway when you shoot portraits, but it probably depends on the look you want to achieve. Anyhow, to diffuse the light, put on the diffusion cap on the flash, or use a softbox.
7. Move the light further away from the subject
If you still have the problem with the overexposed subject, you can always move the light further away. The distance will depend on the amount of overexposure.
There’s one more thing to keep in mind. When shooting in the dark, you’ll need an extra light to separate the subject from the background and prevent it from blending in.
8. Don’t mix the lighting
This tip relies on the first one. If you use the flashlight to get the focus right, always remove it from the subject before you take the shot. If you leave it there, you may result in overexposed shot.
9. Be careful with color temperature
If you have more lights on the subject, be aware of different color temperature. Mixing different types of lights will result in different color casts on the subject, and you may not want that. To avoid this, you can put the subject in the scene where there’s little or no ambient light on their face. Another alternative is to use the gels.
10. Use TTL

If you have a speedlight with TTL, you should use it for OCF night portraits. It helps the speedlight go lower than it normally can, so this can help you get the exposure correctly.
After all these tips, let us take a look at some photos and the behind the scene shots that show the lighting setup:


As someone who uses speedlight once in a blue moon, I found this video pretty inspiring and well explained. I hope it helped all OCF photography newbies learn something new, and those of you who take photos like this – what are your tips for nailing night OCF portraits?
[10 Tips for Taking Portraits at Night w/ Off Camera Flash (OCF) – Samples & BTS Photos – w/ TTL | Francisco Joel Hernandez]

Dunja Đuđić Kalinin
Dunja Djudjic is a multi-talented artist based in Novi Sad, Serbia. With 15 years of experience as a photographer, she specializes in capturing the beauty of nature, travel, concerts, and fine art. In addition to her photography, Dunja also expresses her creativity through writing, embroidery, and jewelry making.
Related Posts
 How to add flash to your shot to create portraits at night
 Delivering Awesome Content On Time – How Preston Kanak Delivered an Awesome D810 Demo
 This is how one photographer uses gelled flashes and modest equipment to produce awesome portraits
 This is why your night sky photography sucked last night
Join the Discussion
DIYP Comment Policy
Be nice, be on-topic, no personal information or flames.