


Exposure Compensation: When and How to Use Plus Minus EV Controls
Nov 27, 2025
Darlene Lleno
Darlene Lleno brings a unique perspective to DIY Photography as someone who grew up surrounded by camera gear but chose words over lenses. With five years of writing experience, she specializes in photography content that’s both technically informed and genuinely passionate. Growing up with a photographer twin brother meant camera talk was everyday conversation in her household. While he mastered capturing moments, Darlene discovered she preferred being the subject and the storyteller behind the scenes. As a travel enthusiast and mother of two, she understands the importance of preserving life’s precious moments. When not exploring new destinations or writing for DIY Photography, you’ll find her reading or tending to her garden. Her approach to photography writing is refreshingly authentic, she may not be behind the camera, but she knows exactly what it takes to help others capture the shots that matter most.
Share:

Exposure compensation lets you control image brightness without leaving semi-automatic modes. This feature overrides your camera’s light meter while you stay in aperture priority, shutter priority, or program mode. Most cameras show exposure compensation as a scale with plus and minus symbols. The range typically runs from -3 to +3 EV.
Your camera’s light meter guesses the right exposure based on what it sees. These calculations assume every scene averages out to middle gray. Middle gray sits at 18% reflectance. This works fine for evenly lit subjects with balanced highlights and shadows. Things get messy when you shoot mostly bright or dark scenes. These extreme situations fool the meter into bad exposure choices.
What Exposure Compensation Actually Does
Exposure compensation changes your camera’s suggested exposure by specific amounts. These adjustments use stops or EV (exposure value) as measurements. Each full stop doubles or halves the light hitting your sensor. Plus settings make images brighter. Minus settings make them darker.
The feature works differently based on your shooting mode. Aperture priority mode changes shutter speed while keeping your chosen aperture locked. Shutter priority mode adjusts aperture instead. Program mode lets the camera pick which settings to change. This flexibility keeps your creative choices intact while fixing exposure problems.
Most cameras let you adjust in 1/3 or 1/2 stop jumps. This fine control helps you nail the perfect exposure. You avoid big leaps between settings. Pro cameras often go up to +/-5 EV for extreme lighting.
How Your Camera’s Meter Gets Fooled
Camera meters handle average scenes really well. They struggle with extremes though. Bright stuff like snow, sand, or white walls causes underexposure. The meter sees too much brightness and cuts exposure. Everything gets pulled toward middle gray. Your pristine white snow turns into muddy gray slush.
Dark subjects create the opposite mess. Black clothing, dark wood, or nighttime scenes trigger overexposure. The meter adds light to brighten the darkness. This washes out the rich tones you wanted. Understanding metering modes helps you predict these problems.
Backlit situations present another challenge. Strong light behind your subject confuses the meter. It exposes for the bright background. Your main subject becomes a dark silhouette. Positive exposure compensation recovers detail in shadowed areas. You don’t blow out the background completely.
When to Apply Positive Exposure Compensation
Positive EV settings add light to images your camera makes too dark. Understanding when to brighten your shots saves countless photos from the trash bin.
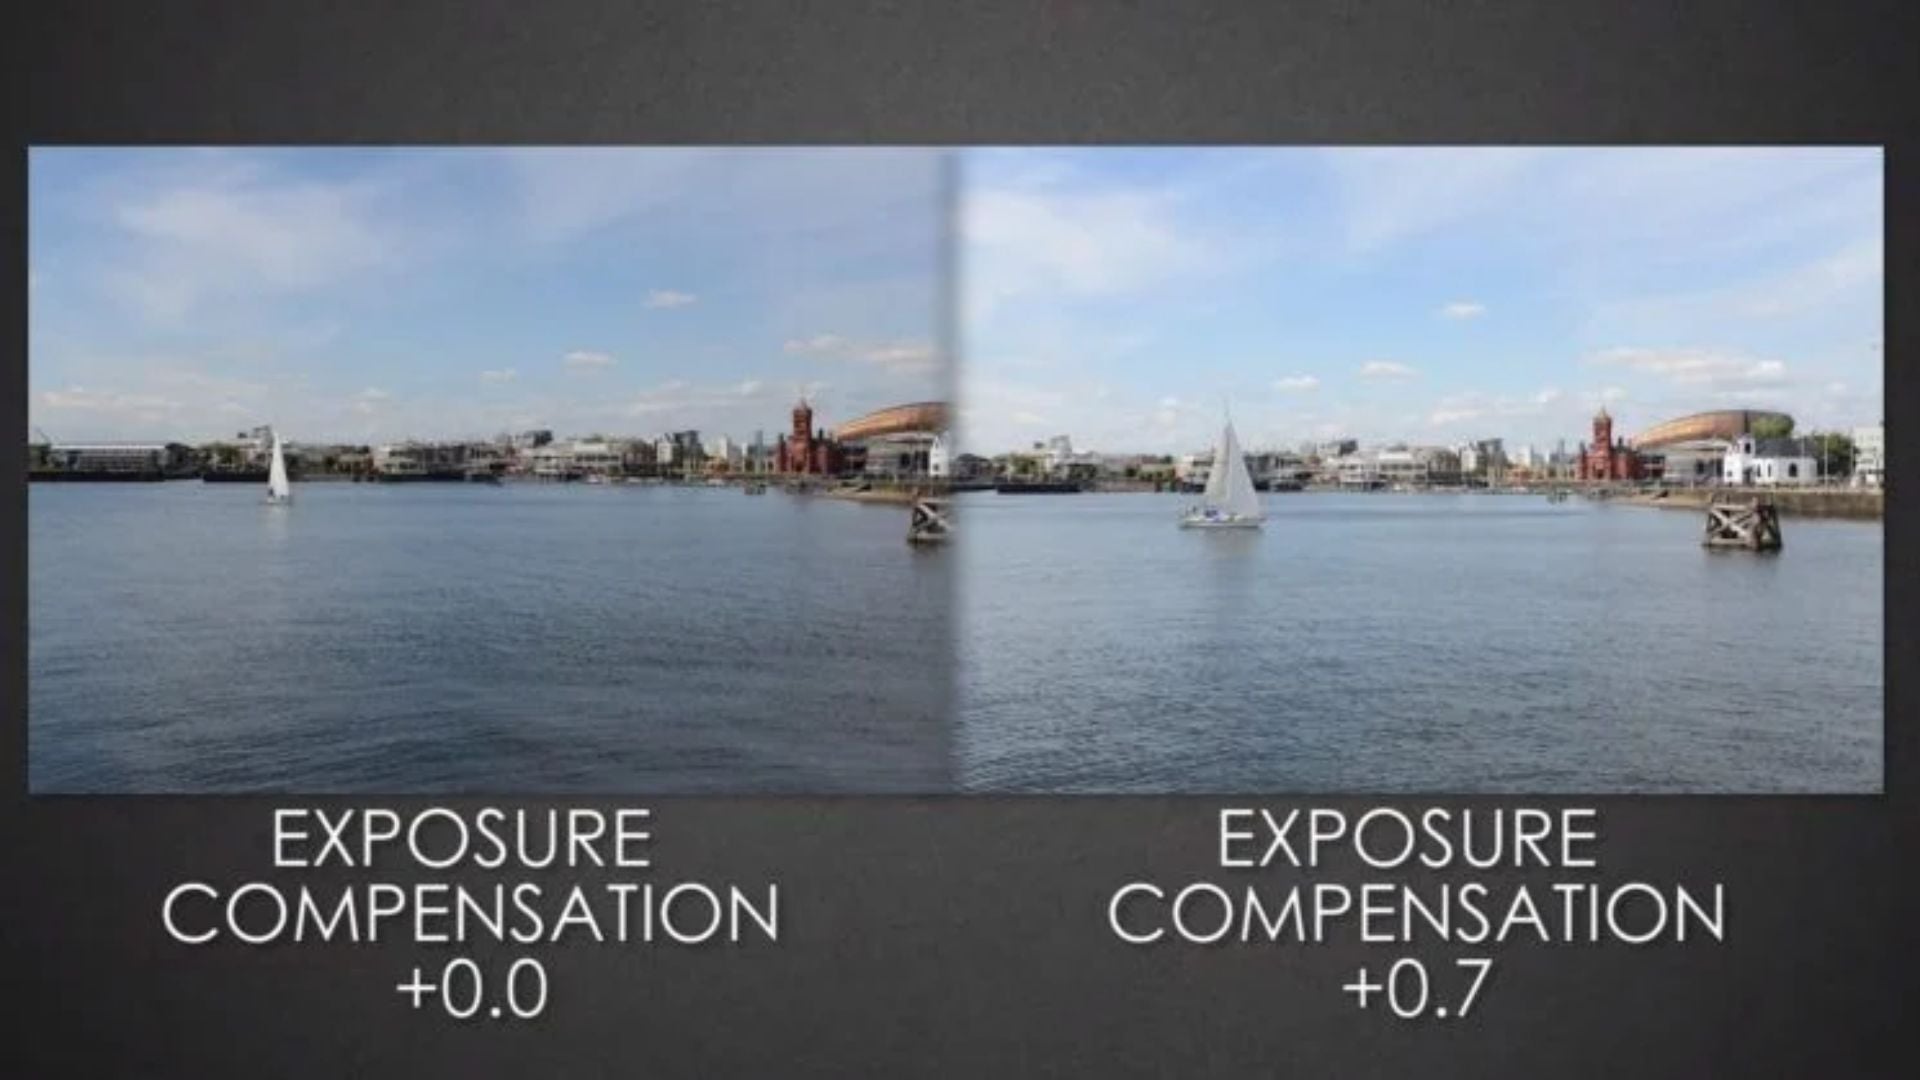
Snow photography needs consistent positive compensation. Add between +1 and +2 stops. Without this adjustment, sparkling white snow looks dull and gray. Beach scenes need similar treatment. Sand and water reflect tons of light.
Wedding photography demands positive compensation for white dresses. The meter sees all that white fabric and underexposes automatically. A +0.7 to +1.3 stop adjustment fixes this. You restore proper brightness while keeping texture in the fabric.
Backlit portraits benefit from positive exposure compensation too. Your subject stands in front of a bright window or setting sun. Their face falls into shadow. Adding +1 to +2 stops brings facial features into proper exposure. This works better than fill flash in many situations. You maintain natural lighting quality.
High-key photography intentionally uses overexposure. This creates bright, airy images. The style needs +2 to +3 stops of positive compensation. Bright tones create an optimistic, clean look. This aesthetic works great for portrait photography.
Technical Considerations for Bright Scenes
Highlight clipping becomes a worry when adding positive exposure compensation. Your camera’s histogram and highlight warnings help monitor this issue. Blown highlights contain no recoverable detail later. Keep your histogram’s right edge just below the max limit.
Modern cameras with expanded dynamic range handle bright scenes better. Older models struggle more. This extra latitude gives you more room when applying positive compensation. Still, watch carefully to prevent losing important highlight detail. Clouds or wedding dresses need that detail preserved.
When to Apply Negative Exposure Compensation
Negative EV settings darken images that your camera makes too bright. Knowing when to reduce brightness protects the mood and tone you’re after.
Dark subjects like black cars need minus compensation. Formal wear or theater stages require it too. The meter tries to brighten these dark tones toward middle gray. Subtracting -1 to -2 stops restores the rich, deep tones.
Low-key photography relies on negative exposure compensation. This maintains its signature moody look. The style emphasizes shadows and dark tones. Settings between -1.5 and -3 stops create intense contrast. Concert photography often uses similar adjustments. You preserve stage lighting atmosphere.
Sunset and sunrise photography sometimes needs negative compensation. This seems weird because they look bright. The camera’s meter reads the dark ground and underexposed sky. Then it overexposes the entire scene. A -0.3 to -1 stop adjustment keeps colors saturated and dramatic. This prevents washed-out skies that lack vibrant hues.
Shadow detail preservation requires careful balance with negative compensation. You darken overall exposure but might lose detail in dim areas. Your camera’s shadow recovery in RAW files helps during editing. Proper exposure compensation in camera produces better results though. Aggressive post-processing can’t match it.
Maintaining Dynamic Range in Dark Scenes
Pushing exposure compensation too far negative creates crushed blacks. Crushed blacks have no recoverable detail. This matches blown highlights. The histogram’s left edge should stay just above zero. You maintain maximum shadow information this way.
Your camera’s dynamic range sets limits on contrast capture. You can only capture so much difference between highlights and shadows. Understanding these limits helps set realistic expectations. Some scenes simply exceed your camera’s abilities. They need bracketing or extra lighting.
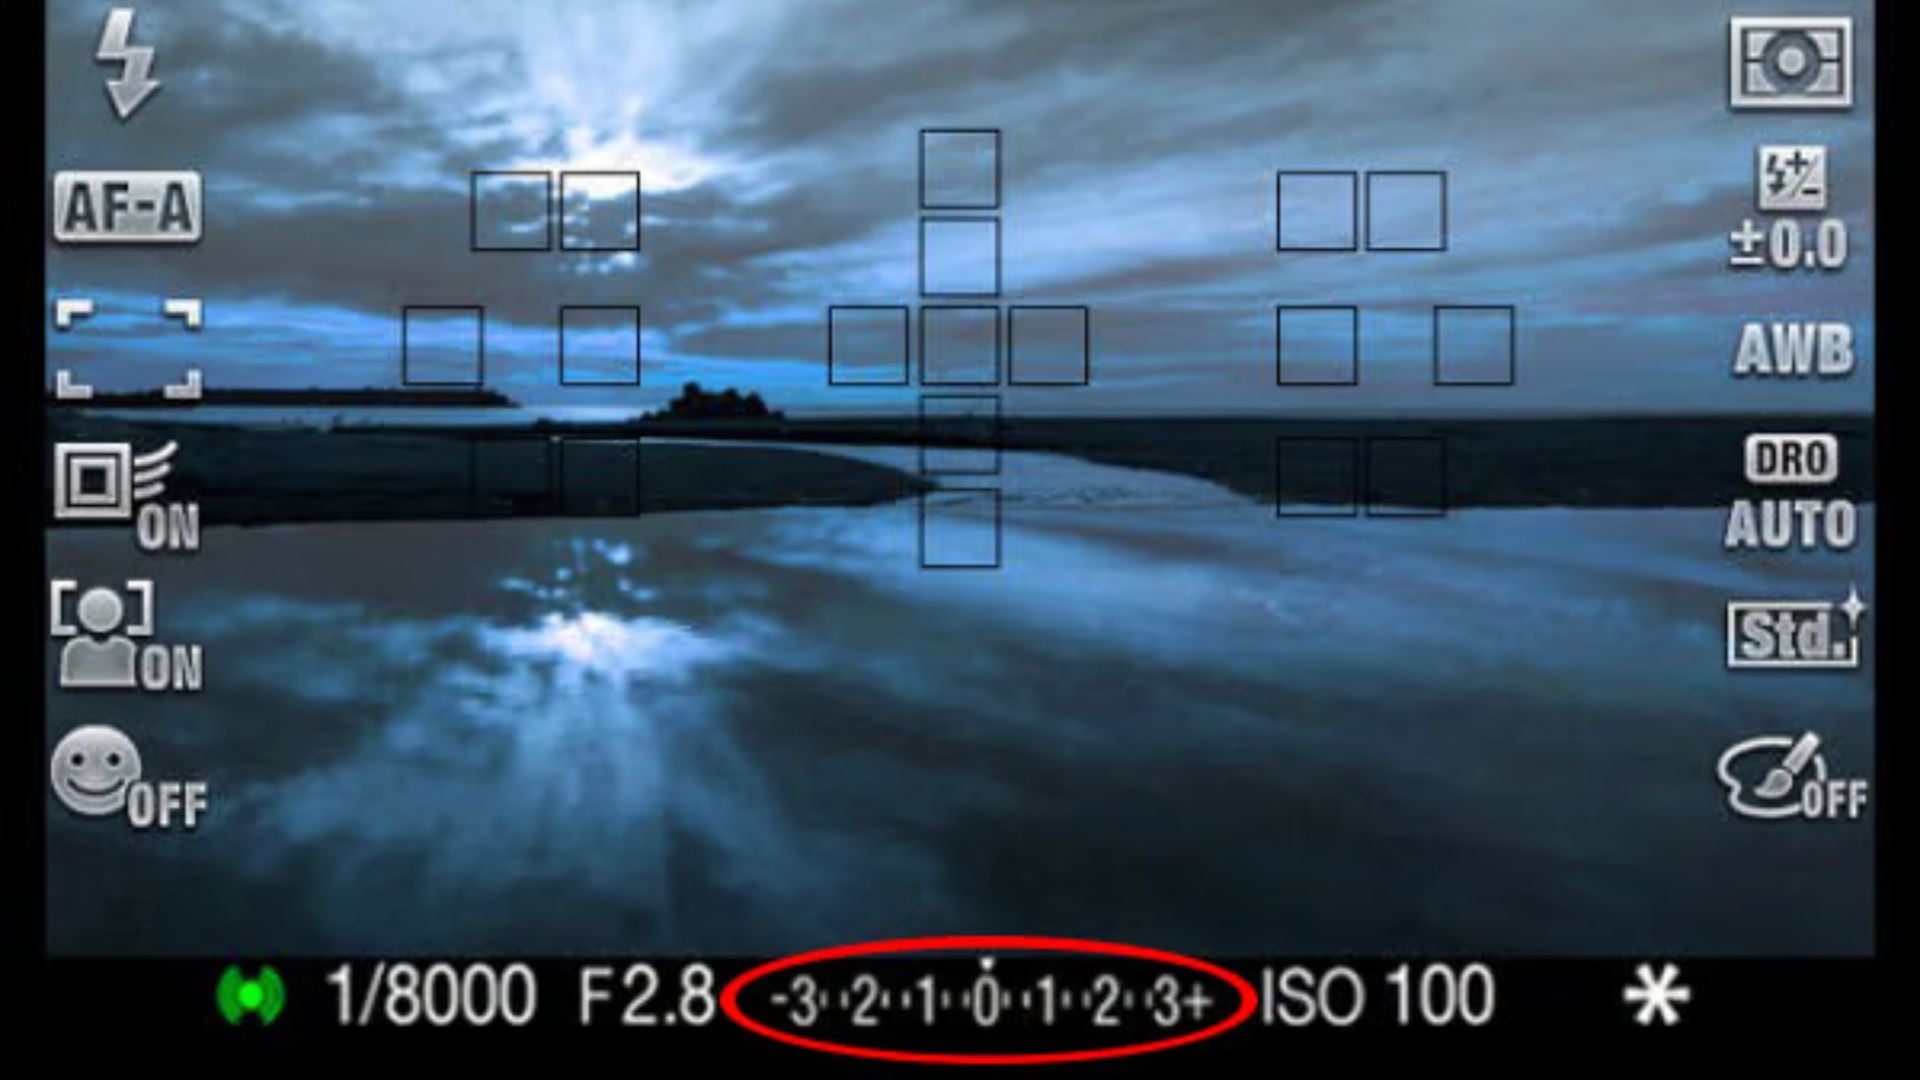
Understanding the EV Scale
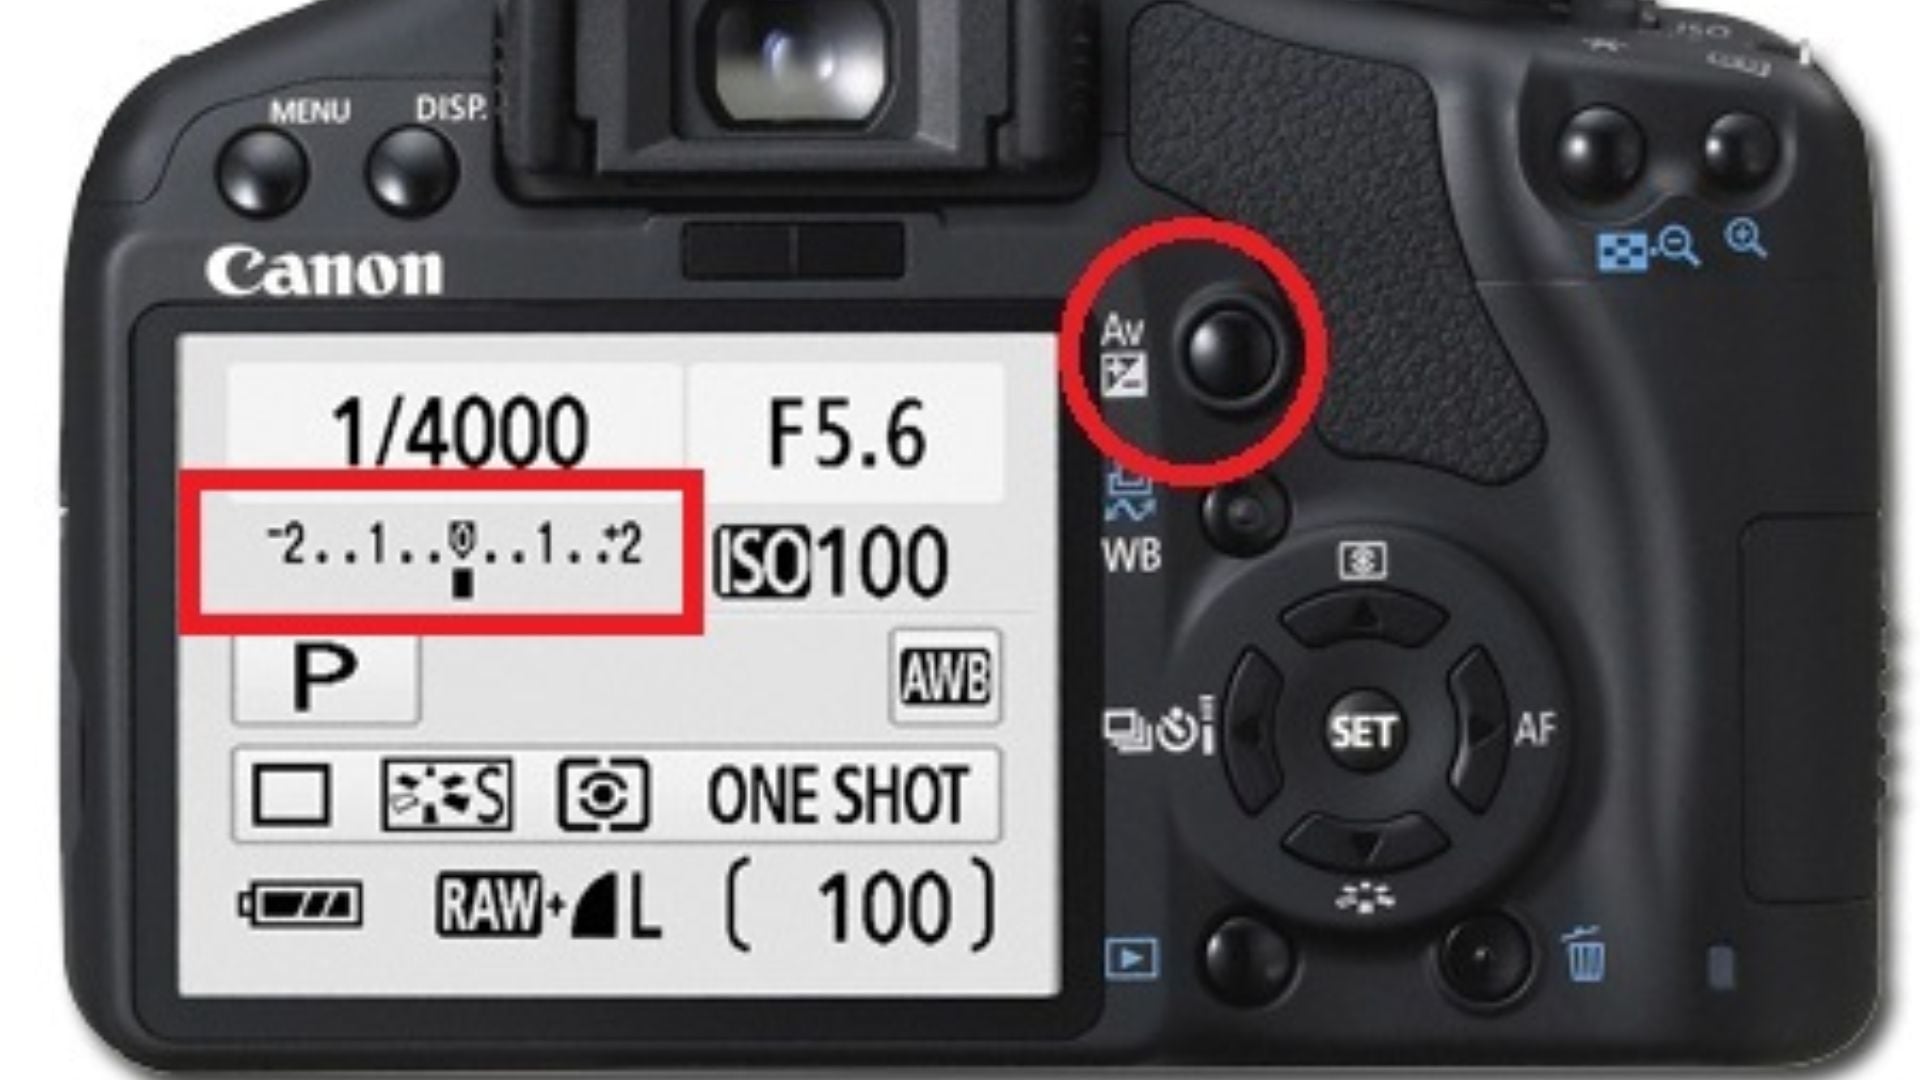
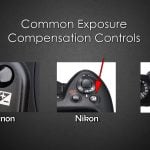
The exposure compensation scale shows as a numbered line. Zero sits in the middle. Positive numbers appear on one side. Negative numbers sit on the other. A small marker shows your current setting. Many cameras use a +/- button with a control dial.
Each number equals one full stop of light adjustment. The marks between numbers show 1/3 or 1/2 stop jumps. This depends on your camera’s setup. Moving from 0 to +1 doubles the light hitting your sensor. Moving to -1 cuts it in half.
You can think of exposure compensation two ways. Some see it as a correction tool. Others view it as creative control. Both work depending on your situation. Corrective use fixes meter errors. Creative use sets a specific tonal palette.
The scale’s range changes by camera model. Entry-level cameras offer +/-3 stops. Pro bodies go to +/-5 stops for extreme conditions. This extended range helps in challenging lighting. Standard metering can’t handle these situations.

Reading Your Camera’s Display
Most cameras show exposure compensation in the viewfinder and on the back screen. A small +/- icon appears next to the number. This shows your current adjustment. Constant visibility helps you remember active settings between shots.
The exposure meter bar often displays alongside the compensation indicator. This combined display shows two things at once. You see your current compensation setting. You also see how the meter reads the scene. Understanding this relationship helps you anticipate needed adjustments.
Some cameras flash a warning when exposure compensation is active. This reminder prevents accidental mistakes. You might forget to turn it off after your shoot ends. Always reset compensation to zero when finished. Change it when you switch to a new scene or subject.
Practical Application Techniques
Start with small adjustments and check results on your LCD screen. The histogram gives more reliable feedback than screen brightness. Ambient light affects how your LCD looks. It doesn’t change histogram data though.
Zoom into your images at 100% to check critical areas. Focus on highlights in bright scenes. Check shadows in dark scenes. These extreme tones show whether your compensation worked right.
Shoot test frames at different compensation levels when you have time. Bracketing your exposure compensation helps you learn faster. You see how different amounts affect your specific camera and lighting. This builds intuitive understanding better than just reading about it.
Keep notes about compensation settings for common situations. Here are some examples photographers use regularly:
- Wedding photographers develop standard adjustments for white dresses
- Landscape photographers learn typical settings for sunrise and sunset
- Portrait photographers note compensation for different skin tones
- Street photographers track settings for various urban lighting conditions
These personal references speed up your workflow once you establish them.
Shooting Mode Considerations
Exposure compensation works differently across shooting modes. In aperture priority mode, your chosen f-stop stays constant. Shutter speed adjusts instead. This keeps your desired depth of field while fixing exposure.
Shutter priority mode keeps your shutter speed locked. It modifies aperture instead. This helps when freezing action or creating motion blur. You still control brightness. Your depth of field changes as aperture adjusts though.
Program mode lets the camera decide which settings to change. This flexibility works well for casual shooting. You get less precise control over the final look. Manual mode ignores exposure compensation completely. You control all settings directly.
Common Mistakes to Avoid
Photographers make several repeated errors with exposure compensation. Learning these helps you avoid wasting shots and missing moments.
Forgetting to reset exposure compensation after a shoot causes problems. You get consistently wrong exposures. This happens when photographers get distracted or rushed. Always check your compensation setting when starting fresh. Look at it before shooting a new subject or location.
Over-relying on exposure compensation creates a bad habit. You prevent yourself from learning proper manual exposure. Use it as a tool for specific situations. Don’t make it a constant adjustment for every shot. Develop your ability to read light correctly. Set baseline exposures accurately.
Ignoring your histogram leads to blown highlights or crushed shadows. This happens even when using compensation. The histogram reveals actual exposure data. Your LCD screen’s brightness changes with ambient light. Trust objective data over what your eyes see.
Applying compensation in manual mode does nothing. You already control all settings directly. This common beginner mistake wastes time and creates confusion. Save exposure compensation for semi-automatic modes. That’s where it actually works.
Learning from Your Mistakes
Review your images after shoots to spot patterns. Notice which situations consistently fool your meter. This helps you anticipate needed adjustments next time. You face similar scenes again.
Compare your in-camera exposures to edited finals. This shows whether you consistently under or overexpose. Adjust your baseline compensation habits based on this. You reduce post-processing work.
According to research from Digital Photography School, photographers who review exposure data improve faster. The Photographic Society of America says understanding exposure compensation is fundamental. You get consistent results across varying lighting this way.
Advanced Exposure Compensation Strategies
Exposure lock combined with compensation gives precise control. Set your compensation first. Point at your subject. Lock exposure. Then recompose. This ensures your subject gets proper exposure. Overall scene brightness doesn’t matter.
Spot metering works beautifully with exposure compensation. You get maximum control. Meter off a critical area first. Apply compensation based on whether that area should be bright or dark. Then shoot. This advanced technique gives almost manual-level precision. You stay in semi-automatic modes though.
Auto exposure bracketing (AEB) captures multiple frames at different levels. This insurance policy ensures a usable exposure. You get good shots even in rapidly changing light. Later you choose the best exposure. Or you can blend them for expanded dynamic range.
Zone system concepts translate well to digital exposure compensation. Visualize your scene divided into brightness zones. These run from pure black to pure white. Place your subject in the desired zone using compensation adjustments. This thinking process improves exposure decisions dramatically.

Integrating with RAW Workflow
Shooting RAW files provides exposure flexibility during editing. Proper in-camera exposure compensation still produces better results though. RAW can’t recover completely blown highlights. It can’t save totally crushed shadows either. Getting exposure right in camera maintains maximum image quality.
The “expose to the right” technique deliberately overexposes slightly. This maximizes shadow detail. It contradicts traditional metering but works well for RAW files. You need careful highlight protection though. Small amounts of positive compensation implement this strategy. Avoid clipping while you do it.
Start Using Exposure Compensation Today
Practice exposure compensation in controlled settings first. Photograph white and black objects to learn required adjustments. This hands-on experience builds confidence faster than theory.
Develop personal compensation guidelines for frequent situations. Document your successful settings for reference. These notes become invaluable quick guides during actual shoots. You’re pressed for time then.
Study images from photographers you admire. Notice their exposure choices in different lighting. This analysis reveals how pros use exposure compensation. They use it creatively rather than just correctively.
Understanding exposure compensation changes how you interact with your camera. This feature bridges automatic convenience with creative control. Master this tool to produce consistently well-exposed images. You handle any lighting situation you face.
Start applying these techniques during your next session. Experiment freely knowing you can always reset to zero. Through practice and careful observation, exposure compensation becomes natural. It stops being a technical challenge.

Darlene Lleno
Darlene Lleno brings a unique perspective to DIY Photography as someone who grew up surrounded by camera gear but chose words over lenses. With five years of writing experience, she specializes in photography content that’s both technically informed and genuinely passionate. Growing up with a photographer twin brother meant camera talk was everyday conversation in her household. While he mastered capturing moments, Darlene discovered she preferred being the subject and the storyteller behind the scenes. As a travel enthusiast and mother of two, she understands the importance of preserving life’s precious moments. When not exploring new destinations or writing for DIY Photography, you’ll find her reading or tending to her garden. Her approach to photography writing is refreshingly authentic, she may not be behind the camera, but she knows exactly what it takes to help others capture the shots that matter most.


Join the Discussion
DIYP Comment Policy
Be nice, be on-topic, no personal information or flames.