


Creating stylish cinematic portraits with the Light Blaster
Nov 2, 2016
Clinton lofthouse
Clinton Lofthouse is a Award-Winning Photographer, Creative Director, and artist based in the United Kingdom, who specialises in creative retouching and composites. Proud 80’s baby, reader of graphic novels and movie geek!
Share:

I recently got my hands on a Light blaster. The Light Blaster Is a strobe-based image projector. Basically it’s a slide projector. You can select and project still images onto any physical space. They claim “unlimited possibilities for creative freedom“, so I thought I’d take it for a spin. It is seriously one cool piece of kit to experiment with. I mostly do cinematic portraits and it fits very well with my kit. Keep reading to watch a speed edit of the Photoshop editing process.
So it wasn’t long before I got my good friend Martin to come over for a test shoot with the Light Blaster. As most sane people, I have a S.W.A.T costume laying around. My idea was to dress Martin up in the costume and create some stylish/cinematic test shots.
Lighting
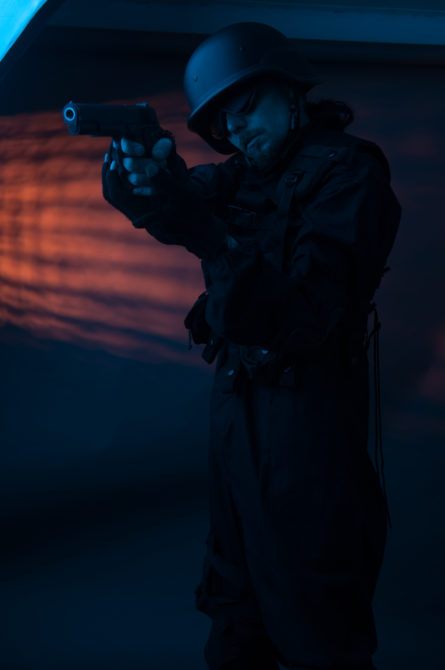
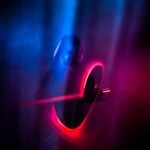
By now you should know that I like to pre-plan my shoots, so as usual I knew exactly what I was going to do when Martin got to the house. I had a Pixapro citi 600, with a 150″ octa, gelled with some blue generic gel sheet from Amazon. The portable flash gun which was being used to fire the Light Blaster had some orange gel sheet over the end of it. I like to use complimentary colors when shooting with gels, although you do not have to. Knowing that the citi 600 would far outpower the flash gun, I set it to to its lowest setting. I then turned up the flashgun to its highest setting and took some test shots……of the test shots! This is getting out of hand now! Haha.


Pleased with the effect, it seemed very noir-ish, we decided it was time to shoot for real. Martin got kitted up and we began. Without changing any of the settings we fired through one slide. The settings were Iso: 100, F5, 1/125 shutter speed.

Slide selection
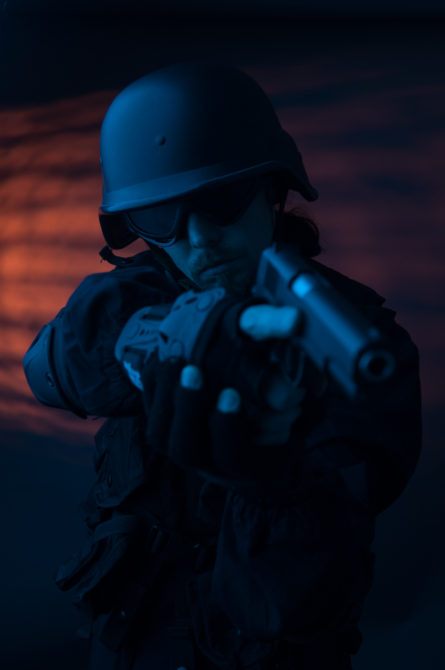
I liked the first slide, but I saw one earlier that caught my eye, it reminded me of some kind of Tokyo inspired symbol from an eighties movie…don’t ask me why, my brain works in mysterious ways. So I switched slides and off we popped again.(I use the metalic “pro” slides)


These images had a real stylish/cinematic 80s feel, and we all know how much I like 80s movies, so I settled on the images from this slide to edit. Once in lightroom, I did my usual selection process. I white flagged the images that stood out, I then whittled them down to one final image, which I believe had the potential to be cool! Which was this bad boy below…..

Now onto the Photoshop
This really didn’t take long to edit compared to my usual work. I have created a speed edit for you all, but here is a quick run down of what went into the editing process.
So first off I made some small adjustments in camera raw. I upped the exposure and shadows a little, just to get some detail pop in there. I then moved back into Photoshop and did some clean up with the healing brush on a blank layer.
From there I took it straight into dodge and burn. I was mostly dodging and burning for styling, which meant going over the lights and darks. I then duplicated the dodge and burn group, around 3 times, really making Martin stand out, and giving him a painterly/illustrated feel.
I then had a play around with effects. At first I thought a lens flare would be cool, but it didn’t seem to work with this image so I settled for some particles from the Raw exchange.
Afterwards I added a little more smoke in for atmosphere. From there I added a Hue-saturation adjustment and put some blues into the blacks. This is something I do to enhance the painterly feel. On top of that was a levels, layers adjustment for extra pop.
It needed a little extra styling so I painted in some light leaks, more subtle than usual with a brush on a screen blend mode. I then sharpened the image using a high end retouching sharpening.
Once completed in Photoshop, I then moved back into Lightroom where I added my final touches. In Lightroom I always add some clarity, just a touch. And then do some subtle, final sharpening, with the masking slider used to keep it restrained.
Here is the final image.
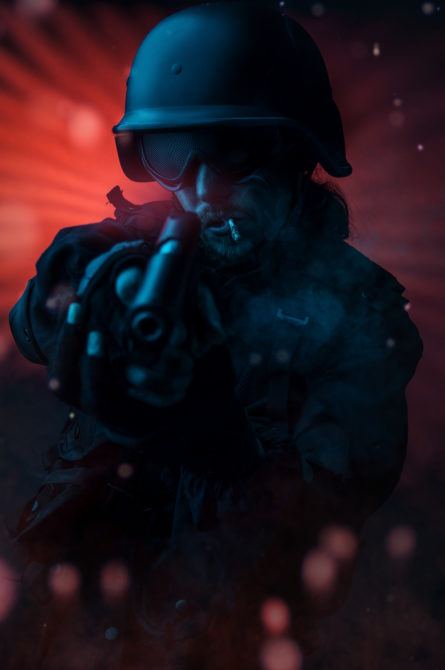
All in all, I am really happy with the possibilities the Light Blaster opens up. I only used it briefly, but there are so many different ways it could be used that I feel it is definitely worth owning.
I also broadcasted this shoot live on my Facebook profile, so feel free to add me as I will be hosting more live shoots in the future. And if you are feeling a little stalker-ish, you can plough through my newsfeed and you should be able to find the live video of this shoot.
So that’s it for this week, any questions, leave a comment in the box below.

Clinton lofthouse
Clinton Lofthouse is a Award-Winning Photographer, Creative Director, and artist based in the United Kingdom, who specialises in creative retouching and composites. Proud 80’s baby, reader of graphic novels and movie geek!
Related Posts
 5 tips for creating perfect cinematic lighting and making your work look stunning
 How To Photograph Darth Vader With The Spiffy Gear™ Light Blaster
 If You Want To Make Things Hard, Combine 4 Mirrors, Ground Fog And A Light Blaster To Create An Image
 Spiffy Gear Announces Studio Strobe Add On To Its Light Blaster™ System
Join the Discussion
DIYP Comment Policy
Be nice, be on-topic, no personal information or flames.