


How to use curves to fix any colour problem!
Jun 18, 2016
Joseph Parry
Joseph Parry is a Commercial and Editorial photographer based in the UK that provides cinematic photography and ounces of humour. Follow him on Instagram for stories and kick ass imagery.
Share:

I had to shoot in an environment without HSS (Didn’t have my Citi600 with me) and I didn’t have my Hoya ND16 filter with me either. Which meant that I couldn’t effectively overpower the ambient light coming off the stage to get rid of the blue on the model’s skin.
This led me to trying a few solutions, albeit badly until Stefan Kohler hooked me up with this ridiculously simple and awesome solution for fixing colour problems while retaining all of the micro details in contrast etc (which you lose when you use Frequency Separation for low level skin etc).
Here’s the before and after:


It’s an impressive, high end fix (though painted in very quickly for the sake of this tutorial) and I think you guys are gonna LOVE the results.
Here’s how it’s done!
Press F8 on windows or go to Window / Info Panel in order to get your info panel showing up if it’s not already. Pay attention to the numbers on the right hand side only! (Circled and arrowed).
Let’s Start:
Make a new curves layer and click on the “hand” tool in the curves box, also make sure that your sample size is set to “5 by 5” in the top left.
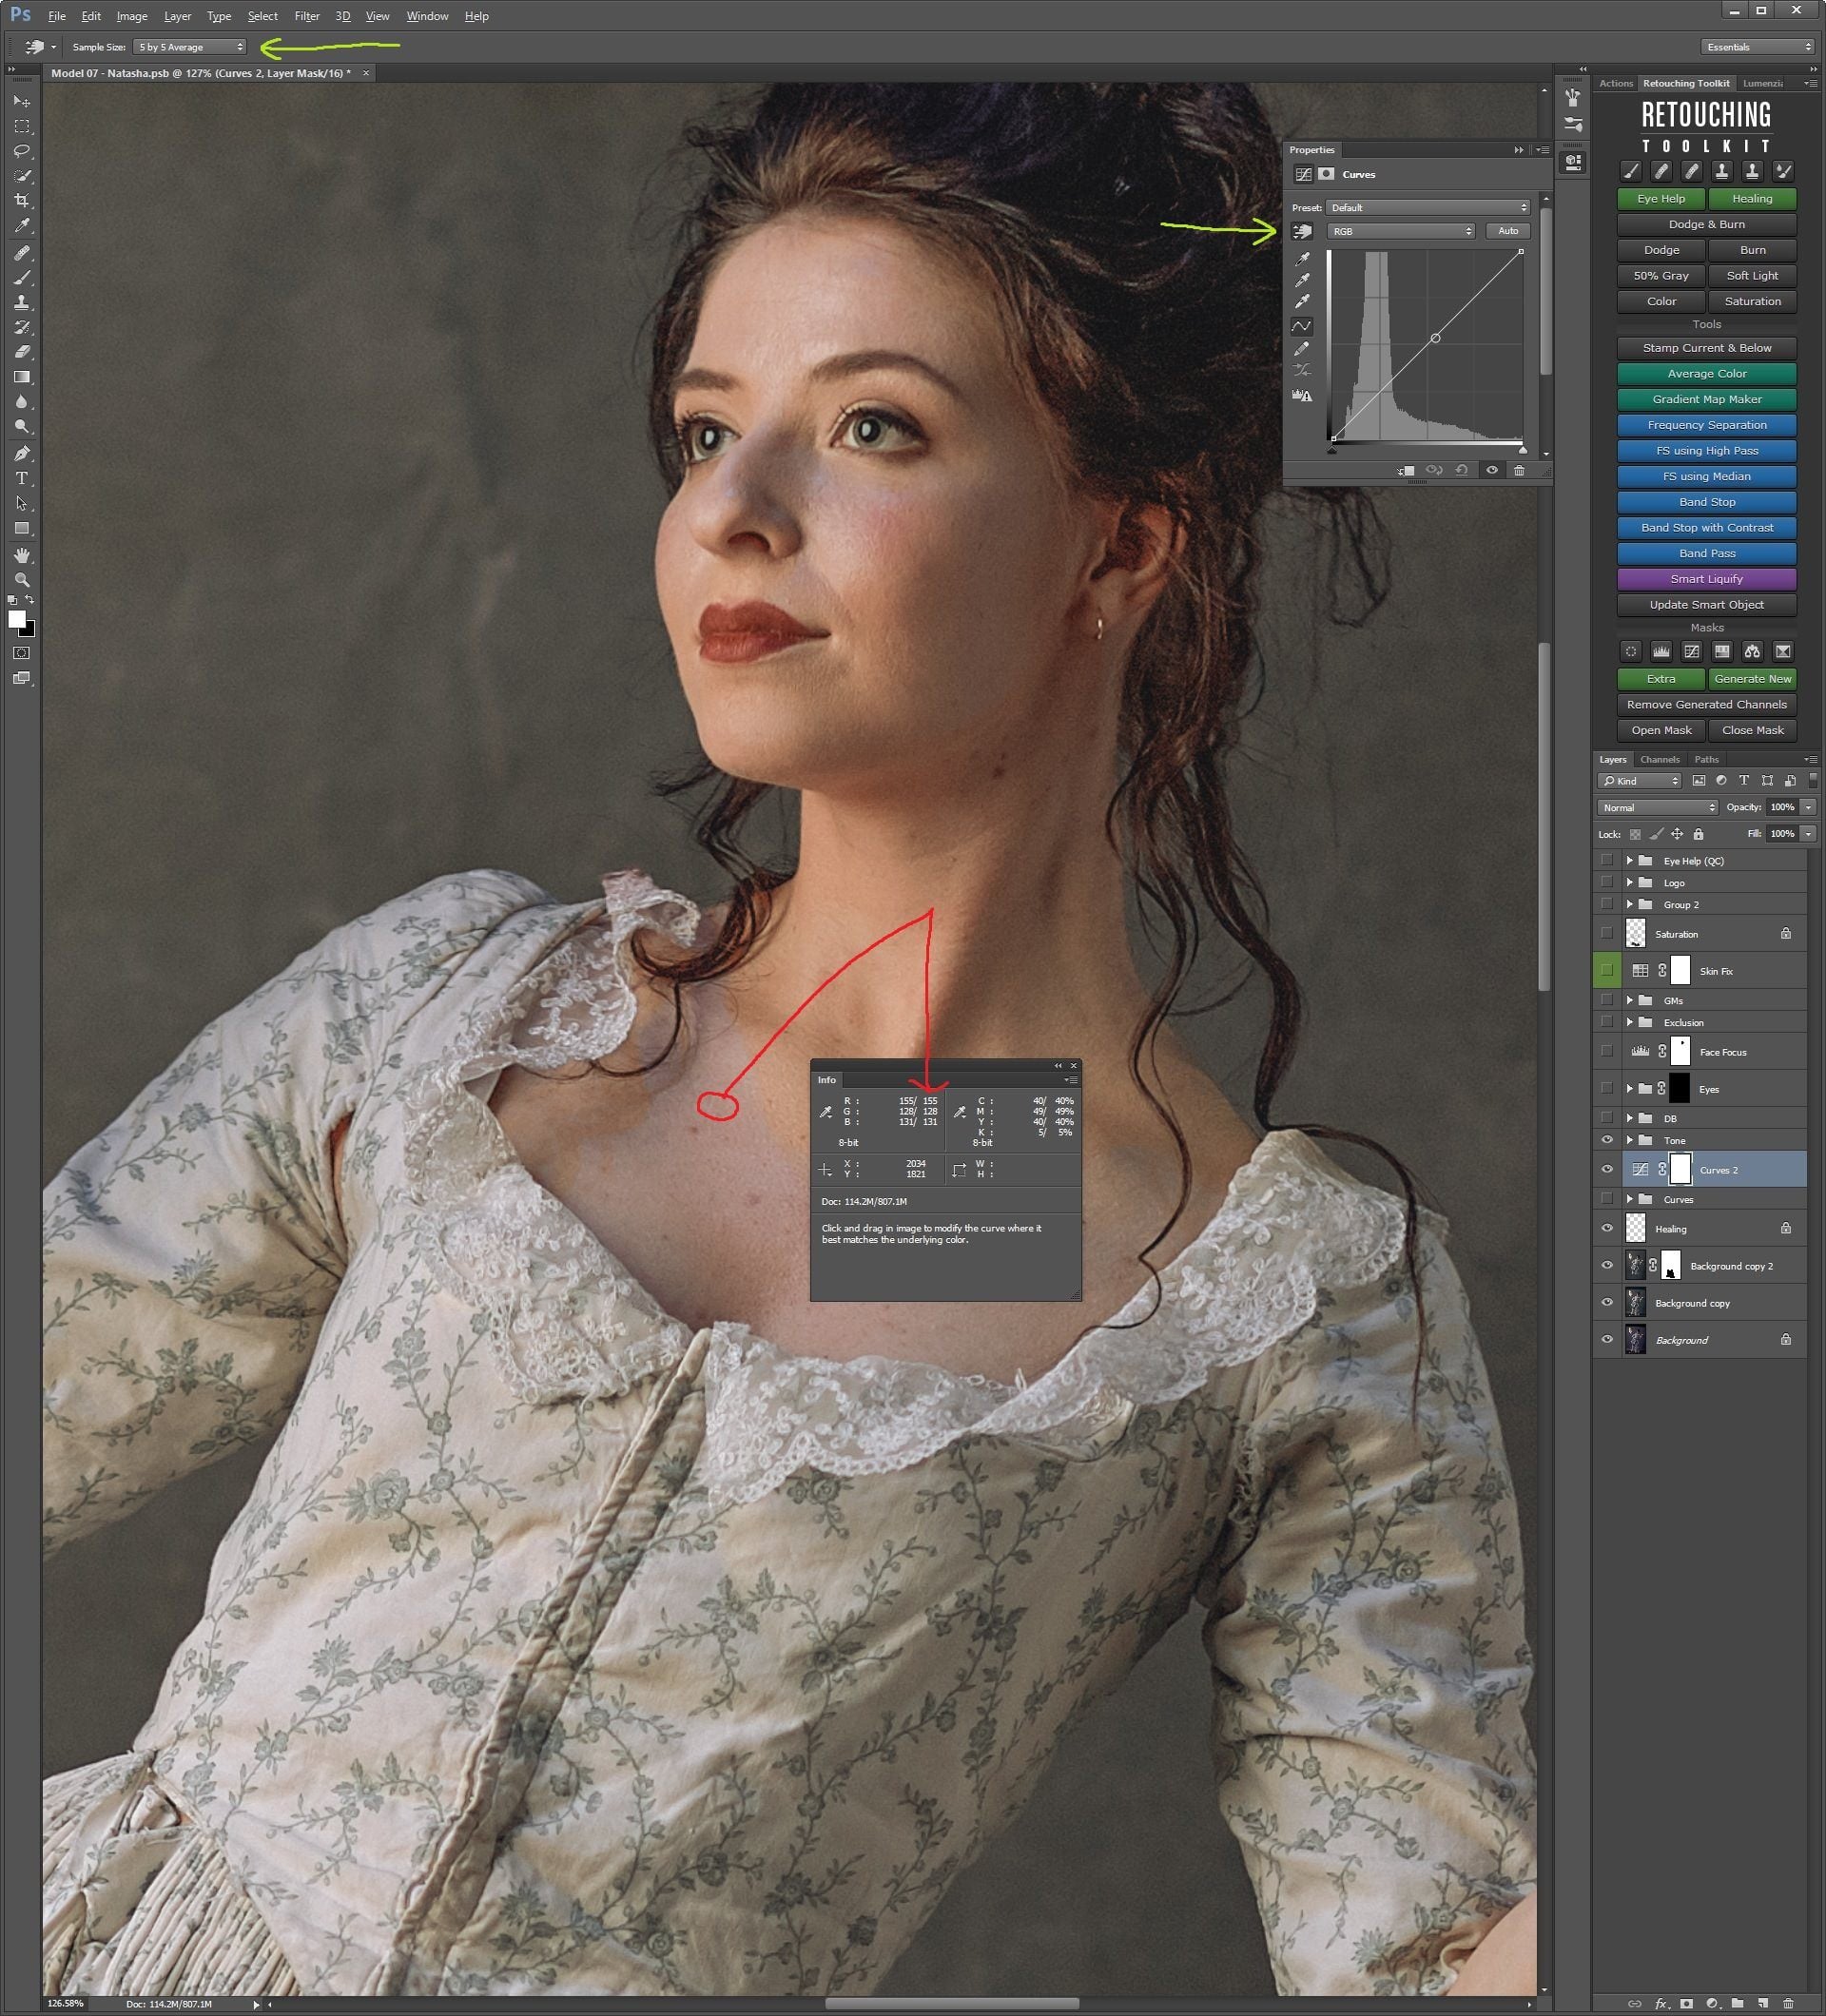
Move the mouse around the problem area (blue chest here) and get a feel for what the numbers are, in this case I was looking at RGB (155, 128, 131).
Now move your mouse around the “correct” area you wish to match and compare the numbers on the right hand side only.
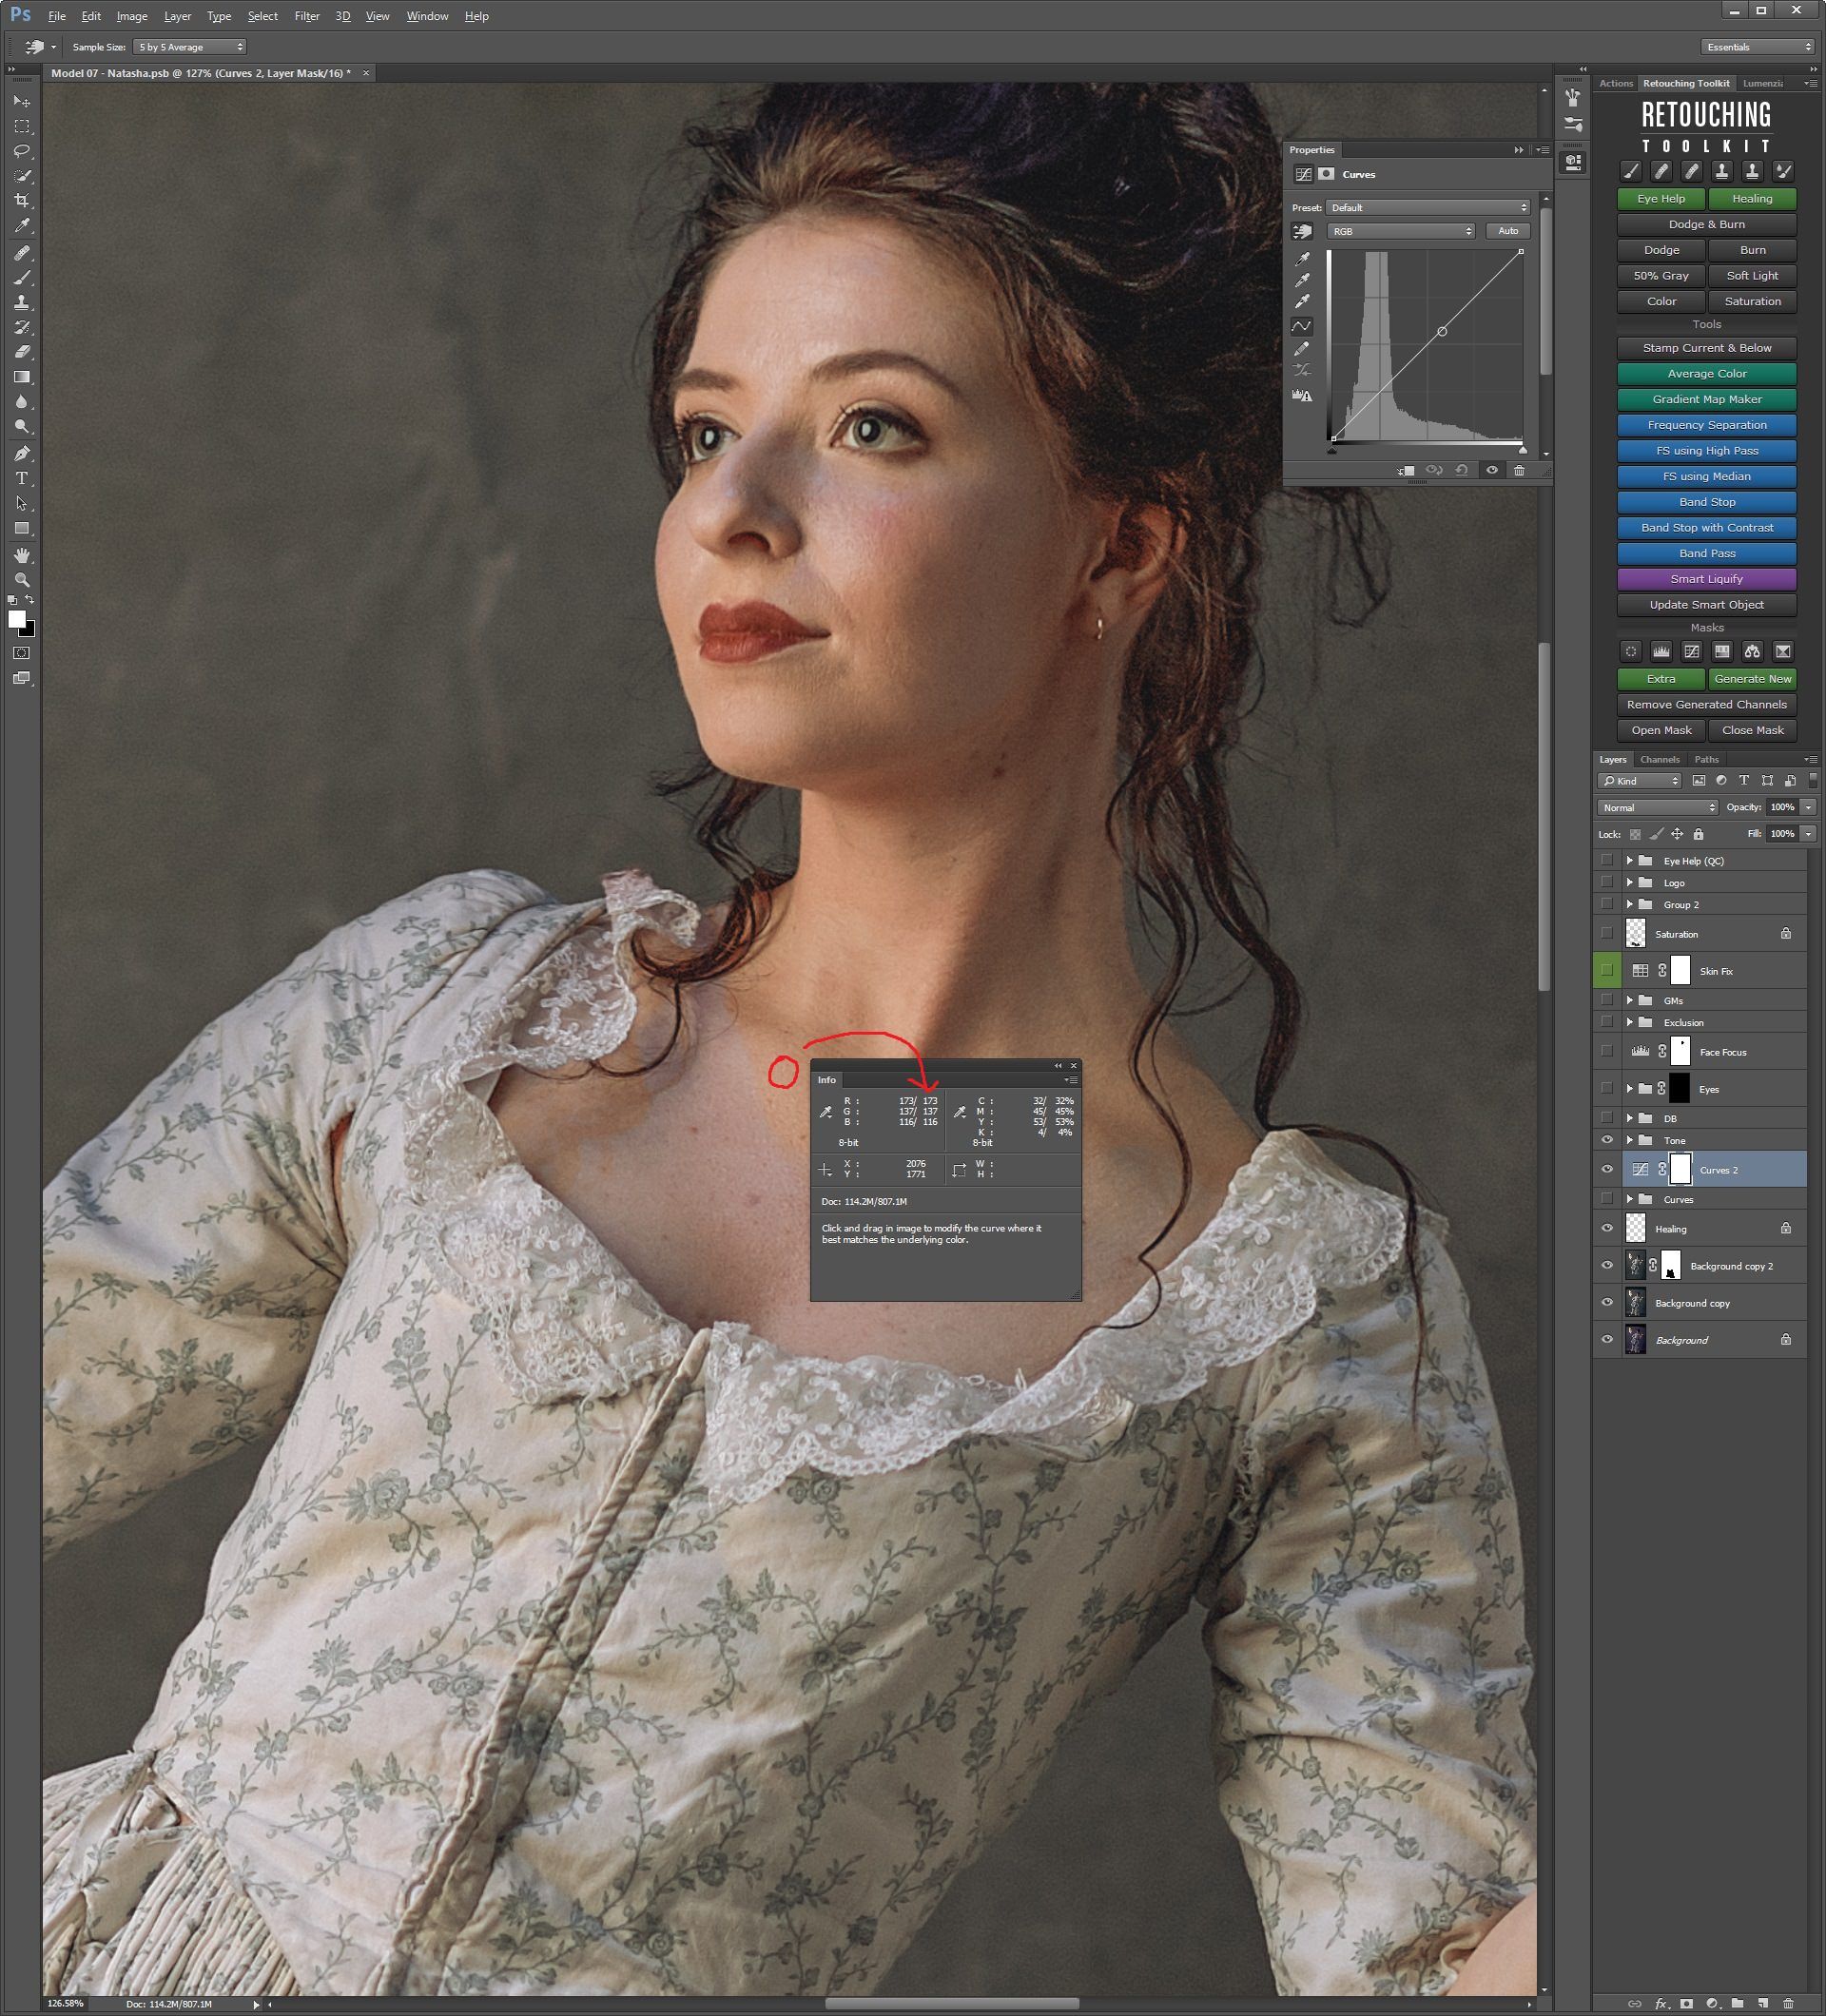
I had RGB (173, 137, 116), from this we can divulge the following:
The “wrong” area is darker (lower numbers in general),
Has less red,
Less green,
More blue.
So here’s where the magic happens.
Go to your curves and select the “Red” channel, now move your cursor back to the “wrong” section you were sampling earlier.

Click and Drag upwards until the values on the right side (in the info box) match the numbers you had in the red channel for the “right” patch of skin. In this instance we want to move from 155 and click and drag up until the red value changes to 173.
Now go to curves and change it to Green and do the same. For me I had to drag upwards to move from 128 to 137.
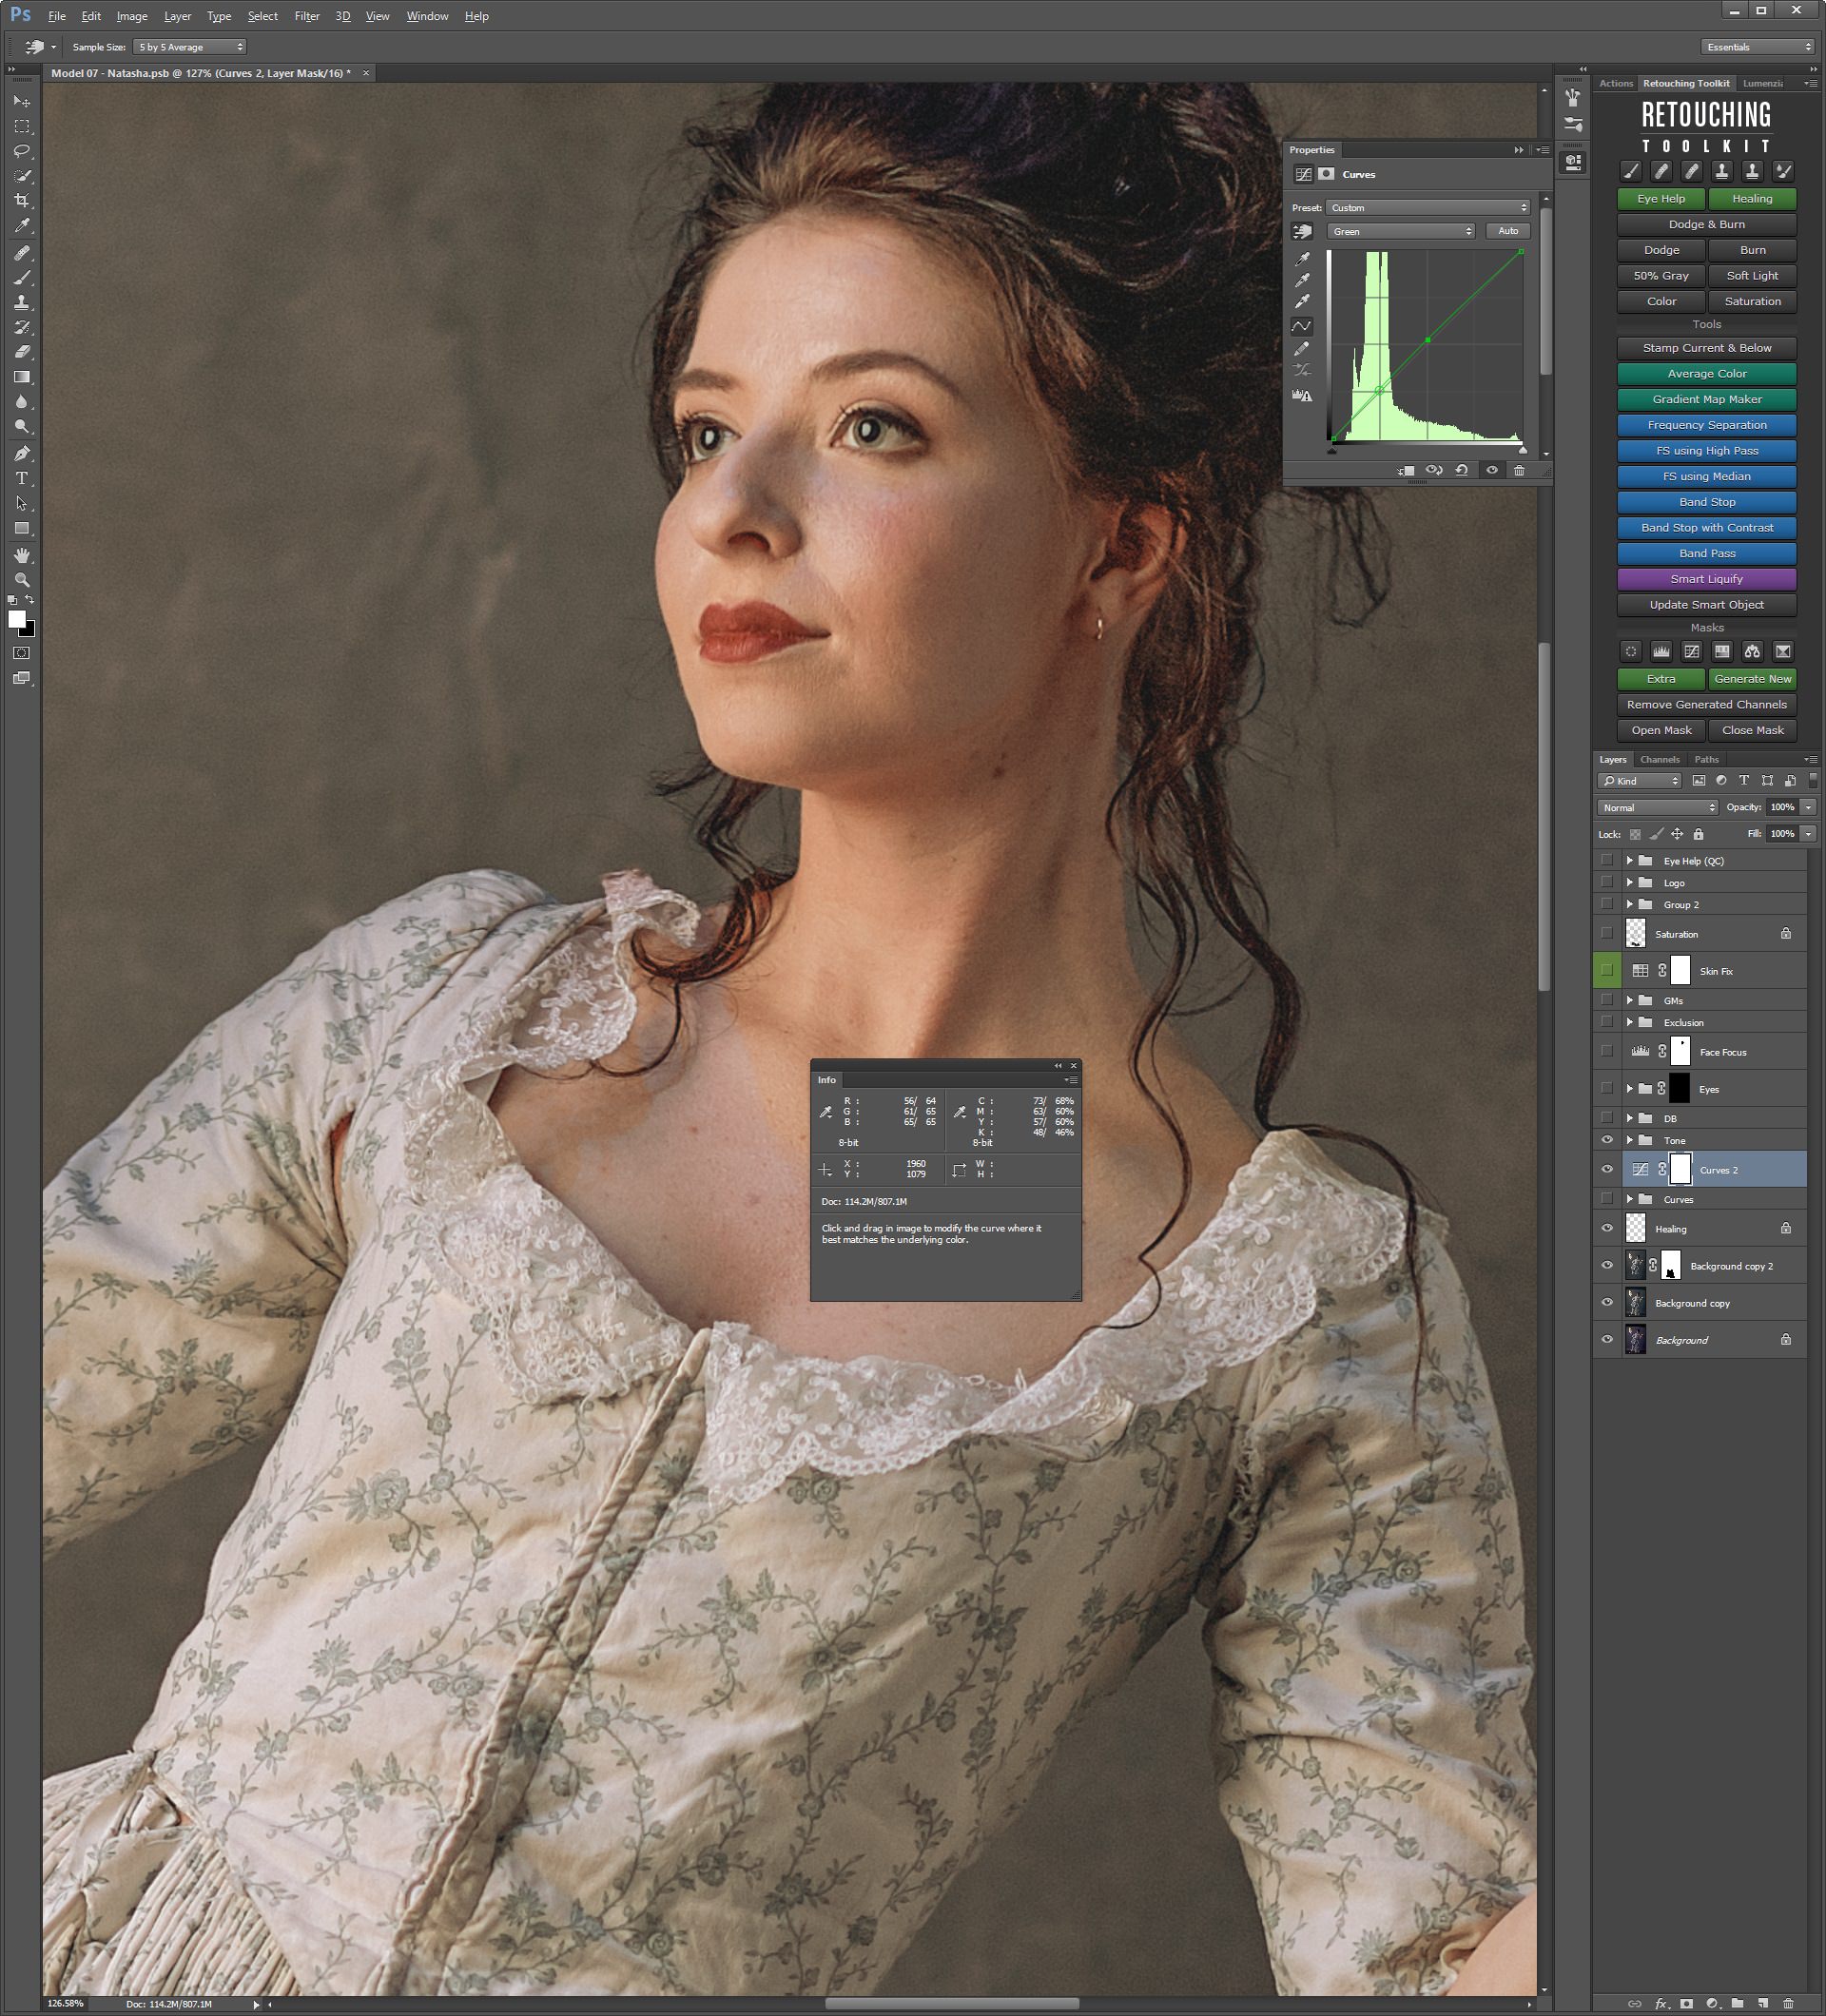
Lastly do it again for blue (make sure you are doing it in the same place each time!) I had to decrease blue from 131 to 116.

Lastly, invert your layer mask (CTRL+I / CMD+I with the layer mask selected), turn the layer mode to “Colour” and paint that sucker back in!


BOOM!
You’re now a master of curves and colour!

Please take into account that the bigger the difference between luminosity the less viable this becomes. Fix luminosity first, then colour.
*I literally cannot recommend Retouching tools’s highly enough… It’s the best tool I’ve ever bought for PS and I would genuinely hate to work without it now.
Cheers guys!!!!!

Joseph Parry
Joseph Parry is a Commercial and Editorial photographer based in the UK that provides cinematic photography and ounces of humour. Follow him on Instagram for stories and kick ass imagery.
Related Posts
 How to reverse engineer colour grades in Photoshop and reproduce them with curves
 Here is why your photos change colour when you export from Photoshop and how to fix it
 Easy but powerful colour correction and grading using colour wheels
 This 3 step raw colour correction tip will fix your white balance woes
Join the Discussion
DIYP Comment Policy
Be nice, be on-topic, no personal information or flames.
9 responses to “How to use curves to fix any colour problem!”
Thank you! This tutorial will help me a whole lot in the near future!!!
AWESOME!!!! :D
Very meaningful article in a sea of articles that teach the same thing. Keep up the good work!
Thanks Robert, appreciate that brother!
This will work wonders for my furniture retouching
Happy to help!
Great tip! Well done.
great article, Joseph!
Great info, thanks.