


How to reverse engineer colour grades in Photoshop and reproduce them with curves
Feb 7, 2018
John Aldred
John Aldred is a photographer with over 25 years of experience in the portrait and commercial worlds. He is based in Scotland and has been an early adopter – and occasional beta tester – of almost every digital imaging technology in that time. As well as his creative visual work, John uses 3D printing, electronics and programming to create his own photography and filmmaking tools and consults for a number of brands across the industry.
Share:

Colour grading is such a complicated and in-depth topic. Sure, you can cheat and buy some preset pack from somewhere, but you gain so much more when you learn to understand colour and its nuances. Then you can create your own grades and get them just the way you want.
That’s the point of the Look Creation & Color Grading series from RAWexchange. The whole course is four hours of video training that covers digital colour theory and principles in both Capture One and Photoshop. It’s a paid course, but there is also this free bonus videos, which shows us how we can analyse and reverse engineer a colour grade, and then apply it to other images using curves adjustments.
The first step in the process is the trickiest. You’re basically going into colour correction mode. It’s finding a way to turn the graded image back into something that resembles what the original might have looked like. Photoshop has a number of auto correction tools that can help to do this, but they don’t offer much insight as to how they did it. You just click something, it fixes it, and you’re done. So, to reverse the process and be able to apply it to other images isn’t as simple.
You’ll still want to duplicate the image and apply various automatic corrections to it to see which gives you the most realistic looking result. Then, use the Threshold adjustment layer in order to determine exactly which are the brightest and darkest points in the image. After that, use the Colour Sampler to mark those highlight and shadow spots. This lets you constantly keep an eye on the RGB values of those areas as you change them.

When you enable your corrected layer, you can see what these highlight and shadow values are supposed to be to provide a more realistic and accurate original colour. So it’s time to add a curves adjustment and use that to alter the red, green and blue levels throughout your graded image to make it resemble the automatically corrected one. It helps to regularly toggle the autocorrected layer on and off so that you can compare.

With the curves adjustment created to turn the image from the graded version, creating a new curves adjustment to generate the grade is quite simple. It’s basically just a case of inverting all of the values along the curve. For this bit, you’ll really want to watch the video to fully understand what that means. But, essentially you’re creating a new curves adjustment which cancels out the one you just created. Basically giving you back the original grade.
This curves adjustment can then be saved out as a custom preset which you can then apply directly onto other images. All you need to do give another image the same grade is add a curves adjustment, load the curves preset, and you’re done.
You could even save the curves preset out as a LUT file and use it to grade video footage in Premiere Pro. After Effects or other application.

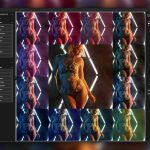
A few more images are demonstrated in the video using the same process, with some trips for getting around certain issues that may pop up. It’s well worth a way if you’ve been trying to figure out how a certain grade was created, or how to replicate it yourself.
And if you’re interested in checking out the whole course, you can do so over at RAWexchange, and it currently appears to be on sale.

John Aldred
John Aldred is a photographer with over 25 years of experience in the portrait and commercial worlds. He is based in Scotland and has been an early adopter – and occasional beta tester – of almost every digital imaging technology in that time. As well as his creative visual work, John uses 3D printing, electronics and programming to create his own photography and filmmaking tools and consults for a number of brands across the industry.


Join the Discussion
DIYP Comment Policy
Be nice, be on-topic, no personal information or flames.
2 responses to “How to reverse engineer colour grades in Photoshop and reproduce them with curves”
Wow.. I almost fell asleep watching that video.. there is no way I’ll be able to learn this becauee that guys monotone voice makes my eyes close
I’ve figured one can simply duplicate the curves layer and work on the inverse then. The thing is, I’m still not sure how this is useful in a broader sense?