


I made my own DIY adapter to use Sony E mount lenses on my Nikon Z7
Mar 11, 2019
Yoshi Imamura

John Aldred is a photographer with over 25 years of experience in the portrait and commercial worlds. He is based in Scotland and has been an early adopter – and occasional beta tester – of almost every digital imaging technology in that time. As well as his creative visual work, John uses 3D printing, electronics and programming to create his own photography and filmmaking tools and consults for a number of brands across the industry.
Share:

To use the Nikon Z7 camera with my Sony system, I needed to make a mount adaptor to attach Sony E Mount (NEX) optics on Nikon Z as none are currently available on the market. “If it is not there, why not to make one myself” is my motto. Since I’ve already made so many lenses to use on Sony A7R, to remake them for Nikon Z mount is too much work.
To be able to have lens comparisons work, there are so many mount adaptor to EOS but very few to Nikon. As I have EOS to NEX adaptor, I can stack Rollei to EOS, Contax to EOS, etc. Or I can use a single adapter, like the EOS to NEX, or Leica to NEX stack it on the NEX to Z Mount. All these lenses could then be compared on the Nikon Z (in theory).
So far, it seems that the Nikon Z7 camera can easily deal with even a dark pinhole while showing very little noise. It seems to be pretty usable and in comparison, in-camera VR seems to be very effective. However, intentionally set M mode, 1/2 second for the test, still, the result was not a shaky picture. It feels too good to be honest. I discovered that it was not because of the VR but the shutter makes very little vibration and the lens I used (Canon 100mm macro F2.8 with Proxer) happen to be very solid and steady even for handheld shooting.
There is only 2 mm gap between the two mounts. Nikon Z has 16mm flange distance, and Sony NEX is 18mm. 2 mm is so small to fill. You may think, though, it is a quite troublesome 2 mm. Unlike M42 (screw mount), bayonet mount needs to fill many requirements. Bayonet claws needed to have slick enough but not wobbling, tight enough spring to hold the male craw, and as it can slip off, it needs to have a secure stopper pin, etc.
Using Nikon F lens on Canon EOS, the EOS mount was large enough to accommodate the Nikon bayonet, therefore 2.5mm gap was enough to make an adaptor – which is why we can easily get them cheap about £5 from China.
Another trouble between NEX and Nikon Z is that Sony lens wouldn’t work on anywhere else, other than a Sony camera. There is no manual focus ring, neither manual F stop control. Attempting to use Sony lens on Nikon Z would be useless = forget it. Yet still, as all of my homemade lenses are utterly bare minimum; nothing automatic, there wouldn’t be any problem of those functions. As long as my optics stay there securely, I can take a picture, and that is all I need.

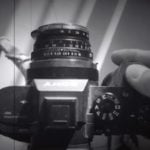
The base material I got for mount adaptor was a 58mm reverse adaptor for Nikon-Z from China. This adaptor goes to the Nikon Z7 body. And to receive the bottom of Sony lens was, simply a rear lens cap for Sony lens.
Then the work starts. It’s all very simple. Scrape off the 58mm screw part on the ring, and cut out the bayonet part from the lens cap. Still, it took nearly half a day. Don’t get short-tempered. It would spoil all the effort done within a short second. Be a good Buddhist! (remember, even a raindrop can carve the rock).
If you have a good milling machine, even a bench drill with a milling bit, such kind of work would be a matter of a few minutes. Although the machine wouldn’t make you enlightened.

Then, insert the bayonet ring of the lens cap into the N-Z adaptor ring and fix it. The lens on the adaptor would be as secure as how the lens cap stays on the lens, so don’t expect too much. The total cost of this adaptor was only about £6 or so – and get enlightened was an option.
Et voila, Sony E mount to Nikon Z mount adaptor. Though, it has no stopper pin, so a heavy lens could fall off. Yet still, it works perfectly with my homemade lenses and adapters, such as 110 Pentax lens, Vest Pocket camera lens, etc.
Thank goodness, I did a good job!
About the Author
Yoshi Imamura is a photographer and prolific tinkerer, who has made many of his own lenses and adapters for use on modern digital cameras. You can see more of his creations on the Yoshizen blog. This article was also published here and shared with permission.
We love it when our readers get in touch with us to share their stories. This article was contributed to DIYP by a member of our community. If you would like to contribute an article, please contact us here.
Related Posts
 Three Adapter Options To Use Nikon Lenses With Sony Mirrorless (Nikon F to Sony E)
 This super slim adapter will let you mount Sony E lenses on Nikon Z cameras with full autofocus
 This is the World’s First Nikon F-Mount to Sony E-Mount Autofocus Adapter
 This is the world’s first Leica M-mount to Sony E-mount autofocus adapter
Join the Discussion
DIYP Comment Policy
Be nice, be on-topic, no personal information or flames.
2 responses to “I made my own DIY adapter to use Sony E mount lenses on my Nikon Z7”
Gah if you need an adorable adapter just ask me for one.
This guy needs to write more regularly for this site. He really gets the whole DIY thing.