


How to Get Consistent Color from Multiple Cameras
Mar 13, 2018
John Walrath

We love it when our readers get in touch with us to share their stories. This article was contributed to DIYP by a member of our community. If you would like to contribute an article, please contact us here.
Share:
This tutorial was graciously supplied by Datacolor

Using multiple cameras is common practice for some photographers. For example, wedding and event photographers often use more than one camera at a time. In some cases, there will be more than one photographer using multiple cameras. To complicate things, these photographers might be using cameras or lenses from different manufacturers. No matter how many cameras are used on a shoot, color harmony is important to help tell a cohesive visual story. Datacolor SpyderCHECKR can help make this easy and precise.
Every combination of lens, camera and sensor has a unique color signature that can change in different lighting conditions. These factors can lead to some variance in color from camera to camera and manufacturer to manufacturer. This can cause issues if you are mixing images from multiple cameras to tell the story of an important event like a wedding.
Color Management is a plan for consistency. Whether you are talking about display calibration, printer profiling or camera calibration, the output of a device can be measured and adjusted to return it to a standard for accuracy. When using multiple cameras, each one varies from the standard for accuracy so each camera must be evaluated independently. Once each camera is corrected, consistency is achieved. In doing so, you will not only have harmony between images but will also speed up the editing process.
SpyderCHECKR is a reference tool used for the capture stage of a photo or video workflow. It creates a color calibration that adjusts the Hue, Saturation and Luminance; commonly known as HSL.

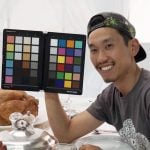
The SpyderCHECKR reference target can be used to adjust a camera on location or in post-production. It is composed of spectrally neutral patches that provide constant results under all kinds of lighting. The front sides are color patches and gray ramps that can be used for manual adjustments or with the SpyderCHECKR software. The reverse sides include another gray ramp and a large neutral gray patch.
Image Capture
For an in-camera adjustment, use the reverse side of SpyderCHECKR as a traditional gray card to create a custom white balance. Raw image formats do not include a specific white balance setting; the Raw editor takes the setting used at capture, but there is full latitude for adjustment. White balance is baked into non-Raw image files and have some ability for adjustment.
The exact procedure varies by manufacturer, but capture an image of the reverse side of the SpyderCHECKR and use this image to set an in camera white balance. For non-Raw capture, such as JPEG and many video formats, setting white balance in camera is essential for the best quality capture. Setting an in camera white balance is also important to achieving consistency between cameras. Directing the camera how to precisely record lighting information will go a long way for continuity.
As a side benefit, the image displayed on the LCD screen on the back of a camera is a JPEG rendering. By white balancing in camera, the quality of this preview will increase and the histogram rendering accuracy will improve as well.
To use for an automated color correction workflow, capture a raw image of the SpyderCHECKR in the same lighting as the subject of your image. Be sure all patches are visible and the target is parallel to the camera’s sensor with even exposure across the target face. Once captured, remove the SpyderCHECKR from the scene and make the images you need. You will use this image as a reference to provide the SpyderCHECKR software with the information it needs.

Creating a Calibration
SpyderCHECKR can make automated color corrections for Adobe Lightroom, Adobe Camera Raw and Hasselblad Phocus. In each compatible Raw converter, you will perform several basic adjustments to prepare the reference image of the SpyderCHECKR for the SpyderCHECKR application. These include crop/straighten, white balance, exposure and black point adjustments. To learn the specifics of these adjustments, look at the User Guide linked at the bottom of this post.
The SpyderCHECKR application can create presets for times when color accuracy is absolute, a preset to boost saturation and a preset that helps make skin tones more pleasing. Once the preset is made, the SpyderCHECKR application sends it to the supported Raw converter mentioned above.


Using Your New Calibration
In Adobe Lightroom, calibrations are stored as a User Preset in the Presets panel of the Develop Module. In Adobe Camera Raw, calibrations are stored in the Presets Dialog below the Histogram and capture information. Calibrations are stored in Hasselblad Phocus within the Color Correction Panel. A calibration can be applied to a single image or a group of images. Filtering images by camera and lens combination or applying them at import are the fastest ways to use the profile.


By using the reference image or a SpyderCUBE to correct white balance, exposure and contrast while applying a color calibration; multiple cameras will have consistently accurate color output. This saves time when editing and helps tell a cohesive story with your images.
Here is a short video showing how to use the SpyderCHECKR
Final Thoughts
I don’t often photograph weddings but SpyderCHECKR played a big part in the last wedding I photographed. When I booked the wedding, I needed a second photographer to help. I knew the person and felt confident in their abilities, but we did not use the same brand of cameras. Both systems are very capable but provided a look that was noticeably different. By including SpyderCHECKR in reference shots with both of our cameras throughout the event, I quickly made calibrations for each of us and saved a lot of time during post-production. The result was a portfolio of images that told the story of a beautiful day and a very happy couple!
The effects of these calibrations can be subtle; the amount of change depends on the color accuracy of your camera’s sensor and color neutrality of a lens. Subtly is important in photography though. Photographers and videographers using SpyderCHECKR benefit from optimized color in any lighting. Variables like camera and lens manufacturer are minimized to make consist color workflow quick and accurate.

Save $40 on Datacolor SpyderCHECKR through April 9th!
About the Author
John Walrath is Datacolor’s Consumer Training & Technical Support Manager and an accomplished photographer. He earned his BFA in Interior Architecture and in 2010 sold a successful company to pursue a career as a professional photographer. Leveraging his training in Interior Architecture and passion for photography, John became a sought after Interiors photographer for Builders, Ad Agencies and Interior Designers in Central Virginia.
Datacolor’s Color Management tools have been vital to John’s personal and professional photography for many years. Since joining the Datacolor team in 2013, he has been an educational resource for photographers and videographers who want to improve their work through Color Management.
We love it when our readers get in touch with us to share their stories. This article was contributed to DIYP by a member of our community. If you would like to contribute an article, please contact us here.
Related Posts
 Multiple lights, Multiple colors setup – The Lighting Series #8
 Use Color Burn and Color Dodge to quickly add color and contrast to your photos
 Here’s how colour charts let you get perfect and consistent colour every time
 How to get great and consistent colour with different brands and qualities of light
Join the Discussion
DIYP Comment Policy
Be nice, be on-topic, no personal information or flames.
One response to “How to Get Consistent Color from Multiple Cameras”
Is there a way to use it with Capture One?