


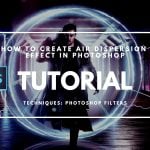
How to create a sunset effect in Photoshop
Mar 9, 2016
Gannon Burgett
Gannon Burgett is a communications professional with over a decade of experience in content strategy, editing, marketing, multimedia content creation. He’s photographed and written content seen across hundreds of millions of pageviews. In addition to his communications work for various entities and publications, Gannon also runs his multimedia marketing agency, Ekleptik Media, where he brings his expertise as a full-stack creator to help develop and execute data-driven content strategies. His writing, photos, and videos have appeared in USA Today, Car and Driver, Road & Track, Autoweek, Popular Mechanics, TechCrunch, Gizmodo, Digital Trends, DPReview, PetaPixel, Imaging Resource, Lifewire, Yahoo News, Detroit Free Press, Lansing State Journal, and more.
Share:

Sometimes it can be hard enough to time the perfect golden hour portrait. What can be even more challenging is to perfectly capture the sun as it’s quickly falling on the horizon.
If you happen to miss it though, don’t fret. The Photoshop gurus over at Phlearn have shared a helpful tutorial showing how you can add your very own sunset effect in Lightroom with a few extra layers and clipping masks.
To detail the process, Aaron Nace of Phlearn breaks down the process step by step. First, you must create an artificial sun in the background using a radial gradient. Once you’ve created that in its own layer, you then make a clipping mask of the layer before making a few adjustments to size and blending mode.

Once the sun is set in place, it’s time to match the color balance of the rest of the image using Photoshop’s integrated color balance tool. Once those steps are finished, it’s just a matter of tweaking the image to taste.
It’s a fun and effective way to add an extra little pop to your photos when they need a little something extra.
Head on over to Phlearn and subscribe for more tutorials.

Gannon Burgett
Gannon Burgett is a communications professional with over a decade of experience in content strategy, editing, marketing, multimedia content creation. He’s photographed and written content seen across hundreds of millions of pageviews. In addition to his communications work for various entities and publications, Gannon also runs his multimedia marketing agency, Ekleptik Media, where he brings his expertise as a full-stack creator to help develop and execute data-driven content strategies. His writing, photos, and videos have appeared in USA Today, Car and Driver, Road & Track, Autoweek, Popular Mechanics, TechCrunch, Gizmodo, Digital Trends, DPReview, PetaPixel, Imaging Resource, Lifewire, Yahoo News, Detroit Free Press, Lansing State Journal, and more.


Join the Discussion
DIYP Comment Policy
Be nice, be on-topic, no personal information or flames.