


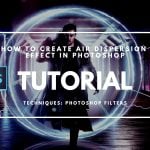
How to create this projected hologram effect in Photoshop
May 18, 2018
John Aldred
John Aldred is a photographer with over 25 years of experience in the portrait and commercial worlds. He is based in Scotland and has been an early adopter – and occasional beta tester – of almost every digital imaging technology in that time. As well as his creative visual work, John uses 3D printing, electronics and programming to create his own photography and filmmaking tools and consults for a number of brands across the industry.
Share:

Projected hologram effects have been popular since about 1977. But for most people, it’s only since the advent of applications like Photoshop and After Effects that they’ve become possible to create ourselves. But they can still be quite intimidating to those new to Photoshop. Creating them is a fairly simple process, though.
In this video, photographer Nemanja Sekulic walks us through his technique to create composited holograms in Photoshop. It’s a fairly long video at 13 minutes, but it contains a lot of tips and advice on how to work around potential problems you may face and things for you to experiment with to make the effect your own.
The principle is fairly straightforward. Create the image you want to project, give it some distorted scan to give a 3D projected appearance, and slap it on top of your background. Then it’s just a case of adding some glow to the parts of your scene that might naturally be lit by the hologram if it were real.
For Nemanja’s demonstration, he chose to project a person’s face onto the side of a building, but regardless of the subject, you’ll typically want to cut it out. Even if you’re projecting a person in their environment, cutting them out and layering will help to add to that 3D feel. The cutout doesn’t have to be perfect for something like a hologram, though. It just has to be close.

The next step is to create the scanlines, which is done using the Halftone Pattern filter. There are many other ways to do it, but the halftone filter makes it quite quick and straightforward, offering a lot of options. This is then applied as a mask to the image. And this is why the cutout in the previous step doesn’t have to be perfect. You’re not going to notice in the final result anyway.

Duplicating this layer a couple of times, and blurring the ones below starts to offer some of that glow and bleed we expect from projected holograms. It’s similar to the ghosting we might’ve seen on old CRT televisions and computer monitors.

But what sells the effect are 3D effects. The displacement map allows the mask on the top layer to be distorted to match the curvature and shape of the face a little more. Even though it’s not perfectly physically accurate, it offers enough distortion to make it appear not flat.

After a little colour toning, the hologram itself is essentially complete. Now it just needs to be dropped into your scene, switched over to Screen blending mode.

The final step is where it all comes together. The perspective warp transform helps to scale and make it fit into your scene. Adding a second duplicate of the layer slightly offset from the first can help to give that 3D effect of it projecting off the surface – although, in this particular example, I’d add it to the water’s reflection below, too, to really sell it.

It’s definitely a technique that will take some time to fully understand and master. And there’s a lot of experimenting you can do with it along the way.
But this is a great method to get you started, and the principle is the same for video, too. While the specifics of what effects and filters to use might be a little different, doing something like this with video in After Effects is essentially the same process. You just might have to add a little motion tracking if your camera’s moving.

John Aldred
John Aldred is a photographer with over 25 years of experience in the portrait and commercial worlds. He is based in Scotland and has been an early adopter – and occasional beta tester – of almost every digital imaging technology in that time. As well as his creative visual work, John uses 3D printing, electronics and programming to create his own photography and filmmaking tools and consults for a number of brands across the industry.


Join the Discussion
DIYP Comment Policy
Be nice, be on-topic, no personal information or flames.