


How to build a PVC pipe medium format lens for under $10
Nov 5, 2024
Dunja Đuđić
Dunja Djudjic is a multi-talented artist based in Novi Sad, Serbia. With 15 years of experience as a photographer, she specializes in capturing the beauty of nature, travel, concerts, and fine art. In addition to her photography, Dunja also expresses her creativity through writing, embroidery, and jewelry making.
Share:
Would you ever consider making your own lens? It sounds super complicated, but it really doesn’t have to be. In his latest video, Ari Jaaksi shares his process of building a dirt-cheap lens for his medium format camera. And when you see the resulting images, you’ll want to make one as well.
What you’ll need
You probably already have most of this at home, especially if you’re into building DIY stuff. But if not, a quick run to your local hardware store, flea market, or your friend’s garage should have you covered. :) Here’s your shopping list:
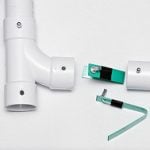
- Drainage pipe (suitable diameter for your lens)
- Magnifying glasses (two, with focal lengths that complement each other)
- Lens board (plywood or metal)
- Black paint
- Aluminum or cardboard sheet
- Screws, nuts, washers
- Tools: drill, saw, sandpaper
- A camera with a modular lens mount (Ari uses Graflex Speed Graphic)
Building the lens
First, mount the two magnifying glasses on a suitable base (e.g., a piece of wood). Adjust the distance between the lenses to observe the image formed on a screen or ground glass. This will help you find the optimal focal length and aperture.
Now, cut a piece of plywood or metal to the desired size. Drill a hole in the center of the board to accommodate the drainage pipe. Paint the board black to minimize any reflections and light leaks, and to the same with the inside of the pipe. Attach the magnifying glasses to the ends of the pipe using screws or glue. Insert the pipe into the hole in the lens board and secure it with screws or washers.
You can use optical formulas or online tools to determine the focal length and aperture of your lens. To figure out the focal length of his DIY lens, Ari first set his camera to focus on something infinitely far away and marked the lens position. Then, he focused on objects at different distances, measuring how far the lens moved each time. He also measured the size of the object’s image on the film or sensor.
With these measurements, he used a lens calculator. This tool crunched the numbers and gave him an estimate of the focal length. To get a more accurate result, he repeated this process a few times and averaged the results. While this method might not be perfectly precise, it’s good enough for an $8 lens.
Finally, to create different apertures, you can cut circular disks of aluminum (or cardboard) with different diameters. Attach these disks to the lens to control the aperture and depth of field. Attach the lens board to your camera’s lens mount, take photos, and have fun!
Make sure to watch Ari’s video for sample images, I quite like how they turned out! And for more fun DIY lenses, check out this link and this link.
[I built a dirt cheap lens for my large-format camera via FStoppers]

Dunja Đuđić
Dunja Djudjic is a multi-talented artist based in Novi Sad, Serbia. With 15 years of experience as a photographer, she specializes in capturing the beauty of nature, travel, concerts, and fine art. In addition to her photography, Dunja also expresses her creativity through writing, embroidery, and jewelry making.


Join the Discussion
DIYP Comment Policy
Be nice, be on-topic, no personal information or flames.