


Studio Lighting – Really cheap homemade diy studio – no lighting needed
Apr 28, 2006
Udi Tirosh
Udi Tirosh is an entrepreneur, photography inventor, journalist, educator, and writer based in Israel. With over 25 years of experience in the photo-video industry, Udi has built and sold several photography-related brands. Udi has a double degree in mass media communications and computer science.
Share:
 So, you want to start your own homemade photography studio but you are totally broke and you want it to be cheap. Actually, being cheap is your prime demand from this studio. You don’t need no external fancy lighting or strobes, you don’t want them expensive softboxes. You just want to try out some still life photography, or you need take some shots for eBay. This article is just for you.
Here is what I have to offer for about 1–3 USD. This still life photography studio utilizes a huge softbox and a seamless backdrop. But before we start lets see some of the prime requirements from a still life photo studio. We want to get even light, with good shadow management and a smooth background that will not distract from our main subject.
If you are serious about your homemade studio and your lighting, you should check out the guides for homemade reflector stand, homemade backdrop stand, homemade hot lighting panel, and the rest of the homemade studio articles.
Here are the materials you will need for your still life studio:
-
A few inches of Duct tape (or just any tape)
-
A thick, A0 sized, sheet of paper. (I use polypropylene sheets because they are more durable and can be cleaned – this is the backdrop I used for the Wolverene shot in the softbox guide).
-
A sunny day and a shady location.
-
A wall/table/chair/fence
Now, this will not take care of your all your studio needs, but it will provide you with a cheap way to start exploring studio like pictures. Namely, you will get good background for your pictures, pictures with little shadows and good even light. If you only want to take “eBay pictures” this is enough.
Instructions – The first thing is to find a nice shaded place on a good sunny day. your porch is fine for that, and so is your back yard. Next, you need a wall, or a chair or anything you can lean your professional backdrop (A.K.A piece of paper) against.
now tape the paper to the wall/chair and tape it to the floor. TADA!! your seamless backdrop is installed. I used my porch as a shady place and a green table I have as a backdrop mount.

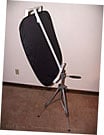
Taping the top of the polypropylene seamless backdrop to the table

A side view of the setup

The next thing you will need is a model. This set up is really good for still life photography or for taking product shots (for eBay.com, or for stock agencies like Fotolia). For this tutorial, I used my daughter’s caterpillar toy.
Shutter speed and aperture– If you have a good sunny day, you can go up and nice with the shutter speed. All the caterpillar pictures here were taken with F/8 and shutter speed of 1/200-1/400.
Here is one picture taken at this “homemade studio”

Multi-color seamless backgdrops – To add some interest to the pictures, I use several sheets of paper and polypropylene, each with different color. This way, I have instant multi-color backdrops.
My roll of papers – each color a different backdrop

Here are two more pictures taken with the homemade studio setup:
(a RED backdrop and a BLUE backdrop – both polypropylene)


And here is another picture taken some time ago utilizing the home studio setup
(white polypropylene as my seamless backdrop)

Good luck with your still life studio.

Udi Tirosh
Udi Tirosh is an entrepreneur, photography inventor, journalist, educator, and writer based in Israel. With over 25 years of experience in the photo-video industry, Udi has built and sold several photography-related brands. Udi has a double degree in mass media communications and computer science.


Join the Discussion
DIYP Comment Policy
Be nice, be on-topic, no personal information or flames.
One response to “Studio Lighting – Really cheap homemade diy studio – no lighting needed”
hi, can you please confirm that how you took the last picture without the shade, which background sheet you used to took this picture on sharp white background.
looking forward to your kind response on it.