


Camera Won’t Focus: Common Causes and Quick Fixes
Dec 15, 2025
Darlene Lleno
Darlene Lleno brings a unique perspective to DIY Photography as someone who grew up surrounded by camera gear but chose words over lenses. With five years of writing experience, she specializes in photography content that’s both technically informed and genuinely passionate. Growing up with a photographer twin brother meant camera talk was everyday conversation in her household. While he mastered capturing moments, Darlene discovered she preferred being the subject and the storyteller behind the scenes. As a travel enthusiast and mother of two, she understands the importance of preserving life’s precious moments. When not exploring new destinations or writing for DIY Photography, you’ll find her reading or tending to her garden. Her approach to photography writing is refreshingly authentic, she may not be behind the camera, but she knows exactly what it takes to help others capture the shots that matter most.
Share:
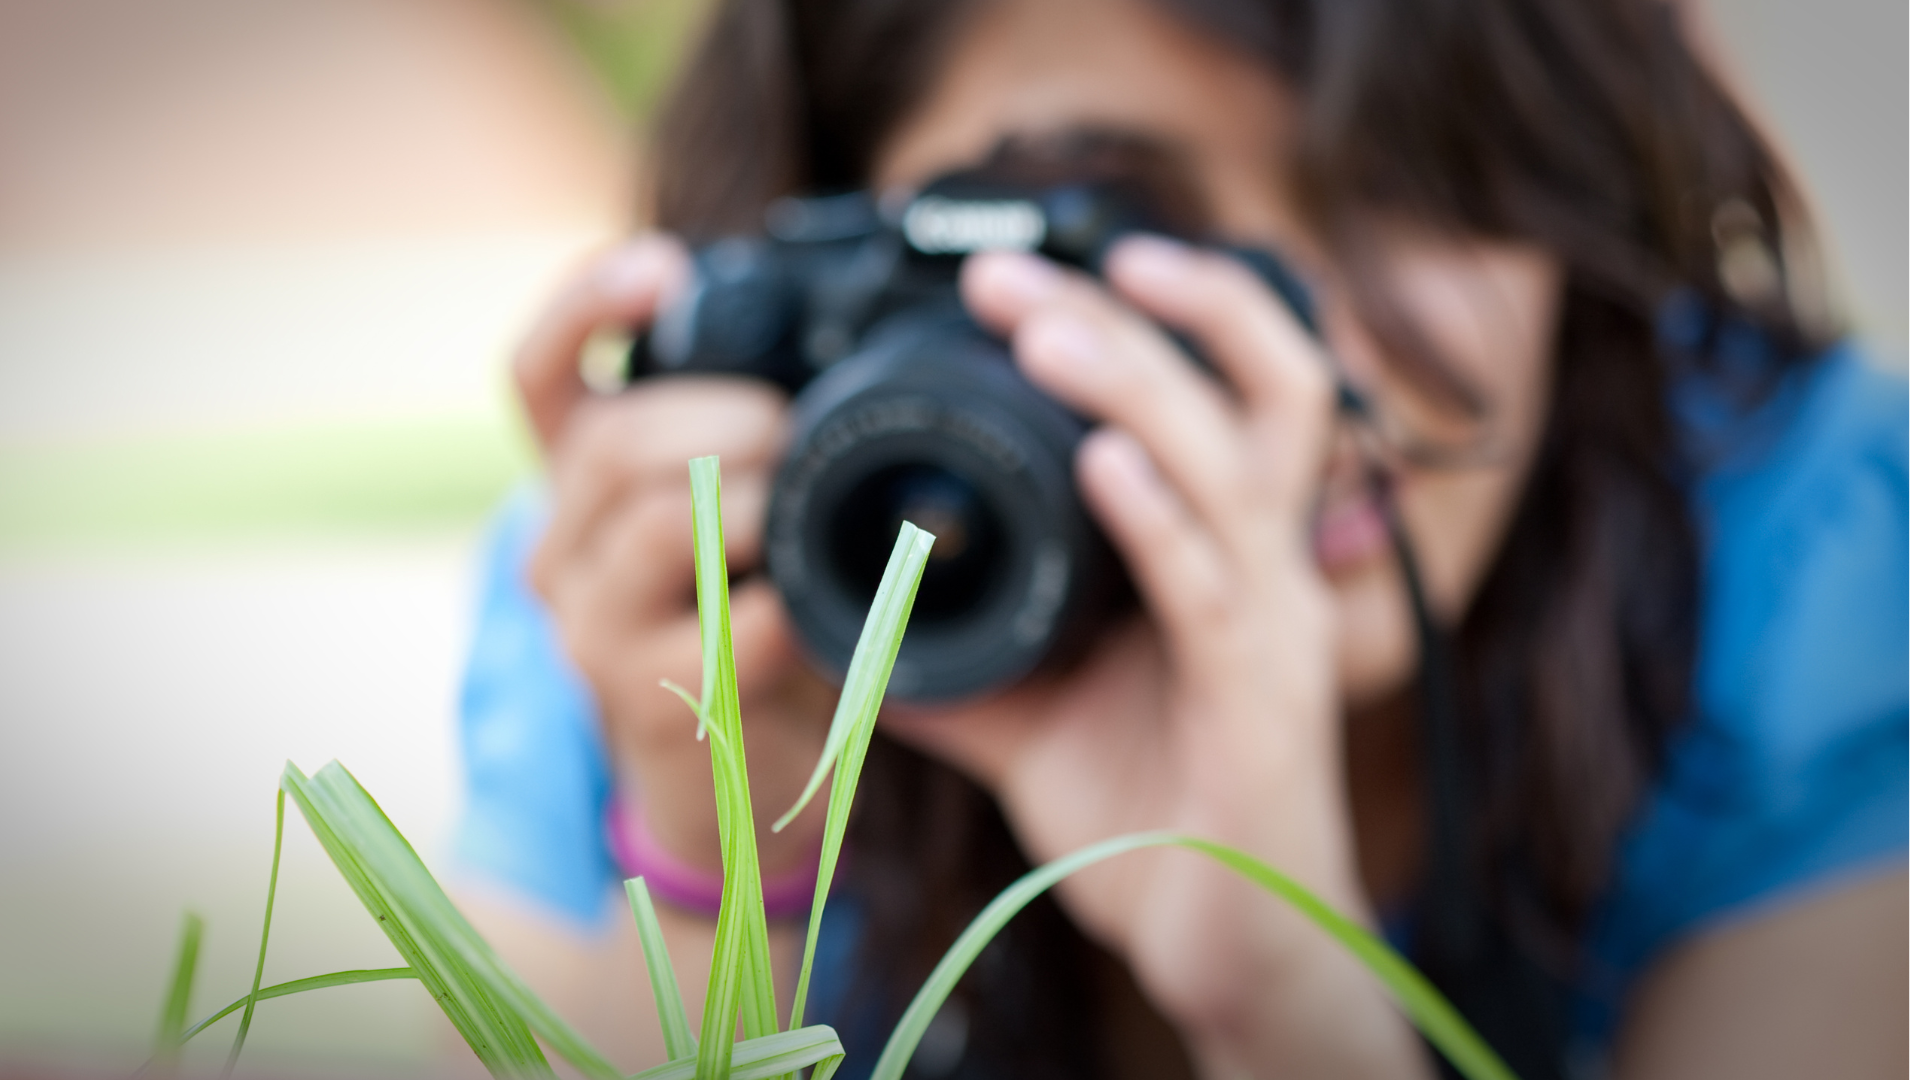
Camera focus issues and fixes frustrate photographers more than almost any other technical problem. You line up the perfect shot. You press the shutter button. But nothing happens. The lens hunts back and forth endlessly. Or worse, you get a blurry image instead of the sharp photo you wanted.
Focus problems rarely mean your camera broke. Most issues stem from simple settings mistakes or technique problems. Understanding why your camera struggles helps you fix issues fast. You can get back to shooting instead of missing great moments.
Why Your Camera Struggles to Focus
Focus failures happen for many reasons. Some stem from how you shoot. Others relate to your gear settings. A few point to actual equipment problems.
Most photographers deal with soft images at some point. The trick lies in identifying the real cause quickly. Then you can apply the right fix instead of guessing.
User Technique Problems
Your shooting style causes most focus headaches. Camera settings that worked yesterday fail today. The scene changed but your settings stayed the same.
Motion blur tops the list of focus-related problems. Your shutter speed runs too slow to freeze action. The camera moves in your hands. Subject movement creates streaks instead of sharp details.
The general rule matches shutter speed to focal length. Use at least 1/100 second for a 100mm lens. Use 1/200 second for 200mm. Longer lenses magnify every tiny shake. Image stabilization helps but has limits.
Wrong autofocus mode creates another common issue. You shoot moving kids with single-shot focus. The camera locks focus then the subject moves. Or you use continuous focus for still landscapes. The system hunts constantly looking for movement.
Switch to continuous AF for sports and wildlife. Moving subjects need tracking capability. Switch to single-shot AF for stationary work. Portraits and landscapes benefit from one-time focus lock.
Equipment and Settings Issues
Sometimes the problem sits in your gear configuration. Simple switches accidentally flip to wrong positions. Settings change without you noticing.
Check your lens and camera body for the AF/MF switch. One accidental bump puts everything in manual focus mode. The autofocus motor stops working completely. Your lens barrel might show an AF/MF switch. Your camera menu might have another setting.
Dirty electrical contacts disrupt communication between lens and body. Dust or oil on those tiny metal pins causes intermittent failures. The autofocus motor works sometimes but fails other times.
Clean the contacts gently using a microfiber cloth. A tiny bit of isopropyl alcohol on a cotton swab works too. Let everything dry completely before reattaching the lens.
Some telephoto lenses include focus limiter switches. These restrict the focusing range to speed up acquisition. Maybe the switch limits focus from 5 meters to infinity. Your subject sits 3 meters away. The lens cannot physically focus that close.
Check your lens barrel for any limit switches. Set them to FULL or ALL range when shooting varied distances. Only use limiters when you know exact shooting distances.
Low battery power affects autofocus performance too. The motors need juice to operate properly. Weak batteries cause slow or failed focusing attempts.
Minimum Focus Distance Problems
Every lens has a closest focusing distance. Move too close and physics prevents sharp focus. The lens elements cannot adjust enough to resolve detail.
This happens most with longer telephoto lenses. A 200mm lens might need 6 feet minimum distance. You try shooting from 3 feet away. The lens hunts endlessly because focusing becomes physically impossible.
Check your lens specifications for minimum focus distance. Step back slightly when the camera cannot lock focus. Most lenses mark this distance on the barrel.
Extension tubes help when you need closer focusing. These hollow spacers mount between camera and lens. They reduce minimum distance dramatically. Some image quality drops but you gain close-focusing ability.

Tackling Camera Focus Issues and Fixes for Specific Situations
Different shooting scenarios create unique focusing challenges. Understanding context helps you solve problems faster.
Dealing with Low Light and Low Contrast
Cameras need contrast to achieve focus. The system looks for edges and differences between light and dark. Blank walls offer nothing to grab onto. Clear skies provide no detail. Very dark scenes hide everything.
The autofocus hunts back and forth endlessly. It never locks because it cannot find anything to measure. This drives photographers confused during evening shoots or overcast days.
Switch to manual focus when autofocus fails completely. Use Live View on your screen. Zoom in digitally to check focus precisely. This takes longer but guarantees sharp results.
Another trick focuses on a high-contrast object at the same distance. Lock that focus. Then recompose for your actual subject. The distance stays the same so focus stays accurate.
Focus assist lights help in darkness. Many cameras include a small beam that projects during focusing. This gives the system something to work with. External flashes often include assist beams too.
Front Focus and Back Focus Problems
These calibration issues plague DSLR cameras primarily. The autofocus system locks on your subject. But the sharpest point lands somewhere else. Front focus means sharpness sits ahead of your target. Back focus means sharpness lands behind it.
Modern mirrorless cameras suffer less from this. They use on-sensor focusing that proves more accurate. But DSLRs rely on separate phase detection sensors. Manufacturing tolerances create slight misalignments.
You notice this problem when shooting at wide apertures. Shallow depth of field reveals the focus shift clearly. One eye looks sharp while the other goes soft. Or the nose looks perfect but eyes fall out of focus.
AF micro-adjustment fixes this problem on advanced cameras. Use a focus calibration chart to measure the error. Then apply correction values in your camera menu. Each lens gets its own adjustment value.
Professional service handles severe calibration problems. The camera needs physical realignment of internal sensors. This costs money but solves persistent issues permanently.
Focus and Recompose Errors
Many photographers use this common technique. Focus on your subject in the center. Lock focus with half-press. Recompose to put the subject off-center. Then take the shot.
This works fine with small apertures and wide lenses. But wide apertures create problems. That f/1.4 portrait lens has incredibly thin focus. Any camera movement shifts the plane of focus.
You focused on the eye dead center. You recomposed to place the subject right-side. The focus plane moved slightly during that shift. The eye now sits slightly out of the sharpest zone.
Back button focus eliminates this problem completely. Separate focus activation from shutter release. Your thumb handles focusing. Your index finger only triggers the shutter.
This lets you focus and recompose without losing lock. Once focused, the setting stays locked until you press the back button again. No half-press juggling. No accidental refocusing.
Single-point AF with direct placement works great too. Put your focus point exactly where you want it. No need to recompose at all. Modern cameras offer tons of selectable points across the frame.
Advanced Camera Focus Issues and Fixes
Some problems require deeper understanding. These situations need specific solutions beyond basic troubleshooting.
Working with Moving Subjects
Action photography tests autofocus systems hard. Kids playing sports. Wildlife running. Cars racing past. The subject moves constantly and unpredictably.
Continuous AF mode tracks moving subjects. The camera adjusts focus continuously while you hold the shutter. Different manufacturers call this AF-C or AI Servo mode.
AF area mode matters hugely here. Wide area or zone focusing works better than single point. The camera tracks the subject even when it moves slightly off your chosen spot.

Predictive tracking uses artificial intelligence now. Modern cameras learn movement patterns. They predict where the subject will be when the shutter fires. This compensates for shutter lag time.
Some cameras let you adjust tracking sensitivity. Set it aggressive for erratic movement. Set it smooth for steady predictable motion. Experiment to find what works for your subjects.
Shooting Through Glass or Fences
Autofocus often grabs the wrong thing when shooting through barriers. The camera locks on glass reflections instead of the subject behind. Or it focuses on chain link fence instead of the animal beyond.
Get as close to the barrier as possible. This minimizes what the autofocus sees. Put your lens hood right against the glass. The camera sees mostly through the clear parts.
Use single-point focus mode rather than automatic area selection. Place that point exactly on your intended subject. This gives the camera less chance to grab the wrong thing.
Manual focus works best for really difficult situations. Take control and set focus where you want it. Live View magnification helps verify sharpness even through barriers.
Macro Photography Challenges
Close-up work creates unique focusing difficulties. Depth of field shrinks to paper-thin at macro distances. The smallest movement throws everything out of focus.
Even breathing shifts your position enough to lose focus. Autofocus often hunts because the target stays so small. The tiniest focus error becomes obvious in the final image.
Lock your camera on a tripod for macro work. Eliminate all movement sources. Use a cable release or timer to avoid shaking from button presses.
Manual focus gives better control for precise placement. Use Live View magnification at 10x or more. Check focus pixel by pixel. This takes time but ensures perfect sharpness.
Focus stacking creates impossible depth of field. Shoot multiple frames focused at different distances. Software blends them together later. You get front-to-back sharpness impossible in a single shot.
Focus rails help with stacking. These let you move the camera forward in tiny increments. Each shot shifts focus slightly farther. The result covers everything from near to far.
Preventing Camera Focus Issues and Fixes Before They Happen
Smart habits reduce focus problems significantly. Prevention beats troubleshooting every time.
Regular Gear Maintenance
Keep your equipment clean and properly maintained. Dust and dirt cause many focusing failures. A little prevention saves huge headaches later.
Clean lens contacts every few months. Wipe both the lens mount and camera body contacts. Use proper lens cleaning tools. Microfiber cloths prevent scratches.
Check for firmware updates regularly. Manufacturers fix autofocus bugs through updates. Your camera might perform better with the latest software. Many autofocus improvements come through firmware rather than hardware.
Store gear properly when not shooting. Camera bags protect against bumps and drops. Physical impacts can knock focusing mechanisms out of alignment. Rough handling creates calibration problems over time.
Mastering Your Camera Settings
Learn your autofocus system thoroughly. Every camera handles focusing differently. Understanding your specific model prevents many operator errors.
Practice switching between AF modes quickly. You need continuous focus for action. You need single-shot for portraits. Fumbling through menus wastes precious shooting time.
Set up custom buttons for common changes. Many cameras let you program function buttons. Dedicate one to AF mode switching. Another can handle focus point selection.
Test your gear regularly under controlled conditions. Shoot focus charts or brick walls. Verify everything works correctly before important shoots. Finding problems at home beats discovering them during paid work.
Understanding Light and Scene Requirements
Recognize situations where autofocus struggles naturally. Anticipate problems before they happen. Adjust your approach proactively.
Low light always challenges autofocus. Carry a small LED light for focus assist. Shine it on your subject briefly during focusing. Turn it off for the actual shot.
High contrast helps autofocus lock quickly. Position yourself where subjects show good definition. Avoid shooting toward bright windows where subjects turn into silhouettes.
Plain surfaces confuse autofocus completely. Blank walls offer nothing to grab. Clear blue skies provide no texture. When shooting these, focus on something else at the same distance first.
Quick Troubleshooting Checklist for Camera Focus Issues and Fixes
When focus fails, run through this systematic check. Most problems reveal themselves quickly with methodical testing.
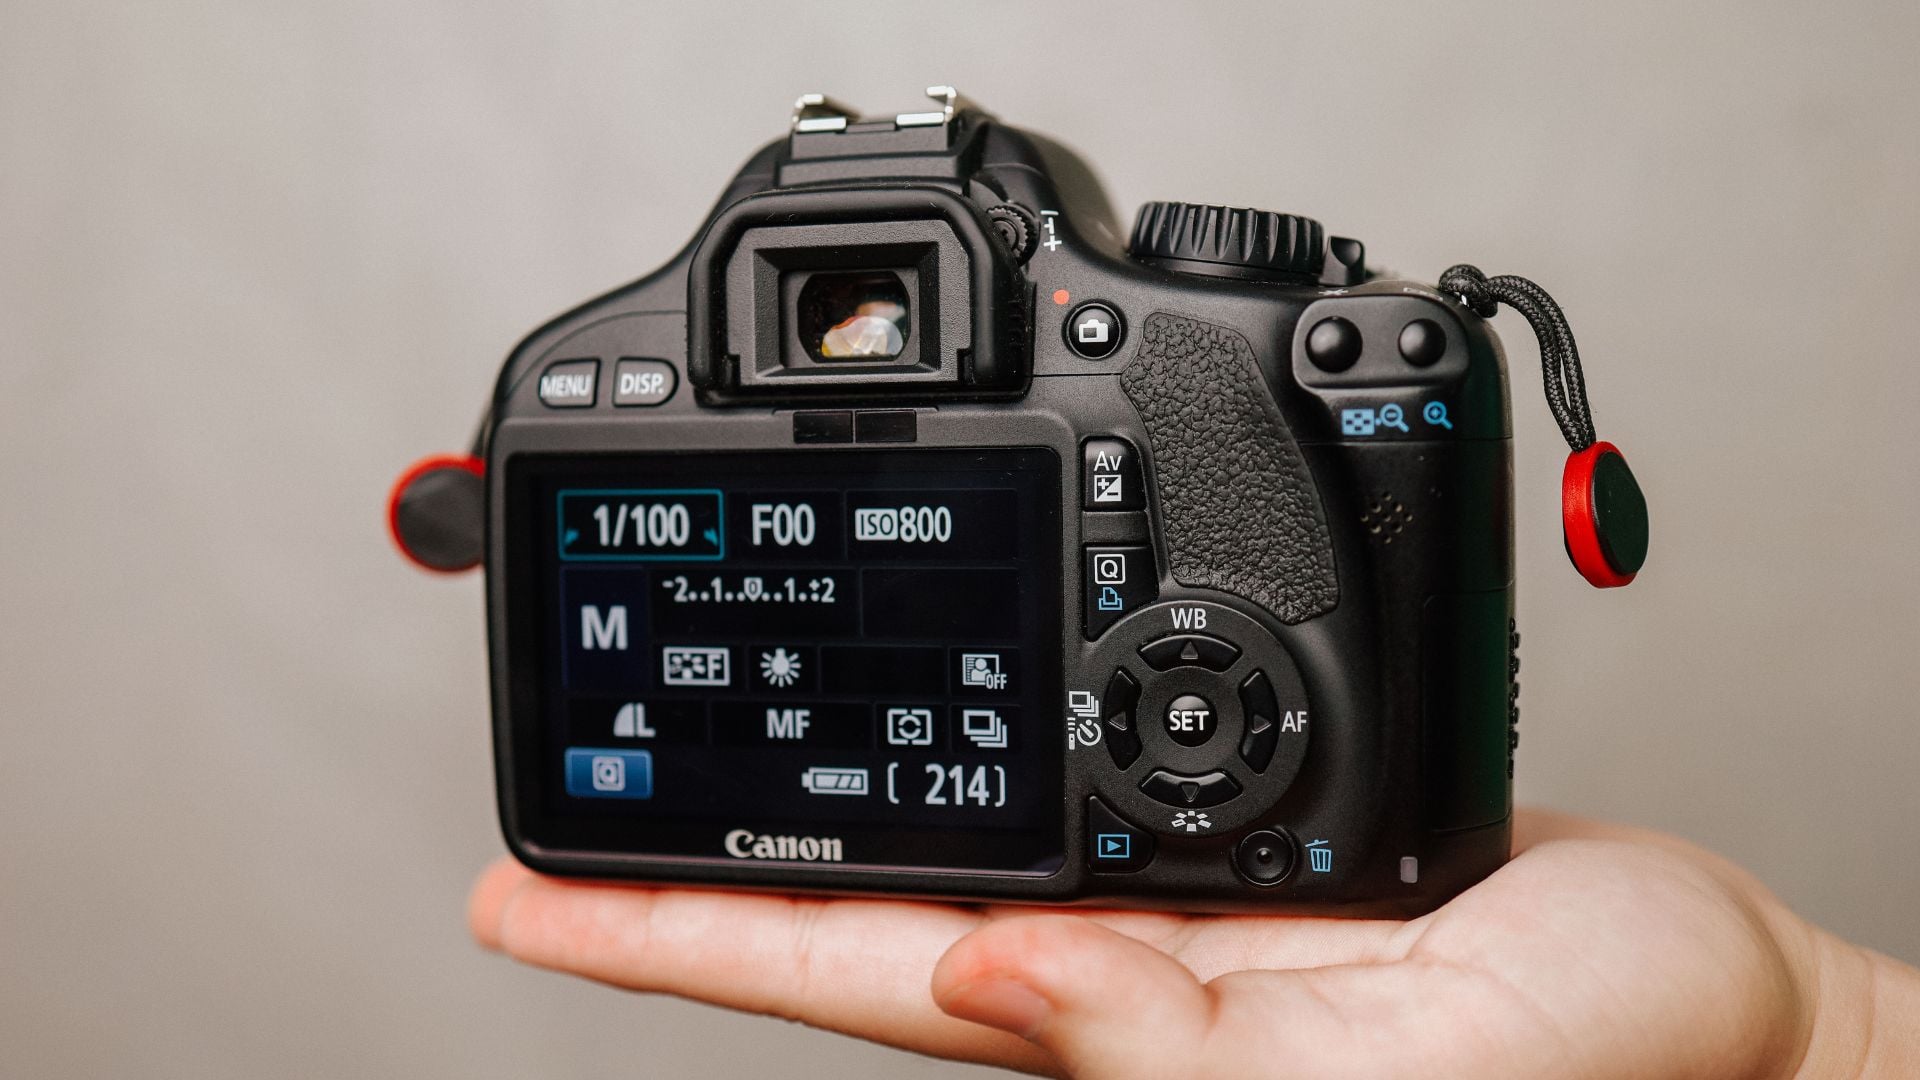
Start with the obvious physical checks. Look at your lens for the AF/MF switch position. Check your camera menu for focus mode settings. Verify your battery shows sufficient charge.
Try a different lens if you have one available. This immediately tells you if the problem sits in the lens or camera body. Lens problems need lens solutions. Body problems need body solutions.
Test in bright outdoor light if possible. This eliminates low light as a factor. Good contrast and plenty of light let you isolate other issues.
Check your camera settings systematically. Review AF mode selection. Check AF area settings. Verify any custom function settings related to focus.
Clean all contacts between lens and camera. Remove the lens completely. Wipe both sets of contacts gently. Reattach and test again.
Try focusing manually to verify the lens works mechanically. If manual focus works but autofocus fails, the problem likely sits in the AF motor or electronics.
Review your images at 100 percent magnification. Sometimes photos look soft on the small camera screen but show acceptable sharpness when viewed larger. Verify the problem exists before spending time fixing it.
When Professional Help Makes Sense
Some camera focus issues and fixes exceed DIY capability. Knowing when to seek professional service saves time and money.
Persistent calibration problems need expert attention. If AF micro-adjustment doesn’t solve front or back focus, internal sensors likely need realignment. This requires specialized equipment and training.
Physical damage requires professional repair. Dropped cameras or lenses often develop focusing problems. Internal components shift or break. These need proper diagnosis and parts replacement.
Intermittent electronic failures suggest deeper issues. If focus works sometimes but fails randomly, electrical problems might exist. These require diagnostic equipment and technical knowledge.
Warranty coverage makes professional service a no-brainer. If your gear sits under warranty, use it. Manufacturers fix problems free during the coverage period. Don’t void warranty with attempted DIY repairs.
Check if your camera qualifies for any recall or service advisories. Manufacturers sometimes discover systemic problems. They offer free repairs even outside normal warranty. Search your camera model plus “recall” or “service advisory” online.
Mastering Camera Focus for Better Photography
Understanding camera focus issues and fixes transforms your photography immediately. Sharp images require more than good technique. Your gear needs proper configuration and maintenance.
Most focus problems have simple solutions. Check settings first. Clean contacts regularly. Match your AF mode to your subject type. These basic steps solve the majority of issues.
Advanced problems need advanced solutions. Learn micro-adjustment for persistent calibration errors. Master back button focus for better control. Understand when manual focus beats autofocus completely.
Prevention beats repair every time. Regular maintenance keeps gear performing well. Understanding light and contrast requirements helps you anticipate problems. Proper settings match your shooting situation.
Your camera includes powerful focusing tools. Modern autofocus systems work incredibly well when properly configured. Take time to learn your specific camera. The investment pays off in consistently sharp images. Your technical skills grow alongside your creative vision. According to Cambridge in Colour, understanding autofocus modes and points remains critical for modern photographers. The Digital Photography School guide explains how back button focus improves shooting efficiency and accuracy.

Darlene Lleno
Darlene Lleno brings a unique perspective to DIY Photography as someone who grew up surrounded by camera gear but chose words over lenses. With five years of writing experience, she specializes in photography content that’s both technically informed and genuinely passionate. Growing up with a photographer twin brother meant camera talk was everyday conversation in her household. While he mastered capturing moments, Darlene discovered she preferred being the subject and the storyteller behind the scenes. As a travel enthusiast and mother of two, she understands the importance of preserving life’s precious moments. When not exploring new destinations or writing for DIY Photography, you’ll find her reading or tending to her garden. Her approach to photography writing is refreshingly authentic, she may not be behind the camera, but she knows exactly what it takes to help others capture the shots that matter most.


Join the Discussion
DIYP Comment Policy
Be nice, be on-topic, no personal information or flames.