


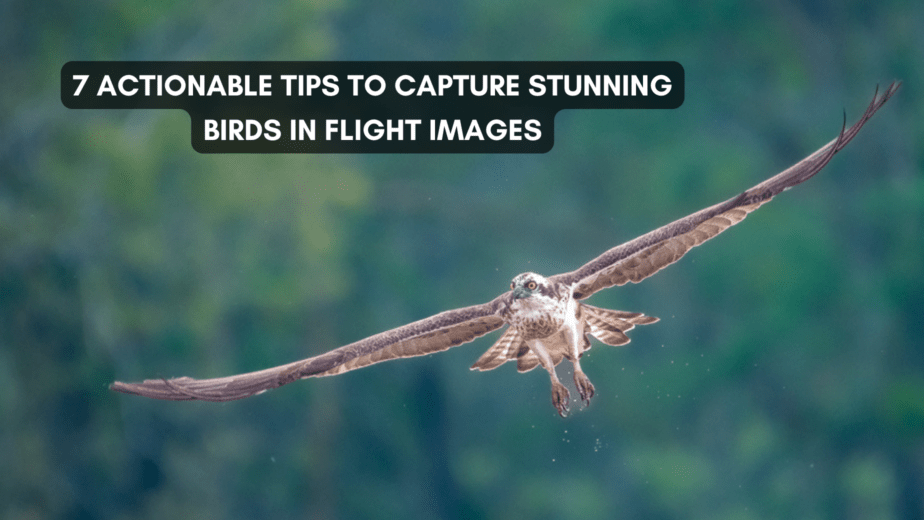
7 Proven Tips for Perfect Bird-in-Flight Photography
Jun 15, 2025
Shreyas S. Yadav

Dunja Djudjic is a multi-talented artist based in Novi Sad, Serbia. With 15 years of experience as a photographer, she specializes in capturing the beauty of nature, travel, concerts, and fine art. In addition to her photography, Dunja also expresses her creativity through writing, embroidery, and jewelry making.
Share:
Why is the bird out of focus in my images? Why are my birds in flight images are blurry? What’s wrong with the exposure? How can I get sharp birds wings and eyeballs in my images?
Does this sound familiar to you? Do you find these challenges while photographing birds in flight?
Well, it’s time to take your birds in flight images to the next level. With the right technique, you can make your birds in flight images awesome.
Photographing birds in flight is a mix of art and photographic technique. Once you learn the right photographic techniques, the quality of your images will skyrocket!
Today, in this article, you will learn the exact seven actionable and proven techniques to create stunning birds-in-flight images. The best part is that you can use the techniques discussed in this article with any brand of DSLR or mirrorless camera.
Let’s dive right in.
AF Mode (Auto Focus Mode)
With AF Mode, you will choose how the camera acquires the focus – Single or Continuous. Most of the camera brands have AF modes such as AF-S and AF-C (names can be different for different brands).
AF-S (AF-Single): Once you half-press the shutter release button or AF-ON button, the focus will lock on. If the subject or camera moves, the camera will not refocus on the subject. Hence, chances are your subject can go out of focus due to Subject or Camera movement. AF-S mode is good for Stationary objects and if there is no / very less camera movement.
AF-C (AF-Continuous): In the AF-C option, till you keep the focus lock button pressed (Either by half pressing the shutter release button or pressing the back button autofocus button) the camera will continuously focus on the subject. The AF-C option is good for moving subjects. As Birds in Flight are in motion, you should select AF-C (or AI-SERVO) mode.
[Related Reading: What are focusing modes, and how do you choose one?]
AF Area (Auto Focus Area mode)
With the AF Area option, you can control where the camera will focus.
Set the Camera AF mode to AF-C (AF-Continuous). Most of the camera brands have AF Area modes such as Single Point, Dynamic Area AF mode, 3D Tracking, Group Area AF mode, and Auto Area AF.
AF Area modes useful for birds in flight photography.
Dynamic Area AF Mode (With 9, 25, 72, 153 points)
In this mode, as you select the focus point, the Camera will acquire a focus on that point and surrounding points based on the point selection.
For Example, if you select Dynamic Area AF mode with 9 Points, then if the bird moves under any of those 9 points, the camera will focus on that bird.
The number of points are selectable in Dynamic Area Autofocus. You can select 9,25,72, 153 points. Typically, 9 points and 25 points work best for birds in flight. This mode is useful for smaller to mid-sized birds.
Group Area Mode
Group focus mode is comparable to Dynamic Area AF mode. However, in Group Area mode, the points are fixed. (Unlike to that of Dynamic area mode, where you can select 9, 25, 72 focus points).
Generally, the Group Area Mode will have 5 points (or closer to 5 points). Group Area mode is useful for large or mid-sized birds.
Single Point Mode
As the name suggests, you will have a single-point area focus. Camera will focus on the point you select, and that’s it!
Although Single point AF area mode is rarely used for birds in flight shots, you can use it for Larger Birds and if the Birds are closer. For the birds in flight shots, prefer to use first mode as Dynamic Area AF Mode (9 or 25 points), second mode as Group Area Mode, and last mode as Single Point AF mode.
Shutter Speed, Aperture, and ISO
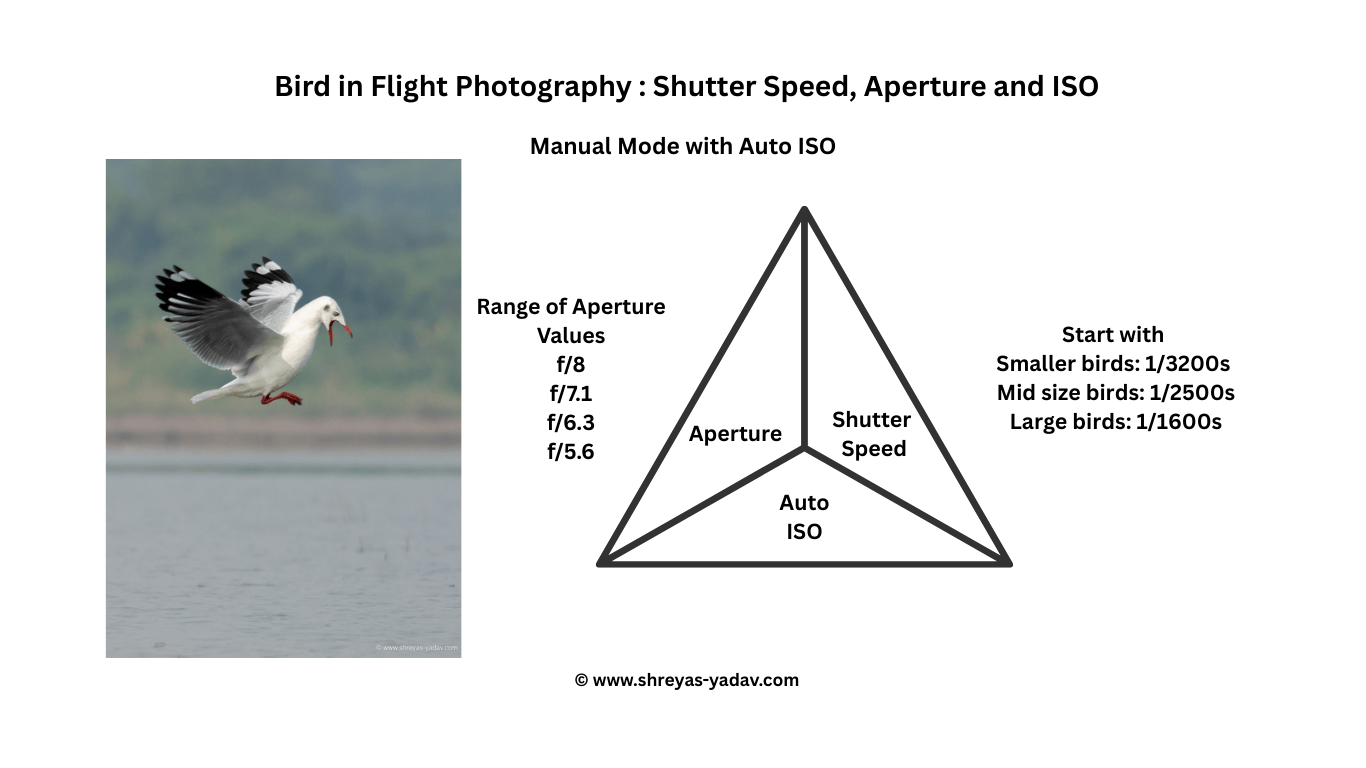
Exposure Setting for Bird In Flight Photography
Shutter Speed
For bird-in-flight images, shutter speed is an important setting. As you want to freeze the motion of the bird’s flight, you need to use higher shutter speeds.
Here are the general starting points for shutter speeds:
- For smaller birds and fast-moving birds – 1/3200s
- For medium-sized birds – 1/2500s
- For larger size birds – 1/1600s
Shutter speeds mentioned here are starting points. Depending on bird motion, wind, type of lens support, you may have to use higher shutter speeds. Also, as you practice more, you will be able to get birds in flight shots with lower shutter speeds than mentioned above.
As a summary, use the above shutter speeds as a starting point.
[Related Reading: What is shutter speed in photography? A complete guide]
Aperture
Aperture will control what part of the bird will be in focus. Also, the bird will be in continuous motion, hence to get a bird in focus, a higher aperture will be required. f/8 is a safe starting point for bird-in-flight images. With f/8, the depth of field will be deep. Most of the bird will be in focus.
However, with a higher aperture, the background may not be smooth and blurred. Also, a higher aperture value will demand a higher ISO. It may not be feasible due to light conditions and image noise.
Hence, depending on the bird size, bird motion, and distance between the bird and the background, choose the aperture.
Start with aperture f/8. If you are getting a good bird in flight (sharp and in focus), then start dropping the aperture slowly. Try the aperture values of f/7.1, f/6.3, up to f/5.6. f/8 to f/5.6 is a good range of aperture to get bird-in-flight images.
[Related Reading: What is Aperture in Photography? A Complete Guide]
ISO
ISO is important in getting higher shutter speeds. If the light conditions are not great, then in order to get usable birds in flight shots, you need higher shutter speeds. Hence, pushing the ISO to a higher value is an option.
Pushing the ISO beyond the camera sensor’s capability will introduce significant image noise and degrade the image quality.
Hence, depending on the light condition and the shutter speed required, choose the lowest possible ISO accordingly. Remember, the priority is to get the required shutter speed and then set the ISO that supports that shutter speed.
For example, if your current ISO is ISO 800 and you need a shutter speed of 1/1600 s (for this example, consider the aperture is set to f/5.6), and the image appears dark, it means you need to increase the ISO. You increase the ISO to ISO 1200, and you are getting a shutter speed of 1/1600s with correct exposure, resulting in a usable shot. Hence, in this case, don’t push the ISO beyond ISO 1200 (like ISO 1600 or ISO 2000). Sure, it will give you extra shutter speed (which you don’t need) and introduce image noise (which will degrade the image quality).
As a summary, choose the lowest possible ISO which will get you the right shutter speed for bird-in-flight photography. Depending on light condition and required shutter speed, choose the ISO.
[Related Reading: What is ISO in photography? A complete guide to understanding ISO]
Exposure mode

For bird-in-flight photography, you need to control the shutter speed to freeze the moment. You also need to control the depth of field to keep the bird in focus.
Bird-in-flight photography demands a quick response to capture the perfect image, which means you need to set the camera exposure quickly.
Setting manual mode with auto ISO will help you get the best possible exposure in the least amount of time.
Set the maximum ISO to the point where you still get usable shots. Some cameras can deliver usable results up to ISO 12800, ISO 6400, or ISO 3200, while others may need to be limited to ISO 1600.
Depending on the size and movement of the bird, choose an appropriate shutter speed. As mentioned earlier, select an aperture between f/8 and f/5.6. Based on the shutter speed and aperture you’ve selected, the camera will then adjust the ISO accordingly.
Aperture priority mode isn’t ideal because it doesn’t give you control over shutter speed—and shutter speed is critical in bird-in-flight photography. Shutter priority may be helpful in some cases, but it often forces the lens to open to its widest aperture, resulting in a shallow depth of field. That can cause your subject to fall out of focus.
So, the best choice is to shoot in manual mode with auto ISO for bird-in-flight photography.
Frame Rate
Higher FPS (frames per second) gives a better success rate for bird-in-flight photography.
Higher FPS will capture more images per second. It will help to capture that perfect bird-in-flight moment.
Most cameras have a frame rate option such as single, low, and high. Single means one frame will be captured per second. High refers to a higher frame rate. Select the highest frame rate that your camera offers.
Make sure you are using a memory card that supports the higher frame rate.
Mid- to pro-level DSLRs have a frame rate of 7 FPS to 10 FPS, whereas recent mirrorless cameras have higher FPS, such as 20 FPS or more.
Using the Back Button Focus for Bird-in-flight Photography

Back-button autofocus helps to switch between AF-Single and AF-Continuous mode quickly.
Imagine a bird is standing or perched on a tree or rock—you will use AF-Single mode to acquire the focus. As soon as the bird takes off, you need to quickly switch to AF-Continuous. Back-button autofocus is important in this type of scenario.
Once you acquire focus on the bird and the back-button autofocus is pressed, the camera will continue to focus on the moving bird.
Here is a detailed step-by-step guide on how to set up back-button autofocus and how to use the back-button autofocus.
Here’s my Step-by-Step Guide to Back Button Autofocus.
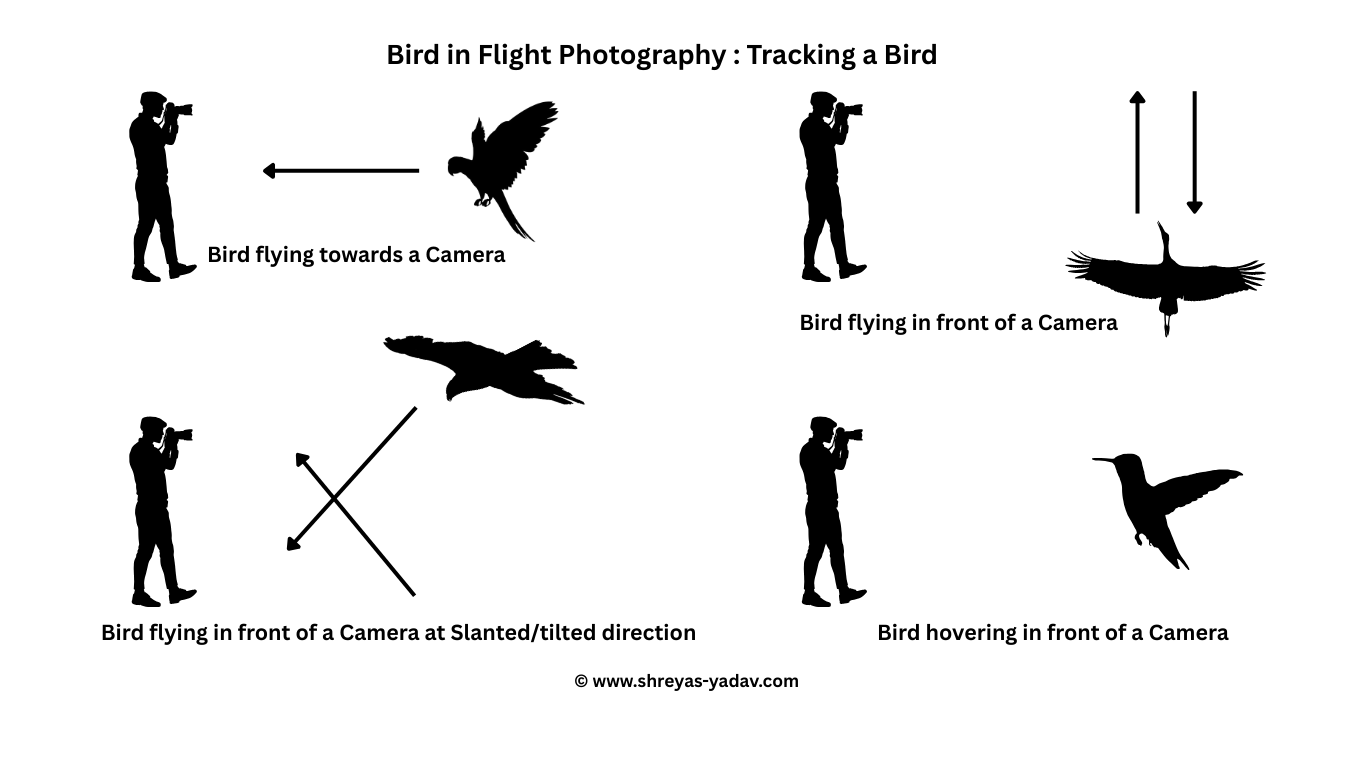
Tracking the Bird
Generally, for bird-in-flight photography, the bird will be flying in front of you, the bird flying towards you, the bird flying towards you in a slanted direction, or the bird hovering.
Refer to the picture below for various birds-in-flight scenarios.
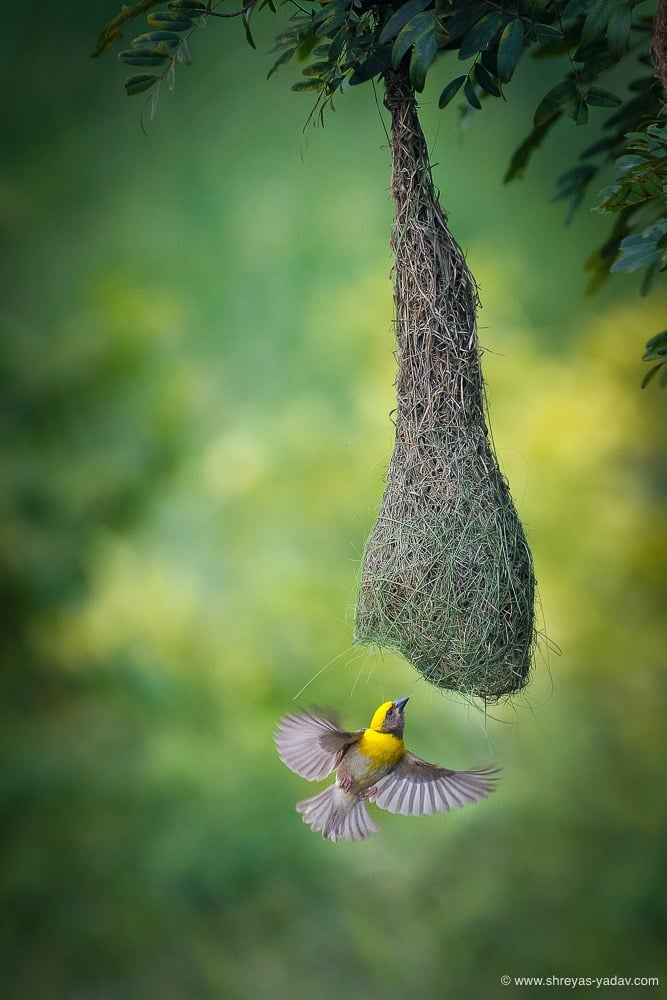
Photographing a bird hovering is relatively easy. Birds such as kingfisher, black-shouldered kite, and sunbird hover with almost no change in location. You can acquire focus, and you will get nice bird-in-flight shots.
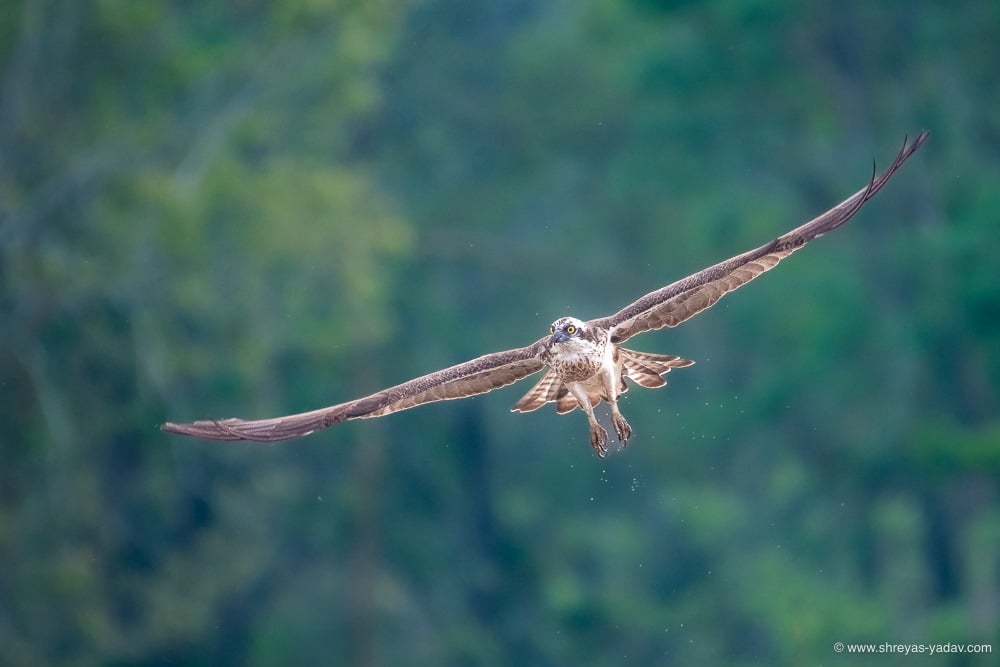
For a bird flying towards you, keeping the focus point on the bird will be relatively manageable. Since the bird is flying towards you, it will mostly stay within the focus area you selected. If the camera acquires focus fast and has a higher frame rate, then you can get a good bird-in-flight image. Shots like a bird flying towards you demand faster camera autofocus capability and higher frame rates.
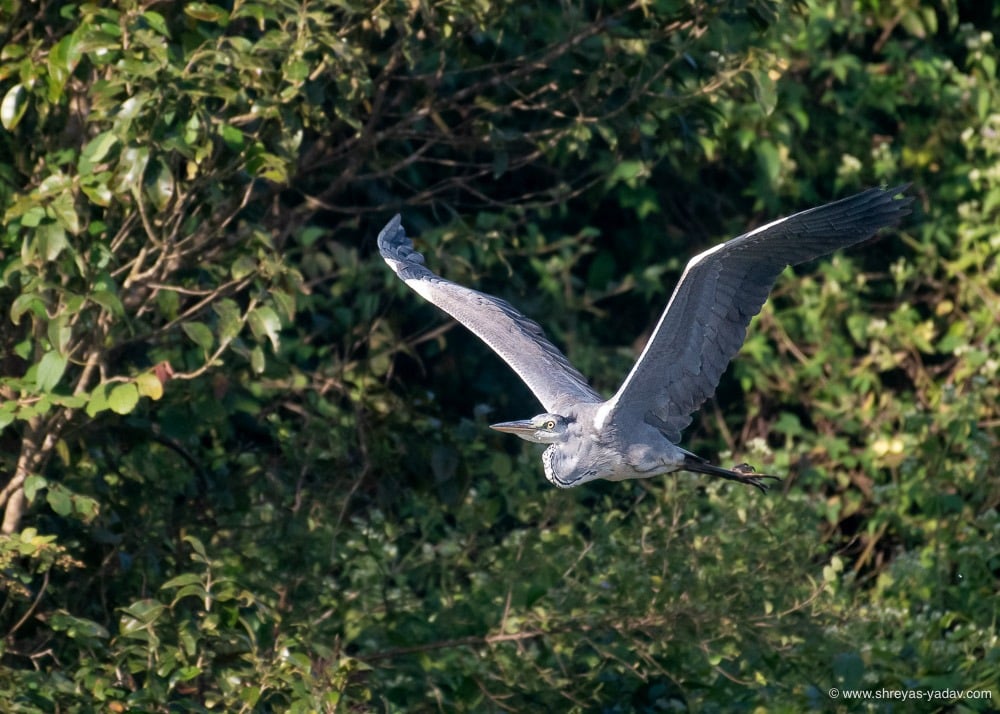
A bird flying in front of you needs to be tracked precisely. Set the camera to AF-Continuous mode. Acquire focus on the bird using back-button autofocus. Once focus is acquired, keep the focus engaged by pressing the back-button autofocus button. Keep tracking the bird. Click the shutter release button. While clicking the shutter release button, make sure you continue to track the bird.
There you go! These are 7 tips that will help you capture stunning bird-in-flight images.
Now I would like to hear from you.
Do you find these tips helpful? Which techniques will you try first? I would love to hear that in the comments below!
About Shreyas S. Yadav
Shreyas S. Yadav is an engineer, wildlife and nature photographer from India. He is also a writer and lifelong adventure explorer. Through his writings, he teaches about digital post-processing and nature photography. He shares field techniques about nature photography, post-processing, and wildlife photo stories on his website. This article was also published here and shared with permission.
We love it when our readers get in touch with us to share their stories. This article was contributed to DIYP by a member of our community. If you would like to contribute an article, please contact us here.


Join the Discussion
DIYP Comment Policy
Be nice, be on-topic, no personal information or flames.