


All about astrophotography: The art of shooting the night sky
Jan 31, 2025
Soumyadeep Mukherjee
Soumyadeep Mukherjee is an award-winning astrophotographer from India. He has a doctorate degree in Linguistics. His work extends to the sub-genres of nightscape, deep sky, solar, lunar and optical phenomenon photography. He is also a photography educator and has conducted numerous workshops. His works have appeared in over 40 books & magazines including Astronomy, BBC Sky at Night, Sky & Telescope among others, and in various websites including National Geographic, NASA, Forbes. He was the first Indian to win “Astronomy Photographer of the Year” award in a major category.
Share:
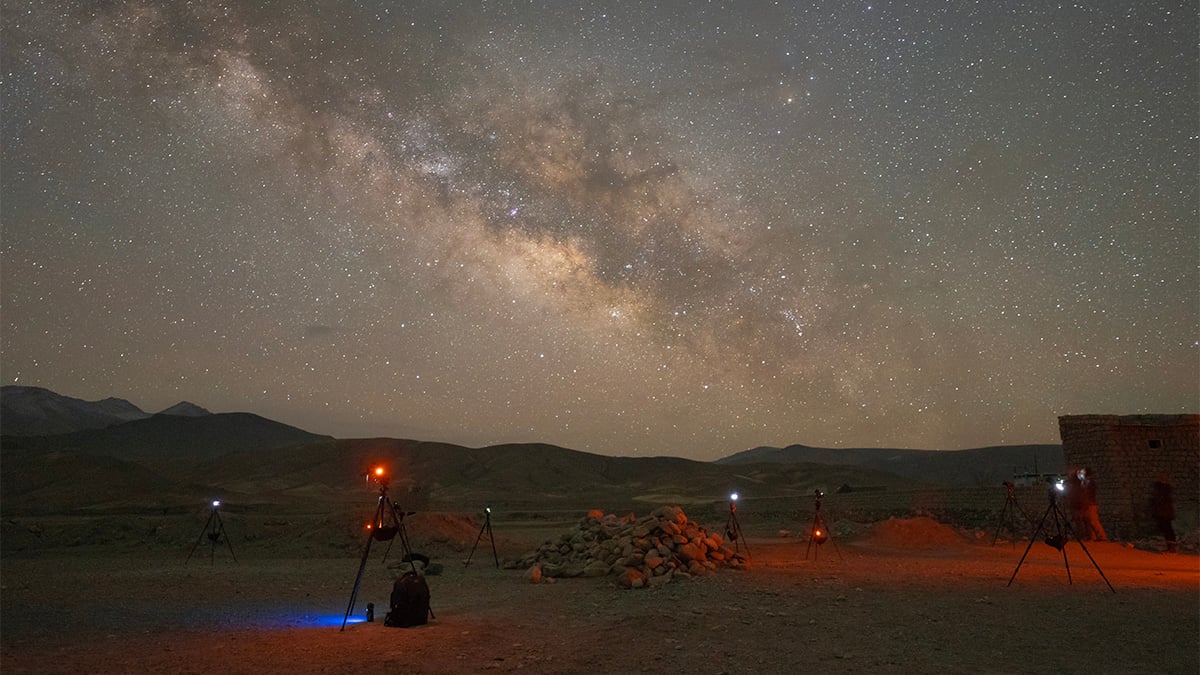
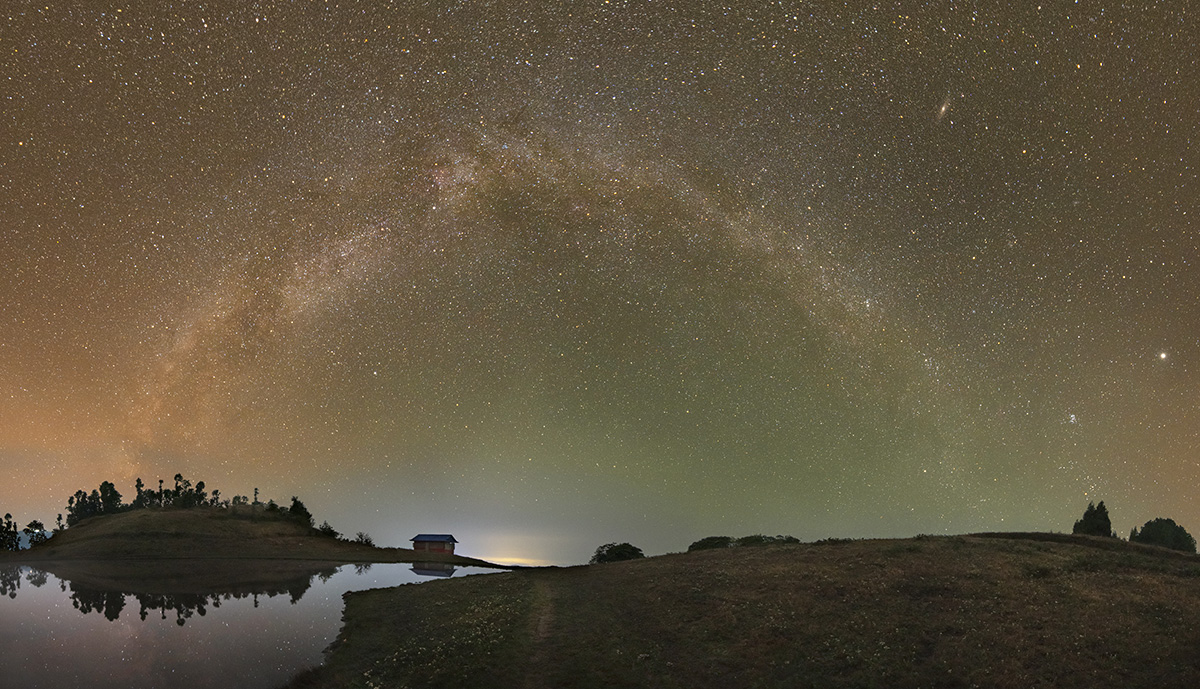
At the heart of photography lies capturing the subject with your camera, and astrophotography is no exception. This is the phase where all the planning meets execution. This is the phase where the beauty of the celestial objects begins to take shape inside your camera. The shooting process is a mix of technical precision, creativity, and patience. Whether you are aiming for the large Milky Way or a small deep sky object, your camera is going to be your partner. This guide explores the process of shooting astronomical objects step-by-step.
Table of contents
Preparing your equipment on location
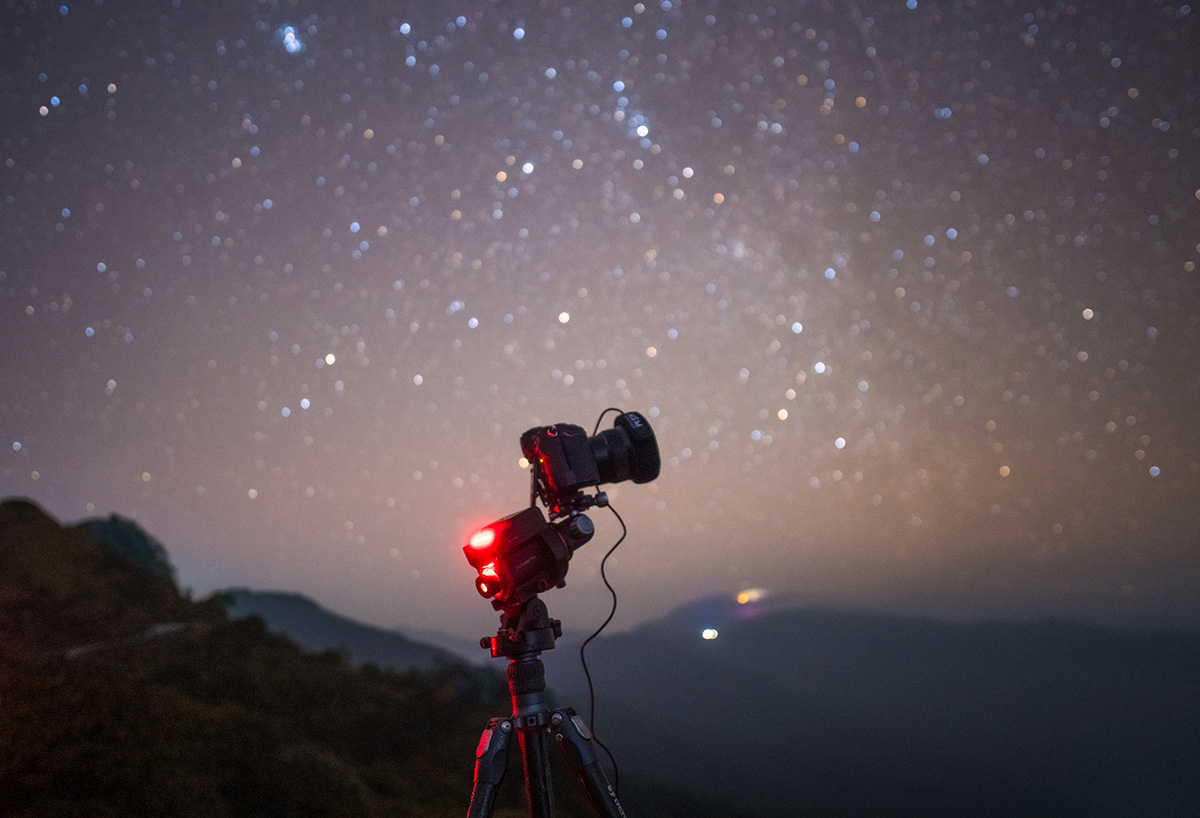
Now that you have scouted your location and know where you will be setting up your equipment, a good idea will be to start setting up at sunrise or during civil twilight. This will make sure that you still have enough light to do the set-up easily and without any mistakes. In case you need to reposition your equipment, it will be easier while there is still some daylight left.
Setting up the tripod
The first step will be to set up your tripod. You may not want to extend your tripod fully as this will give more stability and less vibration. The tripod should be as stable as possible. If the ground is soft, you might want to press your tripod hard (but do not break your tripod at this stage). With the help of a bubble level, either with the one installed on your tripod or with an external one, level your tripod as much as possible. To add some more stability, you can attach some weight (a sandbag or your camera bag) to the bottom hook of your tripod.
Attaching camera and lens
Attach your camera with your lens, check if your camera has battery and memory card inserted. At this point, you might also want to check if the following settings are done correctly in your camera and lens:
- Camera is set to manual mode
- You are capturing in RAW mode
- Your white balance is not set to Auto, and preferably set at “Daylight” or similar
- Any kind of VR is turned off in both camera and lens
- Focusing is set to manual focus
- Any kind of internal noise reduction (e.g. High ISO noise reduction, Long exposure noise reduction, etc.) is turned off
You might also take a random test shot to check everything is working fine. Check for all the cable connections (e.g. external power source, external intervalometer, etc.)
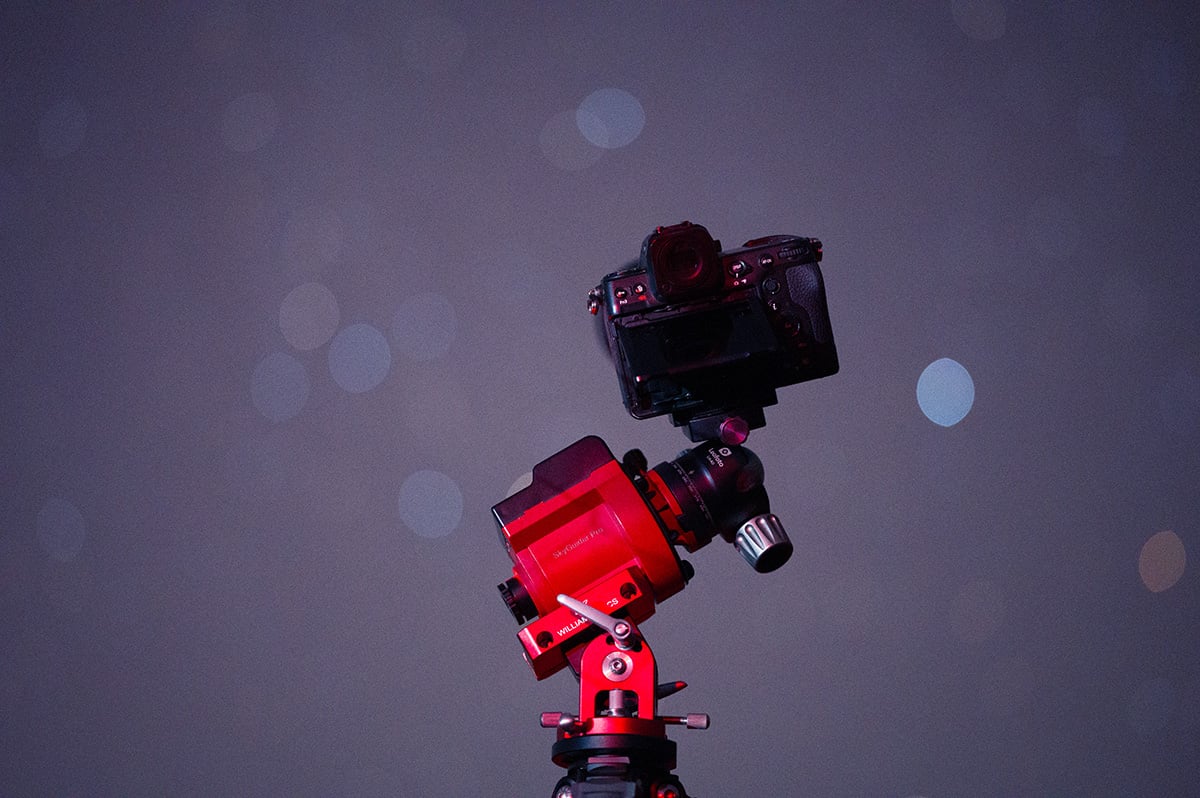
Aligning the mount
Polar aligning your star tracker is crucial for any tracked astrophotography, whether you are taking a wide-field Milky Way shot or aiming for a deep-sky object. If you are opting for untracked astrophotography, i.e. not using a star tracker, this step is not for you. In this step, your mount needs to be aligned to the north axis of Earth, with Polaris as your reference point (if you are in the Northern hemisphere). From a dark sky location, Polaris starts to become visible during nautical twilight. If you can see Polaris with your naked eyes, you can easily see it with the polar scope of your tracker. If the Polaris is not visible, you can align your mount roughly towards the North with the help of a compass or a smartphone app and wait for the sky to get darker. If you are using a green laser pointer to assist the process, remember to double-check if its usage is permitted from the location.
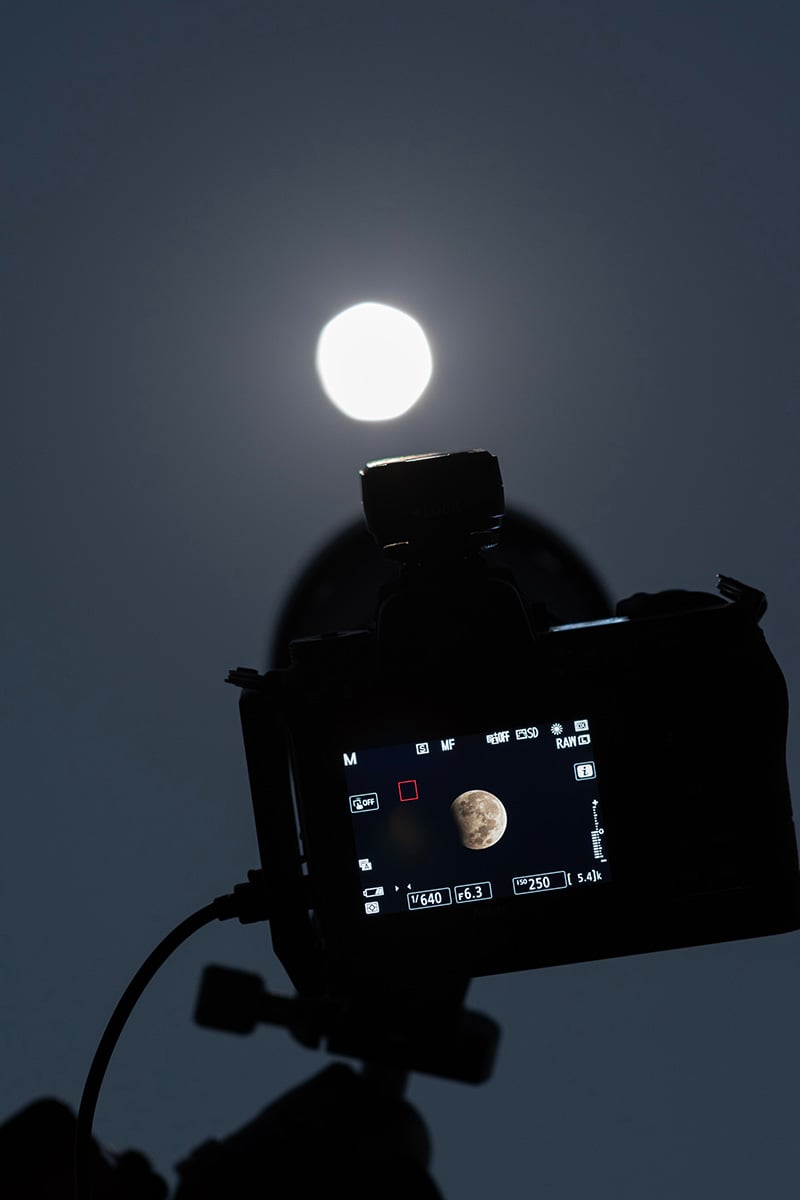
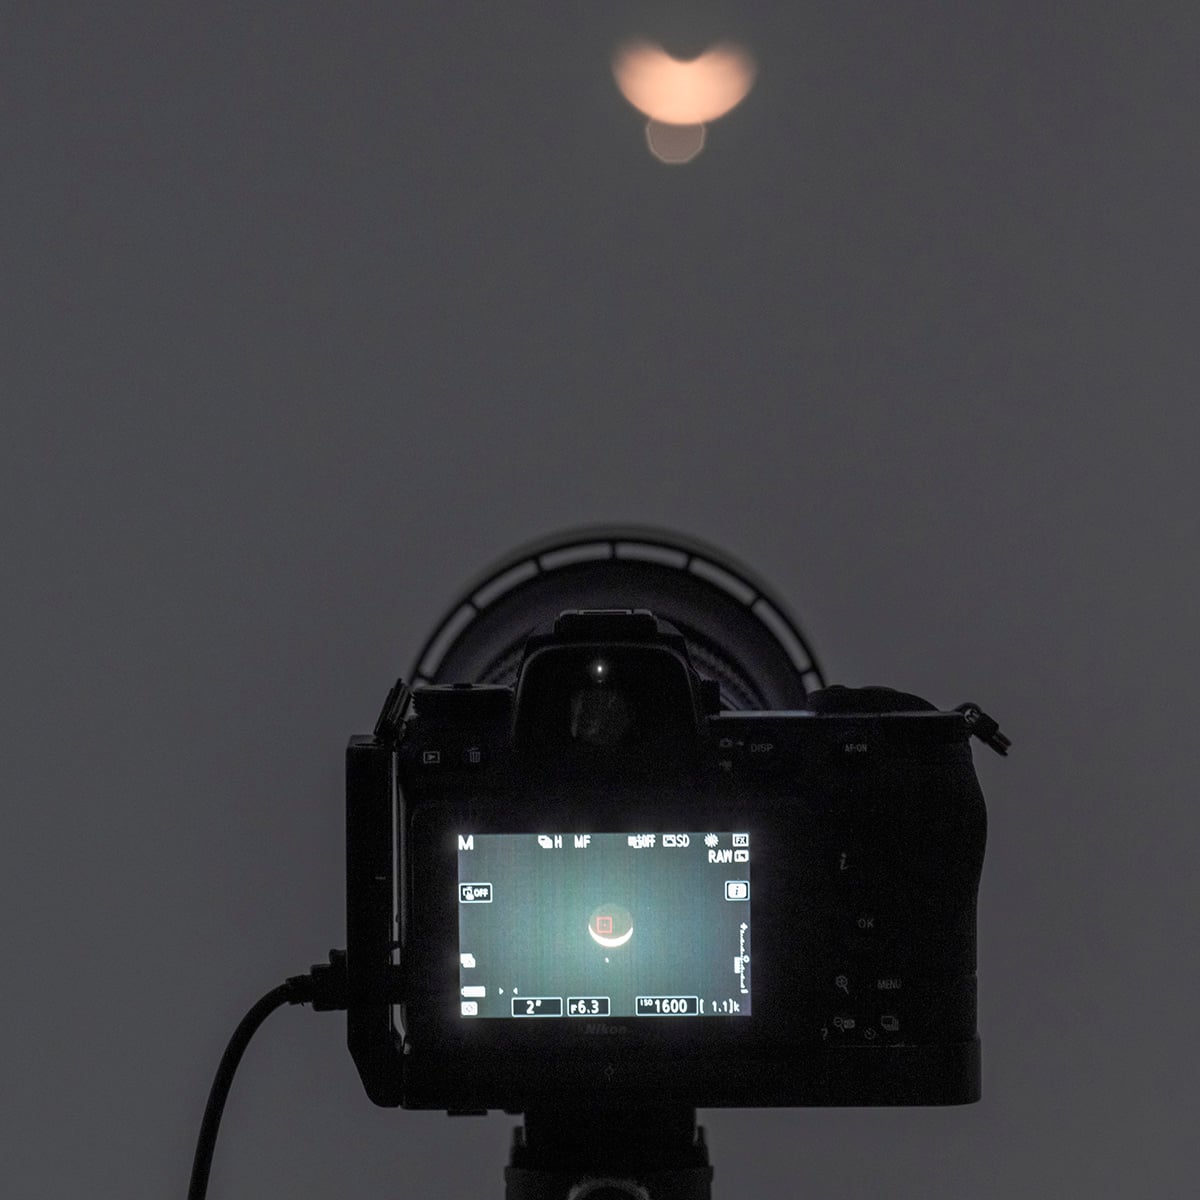
Manually focusing your lens
Once you start seeing some bright stars or planets in the sky, you can start your focusing process. Turn your camera towards the bright star/planet; bring the star to the middle of your field of view. Turn on the live view so that you can see the star/planet clearly on your camera screen. If it is not visible, you can increase the ISO until it appears on your camera screen. Digitally zoom on to the bright star (as much as your camera allows) and slowly start rotating the focusing ring of your lens. Rotate the ring until the star appears the smallest on your screen. You can always double-check the focus by taking a quick test shot and zooming into the image.
Once you are done with all the above steps, all you need to do is wait until the sky gets dark enough (e.g. late astronomical twilight) for you to start your session. You can also utilize this time by double-checking all the above steps, organising your spare batteries, attaching a lens warmer carefully to your lens and making sure that your polar alignment is not disturbed.
Camera settings
The key to setting up your camera for the perfect shot is the knowledge of the “exposure triangle” and how it affects your images. The three main parameters, shutter speed, aperture, and ISO, affect your images in different ways, and together, they create the image.
Shutter speed
Since astrophotography involves capturing faint objects (other than the sun and the moon), the aim is to collect as much light as possible. Imagine the photons (coming from the astronomical objects) as raindrops and your camera sensor as a bucket to collect the raindrops. As long as you keep the bucket in the rain, you will be able to collect more rainwater. The same applies to astronomical imaging. The camera sensor is exposed long to collect enough data, with the help of “long exposures”. With tracked astrophotography, there is no limit to how long your shutter speed will be. You can take an exposure as long as you are getting pinpoint stars, depending on the accuracy of your tracking mount. However, wide-field astrophotographers mostly limit it to 120 or 180 seconds. Deep sky astrophotographers, however, go as long as 300, 600 or 900 seconds per exposure. For the sun and the moon, you are not required to take long exposures due to their brightness.
For untracked astrophotography, photographers are limited with the shutter speed. A basic rule to find out the maximum shutter speed before the stars start trailing is known as the “Rule of 500”.
Maximum shutter speed = 500 / (Effective focal length)
For example, if you are shooting with a 20mm lens on a full-frame camera, your maximum shutter speed will be:
Maximum shutter speed = 500 / 20 = 25 seconds
If you are using an APS-C camera, you are required to multiply your lens’ focal length with the crop factor, which is 1.5x for Nikon and Sony and 1.6x for Canon. So, if you are using a 20mm lens on an aps-c sized Nikon camera,
Maximum shutter speed = 500 / (20 * 1.5) = 500 / 30 = 16.6 seconds
Note that the Rule of 500 is not fully accurate, and it is used for reference purposes only. If you are a pixel peeper and want perfect round stars in your untracked image, you better go with Rule of 400 (similar logic as before). Also note that these rules apply only to wide-field images (up to 50 mm focal length). There is a more accurate NPF rule which you can calculate from this website.
Aperture
Remember the “rain and the bucket” metaphor above? Now, compare your lens’s aperture to the opening of the bucket. The wider the opening is, the more rain you will be able to collect in a shorter span. Since the goal is to collect as much light as possible within the span of your shutter speed, a wide-open aperture (e.g. f/1.8, f/2.8) is the key. For untracked astrophotography, you will want to keep the maximum possible aperture of your lens.
For tracked photography, however, you are not limited by shutter speed. While you are taking a 60 or 120-second exposure, you can stop down your lens’ aperture up to a stop. For example, with an f/1.8 lens, you can use f/2.8 while shooting. This will not only improve the sharpness and overall quality of the image but will also improve the chromatic and comatic aberrations introduced by your lens.
ISO
There is no way to determine the ISO beforehand. It depends on your shutter speed, aperture and the sky (and local) conditions. To determine the right ISO, you will have to choose a starting point (e.g. ISO 800) and go from there. However, do not depend on what you are seeing on the screen. Take test shots and check your histogram. If the peak on the histogram is between the first and the second line, you are good to go. Also check your histogram for highlight clipping and make sure no area is clipping. If you are unsure about the correct exposure, remember it is always better to underexpose than to overexpose. For underexposed images, especially with modern digital cameras, you can easily recover the shadows. However, for overexposed highlights, the data becomes difficult, and at times impossible, to recover.
Now that you have determined the perfect camera settings for your image, double-check everything with a test shot.
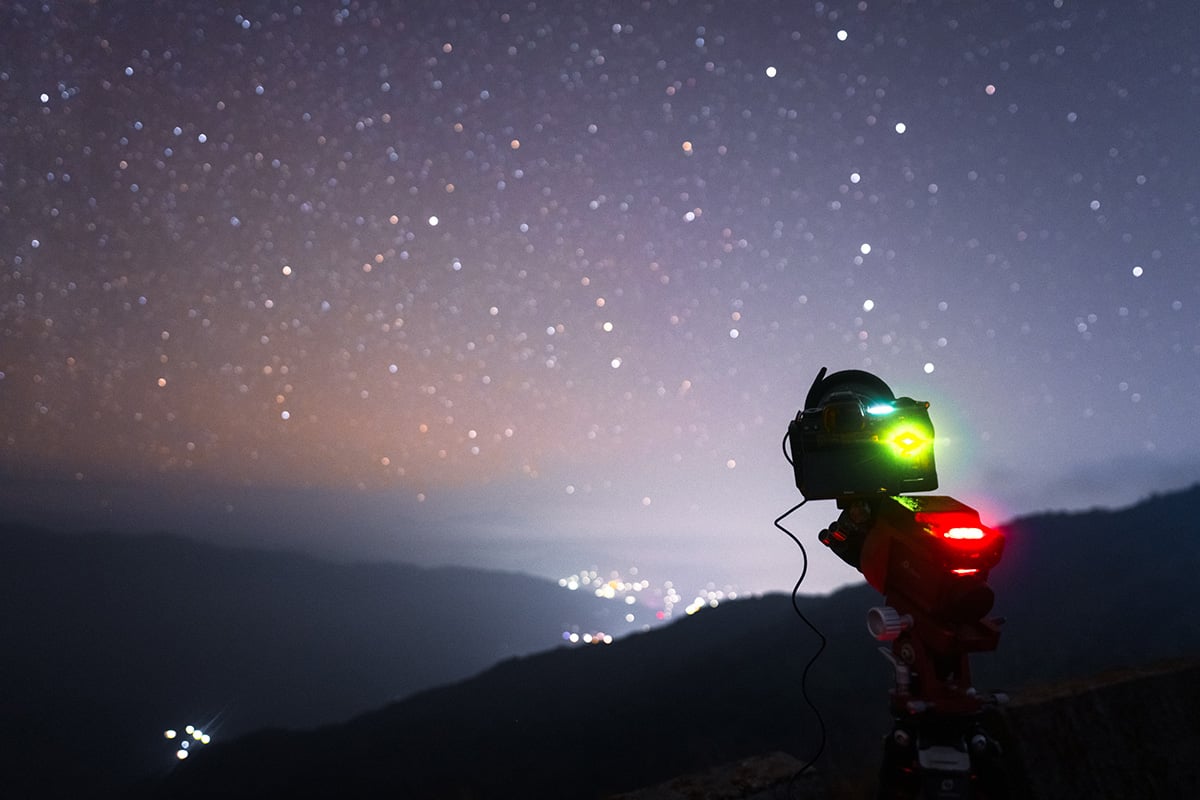
Different shooting techniques
Once you have determined the camera settings, depending on the subject, your equipment, and, of course, your goal, you have multiple ways to capture the image.
Single exposure
This would be the simplest form of exposure. You capture only one image where both the sky portion and landscape portion are evenly exposed. You can get very creative with these kinds of shots. However, remember that single exposures do not work for deep-sky objects as you won’t get enough data to produce an image. Also, if you are tracking, a single exposure may not work as your landscape will become blurry due to the moving tracker.
Multiple exposures for stacking
To get the best results in astrophotography, capturing and stacking multiple images are always helpful. You take multiple images of the same object from the same position without moving your tripod and stack them during processing. Stacking improves the Signal-to-noise ratio or the SNR value. It gives you a cleaner and more detailed image.
There is no minimum or maximum number of images you should stack. For nightscape images, 10 to 20 images is a good starting point. If you are not tracking, your subject will eventually move out of your frame and will create issues during stacking. For untracked astrophotography, you will need your subject towards the centre of your frame. Start with the subject slightly towards the left of your frame and end the shooting when it is slightly towards the right. During the shooting process, keep an eye on the total exposure time.
Total exposure time = single exposure time * number of images
For Milky Way images, 10 to 30 minutes of total exposure works fine. If you are doing it for the first time, you would want to capture more images. While processing the data, make two or three stacking iterations with 1/3, ½ and full amounts of data and decide the perfect exposure time suited to you and your processing style.
For faint, deep sky objects, the total exposure time depends on the object. Starting with just an hour of data, one can go up to 100 hours for really faint objects. For solar and lunar images, 200 to 300 images is a good starting point. All you need to do is experiment with different amounts of images and find the number that suits you the most.
Blending
In astrophotography, blending refers to two or more images blended together to create the final image. Blending can be of different types:
- Track & blend: If you are using a star tracker, tracking the night sky will cause the foreground to become blurry. In order to get a sharp foreground, you are required to turn off the tracker and take separate image(s) for the foreground. These two images (sky + foreground) are blended together during processing.
- Exposure blend: Oftentimes, you will come across a situation where the sky and the foreground do not have the same luminosity. Exposing the sky will underexpose the foreground, or vice versa. For these situations, you are required to take separate exposures (with different camera settings) for the sky and for the foreground. This method can also be applied if there is a bright object in the foreground and you need multiple exposures to properly expose the foreground.
- Focus blend: If there is a close foreground subject, focusing on the stars will make the foreground blurry. In such situations, you will need to adjust your focus for these foreground elements and take separate shots of the sky and the foreground. If you want to achieve a sharp foreground throughout, you can also take multiple exposures for the foreground by adjusting your focus point (also called focus stacking).
- Time blend: From a dark sky location, the foreground remains extremely dark. Getting details of the foreground at night becomes a challenge. To overcome this, photographers employ a “blue-hour” blend. This method requires the foreground image to be taken during the blue hour, specifically during the late nautical twilight. The image for the sky portion is captured later. The opposite can also be applied where you take the images for the sky first and then take the foreground exposures at nautical twilight before sunset.
- Composite: All the above blending methods require your camera to be in the same position, creating a “true representation” of the scene. Photographers, in order to be creative, can also change the position of their tripods. In such cases, the sky portion and foreground portion are captured in different directions. Changing the focal length for the sky and foreground portion (focal length blend) is also considered to be a composite image. Considering that photography is an art form and photographers are allowed to be creative, there is nothing wrong with creating composite images. Having that said, it is also important to remain honest about your composite images and declare the truth if and when required.
Panorama
When you are capturing a larger scene, and your lens’ focal length is not enough to capture the whole scene, you need to take multiple exposures by rotating your set-up. This process is called panorama. The single frames are called panels of a panorama. Panoramas can be creating any numbers of panels, divided into multiple rows and columns. All the shooting methods mentioned above can be employed while creating a panorama, i.e. tracked and stacked panorama, single image panorama, exposure blended panorama, etc. To get a smoother blend between each panel and to get rid of the parallax effect, a 50% overlap between each frame is suggested.
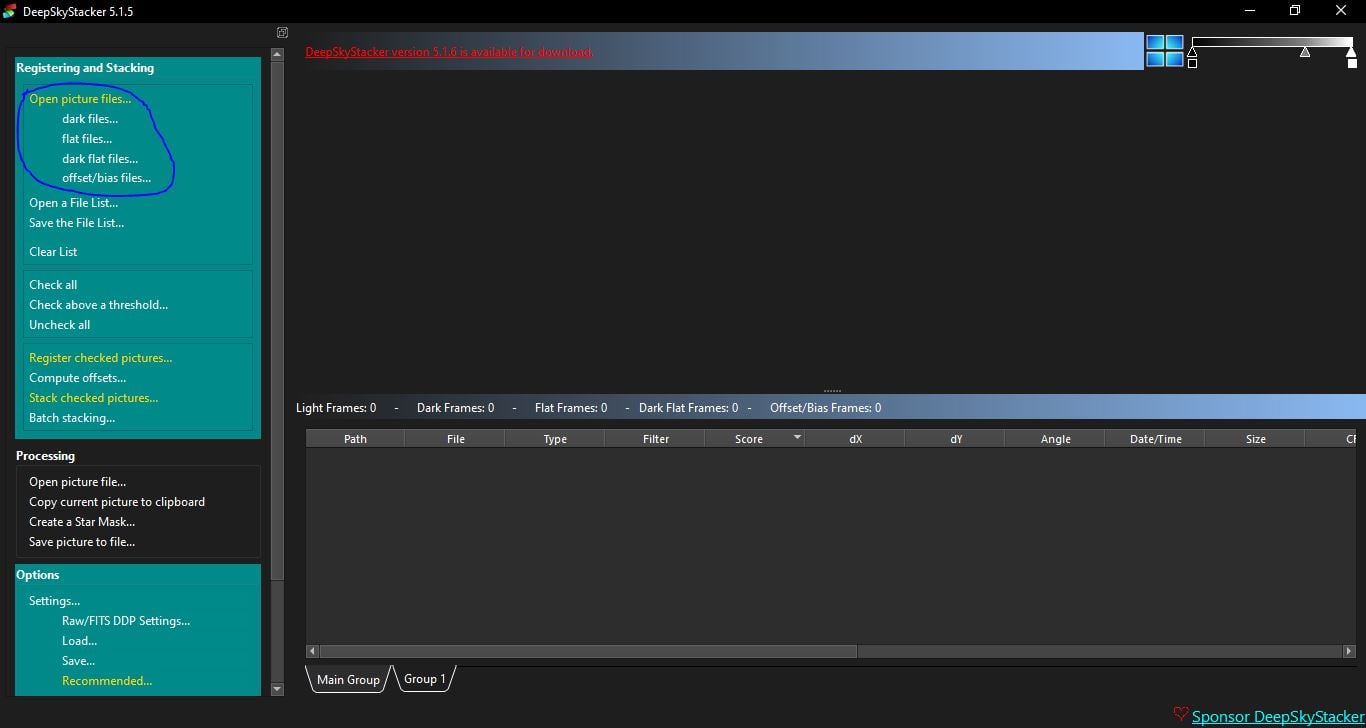
Shooting calibration frames
Once you are done photographing the night sky, you are still required to capture some more images to counter some of the issues introduced by your camera and lens. These are known as calibration frames. The “photographs” of the night sky are known as “light frames”, which might have some issues pertaining to heat noise, electronic noise and other shortcomings. Calibration frames are used to remove those shortcomings. For DSLR/mirrorless astrophotography, three types of calibration frames are typically included.
Dark frames
These calibration frames remove the hot and cold pixels introduced by the heat of the camera sensors. Modern camera sensors, however, introduce very little heat noise, and most of them might get removed during stacking. Dark frames are shot immediately after the light frames. The lens cap is attached to the lens, making sure that no light hits the camera sensor. The settings (shutter speed, aperture and ISO) remain exactly the same as the light frames. Typically, 30-40 dark frames are captured.
Bias frames
Bias frames are shot in order to remove the electronic noise introduced by the camera sensor while reading images. These frames are shot by placing the lens cap on the lens, just like dark frames. Aperture and ISO remain the same as light frames. The only change is made to the shutter speed. You have to choose the highest shutter speed allowed in your camera, typically 1/4000s or 1/8000s.
Flat frames
Flat frames are used to remove the vignetting introduced by the lens and spots introduced by dust motes on the camera sensor or anywhere else in the image train (lens, filter, etc.). Although many techniques are available to capture flat frames, the most popular one is the “white t-shirt method”. A white t-shirt is stretched and attached to the front of your lens using a rubber band or a small rope. The camera is then pointed towards an evenly lit light source, e.g., a white screen, sky, etc. For the settings of flat frames, the focus is kept the same as light frames; the aperture and ISO are also kept the same, but ISO can be lowered if required. The shutter speed depends on the luminosity of your light source. An easy and reliable method is the Aperture Priority mode, allowing your camera to decide the perfect exposure time.
Calibration frames are meant to further fine-tune your images, removing unnecessary noise and spots from your images. During stacking, you are required to load all these calibration frames, and the software will calibrate your images.
Things to remember during shooting
Here are a few things that will help you getting better results:
- Maintain a distance from your set-up while your camera is taking images. This will ensure that you don’t accidentally hit your set-up.
- After each shot or a series of shots, review your images and the histogram. You don’t want to go back home with blurry or overexposed images.
- Tighten every screw and lever on your set-up. Make sure all the cables are placed snugly.
- Before starting a new series of multiple images, check your camera’s battery level. Determine whether you need to change the battery.
- If you are using a dew heater, check if it is attached correctly and working properly. Do this in between your series of images.
- Carry a camping chair. While your camera is busy taking photos, enjoy the night sky. Use this time to identify new stars or new constellations. Also, keep an eye out for meteors. Enjoy some snacks.
Shooting the night sky can get both technical and tiring at times. It is important that you enjoy the process. Once you realize that the photons you just captured travelled hundreds and thousands of light years to your camera, it will give you a thrill. Remember that even pro photographers make silly mistakes during shooting, and it is part of the learning process. If you are making a mistake, you gather experience to make your next session more fruitful. The night sky is your canvas; fill it with your creativity.
Clear skies!
Everything you wanted to know about Astrophotography
Introduction to photographing the night sky | Planning for a night’s session | The art of shooting the night sky | Processing astronomical images

Soumyadeep Mukherjee
Soumyadeep Mukherjee is an award-winning astrophotographer from India. He has a doctorate degree in Linguistics. His work extends to the sub-genres of nightscape, deep sky, solar, lunar and optical phenomenon photography. He is also a photography educator and has conducted numerous workshops. His works have appeared in over 40 books & magazines including Astronomy, BBC Sky at Night, Sky & Telescope among others, and in various websites including National Geographic, NASA, Forbes. He was the first Indian to win “Astronomy Photographer of the Year” award in a major category.


Join the Discussion
DIYP Comment Policy
Be nice, be on-topic, no personal information or flames.
3 responses to “All about astrophotography: The art of shooting the night sky”
Thanks for the informative article. Here are my steps in making an astrophotograph:
1. Find the darkest place possible
2. Focus to the stars manually and in the live-view mode. If your focus is right stars should the smallest lightdots. Somehow fix the focus position
3. Make you composition
4. Best setting for the first snaps: ISO 6400 or even higher (we need much light) and aperture wide open. Shutter speed should be fast enough to freeze moving stars and slow enough to gather as much light as possible
5.After you find best possible shutter speed and focusing distance, play with iso and aperture in order to get more light, more sharpness and less noise. My settings for Orion Nebula with Nikon D600 and 50mm 1.8d were f2.8, ISO 6400, shutter speed 4 (yes, 4!) seconds. With longer shutter speed there were startrails. It’s hard to imagine what shutter speed to use with 85mm 1.8d to shoot Andromeda galaxy)
May the Light be with You!
Hi. Thank you for sharing your experience with us. You are doing it absolutely correct. May be a small suggestion for you: rather than adjusting your iso and aperture, you can do it quicker. Among the three settings of shutter speed, aperture and iso, you would already know your the shutter speed (by rule of 500 or rule of 400) and aperture (max aperture or sharpest aperture). The only thing you need to decide would be the aperture. Rather than taking a complete long exposure (e.g. 20 seconds if you are using a very wide lens), take shorter exposures with increased iso. Remember that you are not going to use your highest iso for the actual image. For example, take an exposure of 4 seconds at f/2.8 with ISO 10000. If the histogram looks good, this will be your exposure. Download a free exposure calculator app on your smartphone. Just enter the above value. To calculate the new exposure, enter your max permissible shutter speed and aperture, and the app will show you the required iso (e.g. to get the same exposure as above with 20 seconds at f/2.8, your required ISO will be 2000). This saves a lot of time, especially for someone who is tracking and wants to take 60 or 90 seconds of exposure.
And yes, once you go above 40mm, rule of 500 becomes irrelevant. In those cases you will be following Rule of 300, exactly what you saw with 4 seconds exposure at 50mm with your D600. With 85mm, you will get 2 or 2.5 seconds without star trails. If you are considering photographing deep sky with focal lengths like 50mm, 85mm or higher, consider getting a small star tracker. It will be worth the investment.