How to reduce noise in high-ISO photos and still keep them sharp
Jan 8, 2018
Share:
Sharpening photos you took at high ISO can be a demanding and tricky. To help you get it right, Blake Rudis of f64 Academy shares some tips for sharpening high-ISO images. He’ll show you how to reduce noise in these photos, but still keep them sharp and achieve optimal results.
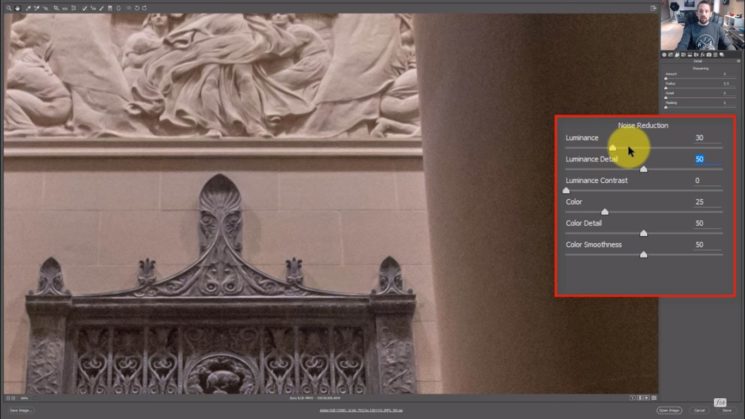
Of course, start by opening the image in Lightroom or Adobe Camera Raw. Zoom in, and go to the Sharpening sliders. For starters, move all of them to zero. This way, you won’t reduce the noise while the effect of sharpening is still showing.
Now, reduce noise in the photo. The values are different for every image, but Blake points out that he likes to set Luminance to half the value of Detail. So, if Detail value is 50, Luminance will be 25. You can add some Color Noise Reduction and Color Detail, depending on your image.
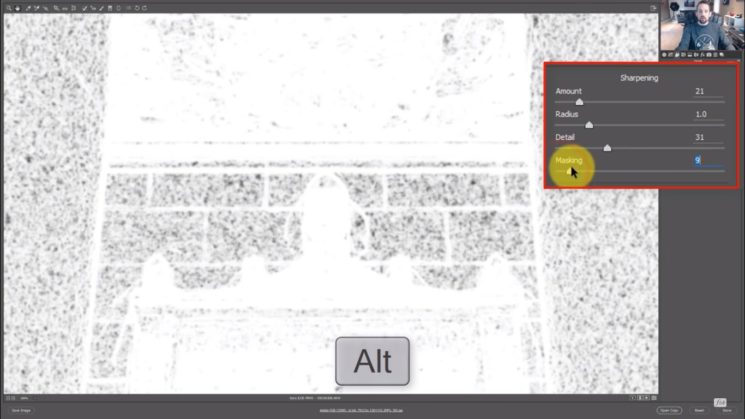
After you’ve reduced noise, you’ll lose some of the detail in the photo. Sharpening will help you get it back, but you don’t want to sharpen the entire image on top of the Noise Reduction. So, start with the Masking slider under Sharpening. Press Alt/Option and click the Masking slider. You’ll see a white screen, which means the Sharpening is applied to the entire image. As you drag the slider to the right, you’ll see black areas starting to appear. Sharpening won’t affect the areas that turn black. So, set the masking so that the Sharpening covers the areas where you want to retain details.
When the masking is done, apply the Sharpening by moving the Amount, Radius and Detail sliders. Again, there’s no universal formula, it all depends on your image. Just make sure not to overdo it.
[High ISO Sharpening in Adobe Camera Raw or Lightroom via FStoppers]
Dunja Đuđić
Dunja Djudjic is a multi-talented artist based in Novi Sad, Serbia. With 15 years of experience as a photographer, she specializes in capturing the beauty of nature, travel, concerts, and fine art. In addition to her photography, Dunja also expresses her creativity through writing, embroidery, and jewelry making.











Join the Discussion
DIYP Comment Policy
Be nice, be on-topic, no personal information or flames.