


How to remove or reduce high ISO noise in Lightroom
Jul 6, 2018
John Aldred
John Aldred is a photographer with over 25 years of experience in the portrait and commercial worlds. He is based in Scotland and has been an early adopter – and occasional beta tester – of almost every digital imaging technology in that time. As well as his creative visual work, John uses 3D printing, electronics and programming to create his own photography and filmmaking tools and consults for a number of brands across the industry.
Share:
Sometimes, when we’re out with our cameras, the light is a little lower than we’d like and we need to ramp up our ISO to compensate. But raising the ISO introduces noise. Potentially a whole lot of noise. And while you can never really get the image to look as good as it would have if you’d been able to shoot it at a low ISO, there are things you can do.
In this video, Unmesh Dinda from PiXimperfect shows us how to use the noise reduction tools in Lightroom to help reduce the impact of noise. This technique also applies to using Adobe Camera Raw. He then goes into Photoshop to illustrate how we can further bring back some of that lost detail.
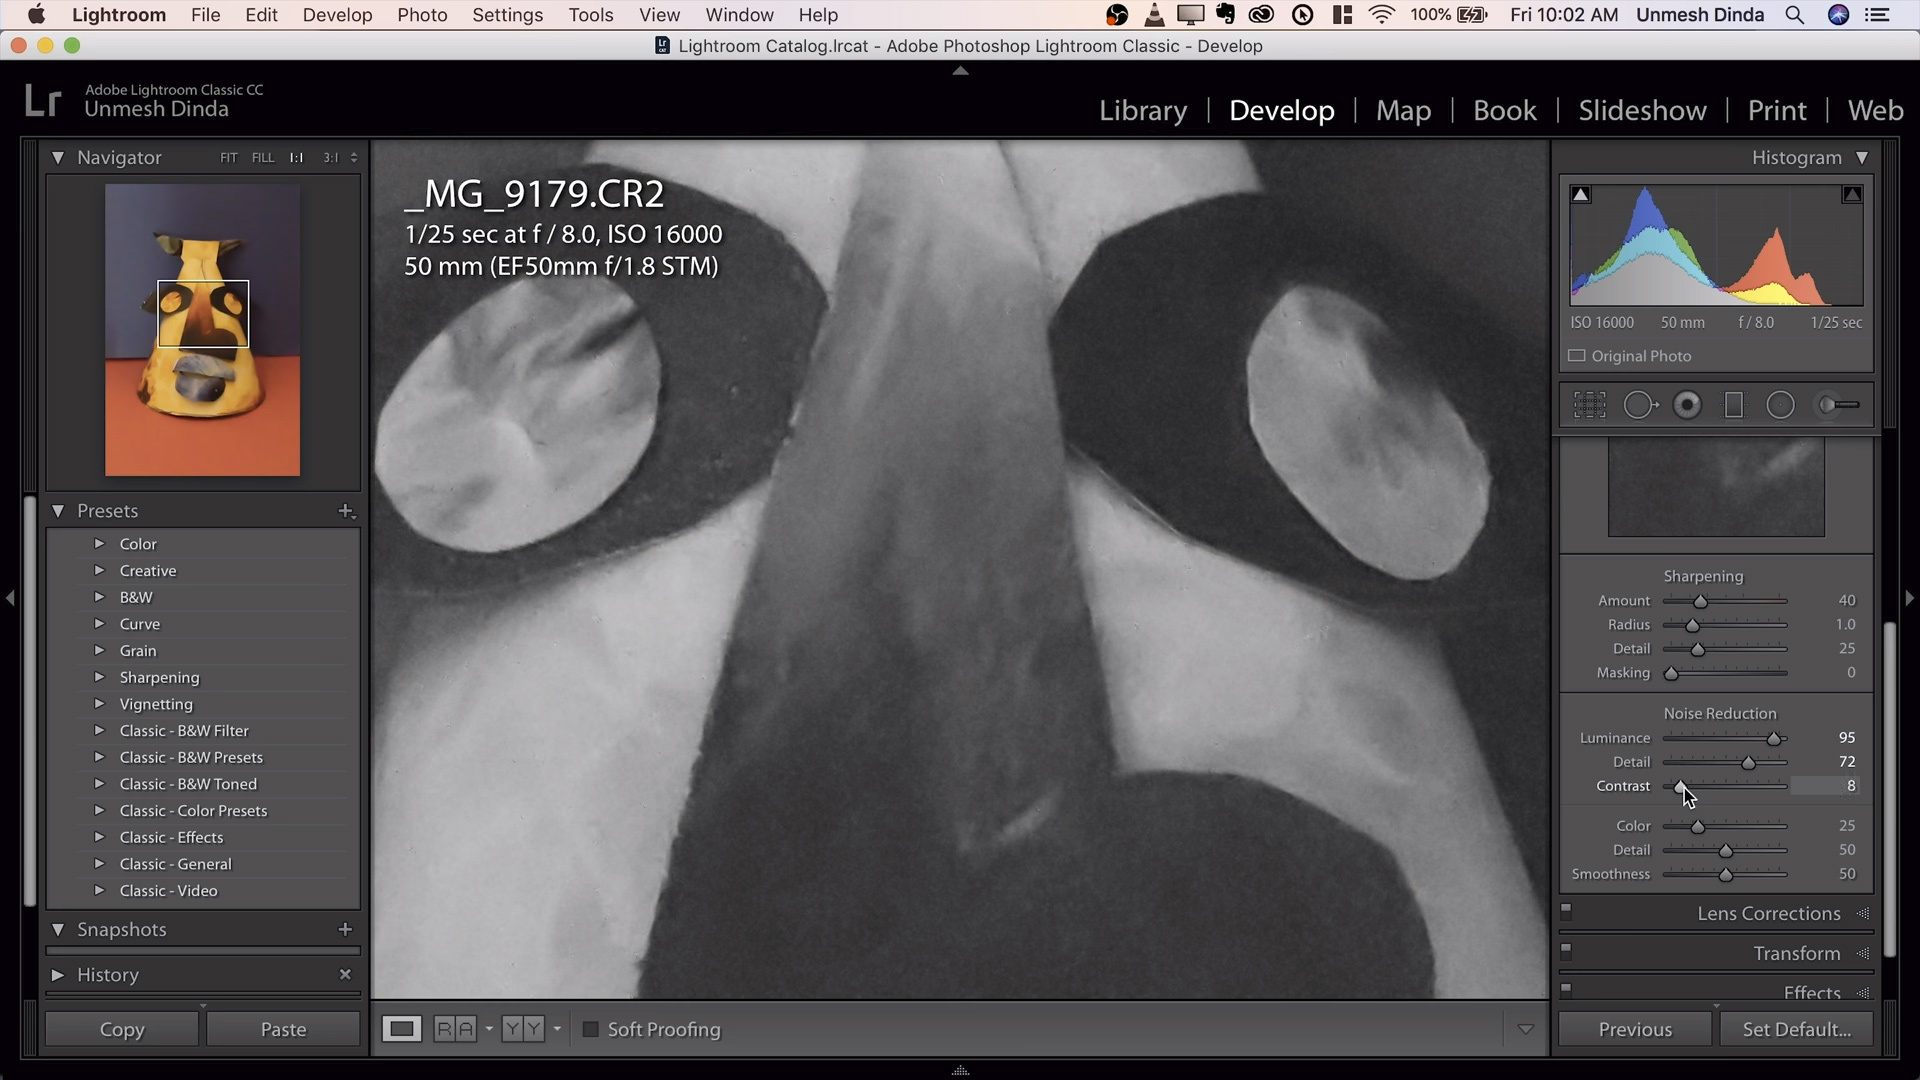
If you’ve not played around much with the noise reduction features in Lightroom or ACR, they can seem a little bit random or meaningless. You slide one slider up or down and it destroys your image. Slide a different slider up or down and nothing seems to happen at all. But the trick with these sliders and getting the most out of them is using them in conjunction with each other.


One simple trick to help guide you through using each one is to hold down the Alt (or Option) key while you click and slide the luminance noise sliders. This removes all of the colour information so that you’re only looking at the brightness levels and can easily distinguish the noise. Unmesh slides Luminance up until just where he no longer sees noise in the image, as shown above.
The next step is to alt+click and drag the Detail slider. to help bring back some of those details. Slide it all the way over to the left, and then slide it to the right just until you see the noise appear. Then pull it back one or two notches. Finally, the contrast slider helps to bring back a little more of that detail and texture.
Usually, there isn’t much need to play with the colour noise settings as the Lightroom/ACR defaults usually work quite well. But Unmesh quickly walks us through what each of those sliders do, too, before moving onto the sharpening settings.
Sharpening in LR/ACR works in a similar way to the Unsharp Mask filter in Photoshop. Here’s it’s just a case of balancing the amount with the radius to bring out detail without introducing halos.
Taking things a step further, Unmesh then brings the image into Photoshop and duplicates it on a new layer. After converting it to a smart object, he applies the High Pass Filter to the top layer and sets it to overlay mode. Now simply create a blank layer mask and paint in where you want to bring the details back.

Like I said, you’ll never achieve the same kind of results you’d see if you’d been able to shoot it at ISO200 or lower to begin with. But, it’s definitely much better after the treatment than before. Personally, I think I would’ve kept in a little bit of noise to help break up some of the solid colour artifacts a bit, but that’s more of a personal preference thing.
But at least now you know how the noise reduction tools in Lightroom/ACR work, and maybe it’ll help you to push your camera a little bit further than you normally would.

John Aldred
John Aldred is a photographer with over 25 years of experience in the portrait and commercial worlds. He is based in Scotland and has been an early adopter – and occasional beta tester – of almost every digital imaging technology in that time. As well as his creative visual work, John uses 3D printing, electronics and programming to create his own photography and filmmaking tools and consults for a number of brands across the industry.
Related Posts
 How to reduce noise in high-ISO photos and still keep them sharp
 What is ISO, Dual ISO, ISO invariance and where does all the noise come from?
 How to reduce noise in your photos with no 3rd party plugins in Lightroom and Camera Raw
 How to reduce noise and more easily work with “Blend if” layer sliders in Photoshop CC
Join the Discussion
DIYP Comment Policy
Be nice, be on-topic, no personal information or flames.
3 responses to “How to remove or reduce high ISO noise in Lightroom”
Outstanding tutorial! Thank you!
Dxo’s optics/photolab most successful iso/grain remover in the photography world
very useful information Many thanks for sharing https://www.filmvideoediting.com/2019/04/how-to-reduce-noise-in-lightroom-adobe.html