


Retouching Essentials: Are You Having Color Issues When Dodging & Burning? This Might Be The Reason
May 15, 2015
Conny Wallstrom
Conny Wallstrom is an experienced software developer, turned retoucher and turned photographer. Based in Sweden with focus on beauty, fashion & advertising. Creator of Retouch Toolkit software, a Photoshop add-on for professional retouchers.
Share:

Many of the tools inside of Photoshop use various color models and techniques to alter color. If you are not familiar with them you might be creating a lot of trouble for yourself.
A lot of retouching tutorials online will teach you to use a Hue/Saturation adjustment layer with -100 saturation to remove the color information from an image (this should eliminate color distractions when Dodging and burning). If you are following this advice, then you are working with Lightness in the HSL color model, which is very different from how our eyes perceive color…
Here is a quick example why it is a bad idea:
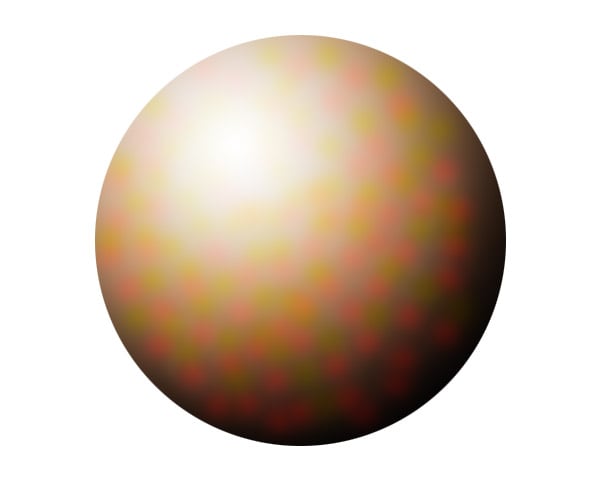
1. Let’s pretend this circle is a face we are going to retouch. It is full of ugly color shifts.
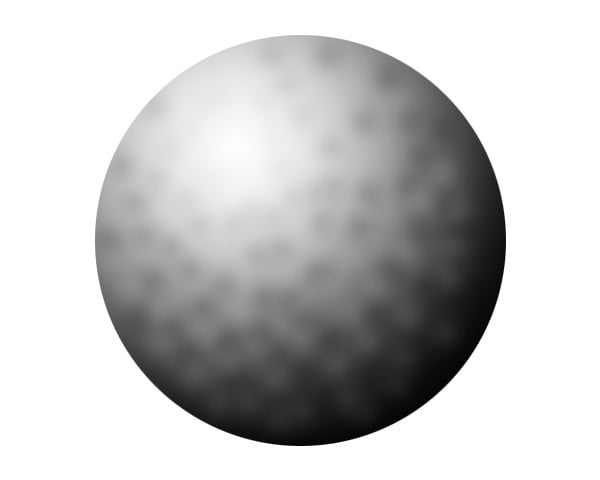
2. Using a Hue/Saturation help layer where we remove the Saturation, this is what we get:
3. If we now proceed to Dodge & Burn to even out the transitions:

4. Then if we turn off the Hue/Saturation help layer and this is what we have:

The problem is still there and now looks even worse! We’ve just introduced even more problems then what we had when we started!
To make matters even worse, if you think this is just a color issue you might go ahead to try and correct it using the Color blend mode or a Gradient Map:

What Just Happened?
You just spent a lot of time to even out the transitions using Dodge & Burn. Why are they back?
This happens because you removed the color using the HSL color model, which is showing you Lightness. Which is very different from our perceived brightness.
Knowing the difference between HSB(HSV), HSL, and Luminosity is essential when dealing with color.
This tutorial will explain a bit more about the different color models. Grab a big cup of coffee and put the video on repeat – even though this video doesn’t go into details, it is a quite complex topic:

Conny Wallstrom
Conny Wallstrom is an experienced software developer, turned retoucher and turned photographer. Based in Sweden with focus on beauty, fashion & advertising. Creator of Retouch Toolkit software, a Photoshop add-on for professional retouchers.


Join the Discussion
DIYP Comment Policy
Be nice, be on-topic, no personal information or flames.