


Organize Your Studio or Set with This DIY Equipment Cart
Jun 6, 2018
John Aldred
John Aldred is a photographer with over 25 years of experience in the portrait and commercial worlds. He is based in Scotland and has been an early adopter – and occasional beta tester – of almost every digital imaging technology in that time. As well as his creative visual work, John uses 3D printing, electronics and programming to create his own photography and filmmaking tools and consults for a number of brands across the industry.
Share:

Equipment carts for use in the studio or on-set can be expensive. REALLY expensive. Of course, those carts often need to hold hundreds of thousands of dollars’ worth of equipment. For a small studio or low-budget set, though, you don’t need to go to such expense. There are many other alternatives out there that can work just as well, that you can customise for your own needs.
In this video from the guys at The Film Look, we see how they organise their own DIY equipment cart. Based off a standard $69 utility cart, it’s very functional after a little tweaking and customisation. And it allows you to keep all your kit organised on set so that you know where everything is, as well as give you a mobile tabletop for gear you’re using.
Overall, the video isn’t so much about how to build something as how to get organised. There’s nothing worse in the studio or on set than wasting time digging around in bags looking for a piece of gear when you could be getting on with shooting. And that applies to both photography and video. And while the bits you’ll need to go onto the cart will depend on the kit you use, some of the tips and tricks shown in the video on how they customised the cart are very useful.
After receiving your basic $69 utility cart, the process begins with something that’s an obvious solution to a big problem with many storage carts, drawers, cupboards, tables and anywhere else you store your gear. That problem being placing things down on a hard, and often noisy, surface. This problem is easily solved by lining each tray of the cart with carpet. This dulls down the noise and helps protect your kit from the hard surface below.

One tip on the carpet that is shown but not mentioned is to stick a gaffer tape underneath with a “tab” sticking out at one end. This will allow you to easily remove the carpet for cleaning or to find tiny screws and bits that you know are in the tray but you just can’t see them. The top shelf is kept clear to use as a work surface on-set. Finding horizontal spaces isn’t always easy, especially at a comfortable working height.

Also on the top shelf are some commonly used tools. A holder at the rear right is bolted to the tray for storage of a screwdriver to tighten and remove tripod plates. A set of allen keys is also kept on the top shelf.
The middle shelf is where most of the action is happening, though. One side is set aside as a charging station for various batteries, along with some cable management. And most of the rest is used for charged battery storage, as well as commonly used lenses.

The middle shelf also contains LED lights and switch, so that when you’re in a dark set or studio, you can still easily see what you’re looking for without having to turn on all the room lights. A useful feature, as sets and studios are often quite dark, especially if you’re trying to shoot something a little more dramatic.
On the bottom shelf is small equipment storage. Equipment that may already have its own carry case, such as audio gear. Then there’s a toolbag, and a box with a lid for dead batteries that need charging – no chance of them being mixed up with your charged ones if they’re in a container on a completely different shelf.

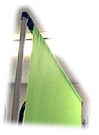
So far, though, the cart has mostly been just about good organisation. The DIY aspects come nearer the end. First up is the gel holder. This is a tube bolted to the edge of the cart which holds the wrapped up gel tubes. For photographers, you may not have pieces this big, especially if they’re just going over a speedlight. But for continuous lights, you’re often working with large sheets.

Again with the bolts is a pen holder. Essentially it’s an empty food can bolted onto the side for keeping pens and pencils handy. These are required more often than you might think, especially when filming, if not so much for photography. Wingnuts hold these bolted items in place so that they can be easily removed if needed. Hanging off the cart’s handle is a velcro strap to keep all of your gaffer tape together.

A pretty cool ideas is the clamp board. This can store away in a bag or lay on a shelf when not in use, but when you need it, it’s there ready to go and clamps right onto the leg of the cart. And you don’t need any special attachments to fix it on there, either. Just use two of the clamps that are already on it.

Bad organisation of equipment is one of the biggest things that will slow you down on-set. Having an equipment cart like this on a film set or in a photography studio can add up to a whole lot of hours saved over the course of just a few weeks. And hours saved are hours you can dedicate to your project or paying clients.
Exactly how you’d organise your cart, and how you’d make it different from the one above will depend on your own needs. But it’s definitely worth having a think about if you’re often hunting for gear in bags or the back of drawers.
I wish my life could be so easy that I could have a cart to organise my kit. But most of my shoots are halfway up a mountain, down a ravine, or in the middle of a river. Not somewhere I could easily take one.

John Aldred
John Aldred is a photographer with over 25 years of experience in the portrait and commercial worlds. He is based in Scotland and has been an early adopter – and occasional beta tester – of almost every digital imaging technology in that time. As well as his creative visual work, John uses 3D printing, electronics and programming to create his own photography and filmmaking tools and consults for a number of brands across the industry.


Join the Discussion
DIYP Comment Policy
Be nice, be on-topic, no personal information or flames.