


Nothing Is More Fun Than Throwing Stuff Through A Water Wall But…
Jul 12, 2011
Udi Tirosh
Udi Tirosh is an entrepreneur, photography inventor, journalist, educator, and writer based in Israel. With over 25 years of experience in the photo-video industry, Udi has built and sold several photography-related brands. Udi has a double degree in mass media communications and computer science.
Share:
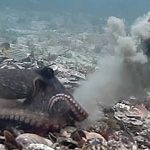
 Nothing is more fun than throwing stuff through a water wall but photographing them.
A wall of water is a fascinating thing by itself. It can get even more amazing if you throw stuff through it.
In this tutorial, Jack Long will explain how he built the water wall and how he uses it to take spectacular photographs.
There is a slight use of power tools so the regular disclaimer applies, don’t do anything stupid, and get assistance if you don’t feel comfy around heavy machinery that spins fast. We also have a non-regular disclaimer about using water and electricity, make sure you take the necessary precautions with the splashes and all.
Parts List
- – 30″ of 3″ PVC pipe
- – PVC fittings from 3″ to 1″ barb
- – High volume water pump, (Iwaki recommended)
Making The Tube
Sadly (or happily) this bit is kinda short, so no steps.
This is what you should end up with

The first thing is to cut a slit on the tube. The easiest way to do this is by using a table saw equipped with a dado blade. (did I say be careful? I did now). Run a 1/4″- 3/16″ opening 6 inches in from each end.
I know what you’re thinking, the water is going to drip right from near the ends. Well, one thing I discovered is that without some form of baffling, the water will spill out from the ends without an even flow. I went with a heavy filter material similar to scotch-brite pad. Cement your filer to the slit all the way through.


Cap each end with pvc fittings adapting it down to take a 1″ hose barb.
If you are low on cash, you can use a single water pump with a “T” pumping the water into each end. If one pump is not adequate, you may use two water pumps to maximize water flow.
Pumps are rated at GPH or LPH. The bigger the number the more the water flow. Another option would be large a submersible pond pump. The strength of the flow will depend on the strength of the pump(s) and the size of the opening.
Position the tube over a shallow tank (agricultural plastic stock tank in my case).

Connect the 1″ plastic tubing to the ends of the tube and to the pumps that you should connect into the stock tank. Some form of filtering will prevent particles from clogging the tube.
Here is how the wall looks like with nothing passing through it

And this is how a hole in the curtain looks like

Keep in mind that this is only a guide. Total success will likely require trial and error as well as time and patience
Taking an Image
The images below (as other similar images) were taken with my a Canon 1DS Mark II. Lens of choice, my 70-200mm f2.8.
Lighting is provided by 4 Vivitar 283‘s with rheostats to dial down the power and flash duration. Sync is done with various splitters and pc extensions. I use a radio slave in order to keep the flash voltage out of the camera.

Once you have a working flat flow of water, then the possibilities are immense. You can reflect white and colored light onto the front surface. Or use colored gels behind white diffusion, behind the fall, or even color the water it’s self. With this much water Fabric Dyes are very concentrated.


About The Author
Jack Long has been a professional photographer for over thirty years. Photographing for a variety of commercial, advertising and portrait clients. His personal projects have spanned a large range of pictorial fine art subjects including nature macro, landscape photography and Studio studies. His latest adventures is in fluid or “splash” photography.

Udi Tirosh
Udi Tirosh is an entrepreneur, photography inventor, journalist, educator, and writer based in Israel. With over 25 years of experience in the photo-video industry, Udi has built and sold several photography-related brands. Udi has a double degree in mass media communications and computer science.


Join the Discussion
DIYP Comment Policy
Be nice, be on-topic, no personal information or flames.