


How to make a budget-friendly DIY strip modifier for speedlights
Oct 25, 2017
Dunja Đuđić Kalinin
Dunja Djudjic is a multi-talented artist based in Novi Sad, Serbia. With 15 years of experience as a photographer, she specializes in capturing the beauty of nature, travel, concerts, and fine art. In addition to her photography, Dunja also expresses her creativity through writing, embroidery, and jewelry making.
Share:

Strip modifiers like LitePipe P and SaberStrip are applicable for portrait photography, both indoors and outdoors. But according to Joe Edelman, their biggest flaw is their price, which he considers too high for something you’ll use only occasionally. So, he came up with his own DIY version of a daylight-balanced strip modifier. It’s easy to build, useful for portraits both in the studio and on location – and it costs around $50in material. And I think it’s a plus that it looks a bit like a lightsaber.
You will need:
- 3” x 60” Kraft mailing tube with end caps x1
- 1” x 12” Hook and loop cable tie down straps x2
- 24” x 48” sheet of white translucent plastic film x1
- Tripod screw holder adapter x1
- Flash speedlight umbrella holder x1
- 1” flat washer x1
- 1/4 20 x 1” screw x1
- Gaffers tape
- Gloss white spray paint
- Super glue
- A table saw or a very sharp knife for cutting the tube
- A power drill
How to make
Joe used the entire 60” tube, but you can cut it to make it shorter. Either way, measure the tube and cut it out like this:


When you’re done with the cutting, paint the inside of the tube with the white spray paint. This is important because it will give you the accurate color of the light, without the yellowish tint of the cardboard. When the paint is dry, cover the outside of the tube with black gaff tape. You can also paint it, but using gaff tape is faster and adds texture.

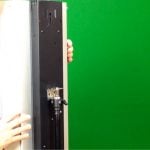
Next, use super glue to attach the two hook and loop cable ties which will hold the speedlight in place. Strap in the speedlight, and while it’s in place, balance the tube on your finger to find its balance point. This is an important step, so take your time and do it right. If you don’t, you’ll be placing unnecessary stress on the tube each time you try to balance it on the stand.


Once you’ve found the balance, mark the spot and drill a hole for the 1/4 20 screw. Place the washer over the hole, insert the screw, attach the tripod screw holder adapter, and tighten as much as possible.

The last step is cutting a strip of white translucent film. In Joe’s case it was 6” wide and 24” long. Curl it, slide it in the opening of the tube, and release. If you want to make it permanent, use some super glue, it will hold it. And finally, add the cap on top of the tube.
Once you’ve made this DIY strip light modifier, you can mount it either vertically or horizontally. The speedlight umbrella holder lets you set it up in many different angles and positions. You can access the controls of your speedlight without removing it from the unit. As Joe points out, this modifier is very lightweight, so it won’t wobble even on compact light stands. He adds that it’s also wind resistant, so it won’t blow around like a big softbox would. You can use it for portraits both indoors and outdoors, and in different setups. Here are some of Joe’s example shots with different lighting setups, all of them using one or two of these DIY modifiers. Check out the video for complete setups, and if you like what you see – head over to the nearest Home Depot.


[DIY Strip Light Modifier for Speedlights. Strip Light Portrait Photography in Studio or on Location | Joe Edelman]

Dunja Đuđić Kalinin
Dunja Djudjic is a multi-talented artist based in Novi Sad, Serbia. With 15 years of experience as a photographer, she specializes in capturing the beauty of nature, travel, concerts, and fine art. In addition to her photography, Dunja also expresses her creativity through writing, embroidery, and jewelry making.


Join the Discussion
DIYP Comment Policy
Be nice, be on-topic, no personal information or flames.
6 responses to “How to make a budget-friendly DIY strip modifier for speedlights”
…you can buy a small strip box with a speedlight bracket for a lot less than building this…
where…
can you post the link??
But make sure it is 40 inches long by whatever width… and it is speedlight friendly and is capable of rotating in the same mount as this one without additional accesories, plus as stated above… very wind resistant for exteriors…
THEN find THAT more affordable and we will follow…
As far as my research goes NOTHING out there even comes close to this NOT even the saber strips, which for on-location exterior are considered almost a standard here in Florida because of the winds.
I thought this was a how to make a DIY Lightsaber.. Th epic is confusing.
Nice!!
For less than $25, why not? I’m just curious why he didn’t put a mirror or a relective suface on the end cap…
I made one with a PVC pipe its a little heavier but you can bang them around etc