


Learn how to use DaVinci Resolve like a pro in 30 minutes or less
Oct 4, 2016
John Aldred
John Aldred is a photographer with over 25 years of experience in the portrait and commercial worlds. He is based in Scotland and has been an early adopter – and occasional beta tester – of almost every digital imaging technology in that time. As well as his creative visual work, John uses 3D printing, electronics and programming to create his own photography and filmmaking tools and consults for a number of brands across the industry.
Share:

Video has become a part of daily life for many photographers. For some, it’s because we’ve expanded our services for clients. For others, it’s simply for our own self promotion. Tips and tricks, tutorials or behind the scenes videos for YouTube & Facebook. One of the biggest problems many photographers starting out with video face is learning a whole new set of software – and the extra cost of said software.
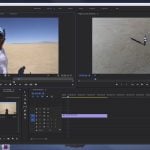
Blackmagic Design’s DaVinci Resolve, an industry standard for colour grading, has recently started to add editing capabilities. While there are $30K and $1K options of the software available, there’s also a completely free version. Between expanded capability, and a super low price tag, it’s no wonder it’s become such a popular tool. But it can be a complex beast to get to grips with. In this video from Learn Color Grading, we’re taken on a 30 minute whirlwind tour of Resolve’s UI, and how it all works.
It’s certainly not a video you can watch start to finish and suddenly expect Spielberg to be knocking on your door. But it is a very handy reference while you’re learning to use the software.
It covers pretty much the entire DaVinci Resolve 12.5 user interface. So, as you’re fumbling around and trying to figure things out, you can quickly scan back and forth through the video to find the parts important to your current task.
Normally, this is the part of the article where I’d link some timecodes throughout the video. This video covers so much, that it’s difficult to really pick out the key points.
I’ve been using Resolve for a few months now, and I’m far from being and expert, but it has some excellent advantages over other editing applications. Unlike Premiere, where colour and other effects are simply stacked on top of each other in a timeline, Resolve uses a node based system.
Getting used to node based systems for colour correction can be very difficult to get to grips with. Especially if you’re transitioning from layer based systems such as Photoshop and Premiere. Node based systems, though, do offer a lot more freedom, flexibility, and control over your footage.

The masking options available with Resolve’s node based system are extremely powerful, allowing you to separate things like skintones from everything else in your scene.
The scopes available in Resolve (the video versions of a Histogram) I find to be much more useful than those found in Premiere. For a start they work in realtime, constantly refreshing as you scrub or play through your footage. They’re also a lot easier to read, and offer more customisation features to get them to appear exactly the way you want.

If you’re not using DaVinci Resolve yet, or have never even tried it, I’d suggest checking it out. With a price of “free”, it doesn’t make sense not to.
The video above will help you get through it in no time at all.
What video editing software do you use? What is most important when it comes to your video workflow? Speed and efficiency or quality? Let us know your thoughts in the comments.
[via ISO1200]
Filed Under:
Tagged With:

John Aldred
John Aldred is a photographer with over 25 years of experience in the portrait and commercial worlds. He is based in Scotland and has been an early adopter – and occasional beta tester – of almost every digital imaging technology in that time. As well as his creative visual work, John uses 3D printing, electronics and programming to create his own photography and filmmaking tools and consults for a number of brands across the industry.


Join the Discussion
DIYP Comment Policy
Be nice, be on-topic, no personal information or flames.
One response to “Learn how to use DaVinci Resolve like a pro in 30 minutes or less”
Nice piece! I talk about this in my own review for DaVinci Resolve, but a few of the pros that make it a great video editing option are that it’s free and multi-platform with no watermarks; it has a slick and intuitive user interface; the software offers a strong compositor, sound editor, and color grader; and the large variety of tutorials that are out there to overcome it’s steeper learning curve.