


How to build a full YouTube studio on a single light stand
Oct 9, 2019
John Aldred
John Aldred is a photographer with over 25 years of experience in the portrait and commercial worlds. He is based in Scotland and has been an early adopter – and occasional beta tester – of almost every digital imaging technology in that time. As well as his creative visual work, John uses 3D printing, electronics and programming to create his own photography and filmmaking tools and consults for a number of brands across the industry.
Share:
One of the big excuses I hear for people who want to do YouTube but don’t is that they don’t have the room. There’s just not enough space where they live to be able to set up lights and cameras and microphones and everything else. Well, Caleb Pike to the rescue!
In this video, Caleb shows us how we can create a complete recording setup for YouTube which includes the camera, light, microphone and other doohickies on just a single light stand in order to be able to shoot whenever we want, wherever we want, and have it take up as little space as possible.
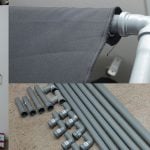
This setup isn’t cheap if you do it exactly the same way that Caleb did. His setup cost him around $1,234, not including the camera and lens. A significant chunk of that, though, is the key light. You can make your setup for less, depending on what gear you might already own, and what alternative kit you might decide to buy instead of Caleb’s choices.
- Impact folding wheeled light stand ($150)
- 2x Grip Heads ($30 each)
- 40″ or 20″ grip arm ($30-40)
- LED key light – Intellitech LC-160 ($799) / Falcon Eyes RX-24TDX ($586)
- 2x Sandbags ($17)
- 6″ end jaw vise grip ($47)
- Super Clamp ($25)
- 6″ Super Clamp Extension Arm ($18)
- Microphone arm ($13)
You’ll also need a spigot and some kind of ball head for mounting your camera to the stand via the super clamp extension arm. Beyond this, the only extras you need are your camera, lens and a microphone. Caleb uses the Rode VideoMicro with an extension cable in the video. These are quite inexpensive, but if you’re using a DSLR or mirrorless camera with terrible preamps, you might want to look into another audio solution.
Jacob also suggests, under the category of “cheating but necessary”, as they’re not attached to the stand, are a couple of small background lights. Caleb recommends the Boling P1, which is a fine little light, but you could also use something like Lumee, Digital Foto YY150 to shine some light on your background or to add a bit of colour. There are a lot of small compact lighting options out there these days that can work for something like this.

As you can see from Caleb’s video, such a setup on a single light stand makes it very easy to quickly switch up your shot if you need to while keeping everything at your fingertips, and having consistent lighting and audio regardless of where you set up. And because everything just lives on the stand, there’s really no set up or teardown time. You just wheel it out when you need it, and stand it in a corner or a closet when you don’t. A very useful rig.
So, what are you waiting for?

John Aldred
John Aldred is a photographer with over 25 years of experience in the portrait and commercial worlds. He is based in Scotland and has been an early adopter – and occasional beta tester – of almost every digital imaging technology in that time. As well as his creative visual work, John uses 3D printing, electronics and programming to create his own photography and filmmaking tools and consults for a number of brands across the industry.


Join the Discussion
DIYP Comment Policy
Be nice, be on-topic, no personal information or flames.
4 responses to “How to build a full YouTube studio on a single light stand”
That’s actually a great idea!
Sébastien Petit
Giba Bendini de Padua
This is a DIY site. How about coming up with an alternative made from PVC pipes?