


Ugh, a Broken Camera: Here are the Top Three Fixes Anyone Can Do
Jul 6, 2025
David Prochnow
Our resident “how-to” project editor, David Prochnow, lives on the Gulf Coast of the United States in Ocean Springs, Mississippi. He brings his expertise at making our photography projects accessible to everyone, from a lengthy stint acting as the Contributing How-To Editor with Popular Science magazine. While you don’t have to actually build each of his projects, reading about these adventures will contribute to your continued overall appreciation of do-it-yourself photography. A collection of David’s best Popular Science projects can be found in the book, “The Big Book of Hacks,” Edited by Doug Cantor.
Share:
Out of warranty does not necessarily mean out of luck. Whether it’s your long trusted, able-bodied workhorse camera or a thrift store steal, some broken cameras can be fixed by you. Obviously, there is one big caveat associated with such a grandiose claim. If it’s a digital camera you can just about forget repairing it by yourself. Unless you have advanced knowledge in soldering and electronics coupled with a detailed camera service manual your chances of success are very slim.
On the other hand, if your camera, either digital or film, has just been ridden over roughshod, then you might be able to mend it with some very careful recovery and restoration work. Basically, there are three camera problems that just about anyone can fix: oozy gooey sticky stuff, bright lights shutter shock, and oops, I did it again. Here’s how to successfully deal with each of these problems.
Oozy Gooey Sticky Stuff
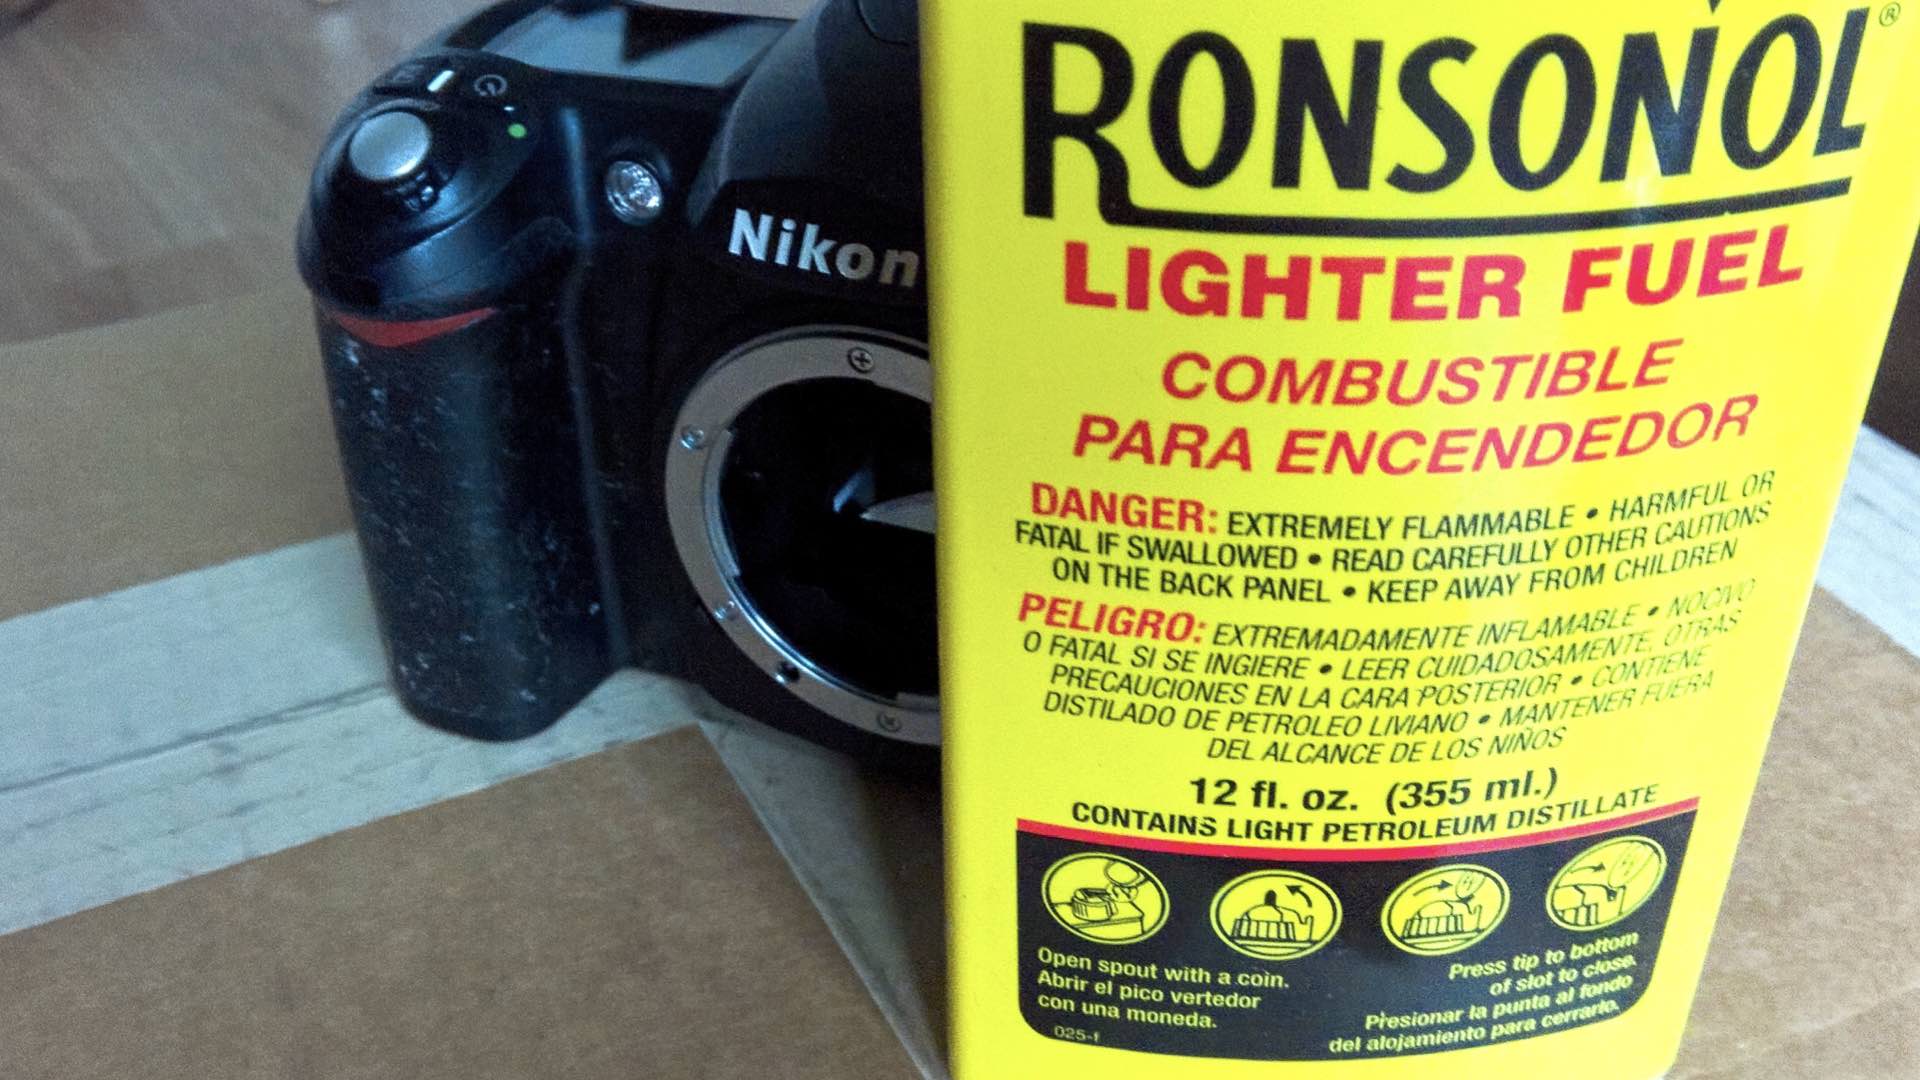
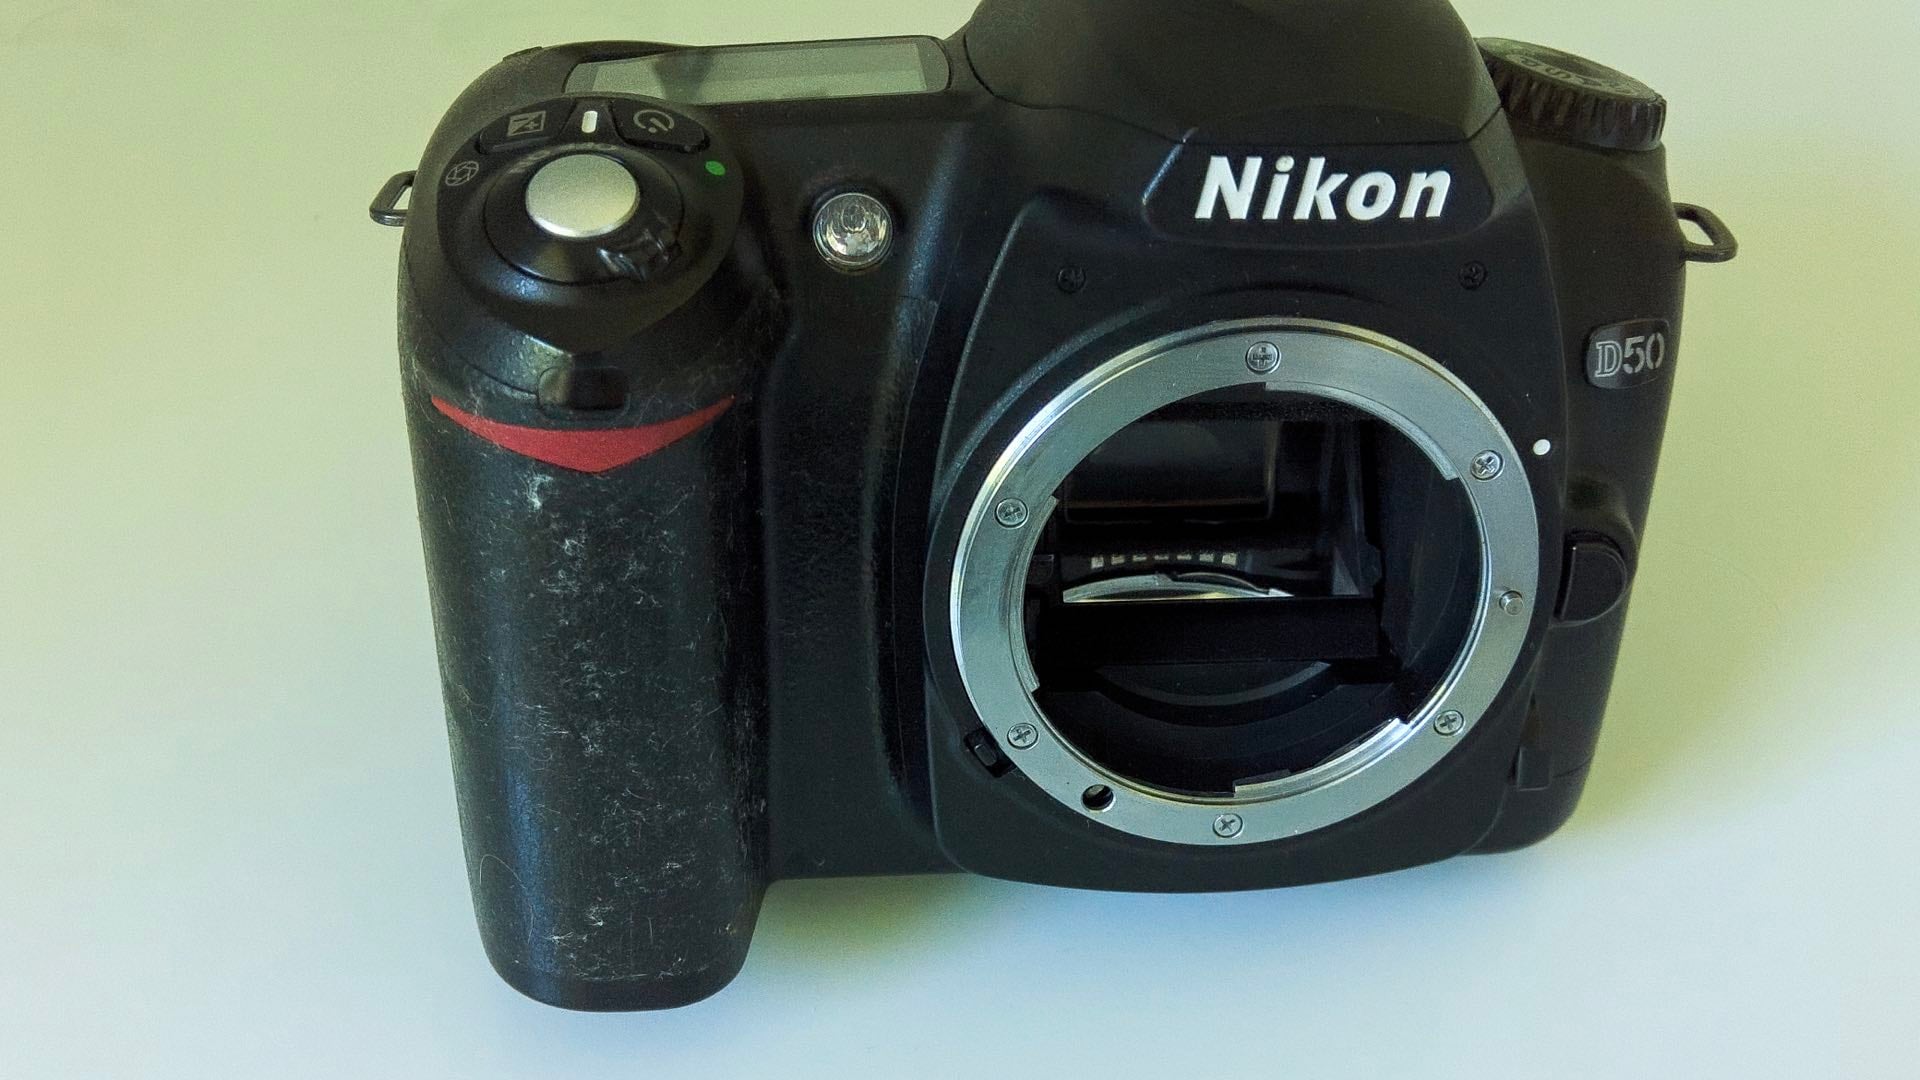
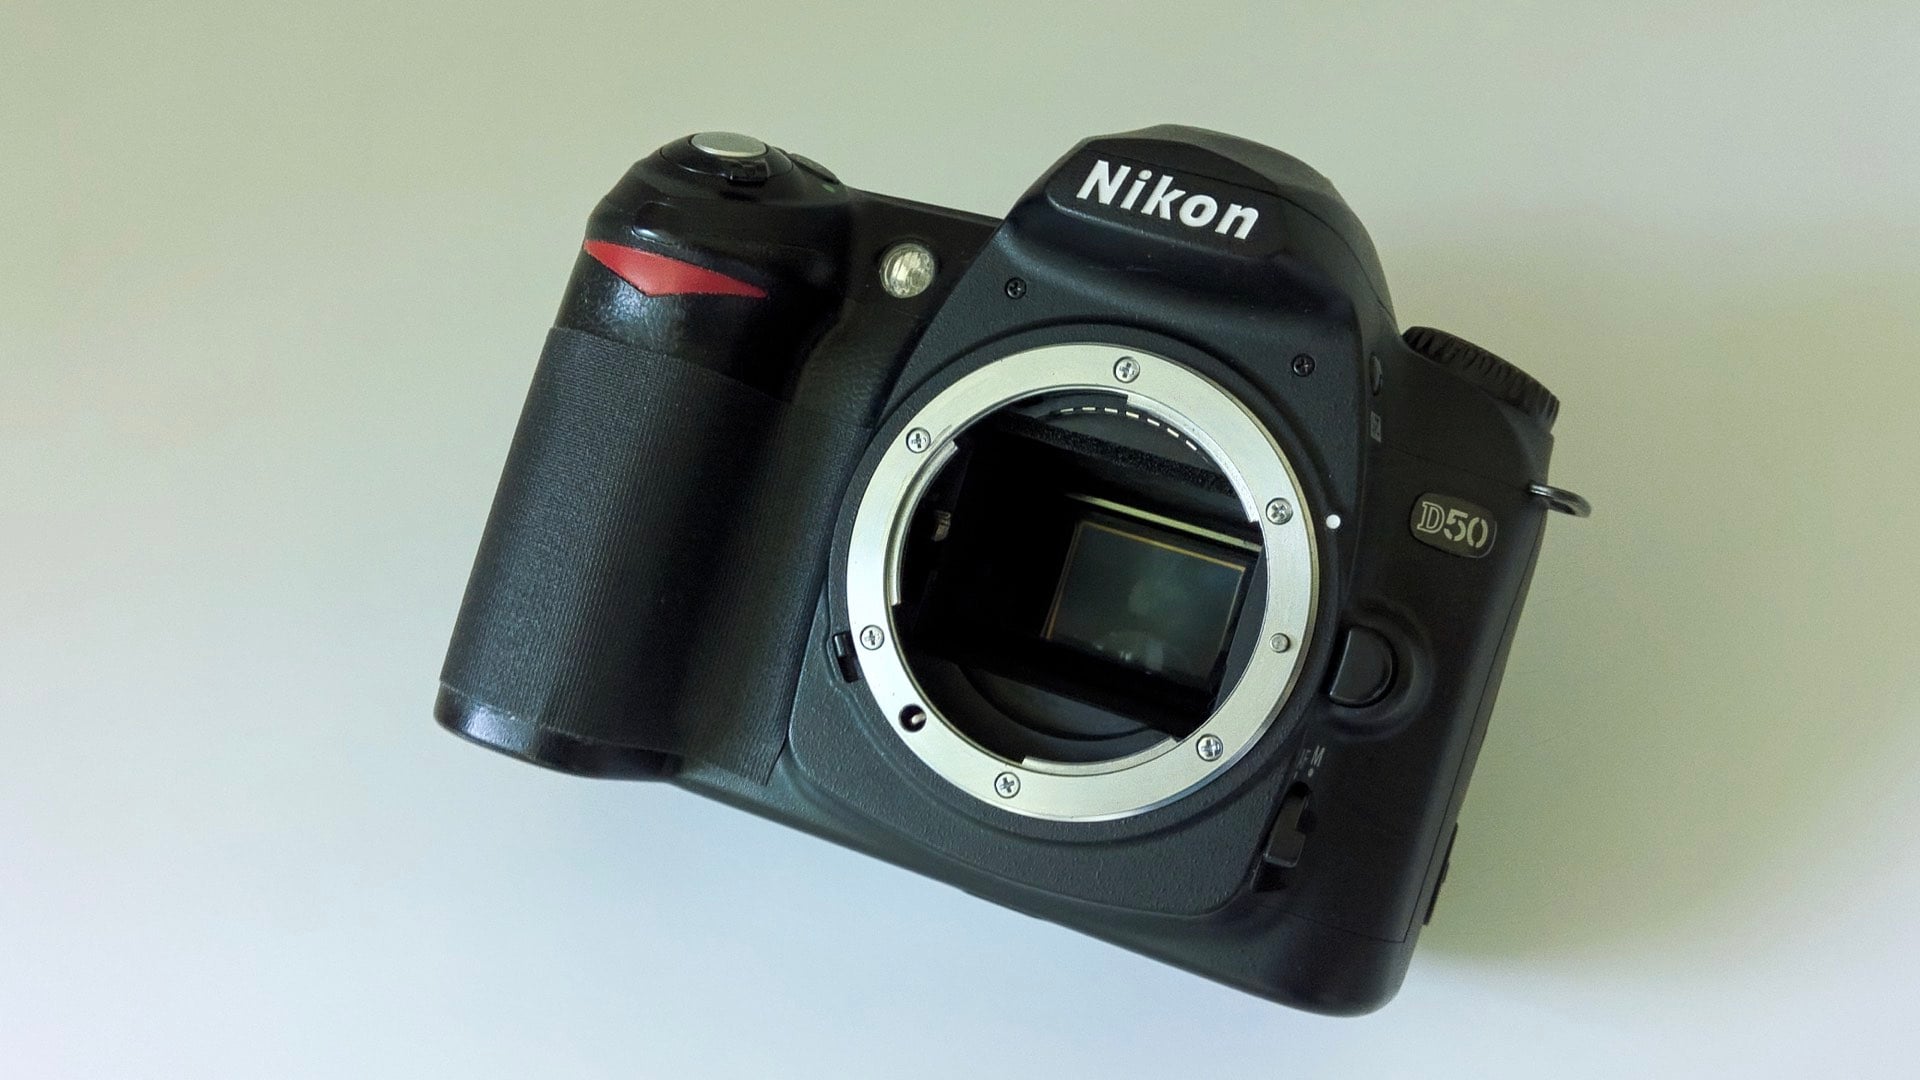
Nothing has ruined more digital cameras than the plague of the infamous “sticky surface.” Generally speaking, this is a chemical breakdown of the rubber or rubber-like grip material that is found on camera body surfaces. This oozy goop will soon attract fingerprints, smudges, dirt, hair, grime, and your ire. It’s an awful malady to hit a camera and typically can’t be truly fixed without the complete removal and replacement of the sticky material.
Another, easier repair takes just three steps to remove this sticky mess. In order to accomplish this simpler fix, you will need four things:
1. Lighter fluid for heavy goop removal.
2. A 60 – 70% solution of isopropyl alcohol, from your local pharmacy, for surface finishing.
3. Gaffer tape for adding a finished texture over the prepared surface.
4. Scrap fabric pieces for applying the cleaning fluids.
Begin the removal of the sticky stuff by soaking a fabric scrap with lighter fluid and rubbing down all of the offending rubber surfaces. This step is used for removing the bulk of the thickest sticky material. Depending upon the amount of goop that is covering the camera, this treatment could take several pieces of fabric.
Set the camera aside to dry and switch your cleaning equipment to an isopropyl alcohol-soaked fabric scrap. Wipe this fresh isopropyl-alcohol rag gently over the entire camera grip area that was treated with lighter fluid. This action will clean-up the grip and should leave a nice clean, but not totally sticky-free, surface. Set the camera aside and let it completely dry.
Unfortunately, if you don’t add a final protective layer to the camera’s grip, the sticky stuff could return. Therefore, cover the area that you cleaned with one or more pieces of gaffer tap. The use of gaffer tape is ideal for this application since it can be stretched and shaped to smoothly cover curves and other compound shapes that are inherent to camera grips.
Your fix is complete.
Bright Lights Shutter Shock
As cloth shutter curtains age, they can crack and develop small pinholes that will let light invade the film chamber. This problem typically manifests itself as bright white dots, blobs, or spots on a photographic print. If you don’t like these light pinholes, there is an easy fix for repairing this shutter curtain problem. First, you’ll need two things for shutting down these bright lights:
1. A high-quality acrylic paint, like Tamiya Color XF-69 (81369) NATO Black. This paint is an almost perfect color match for vintage shutter curtains.
2. The brush for applying the paint to the shutter curtain must be a short, flat bristled brush like a Testor No. 2.
The process for “painting” a shutter curtain consists of adding multiple paint layers that will gradually accumulate and block all of the small holes that are causing light to leak into the film chamber. Please note: this application will take six or more coats of paint that are applied over a period of several days. Each coat of paint should dry for 24 hours before the next coat is applied.
In order to properly coat a leaky shutter curtain, remove the lens (if you can’t remove the lens, you must gain access to the shutter curtain through the camera back), advance the film/shutter mechanism (you might have to also paint the released shutter curtain after firing the shutter mechanism; paint each curtain section separately, NOT at the same time), and lay the camera down on its back. Thoroughly shake the paint bottle and pre-moisten the paint brush. Remove the bottle cap, lightly dip the brush bristle end into the residual paint in the cap and apply nice, gentle, even lengthwise strokes across the surface of the shutter curtain. After painting the entire length of the curtain, set the camera aside to dry, clean your brush, and wait 24 hours before applying another coat.

Apply at least four coats of paint using the above process. Test your work by shooting a roll of film and examining the printed/scanned results. If you still see some pinhole light leaks, reapply two more coats and retest your work. Patience and dedicated real film testing will ensure success.
Your fix is complete.
Oops, I Did it Again
UGH! You did it again…you dropped your film camera. Whew, luckily there’s just a small bump on the baseplate, but now the film advance lever won’t advance and the self-timer lever is just kinda hanging there on the front of the camera. What can you do to fix it?

First of all, resist the temptation to remove the top knobs, plate, and levers to fix a stuck film advance lever. Removing a camera’s top plate is a recipe for disaster. Unless you’re a skilled repair technician that is equipped with the camera service manual, removing a camera’s top plate will not work. A budding camera repair enthusiast will, instead, look for answers via the removal of the camera’s baseplate.
Generally, only a small handful of easily removable screws secure the baseplate to the camera. Once inside the camera, ensure the film advance and shutter arming mechanism are both visible and accessible. Carefully, look for a small lever, arm, or cog that has moved from the impact force of you dropping the camera. Usually, just a gentle slip of this wayward part back into place is the only fix needed to return your camera to working operation.

Another very common mechanism “jamming” can occur from the presence of a scrap of sprocket material that has become broken off from the film. This film fragment might have then been jostled into the film advance inside the baseplate when you dropped the camera. Remove this piece of errant film material and the camera should be ready for many more years of enjoyment.
Your fix is complete.
There ya go: now, you’re a fully-fledged camera repair technician, apprentice. You can easily move up the technician ranks by gaining some more experience and expanding upon your camera repair techniques. Remember, leave no screws behind.
Enjoy.

David Prochnow
Our resident “how-to” project editor, David Prochnow, lives on the Gulf Coast of the United States in Ocean Springs, Mississippi. He brings his expertise at making our photography projects accessible to everyone, from a lengthy stint acting as the Contributing How-To Editor with Popular Science magazine. While you don’t have to actually build each of his projects, reading about these adventures will contribute to your continued overall appreciation of do-it-yourself photography. A collection of David’s best Popular Science projects can be found in the book, “The Big Book of Hacks,” Edited by Doug Cantor.
Related Posts
 This photographer made a working “watch camera” from a broken vintage camera
 An Instax hack that anyone can do in an Instax
 Nikon released new firmware for the Z6/Z7 cameras to add Animal Eye-AF (Z50 gets fixes)
 Get anyone to relax in front of your lens by learning from this experienced fashion photographer
Join the Discussion
DIYP Comment Policy
Be nice, be on-topic, no personal information or flames.